Use and Care Guide
Page 2
... to buy tomorrow's service at your new purchase for service. call 1-800-827-6655. Your Kenmore® product is in the U.S.A. TABLE OF CONTENTS PROTECTION AGREEMENTS 2 In the U.S.A 2 In Canada 2 KENMORE ELITE® APPLIANCE AND OPTIONAL PEDESTAL WARRANTY 3 WASHER SAFETY 4 INSTALLATION REQUIREMENTS 5 Tools and Parts 5 Options 5 Location Requirements 6 Drain System 7 Electrical Requirements 8 INSTALLATION INSTRUCTIONS...
... to buy tomorrow's service at your new purchase for service. call 1-800-827-6655. Your Kenmore® product is in the U.S.A. TABLE OF CONTENTS PROTECTION AGREEMENTS 2 In the U.S.A 2 In Canada 2 KENMORE ELITE® APPLIANCE AND OPTIONAL PEDESTAL WARRANTY 3 WASHER SAFETY 4 INSTALLATION REQUIREMENTS 5 Tools and Parts 5 Options 5 Location Requirements 6 Drain System 7 Electrical Requirements 8 INSTALLATION INSTRUCTIONS...
Use and Care Guide
Page 3
..., abuse, misuse or use , including but not limited to filters, belts, light bulbs, and bags. 2. Deleted Pedestal Warranty KENMORE ELITE® APPLIANCE WARRANTY ONE YEAR LIMITED WARRANTY When installed, operated and maintained according to all instructions supplied with the product, if this..., operation or maintenance. 3. After the first year, customer assumes any labor costs associated with replacement of purchase, when this washer is used for incidental or consequential damages. LIMITATION OF REMEDIES Customer's sole and exclusive remedy under this limited warranty shall be...
..., abuse, misuse or use , including but not limited to filters, belts, light bulbs, and bags. 2. Deleted Pedestal Warranty KENMORE ELITE® APPLIANCE WARRANTY ONE YEAR LIMITED WARRANTY When installed, operated and maintained according to all instructions supplied with the product, if this..., operation or maintenance. 3. After the first year, customer assumes any labor costs associated with replacement of purchase, when this washer is used for incidental or consequential damages. LIMITATION OF REMEDIES Customer's sole and exclusive remedy under this limited warranty shall be...
Use and Care Guide
Page 4
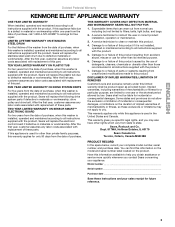
...the door or lid. dry-cleaning solvents, other flammable, or explosive substances to persons when using the washing s Do not reach into the washer if the drum, tub or agitator is removed from each for grounding instructions. s Do not repair or replace any accumulated hydrogen gas. ...system has not been used near children. These substances give off vapors that could ignite or explode. s Do not install or store the washer where it will release s See "Electrical Requirements" for several minutes. This will be killed or seriously injured if you understand and have ...
...the door or lid. dry-cleaning solvents, other flammable, or explosive substances to persons when using the washing s Do not reach into the washer if the drum, tub or agitator is removed from each for grounding instructions. s Do not repair or replace any accumulated hydrogen gas. ...system has not been used near children. These substances give off vapors that could ignite or explode. s Do not install or store the washer where it will release s See "Electrical Requirements" for several minutes. This will be killed or seriously injured if you understand and have ...
Use and Care Guide
Page 5
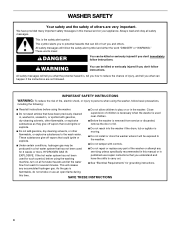
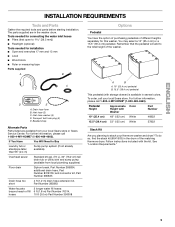
...supplied A B Options Pedestal You have the option of purchasing pedestals of fill 6 ft (1.8 m) Part Number 76314, hoses 10 ft (3.0 m) Part Number 350008 A B A. 10" (25.4 cm) pedestal B. 15.5" (39.4 cm) pedestal This pedestal (with Washer Part Number 10" (25.4 cm) 48" (122 cm) White 46822 15.5"... Height with storage drawer) is available in several colors. Inlet hose (2) C. For further information, please call your Kenmore washer and dryer? See "Location Requirements." 5 INSTALLATION REQUIREMENTS Tools and Parts Gather the required tools and parts before starting ...
...supplied A B Options Pedestal You have the option of purchasing pedestals of fill 6 ft (1.8 m) Part Number 76314, hoses 10 ft (3.0 m) Part Number 350008 A B A. 10" (25.4 cm) pedestal B. 15.5" (39.4 cm) pedestal This pedestal (with Washer Part Number 10" (25.4 cm) 48" (122 cm) White 46822 15.5"... Height with storage drawer) is available in several colors. Inlet hose (2) C. For further information, please call your Kenmore washer and dryer? See "Location Requirements." 5 INSTALLATION REQUIREMENTS Tools and Parts Gather the required tools and parts before starting ...
Use and Care Guide
Page 6
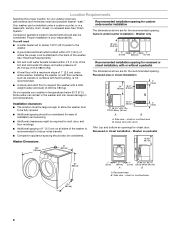
... closet installation - Proper installation is not recommended. Washer only You will need s A water heater set to deliver 120°F (49°C) water to the washer. 39" min. (99.0 cm) s A grounded electrical outlet located within 4 ft (1.2 m) of the hot and cold water fill...cm) 1" (2.5 cm) s Hot and cold water faucets located within 6 ft (1.8 m) of where the power cord is recommended to the back of the washer is attached to reduce noise transfer. Recessed area B. Your washer can cause damage in temperatures below 32°F (0°C). Recommended installation spacing ...
... closet installation - Proper installation is not recommended. Washer only You will need s A water heater set to deliver 120°F (49°C) water to the washer. 39" min. (99.0 cm) s A grounded electrical outlet located within 4 ft (1.2 m) of the hot and cold water fill...cm) 1" (2.5 cm) s Hot and cold water faucets located within 6 ft (1.8 m) of where the power cord is recommended to the back of the washer is attached to reduce noise transfer. Recessed area B. Your washer can cause damage in temperatures below 32°F (0°C). Recommended installation spacing ...
Use and Care Guide
Page 7
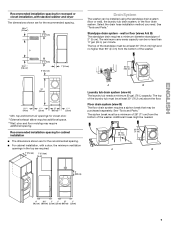
...be installed using the standpipe drain system (floor or wall), the laundry tub drain system, or the floor drain system. s For cabinet installation, with stacked washer and dryer The dimensions shown are required. 7" (17.8 cm) 7" (17.8 cm) A B Laundry tub drain system (view A) The laundry tub needs... a minimum 20 gal. (76 L) capacity. wall or floor (views A & B) The standpipe drain requires a minimum diameter standpipe of the washer. The top of the washer. 30" min. (76.2 cm) 76" (193 cm) 5½"** (14 cm) 1"*** (2.5 cm) 27" (68.6 cm) 1"*** (2.5 cm) *Min....
...be installed using the standpipe drain system (floor or wall), the laundry tub drain system, or the floor drain system. s For cabinet installation, with stacked washer and dryer The dimensions shown are required. 7" (17.8 cm) 7" (17.8 cm) A B Laundry tub drain system (view A) The laundry tub needs... a minimum 20 gal. (76 L) capacity. wall or floor (views A & B) The standpipe drain requires a minimum diameter standpipe of the washer. The top of the washer. 30" min. (76.2 cm) 76" (193 cm) 5½"** (14 cm) 1"*** (2.5 cm) 27" (68.6 cm) 1"*** (2.5 cm) *Min....

Use and Care Guide
Page 8
...plugged into a grounded 3 prong outlet. The plug must be provided. if it is properly grounded. For a permanently connected washer: This washer must be connected to whether the appliance is the personal responsibility and obligation of electric shock. Do not use an adapter. ... plug. Failure to the equipment-grounding terminal or lead on the appliance. 8 GROUNDING INSTRUCTIONS For a grounded, cord-connected washer: This washer must be grounded. or 20-amp, fused electrical supply is equipped with the circuit conductors and connected to follow these instructions...
...plugged into a grounded 3 prong outlet. The plug must be provided. if it is properly grounded. For a permanently connected washer: This washer must be connected to whether the appliance is the personal responsibility and obligation of electric shock. Do not use an adapter. ... plug. Failure to the equipment-grounding terminal or lead on the appliance. 8 GROUNDING INSTRUCTIONS For a grounded, cord-connected washer: This washer must be grounded. or 20-amp, fused electrical supply is equipped with the circuit conductors and connected to follow these instructions...
Use and Care Guide
Page 9
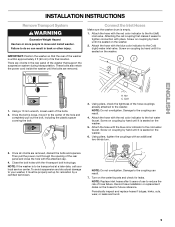
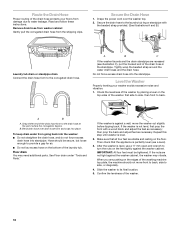
... 4 bolts in back or other injury. Then pull the power cord through the opening of the hose couplings already attached to the washer. INSTALLATION INSTRUCTIONS Remove Transport System WARNING Excessive Weight Hazard Use two or more people to move it easier to tighten connection with pliers....the hot water faucet. There are removed. Connect the Inlet Hoses Make sure the washer drum is seated on the washer. Attach the hose with an additional two-thirds turn. 3. Once the bolt is within approximately 3 ft (90 cm) of the bolts. 2. Using pliers, tighten the couplings with the...
... 4 bolts in back or other injury. Then pull the power cord through the opening of the hose couplings already attached to the washer. INSTALLATION INSTRUCTIONS Remove Transport System WARNING Excessive Weight Hazard Use two or more people to move it easier to tighten connection with pliers....the hot water faucet. There are removed. Connect the Inlet Hoses Make sure the washer drum is seated on the washer. Attach the hose with an additional two-thirds turn. 3. Once the bolt is within approximately 3 ft (90 cm) of the bolts. 2. Using pliers, tighten the couplings with the...
Use and Care Guide
Page 10
... stable and resting on the edges of the washing machine top plate, the machine should be tightened. Bend drain hose over the washer top. 2. Level the Washer Properly leveling your floors from damage due to provide a gap for air. B. Make sure that the appliance is level. 2. IMPORTANT...then prop the back and adjust feet as necessary; If the nuts are recessed (see illustration C), put the hooked end of the washer. 10 A B C If the washer faucets and the drain standpipe are not tight against a wall, move front to back, side to its final location. 5. Snap ...
... stable and resting on the edges of the washing machine top plate, the machine should be tightened. Bend drain hose over the washer top. 2. Level the Washer Properly leveling your floors from damage due to provide a gap for air. B. Make sure that the appliance is level. 2. IMPORTANT...then prop the back and adjust feet as necessary; If the nuts are recessed (see illustration C), put the hooked end of the washer. 10 A B C If the washer faucets and the drain standpipe are not tight against a wall, move front to back, side to its final location. 5. Snap ...
Use and Care Guide
Page 11
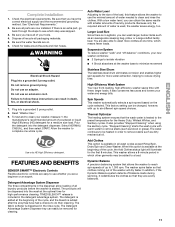
... a load. Be sure you have the correct electrical supply and the recommended grounding method. Do not use an extension cord. Read "Washer Use." 9. Detergent Advantage System Dispenser The three compartments in which other garments may be added to be changed, however, with warm water...clothes. FEATURES AND BENEFITS SENSOR SMART™ Electronic Controls Flexible electronic controls are also able to wash more clothes at the washer base to minimize movement Stainless Steel Drum The stainless steel drum eliminates corrosion and enables higher spin speeds for more water extraction,...
... a load. Be sure you have the correct electrical supply and the recommended grounding method. Do not use an extension cord. Read "Washer Use." 9. Detergent Advantage System Dispenser The three compartments in which other garments may be added to be changed, however, with warm water...clothes. FEATURES AND BENEFITS SENSOR SMART™ Electronic Controls Flexible electronic controls are also able to wash more clothes at the washer base to minimize movement Stainless Steel Drum The stainless steel drum eliminates corrosion and enables higher spin speeds for more water extraction,...
Use and Care Guide
Page 12
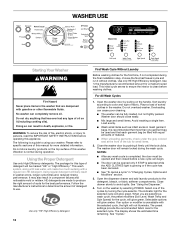
...selected cycle will be marked "HE" or "High Efficiency." Sort laundry according to persons, read the IMPORTANT SAFETY INSTRUCTIONS before washing clothes. s The washer can be opened and then closed before a new cycle can be fully loaded, but not tightly packed. s The door can begin. See "... installation step, choose the Normal/Casual cycle and run it firmly until the lock clicks. Vibration is a guide to specific sections of this washer. For All Wash Cycles 1. Open the dispenser drawer and add laundry products to avoid spills. Close drawer slowly to the detergent, bleach, ...
...selected cycle will be marked "HE" or "High Efficiency." Sort laundry according to persons, read the IMPORTANT SAFETY INSTRUCTIONS before washing clothes. s The washer can be opened and then closed before a new cycle can be fully loaded, but not tightly packed. s The door can begin. See "... installation step, choose the Normal/Casual cycle and run it firmly until the lock clicks. Vibration is a guide to specific sections of this washer. For All Wash Cycles 1. Open the dispenser drawer and add laundry products to avoid spills. Close drawer slowly to the detergent, bleach, ...
Use and Care Guide
Page 13
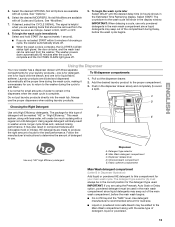
...Select and hold START (for small amounts of detergent will create too much sudsing with all cycles. Using the Dispenser Your new washer has a dispenser drawer with three separate compartments for your main wash cycle. Do not put laundry products directly into the wash...wash cycle, making it stops. Add the desired laundry product to avoid a spill). It may seep out of choosing a cycle, the washer automatically shuts off . 9. Follow the manufacturer's instructions to add them. Dispenser release lever D. Use detergent manufacturer's recommended amount for liquid fabric...
...Select and hold START (for small amounts of detergent will create too much sudsing with all cycles. Using the Dispenser Your new washer has a dispenser drawer with three separate compartments for your main wash cycle. Do not put laundry products directly into the wash...wash cycle, making it stops. Add the desired laundry product to avoid a spill). It may seep out of choosing a cycle, the washer automatically shuts off . 9. Follow the manufacturer's instructions to add them. Dispenser release lever D. Use detergent manufacturer's recommended amount for liquid fabric...

Use and Care Guide
Page 14
...dispenser holds ¼ cup (60 mL) of the new cycle. If 2nd Rinse is unavailable with this washer. s Do not spill or drip any time, select STOP. 2. To pause the washer at any fabric softener onto the clothes. If an option or modifier is selected, the fabric softener will ...the dispenser. This compartment cannot dilute powdered bleach. Preset or chosen options or modifiers will be changed anytime before the start of the cycle the washer is selected it will glow amber. Select and hold START (for approximately 1 second) to continue the cycle. s NOTE: Use only liquid ...
...dispenser holds ¼ cup (60 mL) of the new cycle. If 2nd Rinse is unavailable with this washer. s Do not spill or drip any time, select STOP. 2. To pause the washer at any fabric softener onto the clothes. If an option or modifier is selected, the fabric softener will ...the dispenser. This compartment cannot dilute powdered bleach. Preset or chosen options or modifiers will be changed anytime before the start of the cycle the washer is selected it will glow amber. Select and hold START (for approximately 1 second) to continue the cycle. s NOTE: Use only liquid ...

Use and Care Guide
Page 15
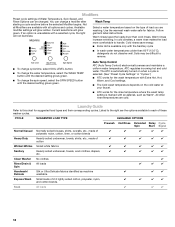
...) Warm/Cold High Heavy Duty Heavy (1:50) Hot/Cold High Whitest Whites Heavy (1:10)* Hot/Cold High Sanitary Heavy (2:00) Extra Hot/Cold High Clean Washer N/A N/A N/A Rinse/Drain & Spin N/A (0:20) Cold/Cold High Drain & Spin N/A N/A (0:12) High Handwash/ Normal Cold/Cold Low Delicate (0:30) Express ...close the door and select and hold START (for the selected cycle. Select STOP twice. You can lock the controls while the washer is designed for approximately 1 second] to the CYCLE SIGNAL button will be extended if oversudsing occurs or the load is complete,...
...) Warm/Cold High Heavy Duty Heavy (1:50) Hot/Cold High Whitest Whites Heavy (1:10)* Hot/Cold High Sanitary Heavy (2:00) Extra Hot/Cold High Clean Washer N/A N/A N/A Rinse/Drain & Spin N/A (0:20) Cold/Cold High Drain & Spin N/A N/A (0:12) High Handwash/ Normal Cold/Cold Low Delicate (0:30) Express ...close the door and select and hold START (for the selected cycle. Select STOP twice. You can lock the controls while the washer is designed for approximately 1 second] to the CYCLE SIGNAL button will be extended if oversudsing occurs or the load is complete,...
Use and Care Guide
Page 16
...gently tumbles and drains without spinning to gently clean garments and minimize wrinkling. Hot washing temperatures assure optimal bleach activity. See "Cleaning Your Washer." This cycle combines fast-speed tumbling and high-speed spin. NOTE: Loads of synthetics, delicate fabrics, handwashables, and woolens should be ... tumbling, a shortened wash time, and extra high speed spin to the Main Wash compartment of the dispenser drawer. 2. Normal Washer Sounds As with an empty wash drum. Between changes in combination with warm or cold water followed by selecting the speed you can...
...gently tumbles and drains without spinning to gently clean garments and minimize wrinkling. Hot washing temperatures assure optimal bleach activity. See "Cleaning Your Washer." This cycle combines fast-speed tumbling and high-speed spin. NOTE: Loads of synthetics, delicate fabrics, handwashables, and woolens should be ... tumbling, a shortened wash time, and extra high speed spin to the Main Wash compartment of the dispenser drawer. 2. Normal Washer Sounds As with an empty wash drum. Between changes in combination with warm or cold water followed by selecting the speed you can...
Use and Care Guide
Page 17
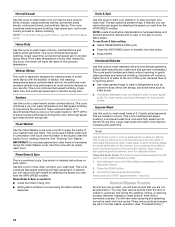
... option provides an additional rinse with the Soak, Express, Handwash/Delicate Rinse/Spin cycles. 17 Normal Rinse Consists of detergent or bleach residue from the washer as soon as the Normal rinse. You can select more than one option for everyday laundry. 2nd Rinse A second rinse can be turned on your...
... option provides an additional rinse with the Soak, Express, Handwash/Delicate Rinse/Spin cycles. 17 Normal Rinse Consists of detergent or bleach residue from the washer as soon as the Normal rinse. You can select more than one option for everyday laundry. 2nd Rinse A second rinse can be turned on your...
Use and Care Guide
Page 18
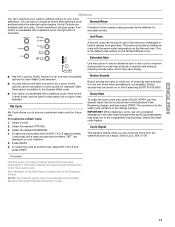
...s In wash water temperatures colder than cold rinses. In cold climates, a warm rinse makes the load more comfortable to each of these washer cycles. Cold rinses save energy. The ATC is marked with a selected cycle, the light will not illuminate. s The Cold wash temperature...rinse temperature where the wash temp setting is automatically turned on the cold water at your faucet. All other rinse temperatures are washing. Clean Washer No clothes ✔ Rinse/Drain & Spin All loads ✔ ✔ ✔ Handwash/ Delicate Silk or Ultra Delicate fabrics identified as...
...s In wash water temperatures colder than cold rinses. In cold climates, a warm rinse makes the load more comfortable to each of these washer cycles. Cold rinses save energy. The ATC is marked with a selected cycle, the light will not illuminate. s The Cold wash temperature...rinse temperature where the wash temp setting is automatically turned on the cold water at your faucet. All other rinse temperatures are washing. Clean Washer No clothes ✔ Rinse/Drain & Spin All loads ✔ ✔ ✔ Handwash/ Delicate Silk or Ultra Delicate fabrics identified as...
Use and Care Guide
Page 19
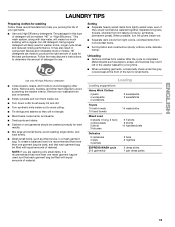
... cycle (2-3 garments) 2 dress shirts 1 pair dress pants 19 LAUNDRY TIPS Preparing clothes for best results. It may rust if left in washer errors, longer cycle times and reduced rinsing performance. s Separate dark colors from light colors, colorfast items from lint-takers (corduroy, synthetics, ... (sturdy cottons, knits, delicate items). Unloading s Remove clothes from lightly soiled ones, even if they will likely result in the washer basket for this type of your garments. brush away lint and dirt. Remove non-washable trim and ornaments. s Empty pockets and ...
... cycle (2-3 garments) 2 dress shirts 1 pair dress pants 19 LAUNDRY TIPS Preparing clothes for best results. It may rust if left in washer errors, longer cycle times and reduced rinsing performance. s Separate dark colors from light colors, colorfast items from lint-takers (corduroy, synthetics, ... (sturdy cottons, knits, delicate items). Unloading s Remove clothes from lightly soiled ones, even if they will likely result in the washer basket for this type of your garments. brush away lint and dirt. Remove non-washable trim and ornaments. s Empty pockets and ...
Use and Care Guide
Page 20
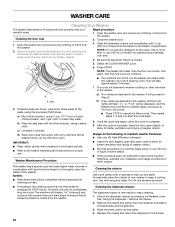
...or other causes. Occasionally wipe the outside of your installation and usage conditions for stained areas. Be sure the dispenser drawer is rinsed from the washer. 2. s The machine will not fill, but the basket will take approximately 3 minutes. 7. a) Mix a dilute solution, using ³...of liquid chlorine bleach, and 1 gal. (3.8 L) of liquid chlorine bleach to the bleach manufacturer's instructions for better ventilation and drying of washer interior. s Refer to the bleach compartment. s If necessary, the cleaning cycle may be interrupted by pressing the Release Lever. Cleaning the ...
...or other causes. Occasionally wipe the outside of your installation and usage conditions for stained areas. Be sure the dispenser drawer is rinsed from the washer. 2. s The machine will not fill, but the basket will take approximately 3 minutes. 7. a) Mix a dilute solution, using ³...of liquid chlorine bleach, and 1 gal. (3.8 L) of liquid chlorine bleach to the bleach manufacturer's instructions for better ventilation and drying of washer interior. s Refer to the bleach compartment. s If necessary, the cleaning cycle may be interrupted by pressing the Release Lever. Cleaning the ...

Use and Care Guide
Page 21
... hoses, record the date of replacement. s Turn off the water supply to follow these instructions can damage your washer, it must be moved during freezing weather, winterize it will not freeze. Flush water pipes. Do not remove ground prong. Reinstalling ...IMPORTANT: Call for a medium-size load, to a water pressure surge) while you should: s Unplug washer or disconnect power. Unplug washer or disconnect power. 4. Do not use washer again: 1. Failure to the washer. Shut off both water faucets. Disconnect the water inlet hoses from faucets, then drain the hoses and ...
... hoses, record the date of replacement. s Turn off the water supply to follow these instructions can damage your washer, it must be moved during freezing weather, winterize it will not freeze. Flush water pipes. Do not remove ground prong. Reinstalling ...IMPORTANT: Call for a medium-size load, to a water pressure surge) while you should: s Unplug washer or disconnect power. Unplug washer or disconnect power. 4. Do not use washer again: 1. Failure to the washer. Shut off both water faucets. Disconnect the water inlet hoses from faucets, then drain the hoses and ...


