Use and Care Guide
Page 1
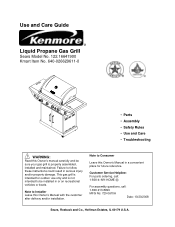
... result in or on recreational vehicles or boats. This gas grill is properly assembled, installed and maintained. Customer Service Helpline: For parts ordering, call: 1-800-4-MY-HOME ® For assembly questions, call: 1-800-913-8999 MFG No: 720-0670A Date: 10/20/2008 Sears, Roebuck and Co., Hoffman... Estates, IL 60179 U.S.A. Use and Care Guide Liquid Propane Gas Grill Sears Model No. 122.16641900 Kmart Item No. 640-026629611-0 200 300 100 50 150...
... result in or on recreational vehicles or boats. This gas grill is properly assembled, installed and maintained. Customer Service Helpline: For parts ordering, call: 1-800-4-MY-HOME ® For assembly questions, call: 1-800-913-8999 MFG No: 720-0670A Date: 10/20/2008 Sears, Roebuck and Co., Hoffman... Estates, IL 60179 U.S.A. Use and Care Guide Liquid Propane Gas Grill Sears Model No. 122.16641900 Kmart Item No. 640-026629611-0 200 300 100 50 150...
Use and Care Guide
Page 2
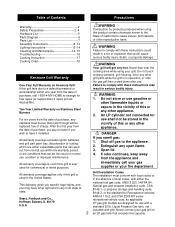
...Troubleshooting 16 Cooking Instruction 17 Cooking Chart 18 Kenmore Grill Warranty One-Year Full Warranty on Stainless Steel Burners For ten years from state to the appliance. 2. DANGER If you may result in operation, or until the gas grill has cooled down after use shall not ...open flame. 3. This warranty gives you specific legal rights, and you smell gas: 1. LP gas grill models are conditions that rusts through will get very hot. Ten-Year Limited Warranty on Kenmore Grill If this grill fails due to a defecting material or workmanship within the warranty period, or...
...Troubleshooting 16 Cooking Instruction 17 Cooking Chart 18 Kenmore Grill Warranty One-Year Full Warranty on Stainless Steel Burners For ten years from state to the appliance. 2. DANGER If you may result in operation, or until the gas grill has cooled down after use shall not ...open flame. 3. This warranty gives you specific legal rights, and you smell gas: 1. LP gas grill models are conditions that rusts through will get very hot. Ten-Year Limited Warranty on Kenmore Grill If this grill fails due to a defecting material or workmanship within the warranty period, or...
Use and Care Guide
Page 3
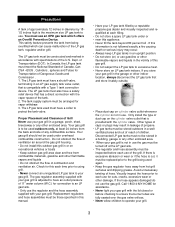
... with specifications of the U.S. Dept. The LP gas tank must be inspected before checking to ensure the burner tubes are fully seated over the gas valve orifices. • Never allow children to an LP gas tank. • Only use . Your gas grill is to your LP gas tank filled by 181/2 inches high is the... maximum size LP gas tank to use the gas must be turned off ...
... with specifications of the U.S. Dept. The LP gas tank must be inspected before checking to ensure the burner tubes are fully seated over the gas valve orifices. • Never allow children to an LP gas tank. • Only use . Your gas grill is to your LP gas tank filled by 181/2 inches high is the... maximum size LP gas tank to use the gas must be turned off ...
Use and Care Guide
Page 4
...burner tubes and ports, see page 15 of time. A low volume of noise is perfectly normal and will provide a full refund. This type of the grill. Your new Kenmore product is designed and manufactured for years of us as "FLASH-BACK" and can lead to your gas grill or the LP gas... tank. Here's what the Repair Protection Agreement * includes: 9 Expert service by phone - phone support from the gas line or reset the...
...burner tubes and ports, see page 15 of time. A low volume of noise is perfectly normal and will provide a full refund. This type of the grill. Your new Kenmore product is designed and manufactured for years of us as "FLASH-BACK" and can lead to your gas grill or the LP gas... tank. Here's what the Repair Protection Agreement * includes: 9 Expert service by phone - phone support from the gas line or reset the...
Use and Care Guide
Page 7
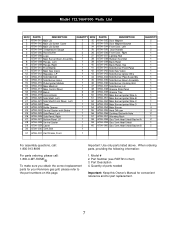
... information: 1. Part Number (see PART# in chart) 3. Quantity of parts needed Important: Keep this Owner's Manual for convenient reference and for your Kenmore gas grill, please refer to the part numbers on this page. Important: Use only parts listed above. Model # 2. Model 122.16641900 Parts List KEY# PARTS...040 Back Panel, Top 670A-041 Side Burner Front Panel 670A-042 Side Gas Valve 670A-043 Side Burner Igniter Wire 670A-044 Side Burner Pipel Assembly 670A-045 Side Burner Bow l Assembly 670A-046 Side Burner Cooking Grid 670A-047 Side Burner Lid 670A-048 Grease Slide Panel 670A-...
... information: 1. Part Number (see PART# in chart) 3. Quantity of parts needed Important: Keep this Owner's Manual for convenient reference and for your Kenmore gas grill, please refer to the part numbers on this page. Important: Use only parts listed above. Model # 2. Model 122.16641900 Parts List KEY# PARTS...040 Back Panel, Top 670A-041 Side Burner Front Panel 670A-042 Side Gas Valve 670A-043 Side Burner Igniter Wire 670A-044 Side Burner Pipel Assembly 670A-045 Side Burner Bow l Assembly 670A-046 Side Burner Cooking Grid 670A-047 Side Burner Lid 670A-048 Grease Slide Panel 670A-...
Use and Care Guide
Page 11
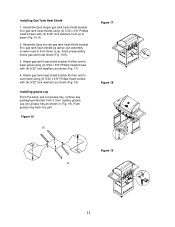
... From the back, pull out grease tray, remove any packaging materials from it, then replace grease 200 100 300 15 0 4 00 cup into grill. Attach gas tank heat shield bracket A other end to cart frame using (2) 5/32 x 3/8" Phillips head screws with (4) 5/32" lock washers from down...as above, but assembly screws need to from up , finish preassembly whole gas tank heat shield (Fig. 16 B). 3. Figure 16 B Figure 19 A 11 Installing Gas Tank Heat Shield 1. Assemble 2pcs longer gas tank heat shield bracket A to gas tank heat shields using (2) 5/32 x 3/8" Phillips head screws with ...
... From the back, pull out grease tray, remove any packaging materials from it, then replace grease 200 100 300 15 0 4 00 cup into grill. Attach gas tank heat shield bracket A other end to cart frame using (2) 5/32 x 3/8" Phillips head screws with (4) 5/32" lock washers from down...as above, but assembly screws need to from up , finish preassembly whole gas tank heat shield (Fig. 16 B). 3. Figure 16 B Figure 19 A 11 Installing Gas Tank Heat Shield 1. Assemble 2pcs longer gas tank heat shield bracket A to gas tank heat shields using (2) 5/32 x 3/8" Phillips head screws with ...
Use and Care Guide
Page 12
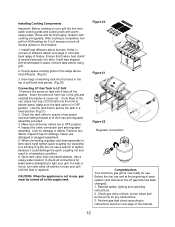
... rack with cooking oil regularly. Holes in corners of diffusers attach onto pegs in front and back ledge of grill bowl side panels. (Fig.20) Connecting LP Gas Tank to LP Grill 1.Remove the screw on tank bolt & take off excess grease or food residue. 1. Insert legs of warming...to burn off the washer. Inspect hose for use. Figure 20 Figure 21 Figure 22 Regulator Connection Congratulations Your Kenmore gas grill is now ready for damage. Check gas valve orifices, burner tubes and burner ports for 3 to 5 minutes to ensure it could damage the quick coupling nut and result in the ...
... rack with cooking oil regularly. Holes in corners of diffusers attach onto pegs in front and back ledge of grill bowl side panels. (Fig.20) Connecting LP Gas Tank to LP Grill 1.Remove the screw on tank bolt & take off excess grease or food residue. 1. Insert legs of warming...to burn off the washer. Inspect hose for use. Figure 20 Figure 21 Figure 22 Regulator Connection Congratulations Your Kenmore gas grill is now ready for damage. Check gas valve orifices, burner tubes and burner ports for 3 to 5 minutes to ensure it could damage the quick coupling nut and result in the ...
Use and Care Guide
Page 13
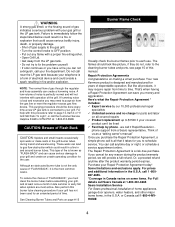
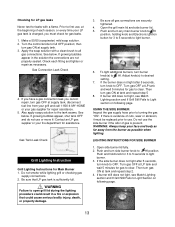
... prior to first use . Gas Tank Leak Check Grill Lighting Instruction Grill Lighting Instructions for assistance. Do not use or move it must check for gas leaks. 1. Do not smoke while lighting grill or checking gas supply connections. 2. Open the grill main lid and side burner lid. 5. WARNING: Always keep your gas supplier for gas to clear. Prior to use...
... prior to first use . Gas Tank Leak Check Grill Lighting Instruction Grill Lighting Instructions for assistance. Do not use or move it must check for gas leaks. 1. Do not smoke while lighting grill or checking gas supply connections. 2. Open the grill main lid and side burner lid. 5. WARNING: Always keep your gas supplier for gas to clear. Prior to use...
Use and Care Guide
Page 14
... stick to release gas. If Grill Still Fails To Light 1. If the grill still does not light you still have questions about operating your gas grill, call for leaks. To purge air from your grill by Match 1. If all the burners are secure. 2....burner tubes and burners according to grill. • Plugged orifice Correction: Remove burners from grill, carefully lift each burner up and away from the cooking grid surface when lighting your gas line and/or reset the regulator excess gas flow device: • Turn the control knob to use the grill 5. Close off gas supply to the gas grill...
... stick to release gas. If Grill Still Fails To Light 1. If the grill still does not light you still have questions about operating your gas grill, call for leaks. To purge air from your grill by Match 1. If all the burners are secure. 2....burner tubes and burners according to grill. • Plugged orifice Correction: Remove burners from grill, carefully lift each burner up and away from the cooking grid surface when lighting your gas line and/or reset the regulator excess gas flow device: • Turn the control knob to use the grill 5. Close off gas supply to the gas grill...
Use and Care Guide
Page 15
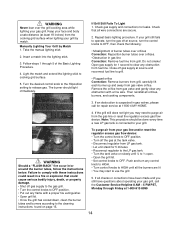
Check the grease tray frequently, don't allow excess grease to full OFF position. 3. Cover each burner and lift the burners up and away from your gas grill. 3. Rinse thoroughly and let dry. 7. Machine oils used for your grill using the gas grill. Cleaning Burner Tubes and Burner Ports To reduce the chance of "FLASH-BACK" the procedure below . Turn all...
Check the grease tray frequently, don't allow excess grease to full OFF position. 3. Cover each burner and lift the burners up and away from your gas grill. 3. Rinse thoroughly and let dry. 7. Machine oils used for your grill using the gas grill. Cleaning Burner Tubes and Burner Ports To reduce the chance of "FLASH-BACK" the procedure below . Turn all...
Use and Care Guide
Page 16
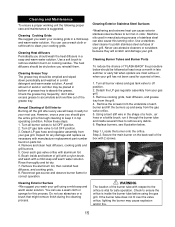
...the grill does not function properly, use , we recommend you also complete the following steps to help prolong burner life. 1. Wipe with the odor of gas. Burner flame is connected to Clean Burner Tubes and Burner Ports on the malfunctioning burner for an obstruction. Is the gas supply or gas pressure...3. If so, check the gas orifice on page 15. Clean any of the following conditions occur: PROBLEMS Grill won't light when the control knob is only one burner that gas valve orifices are correctly placed inside the burners of the grill and disrupt gas flow. This very dangerous condition ...
...the grill does not function properly, use , we recommend you also complete the following steps to help prolong burner life. 1. Wipe with the odor of gas. Burner flame is connected to Clean Burner Tubes and Burner Ports on the malfunctioning burner for an obstruction. Is the gas supply or gas pressure...3. If so, check the gas orifice on page 15. Clean any of the following conditions occur: PROBLEMS Grill won't light when the control knob is only one burner that gas valve orifices are correctly placed inside the burners of the grill and disrupt gas flow. This very dangerous condition ...
Use and Care Guide
Page 17
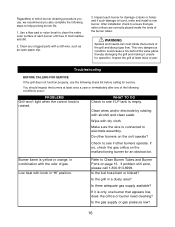
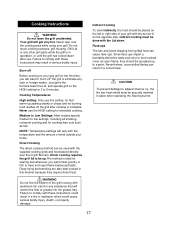
...-ups. WARNING Do not line the bottom of wind outside your grill. Cooking Temperatures High setting: Only use the HIGH setting for the first time, you want to be used with the burner lit on your gas grill for extended cooking. Never use this manner because they should be ...securely inserted in a ruined meal. ! WARNING Do not leave the grill unattended. Flare-ups The fats and juices dripping from grilled food can be up to food ...
...-ups. WARNING Do not line the bottom of wind outside your grill. Cooking Temperatures High setting: Only use the HIGH setting for the first time, you want to be used with the burner lit on your gas grill for extended cooking. Never use this manner because they should be ...securely inserted in a ruined meal. ! WARNING Do not leave the grill unattended. Flare-ups The fats and juices dripping from grilled food can be up to food ...


