Use and Care Guide
Page 4
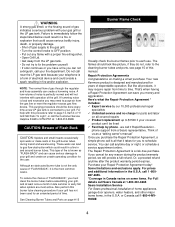
... cause. Purchase your gas grill or the LP gas tank. If humming noise is the most active. To reduce the chance of "FLASH-BACK", you to gas flow obstruction which could create a spark resulting in the U.S.A. Your new Kenmore product is connected to the cleaning burner tubes and ports, ...in Canada varies on all covered repairs 9 Product replacement up to your grill has not been used for the user. This purging procedure should look like all that could cause serious bodily injury, death, or property damage. • Shut off gas supply to the gas grill. • Turn the ...
... cause. Purchase your gas grill or the LP gas tank. If humming noise is the most active. To reduce the chance of "FLASH-BACK", you to gas flow obstruction which could create a spark resulting in the U.S.A. Your new Kenmore product is connected to the cleaning burner tubes and ports, ...in Canada varies on all covered repairs 9 Product replacement up to your grill has not been used for the user. This purging procedure should look like all that could cause serious bodily injury, death, or property damage. • Shut off gas supply to the gas grill. • Turn the ...
Use and Care Guide
Page 7
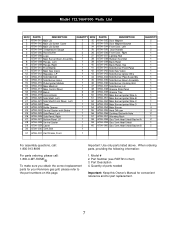
... 122.16641900 Parts List KEY# PARTS DESCRIPTION 1 670A-001 Main Lid 2 670A-002 Main Lid Screw Cover 3 670A-003 Main Lid Screw 4 670A-004 Temperature Gauge 5 670A-005 Hood Buffer 6 670A-006 Logo 7 670A-007 Main Burner Bow l Assembly 8 670A-008 Flange, Left 9 670A-009 Flange, Right 10 670A-010 Front Baffle... part replacement. 7 Part Description 4. Important: Use only parts listed above. Quantity of parts needed Important: Keep this Owner's Manual for convenient reference and for your Kenmore gas grill, please refer to the part numbers on this page.
... 122.16641900 Parts List KEY# PARTS DESCRIPTION 1 670A-001 Main Lid 2 670A-002 Main Lid Screw Cover 3 670A-003 Main Lid Screw 4 670A-004 Temperature Gauge 5 670A-005 Hood Buffer 6 670A-006 Logo 7 670A-007 Main Burner Bow l Assembly 8 670A-008 Flange, Left 9 670A-009 Flange, Right 10 670A-010 Front Baffle... part replacement. 7 Part Description 4. Important: Use only parts listed above. Quantity of parts needed Important: Keep this Owner's Manual for convenient reference and for your Kenmore gas grill, please refer to the part numbers on this page.
Use and Care Guide
Page 15
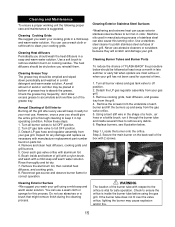
...gas grill. 3. Cleaning and Maintenance To ensure a proper working unit the following proper care and maintenance is vital for safe operation. Cleaning Heat diffusers Periodically you should wash the heat diffusers in a soap and warm water solution. WARNING The location of each gas valve orifice with respect to full OFF position. 3. Cover each burner... and lift the burners up and away from your grill.
...gas grill. 3. Cleaning and Maintenance To ensure a proper working unit the following proper care and maintenance is vital for safe operation. Cleaning Heat diffusers Periodically you should wash the heat diffusers in a soap and warm water solution. WARNING The location of each gas valve orifice with respect to full OFF position. 3. Cover each burner... and lift the burners up and away from your grill.
Use and Care Guide
Page 17
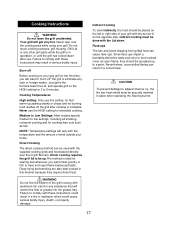
...placed on the HIGH setting for the first time, you want to food cooked cover an open -flame barbecued taste. Just ignite the burners,lower the Lid, and operate grill on the left or right side of your gas grill for 3 to comply with the temperature and the amount of grease into the ...grease tray. WARNING Do not line the bottom of the grill housing with these instructions may result in...
...placed on the HIGH setting for the first time, you want to food cooked cover an open -flame barbecued taste. Just ignite the burners,lower the Lid, and operate grill on the left or right side of your gas grill for 3 to comply with the temperature and the amount of grease into the ...grease tray. WARNING Do not line the bottom of the grill housing with these instructions may result in...