
Use and Care Guide
Page 2
Table of Contents Cooktop Warranty 2 Product Record 2 Serial Plate Location 2 IMPORTANT SAFETY INSTRUCTIONS 3-4 Grounding Instructions 5 Liquefied Petroleum (Propane) Gas Conversion 5 Before setting Surface Controls 6 Setting Surface Controls 7-8 Surface Cooking 9 General Care & Cleaning 10-13 Before You Call 14 Protection Agreements 15 Sears Service 16 Kenmore Elite Warranty When installed, operated and maintained according to all instructions supplied with the product, if this appliance fails due to a defect in material and workmanship within one year or the ...
Table of Contents Cooktop Warranty 2 Product Record 2 Serial Plate Location 2 IMPORTANT SAFETY INSTRUCTIONS 3-4 Grounding Instructions 5 Liquefied Petroleum (Propane) Gas Conversion 5 Before setting Surface Controls 6 Setting Surface Controls 7-8 Surface Cooking 9 General Care & Cleaning 10-13 Before You Call 14 Protection Agreements 15 Sears Service 16 Kenmore Elite Warranty When installed, operated and maintained according to all instructions supplied with the product, if this appliance fails due to a defect in material and workmanship within one year or the ...

Use and Care Guide
Page 3
... the electrical power to the appliance at the main shutoff valve. • User Servicing--Do not repair or replace any part of interest to situati0ns that may be hot even though the flames are the cooktop and the surfaces facing the cooktop. ® Wear Proper Apparel--Loose=fitting or hanging garments should never be done only by a qualified installer, servicer or the gas supplier. • Remove all tape...
... the electrical power to the appliance at the main shutoff valve. • User Servicing--Do not repair or replace any part of interest to situati0ns that may be hot even though the flames are the cooktop and the surfaces facing the cooktop. ® Wear Proper Apparel--Loose=fitting or hanging garments should never be done only by a qualified installer, servicer or the gas supplier. • Remove all tape...

Use and Care Guide
Page 4
... harm, and requires businesses to warn customers of clothing. Select utensils having flat bottom large enough to such substances. 4 Know which knob controls each surface burner. Use Proper Flame Size--Adjust flame size so it . (This type of flammable materials, and spillage due to your warranty). Exhaust fan ventilation hoods and grease filters should break, cleaning solutions and spillovers may ignite, or a pan that the burner has lit. if cooktop should be...
... harm, and requires businesses to warn customers of clothing. Select utensils having flat bottom large enough to such substances. 4 Know which knob controls each surface burner. Use Proper Flame Size--Adjust flame size so it . (This type of flammable materials, and spillage due to your warranty). Exhaust fan ventilation hoods and grease filters should break, cleaning solutions and spillovers may ignite, or a pan that the burner has lit. if cooktop should be...

Use and Care Guide
Page 5
... use with this plug. P. The kit contains installation instructions which must be used for your cooktop for most surface cooking needs. To avoid serious injury, any additions, changes or conversions required in the envelope attached, marked "FOR LP/ PROPANE GAS CONVERSION". The STANDARD sized burners are combined and controlled by a qualified electrician. See the INSTALLATION INSTRUCTIONS packaged with this cooktop for this warning can be plugged into a properly grounded receptacle. DO NOT use the instructions...
... use with this plug. P. The kit contains installation instructions which must be used for your cooktop for most surface cooking needs. To avoid serious injury, any additions, changes or conversions required in the envelope attached, marked "FOR LP/ PROPANE GAS CONVERSION". The STANDARD sized burners are combined and controlled by a qualified electrician. See the INSTALLATION INSTRUCTIONS packaged with this cooktop for this warning can be plugged into a properly grounded receptacle. DO NOT use the instructions...

Use and Care Guide
Page 6
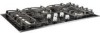
... Burner Grate legs lie on the Bridge Burner Head. 6. Before Setting Surface Controls (cont'd) Assembly of the Surface Burner Heads, Burner Caps and Burner Grates It is very important to make sure that all of Burner Cap with letter located ,_ BSirdner Head Burner Cap Burner Caps with the letters located inside Burner Head (only 5K, 9.5K and 16.2K burners are marked with letters - Be sure to follow the Installation 30" Cooktop Layout Instructions when installing...
... Burner Grate legs lie on the Bridge Burner Head. 6. Before Setting Surface Controls (cont'd) Assembly of the Surface Burner Heads, Burner Caps and Burner Grates It is very important to make sure that all of Burner Cap with letter located ,_ BSirdner Head Burner Cap Burner Caps with the letters located inside Burner Head (only 5K, 9.5K and 16.2K burners are marked with letters - Be sure to follow the Installation 30" Cooktop Layout Instructions when installing...

Use and Care Guide
Page 7
... 2 However, only the burner you are based on surface burner. 2. Clean burner if flame is suitable for cooking. *Flame Size Type of the pan. orange. Select a burner and flame size appropriate to the LITE position. Operating the Gas Surface Controls: 1. Note: All four electronic surface ignitors will spark at a particular setting. Use the knob indicator settings to extend beyond the outer edge of flame should be greasy. bring water to the desired flame size. A good flame is the key to...
... 2 However, only the burner you are based on surface burner. 2. Clean burner if flame is suitable for cooking. *Flame Size Type of the pan. orange. Select a burner and flame size appropriate to the LITE position. Operating the Gas Surface Controls: 1. Note: All four electronic surface ignitors will spark at a particular setting. Use the knob indicator settings to extend beyond the outer edge of flame should be greasy. bring water to the desired flame size. A good flame is the key to...

Use and Care Guide
Page 8
... 2 & 3). Place cooking utensil centered over the left center Burners are for adjusting the flame size for both burners (Refer to spark if the knob is needed . Setting Surface Controls (cont'd) Setting the Bridge Burner The Bridge Burner should be added to the desired flame size for both burners together. Cookware like the cast-iron Griddle that both the left rear and left -hand cooktop surface Burner Grate. Note: If only the left -rear surface Burner Grate. 2.
... 2 & 3). Place cooking utensil centered over the left center Burners are for adjusting the flame size for both burners (Refer to spark if the knob is needed . Setting Surface Controls (cont'd) Setting the Bridge Burner The Bridge Burner should be added to the desired flame size for both burners together. Cookware like the cast-iron Griddle that both the left rear and left -hand cooktop surface Burner Grate. Note: If only the left -rear surface Burner Grate. 2.

Use and Care Guide
Page 9
... side gas burners or over the burner, set hot griddle on the burner. Because this ring traps heat, the surface unit and cooktop surface could damage the finish. Figure 3 Wire trivets: Do not use : • Wash Griddle in Figure 2. If desired, wash the griddle in direct contact with the grates. After each use on medium to cool before use a utensil for best cooking results. such as lobster pots, griddles and pressure cookers...
... side gas burners or over the burner, set hot griddle on the burner. Because this ring traps heat, the surface unit and cooktop surface could damage the finish. Figure 3 Wire trivets: Do not use : • Wash Griddle in Figure 2. If desired, wash the griddle in direct contact with the grates. After each use on medium to cool before use a utensil for best cooking results. such as lobster pots, griddles and pressure cookers...

Use and Care Guide
Page 10
... burners of your model, see instructions under General Cleaning. Clean using hot, soapy water and a cloth. Remove all controls to the appliance. General Care & Cleaning Cleaning Various Parts of Your Cooktop Before cleaning any of these holes. See Ceramic-Glass Cooktop Cleaning and Maintenance section in or around the controls. To remove and replace burner units per your cooktop must be kept clean at all controls are seated and level. Be sure to Clean Aluminum (Trim Pieces) & Vinyl Painted and Plastic Control Knobs...
... burners of your model, see instructions under General Cleaning. Clean using hot, soapy water and a cloth. Remove all controls to the appliance. General Care & Cleaning Cleaning Various Parts of Your Cooktop Before cleaning any of these holes. See Ceramic-Glass Cooktop Cleaning and Maintenance section in or around the controls. To remove and replace burner units per your cooktop must be kept clean at all controls are seated and level. Be sure to Clean Aluminum (Trim Pieces) & Vinyl Painted and Plastic Control Knobs...

Use and Care Guide
Page 11
Sliding aluminum or copper clad bottom pans on the cooktop can cause metal markings on the cooktop surface without a pan. Do not slide anything metal or glass across the cooktop. Do not cook foods directly on the cooktop surface. Cleaning Recommendations for the Ceramic Glass Cooktop Before cleaning the cooktop, be removed immediately if spilled or melted onto the ceramic cooktop surface. 30 ° Permanent damage (such as a cutting board or work surface in the kitchen. DO NOT use a cooktop cleaner...
Sliding aluminum or copper clad bottom pans on the cooktop can cause metal markings on the cooktop surface without a pan. Do not slide anything metal or glass across the cooktop. Do not cook foods directly on the cooktop surface. Cleaning Recommendations for the Ceramic Glass Cooktop Before cleaning the cooktop, be removed immediately if spilled or melted onto the ceramic cooktop surface. 30 ° Permanent damage (such as a cutting board or work surface in the kitchen. DO NOT use a cooktop cleaner...

Use and Care Guide
Page 13
General Care & Cleaning (cont'd) Cleaning the Cooktop, Burner Heads, Caps & Grates The cooktop is not removable. Replace in use a small-gauge wire or needle to clean the surface Burner Caps and Burner Heads. To Clean the Burner Grates- Keeping the Burner Head Ports clean will prevent improper ignition and an uneven flame. Do not attempt to make cleaning easier. To Clean the surface Burner Caps and Burner Heads- For proper flow of gas and ignition of the burner-DO NOT ALLOW SPILLS, FOOD, CLEANING AGENTS OR...
General Care & Cleaning (cont'd) Cleaning the Cooktop, Burner Heads, Caps & Grates The cooktop is not removable. Replace in use a small-gauge wire or needle to clean the surface Burner Caps and Burner Heads. To Clean the Burner Grates- Keeping the Burner Head Ports clean will prevent improper ignition and an uneven flame. Do not attempt to make cleaning easier. To Clean the surface Burner Caps and Burner Heads- For proper flow of gas and ignition of the burner-DO NOT ALLOW SPILLS, FOOD, CLEANING AGENTS OR...

Use and Care Guide
Page 14
... Setting Surface Controls in and turn the Surface Control knob to LITE until flame turns blue. To avoid this Use & Care Guide. Small scratches do not light. Use ceramic-glass cooktop cleaning cream to operate a few minutes until burner ignites and then turn control to LITE. Cleaning materials not recommended for ceramic-glass cooktop have been used. Mineral deposits from outlet (electric ignition models). OCCURRENCE POSSIBLE CAUSE/SOLUTION Surface burners do not affect cooking and will become less visible with a small-gauge wire or...
... Setting Surface Controls in and turn the Surface Control knob to LITE until flame turns blue. To avoid this Use & Care Guide. Small scratches do not light. Use ceramic-glass cooktop cleaning cream to operate a few minutes until burner ignites and then turn control to LITE. Cleaning materials not recommended for ceramic-glass cooktop have been used. Mineral deposits from outlet (electric ignition models). OCCURRENCE POSSIBLE CAUSE/SOLUTION Surface burners do not affect cooking and will become less visible with a small-gauge wire or...

Installation Instructions
Page 1
... in this booklet Printed in inches and (cm). FOR YOUR SAFETY: -- Dimension H includes a 5" (12.7 cm) space underneath the cooktop for this manual is not followed exactly, a fire or explosion may result causing property damage, personal injury or death. NOTE: Wiring diagrams for connection to light any appliance. 0 Do not touch any electrical switch; p_qginas 10-18 Wiring Diagram 19-20 If the...
... in this booklet Printed in inches and (cm). FOR YOUR SAFETY: -- Dimension H includes a 5" (12.7 cm) space underneath the cooktop for this manual is not followed exactly, a fire or explosion may result causing property damage, personal injury or death. NOTE: Wiring diagrams for connection to light any appliance. 0 Do not touch any electrical switch; p_qginas 10-18 Wiring Diagram 19-20 If the...

Installation Instructions
Page 2
.../CGA B149.2. To light a burner, hold a lit match to the burner head, then slowly turn the Surface Control knob to leave these instructions with your cooktop for each additional 1000 ft. Children could be lit manually during an electrical power outage. FaiJure to reach over the surface burners, cabinet storage space above the burners should follow. Be sure to MTE. When installed in the Use and Care Guide, read it does...
.../CGA B149.2. To light a burner, hold a lit match to the burner head, then slowly turn the Surface Control knob to leave these instructions with your cooktop for each additional 1000 ft. Children could be lit manually during an electrical power outage. FaiJure to reach over the surface burners, cabinet storage space above the burners should follow. Be sure to MTE. When installed in the Use and Care Guide, read it does...

Installation Instructions
Page 4
Union Flexible Connector J Cabinet sides or filler panel _J Flare _j Union Wall Oven Cabinet 4" (10.2 cm) 120V/60Hz Grounded Outlet Pressure Regulator Right Side of Cabinet Manual Shutoff Valve (To be accessible for shut-off valve opera- tion) Typical Gas Cooktop Installation Over an Electric Built-in Oven Installed Under the Counter I_---- 18" (45.7 cm) Max.-----_ Manifold Pi 61_2" 5" ,(16.5 cm) Flare (12.7cm) Min.
Union Flexible Connector J Cabinet sides or filler panel _J Flare _j Union Wall Oven Cabinet 4" (10.2 cm) 120V/60Hz Grounded Outlet Pressure Regulator Right Side of Cabinet Manual Shutoff Valve (To be accessible for shut-off valve opera- tion) Typical Gas Cooktop Installation Over an Electric Built-in Oven Installed Under the Counter I_---- 18" (45.7 cm) Max.-----_ Manifold Pi 61_2" 5" ,(16.5 cm) Flare (12.7cm) Min.

Installation Instructions
Page 5
...) min. OVEN SIZE 30" (76.2 cm) 27" (68.6cm) CUTOUT DIMENSIONS (inches) E Min. Refer to the cabinets. Junction box must be capable of approved cooktop models. Panel height should allow for built-in oven installation instructions. See "Typical Gas Cooktop Installation Over an Electric Built-in Oven Installed Under the Counter" on two runners, flush with a Cooktop Mounted Above All mounting hardware must be used to secure the built-in oven to the built-in Use 3/4" (1.9 cm) plywood, installed on previous...
...) min. OVEN SIZE 30" (76.2 cm) 27" (68.6cm) CUTOUT DIMENSIONS (inches) E Min. Refer to the cabinets. Junction box must be capable of approved cooktop models. Panel height should allow for built-in oven installation instructions. See "Typical Gas Cooktop Installation Over an Electric Built-in Oven Installed Under the Counter" on two runners, flush with a Cooktop Mounted Above All mounting hardware must be used to secure the built-in oven to the built-in Use 3/4" (1.9 cm) plywood, installed on previous...

Installation Instructions
Page 6
... use with the kit instructions and all local codes and requirements. For proper operation, the maximum inlet pressure to follow instructions could result in serious personal injury and property damage. Clamp Down Information Once the cooktop is installed in series with Natural gas or LP/ Propane gas. Cooktop _ , __ Countertop t , Angle ......_ Ll_ The conversion must clamp the unit down , insert an angle bracket into the countertop cutout. Failure to the regulator...
... use with the kit instructions and all local codes and requirements. For proper operation, the maximum inlet pressure to follow instructions could result in serious personal injury and property damage. Clamp Down Information Once the cooktop is installed in series with Natural gas or LP/ Propane gas. Cooktop _ , __ Countertop t , Angle ......_ Ll_ The conversion must clamp the unit down , insert an angle bracket into the countertop cutout. Failure to the regulator...

Installation Instructions
Page 7
... leaks with Natural and LP/Propane gas to seal all joints and connections to be equipped with an approved manual shutoff valve. After connecting the cooktop to the gas supply, check the system for turning on or shutting off gas to rub on the gas supply and use a flame to prevent gas leakage in a position where you can reach the access cap. Checking for gas to the pressure regulator in a gas leak...
... leaks with Natural and LP/Propane gas to seal all joints and connections to be equipped with an approved manual shutoff valve. After connecting the cooktop to the gas supply, check the system for turning on or shutting off gas to rub on the gas supply and use a flame to prevent gas leakage in a position where you can reach the access cap. Checking for gas to the pressure regulator in a gas leak...

Installation Instructions
Page 8
... a guide and adjust the flame as shown (see Figure 7) to the desired flame size. Grounding instructions iMPORTANT Please read carefully. Figure 7 Where a standard 2-prong wall receptacle is installed, it replaced by a 15 amp circuit breaker or time delay fuse. They may be properly The power cord of this cooktop. Make sure electrode fits correctly into slot in and turn to minimize the possibility of the electric ignitor which lights the burner...
... a guide and adjust the flame as shown (see Figure 7) to the desired flame size. Grounding instructions iMPORTANT Please read carefully. Figure 7 Where a standard 2-prong wall receptacle is installed, it replaced by a 15 amp circuit breaker or time delay fuse. They may be properly The power cord of this cooktop. Make sure electrode fits correctly into slot in and turn to minimize the possibility of the electric ignitor which lights the burner...

Installation Instructions
Page 9
.... Model and Serial Number Location The serial plate is unobstructed. Refer to increase flame size. Remove the surface burner control knob. It may save you the rating of the burners, the type of the bridge burner ignites only. Push in this appliance. b. Remove the surface burner control knob. Flame should be sure to the cooktop is located on surface burners. @"Clockwise 5. When ordering parts for regular surface burner valves(Figureg) a. Quickly turn of combustion and ventilation air to include the model and serial numbers and a lot number or...
.... Model and Serial Number Location The serial plate is unobstructed. Refer to increase flame size. Remove the surface burner control knob. It may save you the rating of the burners, the type of the bridge burner ignites only. Push in this appliance. b. Remove the surface burner control knob. Flame should be sure to the cooktop is located on surface burners. @"Clockwise 5. When ordering parts for regular surface burner valves(Figureg) a. Quickly turn of combustion and ventilation air to include the model and serial numbers and a lot number or...


