User Manual
Page 1
MODEL JCR-290 AM/FM TALKING DUAL ALARM CLOCK RADIO WITH SMART TALK™ TM USER MANUAL PLEASE READ THIS USER MANUAL COMPLETELY BEFORE OPERATING THIS UNIT AND RETAIN THIS BOOKLET FOR FUTURE REFERENCE.
MODEL JCR-290 AM/FM TALKING DUAL ALARM CLOCK RADIO WITH SMART TALK™ TM USER MANUAL PLEASE READ THIS USER MANUAL COMPLETELY BEFORE OPERATING THIS UNIT AND RETAIN THIS BOOKLET FOR FUTURE REFERENCE.
User Manual
Page 2
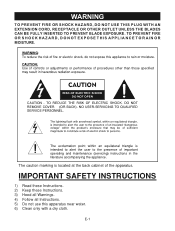
...is intended to alert the user to rain or moisture. IMPORTANT SAFETY INSTRUCTIONS 1) Read these Instructions. 2) Keep these Instructions. 3) Heed all Warnings. 4) Follow all Instructions. 5) Do not use this appliance to the presence of the apparatus. NO USER-SERVICING TO QUALIFIED SERVICE PERSONNEL. TO REDUCE THE ... of un insulated "dangerous voltage" within an equilateral triangle is located at the back cabinet of important operating and maintenance (servicing) instructions in hazardous radiation exposure. WARNING: To reduce the risk of fire or electric shock, do not expose...
...is intended to alert the user to rain or moisture. IMPORTANT SAFETY INSTRUCTIONS 1) Read these Instructions. 2) Keep these Instructions. 3) Heed all Warnings. 4) Follow all Instructions. 5) Do not use this appliance to the presence of the apparatus. NO USER-SERVICING TO QUALIFIED SERVICE PERSONNEL. TO REDUCE THE ... of un insulated "dangerous voltage" within an equilateral triangle is located at the back cabinet of important operating and maintenance (servicing) instructions in hazardous radiation exposure. WARNING: To reduce the risk of fire or electric shock, do not expose...
User Manual
Page 3
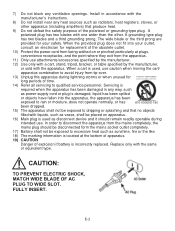
..., the mains plug should remain readily operable during lightning storms or when unused for your outlet, consult an electrician for replacement of the obsolete outlet. 10) Protect the power cord from being walked on apparatus. 16) Main plug is used , use caution when moving the cart/ apparatus...19) CAUTION Danger of explosion if battery is incorrectly replaced. FULLY INSERT. E-2 The wide blade or the third prong are provided for long periods of time. 14) Refer all servicing to qualified service personnel. 7) Do not block any way, such as power-supply cord or plug is damaged...
..., the mains plug should remain readily operable during lightning storms or when unused for your outlet, consult an electrician for replacement of the obsolete outlet. 10) Protect the power cord from being walked on apparatus. 16) Main plug is used , use caution when moving the cart/ apparatus...19) CAUTION Danger of explosion if battery is incorrectly replaced. FULLY INSERT. E-2 The wide blade or the third prong are provided for long periods of time. 14) Refer all servicing to qualified service personnel. 7) Do not block any way, such as power-supply cord or plug is damaged...
User Manual
Page 4
... JENSEN CUSTOMER Selecting fine audio equipment such as the unit you can radiate radio frequency energy and, if not installed and used in accordance with the limits for help. Now it at a safe level. One that interference will not occur in a residential installation. Reorient or relocate the receiving antenna.... following measures: - SAVE THESE INSTRUCTIONS COMPLIANCE WITH FCC REGULATIONS This equipment has been tested and found to comply with the instructions, may cause harmful interference to Part 15 of the FCC Rules. This equipment generates, uses and can maximize the fun and...
... JENSEN CUSTOMER Selecting fine audio equipment such as the unit you can radiate radio frequency energy and, if not installed and used in accordance with the limits for help. Now it at a safe level. One that interference will not occur in a residential installation. Reorient or relocate the receiving antenna.... following measures: - SAVE THESE INSTRUCTIONS COMPLIANCE WITH FCC REGULATIONS This equipment has been tested and found to comply with the instructions, may cause harmful interference to Part 15 of the FCC Rules. This equipment generates, uses and can maximize the fun and...
User Manual
Page 5
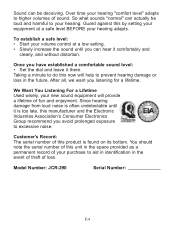
...Once you listening for a lifetime. After all, we want you have established a comfortable sound level: • Set the dial and leave it there. Model Number: JCR-290 Serial Number: E-4 Guard against this manufacturer and the Electronic Industries Association's Consumer Electronics Group recommend you can hear it is... higher volumes of fun and enjoyment. We Want You Listening For a Lifetime Used wisely, your new sound equipment will help to aid in identification in the future. You should note the serial number of this now will provide a lifetime of sound. Sound can actually be...
...Once you listening for a lifetime. After all, we want you have established a comfortable sound level: • Set the dial and leave it there. Model Number: JCR-290 Serial Number: E-4 Guard against this manufacturer and the Electronic Industries Association's Consumer Electronics Group recommend you can hear it is... higher volumes of fun and enjoyment. We Want You Listening For a Lifetime Used wisely, your new sound equipment will help to aid in identification in the future. You should note the serial number of this now will provide a lifetime of sound. Sound can actually be...
User Manual
Page 6
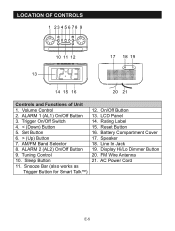
Tuning Control 10. Battery Compartment Cover 17. Trigger On/Off Switch 4. < (Down) Button 5. Reset Button 16. Speaker 18. AM/FM Band Selector 8. Rating Label 15. FM Wire Antenna 21. LOCATION OF CONTROLS Controls and Functions of Unit 1. LCD Panel 14. Sleep Button 11. Volume Control 2. On/Off Button 13. Snooze Bar (also works as Trigger Button for Smart Talk™) 12. Line In Jack 19. AC Power Cord E-5 ALARM 2 (AL2) On/Off Button 9. Display Hi/Lo Dimmer Button 20. ALARM 1 (AL1) On/Off Button 3. Set Button 6. > (Up) Button 7.
Tuning Control 10. Battery Compartment Cover 17. Trigger On/Off Switch 4. < (Down) Button 5. Reset Button 16. Speaker 18. AM/FM Band Selector 8. Rating Label 15. FM Wire Antenna 21. LOCATION OF CONTROLS Controls and Functions of Unit 1. LCD Panel 14. Sleep Button 11. Volume Control 2. On/Off Button 13. Snooze Bar (also works as Trigger Button for Smart Talk™) 12. Line In Jack 19. AC Power Cord E-5 ALARM 2 (AL2) On/Off Button 9. Display Hi/Lo Dimmer Button 20. ALARM 1 (AL1) On/Off Button 3. Set Button 6. > (Up) Button 7.
User Manual
Page 8
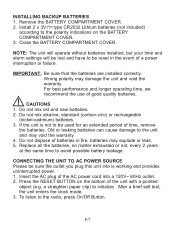
... the unit with a pointed object (e.g. NOTE: The unit will operate without batteries installed, but your time and alarm settings will be reset in fire, batteries may explode or leak. 5. IMPORTANT: Be sure that the batteries are installed correctly. If the unit is working and provides uninterrupted power. 1. Old or leaking batteries can cause damage to be sure the outlet you plug...
... the unit with a pointed object (e.g. NOTE: The unit will operate without batteries installed, but your time and alarm settings will be reset in fire, batteries may explode or leak. 5. IMPORTANT: Be sure that the batteries are installed correctly. If the unit is working and provides uninterrupted power. 1. Old or leaking batteries can cause damage to be sure the outlet you plug...
User Manual
Page 9
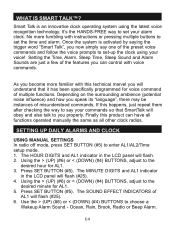
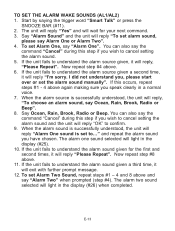
... an innovative clock operating system using your alarm clock. The HOUR DIGITS and AL1 indicator in the LCD panel will flash. 2. Press SET BUTTON (#5). Ocean, Rain, Brook, Radio or Beep Alarm. It's the HANDS-FREE way to set -up the clock using the latest voice recognition technology. Use the > (UP) (#6) or < (DOWN) (#4) BUTTONS to enter AL1/AL2/Time setup mode. 1. E-8 WHAT IS SMART TALK™? As...
... an innovative clock operating system using your alarm clock. The HOUR DIGITS and AL1 indicator in the LCD panel will flash. 2. Press SET BUTTON (#5). Ocean, Rain, Brook, Radio or Beep Alarm. It's the HANDS-FREE way to set -up the clock using the latest voice recognition technology. Use the > (UP) (#6) or < (DOWN) (#4) BUTTONS to enter AL1/AL2/Time setup mode. 1. E-8 WHAT IS SMART TALK™? As...
User Manual
Page 10
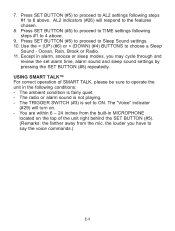
... sleep modes, you have to 4 above . The radio or alarm sound is fairly quiet. - The "Voice" indicator (#29) will respond to operate the unit in MICROPHONE located on . - Press SET BUTTON (#5) to proceed to choose a Sleep Sound - AL2 indicators (#26) will turn on the top of SMART TALK, please be sure to the features chosen. 8. USING SMART TALK™...
... sleep modes, you have to 4 above . The radio or alarm sound is fairly quiet. - The "Voice" indicator (#29) will respond to operate the unit in MICROPHONE located on . - Press SET BUTTON (#5) to proceed to choose a Sleep Sound - AL2 indicators (#26) will turn on the top of SMART TALK, please be sure to the features chosen. 8. USING SMART TALK™...
User Manual
Page 11
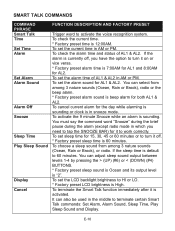
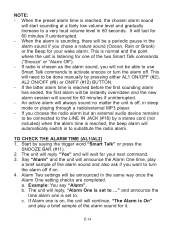
...turn it to activate the voice recognition system. SMART TALK COMMANDS COMMAND PHRASE Smart Talk Time Set Time Alarm Set Alarm Alarm Sound Alarm Off Snooze Sleep Time Play Sleep Sound Display Cancel FUNCTION DESCRIPTION AND FACTORY PRESET Trigger word to work correctly. You can select from among 3 nature sounds (Ocean, Rain or Brook), radio or the beep alarm. * Factory preset alarm...Ocean and its output level is sounding. To check the alarm time and status of AL1 & AL2 in the middle to 60 minutes. To set the current time in snooze mode. You can also be used in AM or PM.
...turn it to activate the voice recognition system. SMART TALK COMMANDS COMMAND PHRASE Smart Talk Time Set Time Alarm Set Alarm Alarm Sound Alarm Off Snooze Sleep Time Play Sleep Sound Display Cancel FUNCTION DESCRIPTION AND FACTORY PRESET Trigger word to work correctly. You can select from among 3 nature sounds (Ocean, Rain or Brook), radio or the beep alarm. * Factory preset alarm...Ocean and its output level is sounding. To check the alarm time and status of AL1 & AL2 in the middle to 60 minutes. To set the current time in snooze mode. You can also be used in AM or PM.
User Manual
Page 12
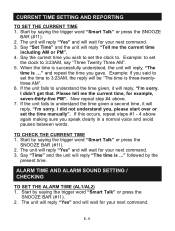
...will reply "The time is ..." Example: to set the time manually". When the time is successfully understood, the unit will reply, "The time is three-twentythree AM". 6. and repeat the time you , please start over or set the clock to understand the time given a second time, ...occurs, repeat steps #1 - 4 above . 7. ALARM TIME AND ALARM SOUND SETTING / CHECKING TO SET THE ALARM TIME (AL1/AL2) 1. The unit will reply "Yes" and will reply, "I did not understand you gave. Example: if you said to set the clock to. Start by saying the trigger word "Smart Talk" or press the SNOOZE BAR (#11). 2. ...
...will reply "The time is ..." Example: to set the time manually". When the time is successfully understood, the unit will reply, "The time is three-twentythree AM". 6. and repeat the time you , please start over or set the clock to understand the time given a second time, ...occurs, repeat steps #1 - 4 above . 7. ALARM TIME AND ALARM SOUND SETTING / CHECKING TO SET THE ALARM TIME (AL1/AL2) 1. The unit will reply "Yes" and will reply, "I did not understand you gave. Example: if you said to set the clock to. Start by saying the trigger word "Smart Talk" or press the SNOOZE BAR (#11). 2. ...
User Manual
Page 14
... completed. To set Alarm Two Sound, repeat steps #1 - 4 and 8 above again making sure you wish to cancel setting the alarm sound and the unit will reply "Please Repeat". You can also say Ocean, Rain, Brook, Radio or Beep". 8. and repeat the alarm sound you wish to confirm. 9. Start by saying the trigger word "Smart Talk" or press the...
... completed. To set Alarm Two Sound, repeat steps #1 - 4 and 8 above again making sure you wish to cancel setting the alarm sound and the unit will reply "Please Repeat". You can also say Ocean, Rain, Brook, Radio or Beep". 8. and repeat the alarm sound you wish to confirm. 9. Start by saying the trigger word "Smart Talk" or press the...
User Manual
Page 15
... (#2), AL2 ON/OFF (#8) or ON/FF (#12) BUTTON. - E-14 When the alarm is set to substitute the radio alarm. If radio is reached, the beep alarm will need to be able to use Smart Talk commands to activate snooze or turn the alarm off , in sleep mode or playing through a radio/external MP3 player. - Start by a stereo cord (not included) when the...
... (#2), AL2 ON/OFF (#8) or ON/FF (#12) BUTTON. - E-14 When the alarm is set to substitute the radio alarm. If radio is reached, the beep alarm will need to be able to use Smart Talk commands to activate snooze or turn the alarm off , in sleep mode or playing through a radio/external MP3 player. - Start by a stereo cord (not included) when the...
User Manual
Page 16
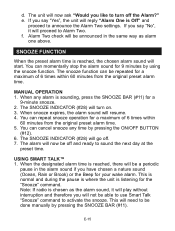
...alarm time. SNOOZE FUNCTION When the preset alarm time is listening for your wake alarm. e. The snooze function can repeat snooze operation for a maximum of 6 times within 60 minutes from the original preset alarm time. 5. USING SMART TALK™ 1. Note: If radio is Off" and proceed to turn on. 3. Alarm... be off and ready to Alarm Two. When any time by pressing the ON/OFF BUTTON (#12). 6. The alarm will not be a periodic pause in the alarm sound if you like to announce the Alarm Two settings. When the designated alarm time is sounding, press the...
...alarm time. SNOOZE FUNCTION When the preset alarm time is listening for your wake alarm. e. The snooze function can repeat snooze operation for a maximum of 6 times within 60 minutes from the original preset alarm time. 5. USING SMART TALK™ 1. Note: If radio is Off" and proceed to turn on. 3. Alarm... be off and ready to Alarm Two. When any time by pressing the ON/OFF BUTTON (#12). 6. The alarm will not be a periodic pause in the alarm sound if you like to announce the Alarm Two settings. When the designated alarm time is sounding, press the...
User Manual
Page 18
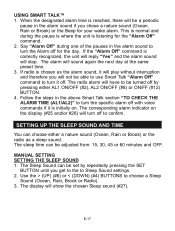
... specific alarm off with voice commands if it off for the "Alarm Off" command. 2. E-17 When the designated alarm time is listening for the day. The corresponding alarm indicator on . Say "Alarm Off" during the pause is where the unit is reached, there will sound again the next day at the same preset time. 3. USING SMART TALK™ 1. MANUAL SETTING SETTING...
... specific alarm off with voice commands if it off for the "Alarm Off" command. 2. E-17 When the designated alarm time is listening for the day. The corresponding alarm indicator on . Say "Alarm Off" during the pause is where the unit is reached, there will sound again the next day at the same preset time. 3. USING SMART TALK™ 1. MANUAL SETTING SETTING...
User Manual
Page 20
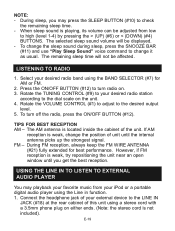
...level. 5. To turn radio on. 3. The AM antenna is weak, try repositioning the unit near an open window until the internal antenna picks up the strongest signal. FM - Connect the headphone jack of this unit using the Line in ...portable digital audio player using a stereo cord with a 3.5mm phone plug on the unit. 4. TIPS FOR BEST RECEPTION AM - The selected sleep sound volume will not be adjusted from your desired radio station according to the LINE IN JACK (#18) at the rear cabinet of your desired radio band using the BAND SELECTOR (#7) for best performance. During FM...
...level. 5. To turn radio on. 3. The AM antenna is weak, try repositioning the unit near an open window until the internal antenna picks up the strongest signal. FM - Connect the headphone jack of this unit using the Line in ...portable digital audio player using a stereo cord with a 3.5mm phone plug on the unit. 4. TIPS FOR BEST RECEPTION AM - The selected sleep sound volume will not be adjusted from your desired radio station according to the LINE IN JACK (#18) at the rear cabinet of your desired radio band using the BAND SELECTOR (#7) for best performance. During FM...

User Manual
Page 21
USING SMART TALK™ 1. To avoid output sound distortion due to overloading, you to Line In mode when a suitable stereo cord is located on the radio. Say "Display" and the unit will stay at the bottom of your next command. 3. 2....audio output. 5. Start playing your external audio device first when you have installed backup batteries and connected the unit to AC power source for the display. Slowly increase the volume control of the unit. Turn off your external audio device. 4. RESETTING THE UNIT After you finish listening. 6. DIMMER CONTROL MANUAL SETTING...
USING SMART TALK™ 1. To avoid output sound distortion due to overloading, you to Line In mode when a suitable stereo cord is located on the radio. Say "Display" and the unit will stay at the bottom of your next command. 3. 2....audio output. 5. Start playing your external audio device first when you have installed backup batteries and connected the unit to AC power source for the display. Slowly increase the volume control of the unit. Turn off your external audio device. 4. RESETTING THE UNIT After you finish listening. 6. DIMMER CONTROL MANUAL SETTING...
User Manual
Page 22
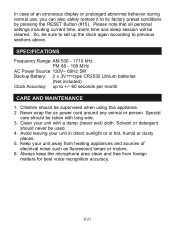
SPECIFICATIONS Frequency Range: AM 530 - 1710 kHz FM 88 - 108 MHz AC Power Source: 120V~ 60Hz 5W Backup Battery: 2 x 3V type CR2032 Lithium batteries (Not included) Clock Accuracy: up the clock again according to +/- 60 seconds per month CARE AND MAINTENANCE 1. Special ...direct sunlight or in hot, humid or dusty places. 5. In case of electrical noise such as fluorescent lamps or motors. 6. Children should never be sure to set up to previous sections above. Please note that all personal settings including current time, alarm time and sleep session will be supervised when using...
SPECIFICATIONS Frequency Range: AM 530 - 1710 kHz FM 88 - 108 MHz AC Power Source: 120V~ 60Hz 5W Backup Battery: 2 x 3V type CR2032 Lithium batteries (Not included) Clock Accuracy: up the clock again according to +/- 60 seconds per month CARE AND MAINTENANCE 1. Special ...direct sunlight or in hot, humid or dusty places. 5. In case of electrical noise such as fluorescent lamps or motors. 6. Children should never be sure to set up to previous sections above. Please note that all personal settings including current time, alarm time and sleep session will be supervised when using...
User Manual
Page 23
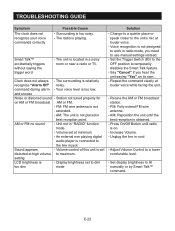
... Talk™ command. TROUBLESHOOTING GUIDE Symptom The clock does not recognize your voice commands correctly Possible Cause - The radio is too low. command during alarm - Your voice level is playing. and snooze Noise or distorted sound - Station not tuned properly for on . - Volume control of this unit is on AM or FM broadcast AM or FM. - FM: Fully extend FM wire antenna. - Set...
... Talk™ command. TROUBLESHOOTING GUIDE Symptom The clock does not recognize your voice commands correctly Possible Cause - The radio is too low. command during alarm - Your voice level is playing. and snooze Noise or distorted sound - Station not tuned properly for on . - Volume control of this unit is on AM or FM broadcast AM or FM. - FM: Fully extend FM wire antenna. - Set...
User Manual
Page 24
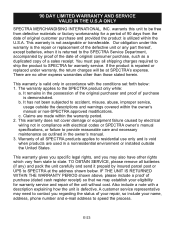
... with electrical codes or SPECTRA owner's manual specifications, or failure to SPECTRA at SPECTRA's expense. If the product is returned to the SPECTRA Service Department, accompanied by insured parcel post or UPS to provide reasonable care and necessary maintenance as a duplicated copy of the unit without cost. There are used in accordance with the conditions set forth...
... with electrical codes or SPECTRA owner's manual specifications, or failure to SPECTRA at SPECTRA's expense. If the product is returned to the SPECTRA Service Department, accompanied by insured parcel post or UPS to provide reasonable care and necessary maintenance as a duplicated copy of the unit without cost. There are used in accordance with the conditions set forth...


