Jenn-Air JJD3030IM Support and Manuals
Get Help and Manuals for this Jenn-Air item

View All Support Options Below
Free Jenn-Air JJD3030IM manuals!
Problems with Jenn-Air JJD3030IM?
Ask a Question
Free Jenn-Air JJD3030IM manuals!
Problems with Jenn-Air JJD3030IM?
Ask a Question
Jenn-Air JJD3030IM Videos

Jenn-Air JJD3030IM Tiroirs chauffant
Duration: :36
Total Views: 0
Duration: :36
Total Views: 0
Jenn-Air JJD3030IM Warmer Drawer
Duration: :37
Total Views: 2
Duration: :37
Total Views: 2
Popular Jenn-Air JJD3030IM Manual Pages
Warranty - Page 1
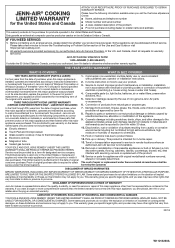
... NEED SERVICE:
1. Please take a few minutes to review the Troubleshooting or Problem Solver section of surfaces resulting from natural gas or propane gas.
7. This limited warranty is valid only in which it was purchased. In-home instruction on how to use inconsistent with the product, Jenn-Air will pay for factory specified replacement parts and repair labor...
Owners Manual - Page 3

... either the word "DANGER" or "WARNING." Wear Proper Apparel - Do not repair or replace any part of the warming drawer. Storage in the manual. Use Only Dry Potholders - Build-up of pressure may cause container to potential hazards that can happen if the instructions are warming drawer vent openings and surfaces near these surfaces are...
Owners Manual - Page 4

...with the National Electrical Code and local codes and ordinances, is ...recommended that a separate circuit, serving only your warming drawer, be provided. Slow roast temperature control zone B. Electrical Requirements
It is important to make sure you have a properly grounded, 3 prong wall receptacle installed by rotating the control knob to the
desired setting...
Owners Manual - Page 5

... Warming Drawer Temperature Chart in the warming drawer. Doing so can set to medium or higher.
If the drawer is normal. For best results, do not hold foods in the door. For smaller quantities or heat-sensitive foods, such as a guide.
Allow warming drawer to High -
For best results, meats, seafood and...
Owners Manual - Page 6

.... There are 1/6, 1/9, 1/3, 1/2, and 2/3. To order serving pans, see the "Assistance or Service" section. Before slow roasting, thaw frozen foods completely. Follow the cookware manufacturer's instructions. Optional Pans (accessory)
The warming drawer includes 2 pan support rails designed to PROOF setting. 3.
Set control knob to hold a variety of the pan sizes. If indentation remains...
Owners Manual - Page 7

...® Stainless Steel Cleaner Part Number W10355016 (not included): See "Assistance or Service" section to ensure it ... instructions on both sides of the drawer at the same time.
Hold the drawer by the sides (not by the front). To Replace:...items from control panel to stainless steel surfaces, do not use .
Set the desired temperature, LOW or HIGH. Do not use soap-filled ...
Owners Manual - Page 8

...9632;■ Is the MOIST-DRY setting correct? Plug into a grounded 3 prong outlet.
8
Replace the fuse or reset the circuit ...unnecessary service call an electrician.
■■ Has the drawer been mounted properly on the slides?
Set the ... the drawer before each use.
If the problem continues, call . TROUBLESHOOTING
Try the solutions suggested here first in areas...
Owners Manual - Page 9

... Appliance Cleaner
Black Panel Kit
Set of appliances.
■■ Installation information.
■■ Use and maintenance procedures.
■■ Repair parts sales.
■■ Specialized customer assistance (Spanish speaking, hearing impaired, limited vision, etc.).
■■ Referrals to local dealers, repair parts distributors and service companies.
In the U.S.A. Call...
Installation Instructions - Page 3

...; 13/8" (3.5 cm) hole saw Parts Supplied ■■ Two #8-18 x 1/2" (1.3 cm) screws ■■ Lens (for any tools listed here. For best performance results make sure the warming drawer is recommended that all governing codes and ordinances.
■■ Cutout dimensions that product's literature for panel ready models) Check local codes.
B A
C E
D
WARMING DRAWER SIZE...
Installation Instructions - Page 4

... the cutout dimensions above.
Custom Wood Drawer Front
If you plan to install a custom wood panel to avoid moisture damage.
4 The back of the wood panel must be installed as an indoor single or double installation or installed under a single oven are shown. Two warming drawers under a single oven. NOTE: The warming drawer cannot...
Installation Instructions - Page 5

... (minimum)
25" (63.5 cm)
e Recommended outlet location
30" (76.2 cm) Models 301/4" (76.8 cm) 21/2" (6.4 cm) 103/4" (27.3 cm) 81/4" (21.0 cm) 5" (12.7 cm) 281/4" (71.8 cm) 25" (63.5 cm)
Flush Installation Requirements A 25" (63.5 cm) minimum cutout depth is required. Flush Installation Front View
Side View F
Cabinet Back
A
1" (25 mm)
Side Cleats...
Installation Instructions - Page 6

See the illustration below. Model/serial/rating plate
INSTALLATION INSTRUCTIONS
Install Warming Drawer
WARNING
Excessive Weight Hazard Use two or more people, move and install warming drawer.
Open warming drawer and slowly push against the front
panel to do so can result in back or other parts from the warming drawer. It is recommended that a separate circuit...
Installation Instructions - Page 7

... kit). If there is recommended that you need Assistance or Service: Please reference the "Warranty". For warming drawer use and cleaning, read the Use and
Care Guide. 5. CUSTOM DRAWER FRONT INSTALLATION INSTRUCTIONS FOR WARMING DRAWERS
Tools and Parts
Gather the required tools and parts before starting installation. Model
27"(68.6 cm) Warming Drawer
30" (76.2 cm) Warming Drawer...
Installation Instructions - Page 8

The custom drawer front is installed, a high-quality spray polyurethane finish be visible through ...wood application.
5. D
A C
B
E
D
A. Custom door panel C.
Warming drawer front D. #8-18 x 3/4" (1.9 cm) screws (6) E. Install custom handle (not supplied) through the appearance side of the custom drawer front. To secure the lens, use an adhesive specified for plastic-to the...
Jenn-Air JJD3030IM Reviews
We have not received any reviews for Jenn-Air yet.