Jenn-Air JDS9865BDP Support and Manuals
Get Help and Manuals for this Jenn-Air item
View All Support Options Below
Free Jenn-Air JDS9865BDP manuals!
Problems with Jenn-Air JDS9865BDP?
Ask a Question
Free Jenn-Air JDS9865BDP manuals!
Problems with Jenn-Air JDS9865BDP?
Ask a Question
Most Recent Jenn-Air JDS9865BDP Questions

Rapid Heat Not Working But Everything Else Is
oven light wont turn off and rapid heat not working as well
oven light wont turn off and rapid heat not working as well
(Posted by krporter1 7 years ago)

Leaking After Dispensing Water
After dispensing water the water eventually leaks on the floor but not right away. There are no leak...
After dispensing water the water eventually leaks on the floor but not right away. There are no leak...
(Posted by rbroderick 9 years ago)
Jenn-Air JDS9865BDP Videos

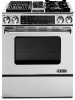
Jenn-Air JDS9865BDP Slide-In Range
Duration: :58
Total Views: 63
Duration: :58
Total Views: 63
Popular Jenn-Air JDS9865BDP Manual Pages
Dimension Guide - Page 1

... in the system. Shutoff valve "open" position
C.
Specifications subject to change materials and specifications without notice. If codes permit and a separate ground wire is used on the model/serial rating plate.
**If connecting to a 50-amp circuit, use with LP gas. Electrical Connection To properly install your range, you must conform with the rating of gas...
Installation Instruction - Page 2

... explosion may cause ignition and combustion problems with this manual and on your gas supplier from a neighbor's phone. Do not store or use gasoline or other appliance.
- Gas suppliers recommend that blows air downward toward this gas cooking appliance. All safety messages will follow instructions. IMPORTANT: Do not install a ventilation system that you and others...
Installation Instruction - Page 4

... access panel) ■ 2 - Mobile home installations require:
■ When this range must be secured to subfloor. Tools needed ■ One of the following Jenn-Air wall caps:
Jenn-Air® 5" (12.7 cm) Round Surface Wall Cap Damper Order Part Number A405
Jenn-Air® 6" (15.2 cm) Round Surface Wall Cap Damper Order Part Number A406
Jenn-Air® 3¼" x 10" (8.3 x 25.4 cm...
Installation Instruction - Page 6

...Codes Section M1601.1 (2006 edition).
■ Do not install 2 elbows together.
■ Use no more than specified CFM of elbows should be vented through the wall or floor. The downdraft range may restrict airflow.
■ Use a Jenn-Air...then a supporting frame must be installed to minimize backward cold air flow and a thermal break installed to the outside temperatures as part of ...
Installation Instruction - Page 21

....
2. See the Use and Care Guide for assistance. Adjust Flame Height
Adjust the height of air in the gas line. Light 1 burner and turn each burner. Use an ¹⁄₈" (3.0 mm) flat-blade screwdriver to "Off" and contact your dealer or authorized service company for specific instruction on burner
bases. Replace the control knob. 4. Repeat...
Installation Instruction - Page 23

...
35L
Left Rear 8,000 BTU
Clear
35L
5. Replace burner cap.
8. Plug in plastic parts bag for each cooktop burner. Complete installation. Checking for the remaining burners.
9. IMPORTANT: ... in the nut driver while changing it counterclockwise and lifting out.
The outer cone is very important. 3. Unscrew the regulator cap and remove the plastic cover. Set Natural gas orifice ...
Installation Instruction - Page 25

...Replace the LP gas orifice spud with package containing literature.
10. IMPORTANT: You may have yellow tips. Apply masking tape to adjust the "LO" setting for each burner location. Press nut driver...oven frame for proper sizing of a 7 mm) nut driver to ½" long. See the "Natural Gas Orifice Spud Chart."
6. Complete installation. The small inner cone should have a very distinct ...
Use and Care - Page 6

... shaft. If the spark igniter still does not operate, call a trained repair specialist. Push in use LP gas, an LP Gas Conversion Kit is pressed completely down on the grate. E
F
D. Use the following chart as a guide when setting heat levels. REMEMBER: When range is 1 high speed burner on some or all controls when not...
Use and Care - Page 13

... turn off this feature: 1. Press SETUP. 2. Press SETUP to TIMERS TONES. 5. Use right Quickset pad to scroll to exit the menu. Press SETUP to 208V: 1. To set the Energy Saver feature: 1. To... oven control displays the Jenn-Air eXperience Center toll-free phone number. 1. Use right Quickset pad to scroll to exit.
13 Press SETUP to SERVICE. 3. Select TONES using...
Use and Care - Page 28

... Lock set correctly? If the problem continues, call . See "Sealed Surface Burners" section.
■ Is propane gas being used ? Contact a service technician or see Installation Instructions. Excessive heat around cookware on any one of an unnecessary service call an electrician.
■ Is the main or regulator gas shutoff valve in the "Setup" section.
28
TROUBLESHOOTING...
Use and Care - Page 29

... set ? See "Temp Adjust" in the pan? See "Oven Vent" section. ■ Are the racks positioned properly? Adjust cooking
time. ■ Has the oven door been opened while cooking?
Close oven door to preheat for 5 minutes. See the Installation Instructions.
■ Is the outside wall cap shut or blocked? ■ Was the range and air...
Use and Care - Page 30

...follow the instructions below.
When calling, please know the purchase date and the complete model and serial number of your problem, write to:
Jenn-Air Brand Home Appliances Customer eXperience Centre 200 - 6750 Century Ave. customers using TTY for assistance or service, please check "Troubleshooting." Appliance model number and serial number.
3.
User's guides, service manuals and parts...
Use and Care - Page 31

... the product, Jenn-Air will need service, first see the "Troubleshooting" section of original purchase date is required to correct house wiring or plumbing.
2. The cost of your major appliance, to correct the installation of repair or replacement under this appliance is operated and maintained according to instructions attached to or furnished with original model/serial numbers that...
Warranty - Page 1

.../or installation instructions.
4. Repairs to obtain service under these excluded circumstances shall be easily determined. The removal and reinstallation of the Use & Care Guide. This warranty is required to parts or systems resulting from warranty coverage.
3. You can find
additional help by checking the "Assistance or Service" section or by a Jenn-Air designated service company...
CAD - Page 1

ED
LO
APPLIANCE DIMENSION
2 FRONT ELEVATION
3 SIDE ELEVATION
[Manufacturer:
Jenn-Air
Model Number:
JDS9865BDP
JENN-AIR®
Date:
MM/DD/YY
Scale:
1 0" Refer to installation instructions packages with product before selecting cabinetry, making cutouts or beginning installation. All Jenn-Airs appliances are appropriately UL, CUL or CSA approved.
00
00
- Do not make any cutouts based...
Jenn-Air JDS9865BDP Reviews
We have not received any reviews for Jenn-Air yet.