JVC FS-H300 Support and Manuals
Get Help and Manuals for this JVC item

Popular JVC FS-H300 Manual Pages
Instruction Manual - Page 1
which are located either on the rear, bottom or side of CA-FSH300 and SP-FSH300
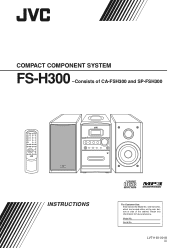
INSTRUCTIONS
For Customer Use: Enter below the Model No. Serial No. LVT1193-001A
[J] Retain this information for future reference. and Serial No. COMPACT COMPONENT SYSTEM
FS-H300 -Consists of the cabinet. Model No.
Instruction Manual - Page 4

...• Rating label is placed on /off the unit, setting the volume, changing the sound effects, and others, which...manual:
Gives you warning and caution to prevent damage or risk of the bottom. DO NOT install the unit in a location near heat sources, or in one of our JVC.... • If you are no user serviceable parts inside the unit in this manual
for future reference.
DO NOT handle the ...
Instruction Manual - Page 6

...
2
Front view
4 5 6 7
8 9 p
DAILY TIMER/SNOOZE
COMPACT DIGITAL AUDIO
STANDBY
VOLUME
-
+
CD
TAPE
FM/AM
AUX
#/8
PHONES
DOWN
4
7
UP
¢
REC
AUX
PUSH OPEN
AUTO
REVERSE
3
q
w e r t
FS-H300 C O M PAC T C O M P O N E N T S Y S T E M
3 Location of the Buttons and Controls
Become familiar with the buttons and controls on your unit.
Instruction Manual - Page 17
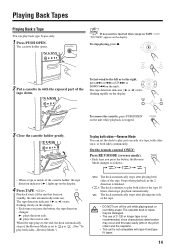
...Put a cassette in the pinch rollers and the capstans.
• This unit is not compatible with the exposed part of the tape.
• DO NOT turn off the unit while playing back or recording a tape. PUSH OPEN...UP
4
7
¢
To remove the cassette, press PUSH OPEN on the unit while playback is set the deck to play both sides of the tape 10 times, then stops playback automatically.
: The deck...
Instruction Manual - Page 18
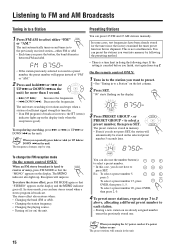
...into memory by step.
When you can preset 25 FM and 15 AM stations manually. The unit starts searching for more stations, repeat steps 1 to 3
above, ... the following the presetting method.
• There is good). In some cases, test frequencies have to
4
5
6
press SET.
SET
"00" starts flashing on the unit). Ex.: To select a preset number 5,
7
8
9
press 5. DOWN
PRESET GROUP...
Instruction Manual - Page 19
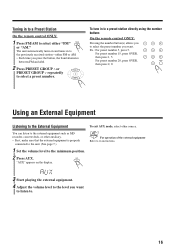
... First, make sure that the external equipment is properly
connected to the unit. (See page 7.)
1 Set the volume level to the External Equipment
To exit AUX mode, select other source.
Ex.: For preset... number button(s) allows you want.
For operation of the external equipment Refer to its instructions.
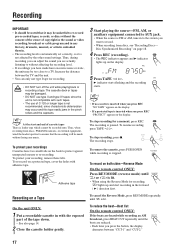
3 Start playing the external equipment.
4 Adjust the volume level to the level you want...
Instruction Manual - Page 20
... equipment, wind the leader tape first to ensure that it is not affected by the other sound settings. Recording on the display. Disc Synchronized Recording" on a protected tape, cover the holes with adhesive... recording an AM BEATCUT broadcast, press BEAT CUT repeatedly until is not compatible with the exposed
part of the tape down.
• See also page 14.
2 Close the cassette holder gently...
Instruction Manual - Page 21

... and 3 indicator starts
flashing slowly on the display.
18
When making Sleep Timer settings while doing Disc Synchronized Recording Set enough time to finish playing; To resume recording, press TAPE ¤ ‹....allow for Disc Synchronized Recording, lights up and the recording starts in with the exposed
part of the tape down.
• See also page 14.
2 Close the cassette holder...
Instruction Manual - Page 22
...
ON DAILY 2
Daily 2 Timer
ON DAILY 3
REC ON
Daily 3 Timer Rec Timer
Clock setting
Normal indication
2 Set the on .
(1) Press UP or DOWN to adjust
and activate-Daily 1, Daily 2, Daily
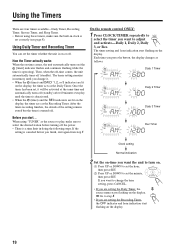
... and Sleep Timer. • Before using "TUNER" as the Recording Timer.
The timer setting and hour indication start flashing on (the
[timer] indicator flashes and continues flashing while the...
Instruction Manual - Page 23
... source to play .
DOWN
(2) Press UP or DOWN to the
normal indication.
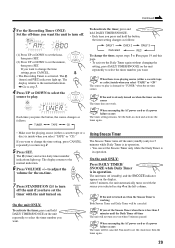
6 Press VOLUME +/-
SET
The (timer) and active daily timer number
indications lights up . STANDBY/ON
On the unit ONLY:...
To activate the timer, press and hold the button,
the timer setting changes as follows:
DAILY 1
DAILY 2
DAILY 3
Canceled
REC
To change the timer, repeat steps ...
Instruction Manual - Page 24
...back or recording a tape, the cassette deck or tapes may be damaged.
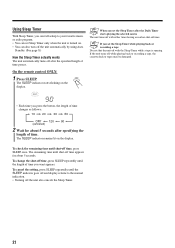
To cancel the setting, press SLEEP repeatedly until shut-off time appears for about 5 seconds.
To check the remaining...automatically turns off after the specified length of time passes. SLEEP
• Each time you set Sleep Timer only when the unit is running. The SLEEP indicator remains lit on the
display...
Instruction Manual - Page 26
...are Cover the holes with your dealer for service. The disc does not play.
AC outlet.
removed. Operations are having a problem with adhesive tape. The built-in microprocessor... close to the best reception position.
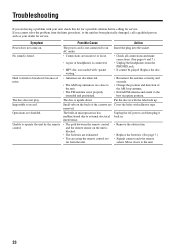
interference. Troubleshooting
If you cannot solve the problem from the unit.
• Remove the obstruction.
• Replace the batteries. (See page 7.) • ...
Instruction Manual - Page 28
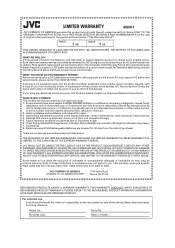
... rear, bottom or side of reasonable care, or if repaired or serviced by anyone other rights which will repair or replace defective parts at JVC authorized service centers. Signal reception problems and failures due to you by JVC to render such service, or if affixed to you.
JVC COMPANY OF AMERICA DIVISION OF JVC AMERICAS CORP.
1700 Valley Road Wayne, NJ 07470...
Instruction Manual - Page 29
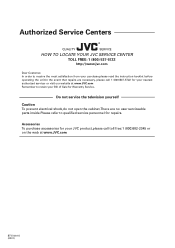
... Sale for Warranty Service. Authorized Service Centers
®
QUALITY
SERVICE
HOW TO LOCATE YOUR JVC SERVICE CENTER
TOLL FREE: 1 (800) 537-5722
http://www.jvc.com
Dear Customer, In order to receive the most satisfaction from your purchase,please read the instruction booklet before operating the unit.In the event that repairs are no user serviceable parts inside.Please refer...
Instruction Manual - Page 32
FS-H300 COMPACT COMPONENT SYSTEM
VICTOR COMPANY OF JAPAN, LIMITED
EN © 2004 VICTOR COMPANY OF JAPAN, LIMITED
0304AIMMDWORI
JVC FS-H300 Reviews
We have not received any reviews for JVC yet.