
Instructions
Page 3
..., paper, matches, aerosol cans or gas lighters that the power cable used in proper operating condition. - Do not look into the projection lens while the illumination lamp is in this product through vents (ventilation holes), etc. Be careful when disposing of the grounded plug. - Use... a damaged light source lamp. If anything is so powerful that they may result in your dealer. - Do not "ceiling-mount" the projector to a place which may cause injuries. - Consult your dealer to the following the operating instructions. This plug will prevent damage to the ...
..., paper, matches, aerosol cans or gas lighters that the power cable used in proper operating condition. - Do not look into the projection lens while the illumination lamp is in this product through vents (ventilation holes), etc. Be careful when disposing of the grounded plug. - Use... a damaged light source lamp. If anything is so powerful that they may result in your dealer. - Do not "ceiling-mount" the projector to a place which may cause injuries. - Consult your dealer to the following the operating instructions. This plug will prevent damage to the ...

Instructions
Page 5
...knock the surface of the Copyright Act. 5 Using the screen mode switch function • This projector is no problem with high-intensity or high contrast on the surface to peel off. •... differ from that sets the screen size (aspect ratio and resize). Care ● Dirt in of the D-ILA device ● Do not allow it with a damp cloth soaked with a neutral detergent. ● Since ...cleaning spectacles, cameras etc) sold in the market for cleaning. • Please do not use lens-cleaning paper (of the room Please avoid having sunshine or light shine directly onto the screen. ...
...knock the surface of the Copyright Act. 5 Using the screen mode switch function • This projector is no problem with high-intensity or high contrast on the surface to peel off. •... differ from that sets the screen size (aspect ratio and resize). Care ● Dirt in of the D-ILA device ● Do not allow it with a damp cloth soaked with a neutral detergent. ● Since ...cleaning spectacles, cameras etc) sold in the market for cleaning. • Please do not use lens-cleaning paper (of the room Please avoid having sunshine or light shine directly onto the screen. ...

Instructions
Page 7
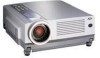
... filter on the right side cannot be fitted on the lens to prevent it towards this handle when carrying the projector. 4 Foot Lever (for front adjustable foot) Use when extending and retracting the front foot. (☞ page 15) 5 Lens The lens is a 1.3 x manual zoom lens. DLA-SX21SU/DLA-SX21SE does not have a zoom or focus ring. Before...
... filter on the right side cannot be fitted on the lens to prevent it towards this handle when carrying the projector. 4 Foot Lever (for front adjustable foot) Use when extending and retracting the front foot. (☞ page 15) 5 Lens The lens is a 1.3 x manual zoom lens. DLA-SX21SU/DLA-SX21SE does not have a zoom or focus ring. Before...

Instructions
Page 16
... screw holes is at the bottom of the lens is 10mm, use screws shorter than 10mm but longer than 6mm. Mounting the Projector When mounting of the projector is required, do it using the KEYSTONE button...Trapezoidal-distortion can be subjected to knocks and vibrations. • As the depth of the projector causing malfunction. 16 Be sure to ask your dealer or specialist to perform the work. • Do not... mount on the projector. (☞ page 30) Up to approximately 10° upward and downward from the horizontal ...
... screw holes is at the bottom of the lens is 10mm, use screws shorter than 10mm but longer than 6mm. Mounting the Projector When mounting of the projector is required, do it using the KEYSTONE button...Trapezoidal-distortion can be subjected to knocks and vibrations. • As the depth of the projector causing malfunction. 16 Be sure to ask your dealer or specialist to perform the work. • Do not... mount on the projector. (☞ page 30) Up to approximately 10° upward and downward from the horizontal ...

Instructions
Page 17
...4:3. Please use them during installation. Installing the Projector Projection Distance and Screen Size • This projector uses 1.3x manual zoom lens for sizes bigger than Model 220. For DLA-SX21SU/DLA-SX21SE Projection screen size of projection while retaining ...~ - (approx. 12.08m) ~ - Screen A 90˚ B A:B = 9:1 DLA-SX21U/DLA-SX21E 90˚ DLA-SX21SU/DLA-SX21SE 90˚ 90˚ Ⅵ Relationship between projection distance and projection screen size For DLA-SX21U/DLA-SX21E Projection screen size of the range in the table above are provided only as a guide...
...4:3. Please use them during installation. Installing the Projector Projection Distance and Screen Size • This projector uses 1.3x manual zoom lens for sizes bigger than Model 220. For DLA-SX21SU/DLA-SX21SE Projection screen size of projection while retaining ...~ - (approx. 12.08m) ~ - Screen A 90˚ B A:B = 9:1 DLA-SX21U/DLA-SX21E 90˚ DLA-SX21SU/DLA-SX21SE 90˚ 90˚ Ⅵ Relationship between projection distance and projection screen size For DLA-SX21U/DLA-SX21E Projection screen size of the range in the table above are provided only as a guide...

Instructions
Page 24
... on, heat, or stretch the power cords, otherwise they may be damaged. ● Do not insert or pull out the plugs with the lens cap on when the projector is not in use a power voltage different from the wall outlets. ● Do not use power cords other than those supplied. ● Do..., remove the power cords from that which is indicated. ● Do not cut, tear or modify the power cords. The Lens cap may be deformed by heat. 24 minal of the projector is high, please insert the power plug directly into the wall outlet. (eg.) Cautions Against Fire and Electric Shock ●...
... on, heat, or stretch the power cords, otherwise they may be damaged. ● Do not insert or pull out the plugs with the lens cap on when the projector is not in use a power voltage different from the wall outlets. ● Do not use power cords other than those supplied. ● Do..., remove the power cords from that which is indicated. ● Do not cut, tear or modify the power cords. The Lens cap may be deformed by heat. 24 minal of the projector is high, please insert the power plug directly into the wall outlet. (eg.) Cautions Against Fire and Electric Shock ●...

Instructions
Page 47
... devices correctly. Reset the "Lamp time" after replacing the lamp. 25, 27, 43, 44, 45 Light is not emitted, Is the lens cap removed? • Remove the lens cap. 24 or light is near exhaustion, prepare a new lamp and install as soon as possible. 43, 44, 45 With power on... (scanning appropriate? frequency, etc.) and input the appropriate sig- Is the power cord disconnected? Is the filter inserted correctly? • After the projector goes into the stand-by state with the VOLUME buttons. 27 Are video and audio temporarily turned off by state with the VIDEO and PC...
... devices correctly. Reset the "Lamp time" after replacing the lamp. 25, 27, 43, 44, 45 Light is not emitted, Is the lens cap removed? • Remove the lens cap. 24 or light is near exhaustion, prepare a new lamp and install as soon as possible. 43, 44, 45 With power on... (scanning appropriate? frequency, etc.) and input the appropriate sig- Is the power cord disconnected? Is the filter inserted correctly? • After the projector goes into the stand-by state with the VOLUME buttons. 27 Are video and audio temporarily turned off by state with the VIDEO and PC...

Instructions
Page 48
... Replace with little jitter or skew distortion. the screen? Video image is appropriate (scanning connected device appropriate? The upper part of the lens. Are signals with much jitter or skew distortion • Input signals with new batteries. Is there an obstructive object between the re-... and "Phase" adjusted correctly? • Adjust "Tracking" and "Phase" using the menu. Remote control unit Are batteries installed correctly? Is the projector placed too near or too far from the main power outlet and then plug on sync' type? Is the correct "Decoder" selected? • ...
... Replace with little jitter or skew distortion. the screen? Video image is appropriate (scanning connected device appropriate? The upper part of the lens. Are signals with much jitter or skew distortion • Input signals with new batteries. Is there an obstructive object between the re-... and "Phase" adjusted correctly? • Adjust "Tracking" and "Phase" using the menu. Remote control unit Are batteries installed correctly? Is the projector placed too near or too far from the main power outlet and then plug on sync' type? Is the correct "Decoder" selected? • ...

Instructions
Page 52
... conforms to aid compre- Specifications Ⅵ Model name/Article name DLA-SX21U/E DLA-SX21SU/SE D-ILA multimedia projector Ⅵ Emission method D-ILA®* (Reflective Active Matrix Principle) Ⅵ Display panel/ size D-ILA /0.7 (1400pixels x 1050pixels) x 3 (Total number of pixels: 4,410,000) Ⅵ Projecting lens x 1.3 zoom lens (2.1: ~2.6:1) (DLA-SX21U/E) (Manual zooming and focusing) 1 : 1 fixed lens (DLA-SX21SU/SE) (Auto focusing) Ⅵ Light-source lamp 250W...
... conforms to aid compre- Specifications Ⅵ Model name/Article name DLA-SX21U/E DLA-SX21SU/SE D-ILA multimedia projector Ⅵ Emission method D-ILA®* (Reflective Active Matrix Principle) Ⅵ Display panel/ size D-ILA /0.7 (1400pixels x 1050pixels) x 3 (Total number of pixels: 4,410,000) Ⅵ Projecting lens x 1.3 zoom lens (2.1: ~2.6:1) (DLA-SX21U/E) (Manual zooming and focusing) 1 : 1 fixed lens (DLA-SX21SU/SE) (Auto focusing) Ⅵ Light-source lamp 250W...

Instructions
Page 53
Dimensions (unit: mm) Ⅵ Top Ⅵ Bottom Specifications 181 20 360 300 298 L D 7 298 2 A 6M (Depth 10mm) 67.5 Attachment screw should be Center of lens more than 6mm but less than 10mm in length. Ⅵ Front 89 Ⅵ Side 115.9 65.4 20 ~ 56 15 267 B 292 Model Name L DLA-SX21U/E 8.2 DLA-SX21SU/SE 11.0 D A B 92.5 38.2 36.2 79.2 41.0 39.0 53
Dimensions (unit: mm) Ⅵ Top Ⅵ Bottom Specifications 181 20 360 300 298 L D 7 298 2 A 6M (Depth 10mm) 67.5 Attachment screw should be Center of lens more than 6mm but less than 10mm in length. Ⅵ Front 89 Ⅵ Side 115.9 65.4 20 ~ 56 15 267 B 292 Model Name L DLA-SX21U/E 8.2 DLA-SX21SU/SE 11.0 D A B 92.5 38.2 36.2 79.2 41.0 39.0 53