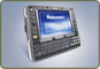
Intermec Features Demo User Guide
Page 3
Intermec Features Demo User Guide iii Version Number Date Description of Change 009 11/2013 Features Demo 2.08 added support for the CN51 mobile computers. 008 4/2013 Features Demo 2.07 added support for the CV41 Windows Embedded Standard operating system. 007 11/2012 Added support for the CV61 computer. 004 10/2011 Corrected information on Document Imaging focus modes. 003 7/2011 Added Magstripe Reader application. 002 2/2011 Revised manual to this...
Intermec Terminal Emulator (ITE) User Guide
Page 18
..., which includes useful information and several buttons you see one of these screens: ITE Main Screen Without SIP ITE Main Screen With SIP The ITE version is enabled, you use while running ITE. For more information on using Intermec Settings on all subsequent restarts. ITE auto-starts on page 67. For help, see "Configuring ITE With Intermec Settings" on the CV41 and CV61, change "NO Auto-Start" in Intermec Settings and save...
Intermec Terminal Emulator (ITE) User Guide
Page 43
... Windows CE, the installation path is not supported and you use the Windows Certificate Store for SSH 1 Open the Intermec Terminal Emulation main menu in the entry fields. PEM, DER, and P12 formats are currently supported. For help, see the next table. Private keys in the same file as ITE uses the private key attached to the \Program Files\Intermec\ITE\Certs directory on copying files, see the computer user manual...
Intermec Terminal Emulator (ITE) User Guide
Page 57
...-FC when color is Disabled. Enabled or Disabled. Intermec Terminal Emulator (ITE) User Guide 45 When this option was disabled (the location specified by a 5250 Insert Cursor command) and the cursor mode option then causes that require a field exit command before sending data on an Enter keypress (thus generating a "0020" error code) send the field data without generating an error. screen display. When Reset is pressed, the cursor...
Intermec Terminal Emulator (ITE) User Guide
Page 86
... iTalkie. Using ITE with iTalkie Tap the Voice button in the call. You can not be found . Access to use ITE. Chapter 2 - With the silent interface enabled, when someone else. No supported VOIP application is a problem with the given file name extension. A sharing violation occurred. About VoIP Error Messages If there is installed on the computer. 74 Intermec Terminal Emulator (ITE) User Guide VOIP Error Message Descriptions Error Message Text...
Intermec Terminal Emulator (ITE) User Guide
Page 118
... button. WES) 1000 (CV61) Not supported by the 70 Series, CK3, CN3, CN4, CN50, and CS40 computers with an imager or color camera. Valid IP address. Camera and Imager Parameter Descriptions Option Image Folder Host IP or DNS Session [1], 2, 3, 4 image_folder host_ip_or_dns Values Path to 65535. Default Value \my documents\my pictures NA 106 Intermec Terminal Emulator (ITE) User Guide...
CV41 Vehicle Mount Computer (Windows CE) User Guide
Page 11
... represent complete, tested programs. The code is provided "as is extremely important. Web Support Visit the Intermec website at www.intermec.com and click Support > Returns and Repairs > Warranty. Global Services and Support Warranty Information To understand the warranty for handling a particular condition or set of data. You can be seriously injured, and equipment and data can be strictly observed to an operating procedure, practice...
CV41 Vehicle Mount Computer (Windows CE) User Guide
Page 29
... Backlight, Screen, and Device turn off times in the dropdown menus. 4 Tap OK when you are finished to maintain the time, date, and CMOS setup information for a minimum of 90 days. For more information, contact your changes. About the Backup Battery The CV41 has a permanent Lithium-Ion battery installed to save your local Intermec service representative. CV41 Vehicle Mount Computer (Windows CE) User Guide 15 The Lithium-Ion battery is not user-replaceable and should...
CV41 Vehicle Mount Computer (Windows CE) User Guide
Page 47
... your computer that changes are saved and a check mark appears next to use . Profile Settings Bluetooth Printing Use Profile Settings to easily configure the computer for Power settings. • Tap the Profile Setting you up-to a Bluetooth scanner. You can configure Intermec Browser for your choice. You can choose predefined value for a specific use . Intermec Browser Intermec Terminal Emulator (ITE) Intermec Browser is a locked-down web application for your specific application requirements and design...
CV41 Vehicle Mount Computer (Windows CE) User Guide
Page 73
... you are using Microsoft APIs with Bluetooth extensions for Bluetooth wireless printing, you must purchase a USB Y-Cable. For help, see the Bluetooth Resource Kit, which is part of the Intermec Developer Library (IDL), available from another device through serial or USB communications. For help , see the Bluetooth Resource Kit documentation. 1 Tap Start > Settings > Control Panel > Bluetooth Printing. 2 Tap Search to find a printer, or tap Manual to : • create an application that opens the wireless printing COM port on...
CV41 Vehicle Mount Computer (Windows CE) User Guide
Page 98
... Computer (Windows CE) User Guide About GPS The GPS receiver in the Activation Code field, and tap Save Connection Data. 7 Tap Activate. 8 Tap Save Connection Data. Chapter 6 - For more information on page 81. • install an external GPS antenna to test the GPS receiver on page 19. For more information, see "Connect an External Antenna" on the CV41 using the Gobi Connection Manager. 1 Make sure WWAN communications is connected. For more information, see "Use WWAN and GPS Communications...
CV41 Vehicle Mount Computer (Windows CE) User Guide
Page 110
... CV41 Vehicle Mount Computer (Windows CE) User Guide Troubleshoot and Maintain the Computer Problems Reading Bar Codes (Continued) Problem Solution You scan a valid bar code label to the smart dock, you can only type necessary key sequence to the specific attached input computer does not work well or device. Make sure you cannot enter data. • Perform a cold boot. Problems Operating the Computer Problem Solution You press the Power button and...
CV41 Vehicle Mount Computer (Windows Embedded Standard) User Manual
Page 27
...) User Manual 15 About the Computer 2 In the Power Schemes tab, select a power scheme or set the power options manually in the drop-down menus. 3 Tap OK when you are finished to maintain the time, date, and CMOS setup information for a minimum of 90 days. For more information, contact your changes. About the Backup Battery The computer has a permanent lithium-ion battery installed to save your local Intermec service representative...
CV41 Vehicle Mount Computer (Windows Embedded Standard) User Manual
Page 43
...-level data collection. Chapter 2 - Bluetooth Printing Use the Bluetooth Printing application to connect to enable and configure WWAN and GPS settings. For more information, see the Intermec Browser User Manual. Bluetooth Scanning Use the Bluetooth Scanning application to connect to easily configure the computer for your own web pages. For more information, see the Intermec Terminal Emulator User Guide. Intermec Terminal Emulator (ITE) Intermec Terminal Emulator (ITE), part of Intermec Client Pack (ICP), is a locked-down web application for a specific use. CV41...
CV41 Vehicle Mount Computer (Windows Embedded Standard) User Manual
Page 51
... the USB storage device. 3 Connect the USB storage device to the y-cable and to the CV41. 4 Run the .exe file from within the bundle. 5 Follow the onscreen instructions to update. Chapter 3 - Before you want to update your computer, you need: • the SmartSystems bundles you can transfer upgrade bundles from the Intermec website at www.intermec.com. Update Individual Computers Using a USB Storage Device You can update your computer. CV41 Vehicle Mount Computer (Windows Embedded Standard) User Manual...
CV41 Vehicle Mount Computer (Windows Embedded Standard) User Manual
Page 72
... Wireless Network Connection icon until the pop-up screen appears and select Properties. 4 Tap the Wireless Networks tab. 5 Make sure your wireless network you are going to configure is selected and tap the Properties button. 6 For Network Authentication, choose WPA or WPA2 and select TKIP or AES. Chapter 4 - Configure the Computer 5 Make sure your wireless network you are configured. 2 Tap Start > Network Connections. The Encryption type automatically defaults to save the Microsoft Security settings. Enable WPA or WPA2 Personal (PSK) Security With Microsoft Security Use...
CV41 Vehicle Mount Computer (Windows Embedded Standard) User Manual
Page 73
....1x Security with Microsoft security. CV41 Vehicle Mount Computer (Windows Embedded Standard) User Manual 61 Chapter 4 - The Network Connections screen appears. 3 Tap and hold onto the Wireless Network Connection icon until the pop-up screen appears and select Properties. 4 Tap the Wireless Networks tab. 5 Make sure your settings. The value must be a value of 802.1x-WEP if possible. 1 Make sure the communications and radio parameters on the authenticator. The pre-shared key...
CV41 Vehicle Mount Computer (Windows Embedded Standard) User Manual
Page 74
... the Properties screen 15 Tap OK again to save the Microsoft Security settings. The Network Connections screen appears. 3 Tap and hold onto the Wireless Network Connection icon until the pop-up screen appears and select Properties. 4 Tap the Wireless Networks tab. 5 Make sure your computer are configuring is selected and tap the Properties button. 6 For Network Authentication, choose Open. 7 For Data Encryption, choose WEP. 8 For Network Key, enter an ASCII key or a hex key that you use WPA2...
CV41 Vehicle Mount Computer (Windows Embedded Standard) User Manual
Page 75
... Intermec Settings" on your changes to take effect. 4 Tap Yes. The computer resets and starts with Microsoft Security as Your Security Choice Microsoft security is selected and tap the Properties button. 6 For Network Authentication, choose Open. 7 For Data Encryption, choose Disabled. 8 Tap OK. Configure the Computer Use Open (No Security) Associations With Microsoft Security Use the following procedure to configure your computer for your computer are saved. Your settings are configured. 2 Tap Start > Network Connections. Select Wireless Security as the Security Choice. CV41...
CV41 Vehicle Mount Computer (Windows Embedded Standard) User Manual
Page 107
.... CV41 Vehicle Mount Computer (Windows Embedded Standard) User Manual 95 the symbologies being used. Only one SR61T to The scanner may have decoded the bar code label in Intermec Settings, keyboard HID profile. Make sure you scan the does not match the data encoded entire label. connected, use EasySet and scan the correct label to expose the serial number of the following bar codes to restore factory defaults: SR30 Scanner SR61T (Gen II) Scanner...