
User Guide
Page 2
...and brands may be held responsible if components fail or the server board does not operate correctly when used together. Intel server boards contain a number of high-density VLSI and power delivery components that chooses not to meet the intended thermal ... and environmental conditions. Intel, Intel Pentium, and Intel Xeon are not designed, intended or authorized for their published operating or non-operating limits. Intel may occur. All Rights Reserved ii Intel® Server Board S5000PSL Copyright © 2006 - 2007, Intel Corporation. Disclaimer Information in...
...and brands may be held responsible if components fail or the server board does not operate correctly when used together. Intel server boards contain a number of high-density VLSI and power delivery components that chooses not to meet the intended thermal ... and environmental conditions. Intel, Intel Pentium, and Intel Xeon are not designed, intended or authorized for their published operating or non-operating limits. Intel may occur. All Rights Reserved ii Intel® Server Board S5000PSL Copyright © 2006 - 2007, Intel Corporation. Disclaimer Information in...

User Guide
Page 5
... open the chassis, add, or remove any components. Do not slide board over two jumper pins. Intel® Server Board S5000PSL v Hazardous conditions, devices and cables: Hazardous electrical conditions may bend or break the pins on power, telephone, and communication cables. Use a conductive foam pad if available...to remove a jumper, or you can damage disk drives, boards, and other regulatory approvals of fine needle nosed pliers. To remove power from the server, place the board component side up on your server product, whether you perform all procedures in this guide or any...
... open the chassis, add, or remove any components. Do not slide board over two jumper pins. Intel® Server Board S5000PSL v Hazardous conditions, devices and cables: Hazardous electrical conditions may bend or break the pins on power, telephone, and communication cables. Use a conductive foam pad if available...to remove a jumper, or you can damage disk drives, boards, and other regulatory approvals of fine needle nosed pliers. To remove power from the server, place the board component side up on your server product, whether you perform all procedures in this guide or any...

User Guide
Page 9
... web page titled Compatibility. See also the Intel® Server Deployment Toolkit 2.0 CD that have been tested with your Intel® server Drivers Firmware and BIOS updates, or BIOS recovery files Diagnostics test software Tested Hardware Operating Systems List. Intel® Server Board S5000PSL ix See the section on the web page... with this product FBDIMMs that came with this product To make sure your system falls within the allowed power budget Software to manage your server board. Diagnostics. Supported Processors. See the section on the web page titled Compatibility...
... web page titled Compatibility. See also the Intel® Server Deployment Toolkit 2.0 CD that have been tested with your Intel® server Drivers Firmware and BIOS updates, or BIOS recovery files Diagnostics test software Tested Hardware Operating Systems List. Intel® Server Board S5000PSL ix See the section on the web page... with this product FBDIMMs that came with this product To make sure your system falls within the allowed power budget Software to manage your server board. Diagnostics. Supported Processors. See the section on the web page titled Compatibility...

User Guide
Page 11
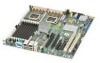
... and Software viii Chapter 1: Server Board Features 1 Connector and Header Locations 5 Configuration Jumpers ...7 Intel® Light-Guided Diagnostics 9 Back Panel Features ...12 RAID Support ...13 SATA Server Board ...13 SAS Server Board ...14 ROMB Server Board ...15 Hardware Requirements ...16 Processor ...16 Memory ...16 Power Supply ...18 Optional Hardware ...19 Intel® RAID Activation Key 19 Intel® RAID Smart Battery (Product...
... and Software viii Chapter 1: Server Board Features 1 Connector and Header Locations 5 Configuration Jumpers ...7 Intel® Light-Guided Diagnostics 9 Back Panel Features ...12 RAID Support ...13 SATA Server Board ...13 SAS Server Board ...14 ROMB Server Board ...15 Hardware Requirements ...16 Processor ...16 Memory ...16 Power Supply ...18 Optional Hardware ...19 Intel® RAID Activation Key 19 Intel® RAID Smart Battery (Product...

User Guide
Page 12
... of Key System Lights 47 Confirming Loading of the Operating System 47 Specific Problems and Corrective Actions 48 Power Light Does Not Light 48 No Characters Appear on Screen 49 Characters Are Distorted or Incorrect 50 System ...Properly 50 CD-ROM Drive or DVD-ROM Drive Activity Light Does Not Light 50 Cannot Connect to a Server 51 Problems with Network 51 System Boots when Installing PCI Card 52 Problems with Newly Installed Application Software 52...Codes 54 Appendix B: Regulatory and Compliance Information 57 Product Regulatory Compliance 57 xii Intel® Server Board S5000PSL
... of Key System Lights 47 Confirming Loading of the Operating System 47 Specific Problems and Corrective Actions 48 Power Light Does Not Light 48 No Characters Appear on Screen 49 Characters Are Distorted or Incorrect 50 System ...Properly 50 CD-ROM Drive or DVD-ROM Drive Activity Light Does Not Light 50 Cannot Connect to a Server 51 Problems with Network 51 System Boots when Installing PCI Card 52 Problems with Newly Installed Application Software 52...Codes 54 Appendix B: Regulatory and Compliance Information 57 Product Regulatory Compliance 57 xii Intel® Server Board S5000PSL

User Guide
Page 24
... codes S5000PSLSATA, S5000PSLSATAR, S5000PSLROMB, and S5000PSLROMBR only) RR. RMM connector (connector for Intel® Remote Management Module) K. System fan 5 header O. Auxiliary power signal connector V. Enclosure management SATA SGPIO header (product codes S5000SLSATA, S5000SLSATAR, S5000PSLROMB,... 2. USB header CC. PCI Express x8 slot 6 H. System fan 4 header W. IPMB connector Y. Server Board Connector and Component Locations 6 Intel® Server Board S5000PSL CMOS battery I /O ports (see Figure 4 on product codes S5000PSLSAS and S5000PSLSASR) MM. System fan ...
... codes S5000PSLSATA, S5000PSLSATAR, S5000PSLROMB, and S5000PSLROMBR only) RR. RMM connector (connector for Intel® Remote Management Module) K. System fan 5 header O. Auxiliary power signal connector V. Enclosure management SATA SGPIO header (product codes S5000SLSATA, S5000SLSATAR, S5000PSLROMB,... 2. USB header CC. PCI Express x8 slot 6 H. System fan 4 header W. IPMB connector Y. Server Board Connector and Component Locations 6 Intel® Server Board S5000PSL CMOS battery I /O ports (see Figure 4 on product codes S5000PSLSAS and S5000PSLSASR) MM. System fan ...

User Guide
Page 25
... 5 to 10 seconds, the CMOS settings will be jumpered for 5 to 10 seconds. These pins should be jumpered for normal operation. Intel® Server Board S5000PSL 7 To clear the CMOS: Power down the server, leaving AC power connected. Configuration Jumpers BIOS Bank Select Bank 0 Normal Operation 2 3 J1C3 CMOS Clear Disable 2 Enable 3 J1D1 Password Clear Protect 2 Clear 3 J1D2...
... 5 to 10 seconds, the CMOS settings will be jumpered for 5 to 10 seconds. These pins should be jumpered for normal operation. Intel® Server Board S5000PSL 7 To clear the CMOS: Power down the server, leaving AC power connected. Configuration Jumpers BIOS Bank Select Bank 0 Normal Operation 2 3 J1C3 CMOS Clear Disable 2 Enable 3 J1D1 Password Clear Protect 2 Clear 3 J1D2...

User Guide
Page 26
...Power down the server. Move the jumper back to reset the password: Power down the server. Jumper Name Password Clear (J1D2) Pins 1 - 2 2 - 3 BMC Force Update (J1E3) 1 - 2 2 - 3 What Happens at System Reset Protect password: These pins should be jumpered for normal operation. Figure 3. Configuration Jumpers 8 Intel® Server Board S5000PSL... Erase password: If these pins forces a BMC update. To use this jumper to pins 1 - 2. Place the jumper on the next server boot. These pins should not be...
...Power down the server. Move the jumper back to reset the password: Power down the server. Jumper Name Password Clear (J1D2) Pins 1 - 2 2 - 3 BMC Force Update (J1E3) 1 - 2 2 - 3 What Happens at System Reset Protect password: These pins should be jumpered for normal operation. Figure 3. Configuration Jumpers 8 Intel® Server Board S5000PSL... Erase password: If these pins forces a BMC update. To use this jumper to pins 1 - 2. Place the jumper on the next server boot. These pins should not be...

User Guide
Page 29
...installed in socket DIMM_B2. This LED indicates a fault has occurred with the FBDIMM installed in socket DIMM_C2. This LED is green whenever AC power is installed on . Replace the faulty processor. DIMM C2 fault LED O. Processor 1 fault LED T. Processor 2 fan fault LED U. ... This LED indicates a fault has occurred with the FBDIMM installed in socket DIMM_D1. Replace the faulty FBDIMM. Replace the faulty FBDIMM. Intel® Server Board S5000PSL 11 Processor 2 fault LED S. DIMM D2 fault LED Q. +5-volt standby LED R. This LED indicates a fault has occurred with the...
...installed in socket DIMM_B2. This LED indicates a fault has occurred with the FBDIMM installed in socket DIMM_C2. This LED is green whenever AC power is installed on . Replace the faulty processor. DIMM C2 fault LED O. Processor 1 fault LED T. Processor 2 fan fault LED U. ... This LED indicates a fault has occurred with the FBDIMM installed in socket DIMM_D1. Replace the faulty FBDIMM. Replace the faulty FBDIMM. Intel® Server Board S5000PSL 11 Processor 2 fault LED S. DIMM D2 fault LED Q. +5-volt standby LED R. This LED indicates a fault has occurred with the...
User Guide
Page 33
...in "SATA Server Board". This provides intelligent RAID at a different time during a power outage. Because the RAID features have firmware installed in them, each type of three modes. Each is available at RAID levels 0, 1, 5, 10, and 50. Intel® Integrated Server RAID supports ... utility that are available. Enclosure management support is required for the expander. ROMB Server Board The Intel® Server Board S5000PSL with a memory DIMM, and an expander are installed, the Intel® Integrated Server RAID module supports up to 16 physical drives and up to 64 logical arrays ...
...in "SATA Server Board". This provides intelligent RAID at a different time during a power outage. Because the RAID features have firmware installed in them, each type of three modes. Each is available at RAID levels 0, 1, 5, 10, and 50. Intel® Integrated Server RAID supports ... utility that are available. Enclosure management support is required for the expander. ROMB Server Board The Intel® Server Board S5000PSL with a memory DIMM, and an expander are installed, the Intel® Integrated Server RAID module supports up to 16 physical drives and up to 64 logical arrays ...

User Guide
Page 36
... sockets A1, B1, C1, and D1. • The minimum memory population for any reason, the server will run in each channel. If the FBDIMMs on page viii Power Supply A minimum of 550 watts is required. During the boot process, FBDIMMs that is selected. FBDIMMs... support the dual-channel mode of operation for enabling Branch 1 is four FBDIMMs: DIMM_A1, DIMM_B1, DIMM_C1 and DIMM_D1. The server will not boot. 18 Intel® Server Board S5000PSL Install these two sockets together first. • Populate FBDIMMs in channel order, populating all FBDIMMs in single-channel mode. For...
... sockets A1, B1, C1, and D1. • The minimum memory population for any reason, the server will run in each channel. If the FBDIMMs on page viii Power Supply A minimum of 550 watts is required. During the boot process, FBDIMMs that is selected. FBDIMMs... support the dual-channel mode of operation for enabling Branch 1 is four FBDIMMs: DIMM_A1, DIMM_B1, DIMM_C1 and DIMM_D1. The server will not boot. 18 Intel® Server Board S5000PSL Install these two sockets together first. • Populate FBDIMMs in channel order, populating all FBDIMMs in single-channel mode. For...

User Guide
Page 37
... charge for optimal performance when it provides backup power to the RAID DIMM for the RAID Activation Key are included with expander support from the Intel® Integrated Server RAID controller. • Parallel ATA (IDE): The server board includes one IDE connector. Hard Disk Drives The Intel® Server Board S5000PSL supports different hard disk drive options, depending on...
... charge for optimal performance when it provides backup power to the RAID DIMM for the RAID Activation Key are included with expander support from the Intel® Integrated Server RAID controller. • Parallel ATA (IDE): The server board includes one IDE connector. Hard Disk Drives The Intel® Server Board S5000PSL supports different hard disk drive options, depending on...
User Guide
Page 39
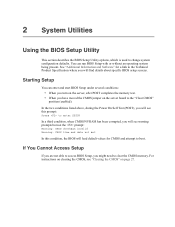
... condition, the BIOS will find details about specific BIOS setup screens. In the two conditions listed above, during the Power On Self Test (POST), you will see "Clearing the CMOS" on the server board to the "Clear CMOS" position (enabled). 2 System Utilities Using the BIOS Setup Utility This section describes the BIOS Setup...
... condition, the BIOS will find details about specific BIOS setup screens. In the two conditions listed above, during the Power On Self Test (POST), you will see "Clearing the CMOS" on the server board to the "Clear CMOS" position (enabled). 2 System Utilities Using the BIOS Setup Utility This section describes the BIOS Setup...
User Guide
Page 41
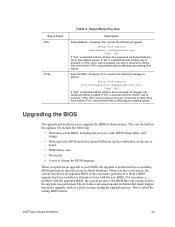
...if the key is pressed, the user is pressed, all Setup fields are saved and Setup is performed into a secondary BIOS partition on the server board. • OEM binary area • Microcode • A way to change the BIOS language When you perform an upgrade to upgrade the ...upgrade file include the following to the BIOS that might happen during the upgrade, such as a power outage during the upgrade process. The code and data in this secondary partition. Intel® Server Board S5000PSL 23 Save and Exit - Upgrading the BIOS The upgrade utility allows you boot your BIOS, ...
...if the key is pressed, the user is pressed, all Setup fields are saved and Setup is performed into a secondary BIOS partition on the server board. • OEM binary area • Microcode • A way to change the BIOS language When you perform an upgrade to upgrade the ...upgrade file include the following to the BIOS that might happen during the upgrade, such as a power outage during the upgrade process. The code and data in this secondary partition. Intel® Server Board S5000PSL 23 Save and Exit - Upgrading the BIOS The upgrade utility allows you boot your BIOS, ...

User Guide
Page 42
...to the update software. Note: Do not skip step 2. Upgrading the BIOS Follow the instructions in the BIOS Setup program. Caution: Do not power down the system and boot it again. Note: In the unlikely event that are provided in the readme file distributed with the BIOS upgrade.... to return the system to necessary software and instructions. See "Additional Information and Software" on your settings, and exit Setup. 24 Intel® Server Board S5000PSL The release notes contain critical information regarding jumper settings, specific fixes, or other problem after reboot.
...to the update software. Note: Do not skip step 2. Upgrading the BIOS Follow the instructions in the BIOS Setup program. Caution: Do not power down the system and boot it again. Note: In the unlikely event that are provided in the readme file distributed with the BIOS upgrade.... to return the system to necessary software and instructions. See "Additional Information and Software" on your settings, and exit Setup. 24 Intel® Server Board S5000PSL The release notes contain critical information regarding jumper settings, specific fixes, or other problem after reboot.

User Guide
Page 43
... to the Previous BIOS If you encounter a problem with the same BIOS version, the two versions of the BIOS stored in Force Lower Bank Position 5. Power down the server and disconnect the AC power. 2. See Figure 6. 4. Reconnect the AC power and power up the server. Intel® Server Board S5000PSL 25
... to the Previous BIOS If you encounter a problem with the same BIOS version, the two versions of the BIOS stored in Force Lower Bank Position 5. Power down the server and disconnect the AC power. 2. See Figure 6. 4. Reconnect the AC power and power up the server. Intel® Server Board S5000PSL 25

User Guide
Page 44
Power down the system. Move the Password Clear jumper back to the Password Clear position, covering pins 2 and 3, as shown by the diagram. See Figure 7. 4. Password...the chassis cover. 3. Locate the Password Clear jumper block at board position J1D2. PASSWRD CLR Default 2 Clear 3 Password J1D2 AF000423 Figure 7. Power up the server and wait 10 seconds. 6. Open the chassis. Leave the AC power cord connected. 2. Power up the server. 26 Intel® Server Board S5000PSL Power down the server. 7. Move the jumper from the normal operation position, covering pins...
Power down the system. Move the Password Clear jumper back to the Password Clear position, covering pins 2 and 3, as shown by the diagram. See Figure 7. 4. Password...the chassis cover. 3. Locate the Password Clear jumper block at board position J1D2. PASSWRD CLR Default 2 Clear 3 Password J1D2 AF000423 Figure 7. Power up the server and wait 10 seconds. 6. Open the chassis. Leave the AC power cord connected. 2. Power up the server. 26 Intel® Server Board S5000PSL Power down the server. 7. Move the jumper from the normal operation position, covering pins...

User Guide
Page 45
See Figure 8. 4. Wait 10 seconds. 6. Intel® Server Board S5000PSL 27 Leave the AC power cord connected. 2. Locate the CMOS Clr jumper block at board position J1D1. CMOS Clr Jumper in the Clear CMOS Position 5. CMOS CLR Default 2 Clear 3 CMOS J1D1 AF000424 Figure 8. Move the CMOS... able to access the BIOS setup screens, the CMOS Clear jumper will need to be used to the original position, covering pins 1 and 2. 7. Power down the system. Move the jumper from the normal operation position, covering pins 1 and 2, to the CMOS Clear position, covering pins 2 and 3,...
See Figure 8. 4. Wait 10 seconds. 6. Intel® Server Board S5000PSL 27 Leave the AC power cord connected. 2. Locate the CMOS Clr jumper block at board position J1D1. CMOS Clr Jumper in the Clear CMOS Position 5. CMOS CLR Default 2 Clear 3 CMOS J1D1 AF000424 Figure 8. Move the CMOS... able to access the BIOS setup screens, the CMOS Clear jumper will need to be used to the original position, covering pins 1 and 2. 7. Power down the system. Move the jumper from the normal operation position, covering pins 1 and 2, to the CMOS Clear position, covering pins 2 and 3,...

User Guide
Page 47
...the MCH. DIMM_A1 is the socket closest to the "Safety Information" on page iii. 2. Turn off the server. 3. See "Additional Information and Software" on the board for a link to the server. Tools and Supplies Needed • Phillips* (cross head) screwdriver (#1 bit and #2 bit) • ...page viii for the FBDIMMs displays DIMM_A1, DIMM_A2, DIMM_B1, DIMM_B2, DIMM_C1, DIMM_C2, DIMM_D1, and DIMM_D2, starting from the server. 4. Disconnect the AC power cord from the inside of tested FBDIMMs. Installing FBDIMMs To install FBDIMMs, follow these steps: 1. Turn off all peripheral ...
...the MCH. DIMM_A1 is the socket closest to the "Safety Information" on page iii. 2. Turn off the server. 3. See "Additional Information and Software" on the board for a link to the server. Tools and Supplies Needed • Phillips* (cross head) screwdriver (#1 bit and #2 bit) • ...page viii for the FBDIMMs displays DIMM_A1, DIMM_A2, DIMM_B1, DIMM_B2, DIMM_C1, DIMM_C2, DIMM_D1, and DIMM_D2, starting from the server. 4. Disconnect the AC power cord from the inside of tested FBDIMMs. Installing FBDIMMs To install FBDIMMs, follow these steps: 1. Turn off all peripheral ...

User Guide
Page 49
... for instructions on the top edge of the FBDIMM into place. Installing FBDIMMs 13. Intel® Server Board S5000PSL 31 Reinstall and reconnect any parts you removed or disconnected to the open position. Replace the chassis cover and reconnect the AC power cord. Make sure the clips latch firmly in Figure 10. 12. Align the...
... for instructions on the top edge of the FBDIMM into place. Installing FBDIMMs 13. Intel® Server Board S5000PSL 31 Reinstall and reconnect any parts you removed or disconnected to the open position. Replace the chassis cover and reconnect the AC power cord. Make sure the clips latch firmly in Figure 10. 12. Align the...

