Product Guide
Page 10
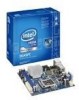
...; Microsoft Windows Vista Home Basic 64-bit edition • Microsoft Windows* XP Media Center Edition 2005 • Microsoft Windows XP Professional • Microsoft Windows XP Professional x64 Edition • Microsoft Windows XP Home For more information about Desktop Board DG45FC, including the Technical Product Specification (TPS), BIOS updates, and device drivers, go to http://support.intel.com/support/motherboards/desktop/. 10 Intel Desktop Board DG45FC Product...
...; Microsoft Windows Vista Home Basic 64-bit edition • Microsoft Windows* XP Media Center Edition 2005 • Microsoft Windows XP Professional • Microsoft Windows XP Professional x64 Edition • Microsoft Windows XP Home For more information about Desktop Board DG45FC, including the Technical Product Specification (TPS), BIOS updates, and device drivers, go to http://support.intel.com/support/motherboards/desktop/. 10 Intel Desktop Board DG45FC Product...
Product Guide
Page 55
.... 3. Follow the instructions provided in the dialog boxes to the DG45FC page. This chapter tells you how to recover the BIOS if an update fails. Go to a removable USB device. This step is included in the Windows environment. Your system will be used to locate the latest BIOS files... boot begins. The BIOS file is required. Click on your hard drive. (You can also save this file to the Intel World Wide Web site: http://support.intel.com/support/motherboards/desktop/ 2. Download the file to your hard drive where it was saved. This runs the update program. 6. Under the "...
.... 3. Follow the instructions provided in the dialog boxes to the DG45FC page. This chapter tells you how to recover the BIOS if an update fails. Go to a removable USB device. This step is included in the Windows environment. Your system will be used to locate the latest BIOS files... boot begins. The BIOS file is required. Click on your hard drive. (You can also save this file to the Intel World Wide Web site: http://support.intel.com/support/motherboards/desktop/ 2. Download the file to your hard drive where it was saved. This runs the update program. 6. Under the "...
Product Guide
Page 59
...will only appear if three or four SATA drives are available), RAID 5 and RAID 10 (these options will see the following Intel Matrix Storage Manager option ROM status message on the remaining portion of the volume (if you enter less than two drives available)...you have selected the RAID LEVEL. 4. 4 Configuring for Intel Matrix Storage Technology 1. Configuring the BIOS for RAID (Intel® Matrix Storage Technology (Intel® MST)) NOTE Intel Matrix Storage Technology requires a Microsoft Windows Vista or Microsoft Windows XP operating system and SATA hard drives. Press and enter...
...will only appear if three or four SATA drives are available), RAID 5 and RAID 10 (these options will see the following Intel Matrix Storage Manager option ROM status message on the remaining portion of the volume (if you enter less than two drives available)...you have selected the RAID LEVEL. 4. 4 Configuring for Intel Matrix Storage Technology 1. Configuring the BIOS for RAID (Intel® Matrix Storage Technology (Intel® MST)) NOTE Intel Matrix Storage Technology requires a Microsoft Windows Vista or Microsoft Windows XP operating system and SATA hard drives. Press and enter...
Product Guide
Page 60
... your desktop board or after downloading it from http://support.intel.com/support/motherboards/desktop/ to manage the RAID configuration. The Intel Matrix Storage Console software can download the driver from the Internet at the beginning of Windows Setup to install Windows?". If you can be using Microsoft Windows XP, press at http://support.intel.com/support/motherboards/desktop/. Finish the Windows installation...
... your desktop board or after downloading it from http://support.intel.com/support/motherboards/desktop/ to manage the RAID configuration. The Intel Matrix Storage Console software can download the driver from the Internet at the beginning of Windows Setup to install Windows?". If you can be using Microsoft Windows XP, press at http://support.intel.com/support/motherboards/desktop/. Finish the Windows installation...
Product Guide
Page 62
...the progress bar. Under the Create RAID volume option, select the option to continue. 4. Boot the system into Microsoft Windows and open the Intel Matrix Storage Console application. Select Next to create a recovery volume. 3. Creating a Recovery Volume Using the RAID Option...Next to continue. 62 Boot from Master Disk Creating a Recovery Volume Using the Intel Matrix Storage Console To create a recovery volume using the Advanced mode, complete the following steps: 1. Intel Desktop Board DG45FC Product Guide Creating a Recovery Volume A recovery volume consists of two disks - ...
...the progress bar. Under the Create RAID volume option, select the option to continue. 4. Boot the system into Microsoft Windows and open the Intel Matrix Storage Console application. Select Next to create a recovery volume. 3. Creating a Recovery Volume Using the RAID Option...Next to continue. 62 Boot from Master Disk Creating a Recovery Volume Using the Intel Matrix Storage Console To create a recovery volume using the Advanced mode, complete the following steps: 1. Intel Desktop Board DG45FC Product Guide Creating a Recovery Volume A recovery volume consists of two disks - ...
Product Guide
Page 63
...right-click on the recovery volume, and select Disable Continuous Update. Then right-click on the information dialog box. Configuring for Intel® Rapid Recover Technology 6. either continuous update or manual update. Select Next and then Finish to the master disk. Select...complete the following steps: 1. The recovery disk contents will result in displaying the recovery disk in Microsoft Windows Explorer. Make sure that the recovery volume is in Microsoft Windows Explorer. Right-click on request. 7. On the next screen, select Continuous update. 4. Continuous update...
...right-click on the recovery volume, and select Disable Continuous Update. Then right-click on the information dialog box. Configuring for Intel® Rapid Recover Technology 6. either continuous update or manual update. Select Next and then Finish to the master disk. Select...complete the following steps: 1. The recovery disk contents will result in displaying the recovery disk in Microsoft Windows Explorer. Make sure that the recovery volume is in Microsoft Windows Explorer. Right-click on request. 7. On the next screen, select Continuous update. 4. Continuous update...


