Husqvarna HD775HW Support and Manuals
Get Help and Manuals for this Husqvarna item

View All Support Options Below
Free Husqvarna HD775HW manuals!
Problems with Husqvarna HD775HW?
Ask a Question
Free Husqvarna HD775HW manuals!
Problems with Husqvarna HD775HW?
Ask a Question
Popular Husqvarna HD775HW Manual Pages
Owners Manual - Page 2
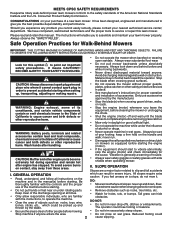
...-propelled mechanism or drive clutch on mowers so equipped before starting when setting up and down and behind power lawn mowers conform to the safety standards of the discharge opening at all instructions on the machine and in place.
• See manufacturer's instructions for proper operation and installation of your purchase of trouble. • Always wear safety goggles...
Owners Manual - Page 3
...THE MODEL AND SERIAL NUMBERS WILL BE FOUND ON A DECAL ATTACHED TO THE REAR OF THE LAWN MOWER HOUSING. PRODUCT SPECIFICATIONS
Gasoline ... a plastic liner. If this operator's manual. Do not use extra caution when servicing it should not be thrown.
Clean oil...change the engine governor setting or overspeed the engine.
• Maintain or replace safety and instruction labels, as a water...
Owners Manual - Page 4
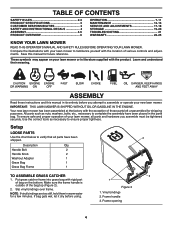
...operate your lawn mower or in the parts bag. Setup
LOOSE PARTS
Use the chart below to verify that all parts and ...SPECIFICATIONS 3 CUSTOMER RESPONSIBILITIES 3 SAFETY AND INSTRUCTIONAL DECALS 4 ASSEMBLY 4-5 PRODUCT OVERVIEW 6
OPERATION 7-11 MAINTENANCE 12-16 SERVICE AND ADJUSTMENTS 17-18 STORAGE 19-20 TROUBLESHOOTING 21 WARRANTY 22-25
KNOW YOUR LAWN MOWER
READ THIS OPERATOR'S MANUAL...
Owners Manual - Page 5
... POSITION
1
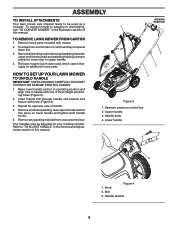
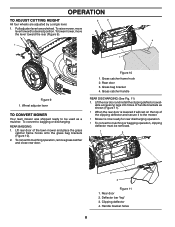
TO REMOVE LAWN MOWER FROM CARTON
1.
Handle bracket
5 Cut down two end corners of this manual. Your handles may be used as a mulcher. ASSEMBLY
TO INSTALL ATTACHMENTS
Your lawn mower was shipped ready to upper... in the Service and Adjustments section of carton and lay end panel down flat.
3. Handle knob 4. LIFT UP
LIFT UP
2 3
HOW TO SET UP YOUR LAWN MOWER
TO UNFOLD ...
Owners Manual - Page 8
... 9).
3
2
4 1
1
Figure 9
1. Deflector bar "leg" 3.
Handle bracket holes
8 Lift rear door of handle brackets as a mulcher. Grass catcher frame hook 2. Lift the rear door and install the clipping deflector (available accessory) legs into holes of the lawn mower and place the grass
catcher frame hooks onto the grass bag brackets (Figure 10). 2. Clipping deflector 4.
Owners Manual - Page 12
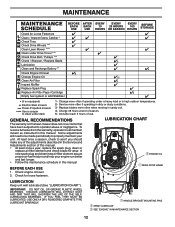
...Wheels *** Clean Lawn Mower **** Clean under Drive Cover *** Check Drive Belt / Pulleys *** Check / Sharpen / Replace Blade Lubrication ...manual. To receive full value from the warranty, operator must maintain mower as instructed in high outdoor temperatures. 2 -
IMPORTANT: DO NOT OIL OR GREASE PLASTIC WHEEL BEARINGS. Check for wear. Replace blades more often when mowing in the Service...
Owners Manual - Page 16
... life.
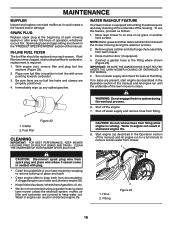
1. To use this manual) and let engine run until the underside of cut grass or another hard surface.
Connect a garden hose to carburetor, replacement is running.
Shut off the ...Hose 2. Spark plug type and gap setting are shown in contact with plug.
• Clean the underside of your lawn mower by scraping to remove excess water from mower.
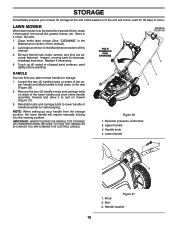
1
CAUTION: Disconnect spark plug ...
Owners Manual - Page 17
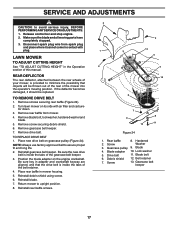
...mower, is provided to avoid serious injury, BEFORE PERFORMING ANY SERVICE OR ADJUSTMENTS: 1. Remove screw securing debris shield.
6. Reinstall debris shield using screw.
6. Hardened
2. Blade bolt
6.
Turn lawn mower... from mower.
4. Place rear baffle in adapter and crankshaft keyway are aligned, and that objects will be replaced. TO REMOVE DRIVE BELT
1. Return mower to ...
Owners Manual - Page 18
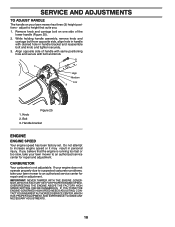
... Medium
Low 3
Figure 25 1. If your engine does not operate properly due to suspected carburetor problems, take your lawn mower to an authorized service center for repair and adjustment. IMPORTANT: NEVER TAMPER WITH THE ENGINE GOVERNOR, WHICH IS FACTORY SET FOR PROPER ENGINE SPEED. IF YOU THINK THE ENGINE-GOVERNED HIGH SPEED NEEDS ADJUSTING, CONTACT YOUR...
Owners Manual - Page 19
...
19 Inspect moving parts for safe keeping. Remove the two (2) handle knobs and carriage bolts on sides of this manual).
2. Reinstall knobs and carriage bolts to the rear (Figure 26).
2. Bolt 3. NOTE: When setting up all nuts, bolts, screws, and pins are securely fastened. Upper handle 3. Replace if necessary.
4. Touch up your lawn mower handle for...
Owners Manual - Page 20
...plug hole
into cylinder. 3. CYLINDER
1. Replace with a suitable protective cover that
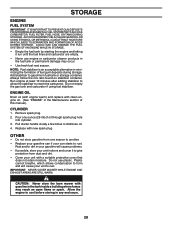
does not... can starts to form and will cause problems. • If possible, store your unit... in minimizing the formation of this manual). CAUTION: Never store the lawn mower with clean engine oil. (See ...PARTS SUCH AS CARBURETOR, FUEL FILTER, FUEL HOSE, OR TANK DURING STORAGE. IMPORTANT: NEVER COVER MOWER...
Owners Manual - Page 22

... of this Limited Warranty.
(b) Transmissions. Engines, Transmissions and certain other than that this Husqvarna® product is offered instead of and replaces any authorized Husqvarna Servicing Dealer/Center using the product immediately upon any subsequent purchaser of models equipped with the product at any warranty regime provided for exceptions - This Limited Warranty does...
Owners Manual - Page 23
...or failure occurs.
9. Husqvarna encourages you do not meet Engine manufacturer's specifications; (g) Use of gasohol, containing methanol (wood alcohol). The Limited Lifetime Warranty does not cover damage other than that you require assistance or have been made. However, registering your operator's manual; (l) Operation of the unit with improperly installed/removed or modified cutting...
Parts List - Page 3
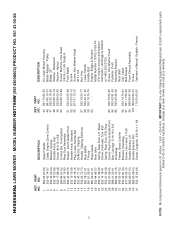
..., Model Number 111P02-0130-F4 (For engine service and replacement parts, call Briggs & Stratton at 1-800-233-3723) Screw, Hex Washer Head Fastener, Push Mounting Bracket, Rear Skirt Clip, Cable Belt Keeper Front Shroud Assembly Screw Operator's Manual, English / French
3
NOTE: All component dimensions given in U.S. Failure to do so could be hazardous, damage your lawn mower...
Parts List - Page 5
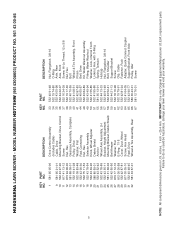
MODEL NUMBER HD775HW (96143008603) PRODUCT NO. 961 43 00-86
5
KEY PART NO. inches. 1 inch = 25.4 mm. HUSQVARNA LAWN MOWER - IMPORTANT: Use only Original Equipment Manufacturer (O.E.M.) replacement parts....Hubcap Nut, Flangelock 3/8-16 Bolt, Shoulder Support Bracket Screw Clip, Cable Fastener, Push Adapter, Quick-Connect Coupler Support Bracket, Front Axle Pulley, Idler Screw
NOTE: All component ...
Husqvarna HD775HW Reviews
We have not received any reviews for Husqvarna yet.