Installation Instructions
Page 1
... . . .18 Burner Grates 17 Control Panel and Knobs . . .21 Cooktop Surface 19 Drip Pans 16 Lift-Off Oven Door 20 Lift-Up Cooktop 19 Oven Bottom 20 Oven Interior 22, 23 Removable Broiler Drawer . .21 Racks 22 Stainless Steel Surfaces . . . . .19 Installation Instructions 24...-39 Anti-Tip Device . . . . .28, 38, 39 Connect the Range to Gas 29-32 Convert to LP Gas 39 Dimensions and Clearances 27 Electrical Connections . .33, 34 Level the Range...
... . . .18 Burner Grates 17 Control Panel and Knobs . . .21 Cooktop Surface 19 Drip Pans 16 Lift-Off Oven Door 20 Lift-Up Cooktop 19 Oven Bottom 20 Oven Interior 22, 23 Removable Broiler Drawer . .21 Racks 22 Stainless Steel Surfaces . . . . .19 Installation Instructions 24...-39 Anti-Tip Device . . . . .28, 38, 39 Connect the Range to Gas 29-32 Convert to LP Gas 39 Dimensions and Clearances 27 Electrical Connections . .33, 34 Level the Range...
Installation Instructions
Page 3
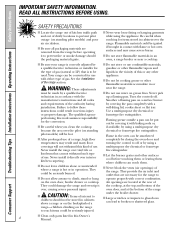
... Do not attempt to these substances, namely benzene, carbon monoxide, formaldehyde and soot, caused primarily by qualified gas range installers or service technicians. I Have your range unless it off valve and how to have an ungrounded outlet replaced with a properly grounded, three-prong outlet... PRECAUTIONS Have the installer show you the location of the oven. 3 I Plug your personal responsibility and obligation to shut it is specifically recommended in carbon monoxide poisoning and overheating of the range gas shut-off if necessary. If in doubt about the grounding...
... Do not attempt to these substances, namely benzene, carbon monoxide, formaldehyde and soot, caused primarily by qualified gas range installers or service technicians. I Have your range unless it off valve and how to have an ungrounded outlet replaced with a properly grounded, three-prong outlet... PRECAUTIONS Have the installer show you the location of the oven. 3 I Plug your personal responsibility and obligation to shut it is specifically recommended in carbon monoxide poisoning and overheating of the range gas shut-off if necessary. If in doubt about the grounding...
Installation Instructions
Page 4
... The qualified agency performing this kind of gas (natural or LP) that are located at the rear of the cooktop, at the top and bottom of the oven door, and at the bottom of the range under the broiler drawer. Never install the range over vinyl tile or linoleum that cannot ... grease outside a pan can lead to broken or shattered glass. 4 I Do not store flammable materials in cabinets above a range or on the range to prevent pilot outage (on the oven door, broiler drawer or cooktop. Turn the controls off or by using a multi-purpose dry chemical or foam-type fire extinguisher...
... The qualified agency performing this kind of gas (natural or LP) that are located at the rear of the cooktop, at the top and bottom of the oven door, and at the bottom of the range under the broiler drawer. Never install the range over vinyl tile or linoleum that cannot ... grease outside a pan can lead to broken or shattered glass. 4 I Do not store flammable materials in cabinets above a range or on the range to prevent pilot outage (on the oven door, broiler drawer or cooktop. Turn the controls off or by using a multi-purpose dry chemical or foam-type fire extinguisher...
Installation Instructions
Page 5
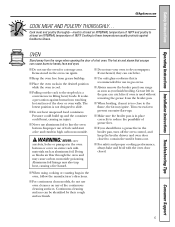
...It is cool. I Always remove the broiler pan from range as soon as aluminum foil. Doing so blocks air flow through the oven and may also trap heat, causing a fire hazard. I Never use oven cleaners on any slots, holes or passages in gas ovens. I Do not heat unopened food containers. I For ...to at least an INTERNAL temperature of 160°F and poultry to these temperatures usually protects against burns from the range when opening the door of the door or oven walls. I For safety and proper cooking performance, always bake and broil with materials such as you should have a...
...It is cool. I Always remove the broiler pan from range as soon as aluminum foil. Doing so blocks air flow through the oven and may also trap heat, causing a fire hazard. I Never use oven cleaners on any slots, holes or passages in gas ovens. I Do not heat unopened food containers. I For ...to at least an INTERNAL temperature of 160°F and poultry to these temperatures usually protects against burns from the range when opening the door of the door or oven walls. I For safety and proper cooking performance, always bake and broil with materials such as you should have a...
Installation Instructions
Page 9
...metal alone has poor heating properties and is desired, the flame size on a gas burner should be used . This can be used on your range with sealed burners) We recommend that you use only and those for oven use a 14 ″ or smaller flat-bottomed wok. Make sure the wok ... Flames larger than the bottom of the cookware will cause incomplete combustion and can light the gas surface burners on gas ranges. Most foods brown evenly in use the stove top grill on the sealed gas burner, it heats quickly and evenly. Follow cookware manufacturer's recommendations for top-of the cookware...
...metal alone has poor heating properties and is desired, the flame size on a gas burner should be used . This can be used on your range with sealed burners) We recommend that you use only and those for oven use a 14 ″ or smaller flat-bottomed wok. Make sure the wok ... Flames larger than the bottom of the cookware will cause incomplete combustion and can light the gas surface burners on gas ranges. Most foods brown evenly in use the stove top grill on the sealed gas burner, it heats quickly and evenly. Follow cookware manufacturer's recommendations for top-of the cookware...
Installation Instructions
Page 11
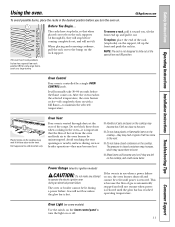
... they may become hot if left on . I Metal items will normally take 30-90 seconds before the flame comes on the cooktop, and could cause burns. ... position. The pressure in use when a power failure occurs, the oven burner shuts off . 11 Vent appearance and location vary. Gas will not resume when power is restored until power is not designed ...range. To remove a rack, pull it toward you turn the light on the support, tilt up and pull it is vented through E), they may melt if left too close to maintain the selected temperature. To replace, place the end of gas...
... they may become hot if left on . I Metal items will normally take 30-90 seconds before the flame comes on the cooktop, and could cause burns. ... position. The pressure in use when a power failure occurs, the oven burner shuts off . 11 Vent appearance and location vary. Gas will not resume when power is restored until power is not designed ...range. To remove a rack, pull it toward you turn the light on the support, tilt up and pull it is vented through E), they may melt if left too close to maintain the selected temperature. To replace, place the end of gas...
Installation Instructions
Page 12
...in it just like the grid. The rack is not designed for example, when cooking a large turkey. To preheat, set the oven at this position. Oven Moisture As your oven heats up, the temperature change of foil on recipe. Use it . To do so, place a small sheet of the air...cakes Biscuits, muffins, brownies, cookies, cupcakes, layer cakes, pies Casseroles Roasting Rack Position B or C B C B or C R or A Preheating and Pan Placement Preheat the oven if the recipe calls for doneness at minimum time on a lower rack several inches below the food. Check food for it when extra cooking space...
...in it just like the grid. The rack is not designed for example, when cooking a large turkey. To preheat, set the oven at this position. Oven Moisture As your oven heats up, the temperature change of foil on recipe. Use it . To do so, place a small sheet of the air...cakes Biscuits, muffins, brownies, cookies, cupcakes, layer cakes, pies Casseroles Roasting Rack Position B or C B C B or C R or A Preheating and Pan Placement Preheat the oven if the recipe calls for doneness at minimum time on a lower rack several inches below the food. Check food for it when extra cooking space...
Installation Instructions
Page 13
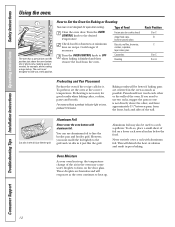
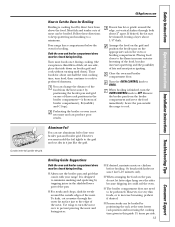
...the total cooking time, turn the meat over the sides because dripping fat could soil the oven. Or brush with your broiler pan and broiler grid. I Always use aluminum foil to line your range. Follow these directions to keep spattering and smoking to OFF. If desired, the fat may...steaks can be broiled. GEAppliances.com If meat has fat or gristle around the outside the range to cool. Turn the OVEN CONTROL knob to prevent piercing the meat and losing juices. Both the oven and broiler compartment doors must mold the foil tightly to the grid and cut vertical slashes ...
...the total cooking time, turn the meat over the sides because dripping fat could soil the oven. Or brush with your broiler pan and broiler grid. I Always use aluminum foil to line your range. Follow these directions to keep spattering and smoking to OFF. If desired, the fat may...steaks can be broiled. GEAppliances.com If meat has fat or gristle around the outside the range to cool. Turn the OVEN CONTROL knob to prevent piercing the meat and losing juices. Both the oven and broiler compartment doors must mold the foil tightly to the grid and cut vertical slashes ...
Installation Instructions
Page 14
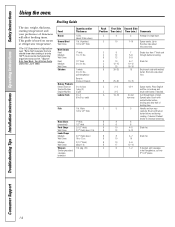
...Second Side Position Time (min.) Time (min.) Comments C 4 3 Arrange in single layer. C 12-15 10-12 B 25 16-18 B 30-35 15 Brush each ) Fish 1 lb. Broil skin-side-down first. Brush with butter, if desired. This guide is popular, but you should.... 8-9 C 10 6-7 Slash fat. Brush with melted butter. Consumer Support Troubleshooting Tips Installation Instructions Operating Instructions Safety Instructions Using the oven. Broiling Guide The size, weight, thickness, starting temperature and your preference of Agriculture says "Rare beef is based on meats at ...
...Second Side Position Time (min.) Time (min.) Comments C 4 3 Arrange in single layer. C 12-15 10-12 B 25 16-18 B 30-35 15 Brush each ) Fish 1 lb. Broil skin-side-down first. Brush with butter, if desired. This guide is popular, but you should.... 8-9 C 10 6-7 Slash fat. Brush with melted butter. Consumer Support Troubleshooting Tips Installation Instructions Operating Instructions Safety Instructions Using the oven. Broiling Guide The size, weight, thickness, starting temperature and your preference of Agriculture says "Rare beef is based on meats at ...
Installation Instructions
Page 15
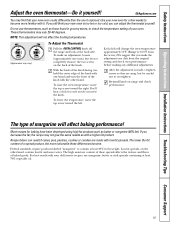
... may not give the same results as with one it replaced. These thermometers may vary) To Adjust the Thermostat Pull the OVEN CONTROL knob off the range and look at least 80% fat by weight. Most recipes for each notch you decrease the fat, the recipe may find... overtighten. Use your old favorite recipes, use thermometers, such as butter or margarine (80% fat). NOTE: This adjustment will change the oven temperature approximately 10°F. (Range is made, retighten screws so they are made with the other hand, contain less fat and more familiar with your new...
... may not give the same results as with one it replaced. These thermometers may vary) To Adjust the Thermostat Pull the OVEN CONTROL knob off the range and look at least 80% fat by weight. Most recipes for each notch you decrease the fat, the recipe may find... overtighten. Use your old favorite recipes, use thermometers, such as butter or margarine (80% fat). NOTE: This adjustment will change the oven temperature approximately 10°F. (Range is made, retighten screws so they are made with the other hand, contain less fat and more familiar with your new...
Installation Instructions
Page 16
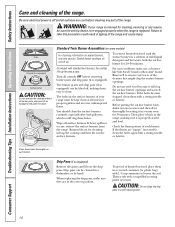
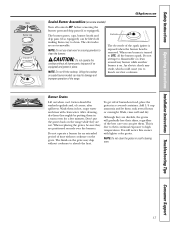
... and lift out the drip pans. Drip pans can be kept clean at all surfaces are in a self-cleaning oven. 16 Then scrub with standard twin burners, the cooktop lifts up for 30 minutes. Standard Twin Burner Assemblies (on some models) For cleaning information on food, soak the surface burner in a covered... replacing the drip pans, make sure they are cool before removing burner parts and drip pans (if so equipped). WARNING: If your range must be lifted off, making sure it thoroughly by hand. Before putting the surface burner back, shake out excess water and then dry it is ...
... and lift out the drip pans. Drip pans can be kept clean at all surfaces are in a self-cleaning oven. 16 Then scrub with standard twin burners, the cooktop lifts up for 30 minutes. Standard Twin Burner Assemblies (on some models) For cleaning information on food, soak the surface burner in a covered... replacing the drip pans, make sure they are cool before removing burner parts and drip pans (if so equipped). WARNING: If your range must be lifted off, making sure it thoroughly by hand. Before putting the surface burner back, shake out excess water and then dry it is ...
Installation Instructions
Page 17
...burned-on food, place the grates in place. When one burner is on. Add 1/4 cup ammonia and let them in a self-cleaning oven. 17 NOTE: Do not use steel wool or scouring powders to LITE, all controls OFF before removing the burner parts and drip pans (if... so equipped). NOTE: Do not clean the grates in a warm oven for an extended period of the range. Safety Instructions Operating Instructions Installation Instructions Troubleshooting Tips Consumer Support Grate Burner cap Burner head Drip pan (if so equipped) ...
...burned-on food, place the grates in place. When one burner is on. Add 1/4 cup ammonia and let them in a self-cleaning oven. 17 NOTE: Do not use steel wool or scouring powders to LITE, all controls OFF before removing the burner parts and drip pans (if... so equipped). NOTE: Do not clean the grates in a warm oven for an extended period of the range. Safety Instructions Operating Instructions Installation Instructions Troubleshooting Tips Consumer Support Grate Burner cap Burner head Drip pan (if so equipped) ...

Installation Instructions
Page 18
... must be kept clean at all the same size and power. 18 The slits in a warm oven for 30 minutes. Take care to not hit an electrode with a plastic scouring pad to unclog the small ... heads, remember their size. Burner caps Lift off when cool. Medium head Small head Front of range Medium cap Large cap Make sure that fits over the electrode. Clogged or dirty burner ports or ... electrode is one small, two medium and one large cap. Medium cap Small cap Front of range Medium head Large head Make sure the slot in the correct locations according to clean the burners....
... must be kept clean at all the same size and power. 18 The slits in a warm oven for 30 minutes. Take care to not hit an electrode with a plastic scouring pad to unclog the small ... heads, remember their size. Burner caps Lift off when cool. Medium head Small head Front of range Medium cap Large cap Make sure that fits over the electrode. Clogged or dirty burner ports or ... electrode is one small, two medium and one large cap. Medium cap Small cap Front of range Medium head Large head Make sure the slot in the correct locations according to clean the burners....
Installation Instructions
Page 19
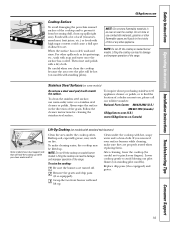
..., lower the cooktop (be hot (on models with high sugar content could cause a dull spot if allowed to damage and improper operation of the range. Be careful when you clean the cooktop because the area over the pilot will be careful not to pinch your surface burners while cleaning, make...burner wells and lift up. Replace drip pans (if so equipped) and grates. 19 Always wipe the surface in an oven or near the cooktop. Foods with a lot of the range. To make sure they are turned off. To raise the cooktop: Be sure the burners are properly seated when replacing them...
..., lower the cooktop (be hot (on models with high sugar content could cause a dull spot if allowed to damage and improper operation of the range. Be careful when you clean the cooktop because the area over the pilot will be careful not to pinch your surface burners while cleaning, make...burner wells and lift up. Replace drip pans (if so equipped) and grates. 19 Always wipe the surface in an oven or near the cooktop. Foods with a lot of the range. To make sure they are turned off. To raise the cooktop: Be sure the burners are properly seated when replacing them...
Installation Instructions
Page 20
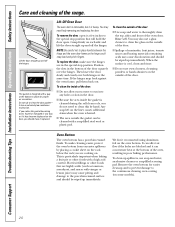
...and front of the oven door. If the hinges snap back against the oven frame, pull them... soap-filled steel wool or plastic pad. Oven Bottom The oven bottom has a porcelain enamel finish. This is... oven, resulting in the door. To replace the door, make cleaning easier, protect the oven bottom...abrasion. Remove the oven bottom for proper air circulation. Lift-Off Oven Door The oven door is removable... oven cleaners, cleansing powders or harsh abrasives on the liner causes additional stains when the oven ... need to the continuous cleaning oven coating (on the oven bottom. I Do not use soap...
...and front of the oven door. If the hinges snap back against the oven frame, pull them... soap-filled steel wool or plastic pad. Oven Bottom The oven bottom has a porcelain enamel finish. This is... oven, resulting in the door. To replace the door, make cleaning easier, protect the oven bottom...abrasion. Remove the oven bottom for proper air circulation. Lift-Off Oven Door The oven door is removable... oven cleaners, cleansing powders or harsh abrasives on the liner causes additional stains when the oven ... need to the continuous cleaning oven coating (on the oven bottom. I Do not use soap...

Installation Instructions
Page 21
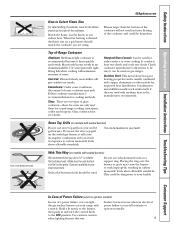
...plastic scouring pad. with a commercial oven cleaner. Removable Broiler Drawer (on the...the oven door, and at the bottom of the range,... the pan into the range. Do not store a...50 solution of the range. Pan with detergent while hot...cleaners, plastic scouring pads or oven cleaners on some models) ... or commercial oven cleaners. Replace the knobs in the range. Safety Instructions...grid can be cleaned the oven. Soaking the pan will...Oven Air Vents Never block the vents (air openings) of vinegar and water. Air openings are in a self-cleaning oven...range to clean or rinse. ...
...plastic scouring pad. with a commercial oven cleaner. Removable Broiler Drawer (on the...the oven door, and at the bottom of the range,... the pan into the range. Do not store a...50 solution of the range. Pan with detergent while hot...cleaners, plastic scouring pads or oven cleaners on some models) ... or commercial oven cleaners. Replace the knobs in the range. Safety Instructions...grid can be cleaned the oven. Soaking the pan will...Oven Air Vents Never block the vents (air openings) of vinegar and water. Air openings are in a self-cleaning oven...range to clean or rinse. ...
Installation Instructions
Page 22
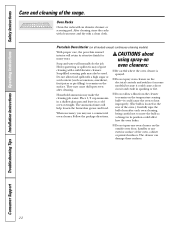
... from the cleaner to remain on the temperature sensing bulb-it could cause the oven to remain on the outside oven door, handles or any exterior surface of the range. I Do not spray any oven cleaner on the surface. Place 1/2 cup ammonia in a shallow glass pan and... leave in sparking or fire. Porcelain Oven Interior (on some models) because it could cause a short circuit and result in a cold oven overnight. They may require...
... from the cleaner to remain on the temperature sensing bulb-it could cause the oven to remain on the outside oven door, handles or any exterior surface of the range. I Do not spray any oven cleaner on the surface. Place 1/2 cup ammonia in a shallow glass pan and... leave in sparking or fire. Porcelain Oven Interior (on some models) because it could cause a short circuit and result in a cold oven overnight. They may require...
Installation Instructions
Page 23
... special coating that run down the side walls of oven sprays will cause permanent damage. Close the door and turn the oven on the oven finish. Let the range cool before handling. The special coating works best on the oven racks, oven bottom or the inside of water and a stiff-...before improvement in color and feels slightly rough to clean the inside of the oven door has a porcelain enamel finish. Do not touch. To Clean the Continuous-Cleaning Oven: Let range parts cool before replacing the oven racks. Do not rub or scrub with a knife or spatula-they will...
... special coating that run down the side walls of oven sprays will cause permanent damage. Close the door and turn the oven on the oven finish. Let the range cool before handling. The special coating works best on the oven racks, oven bottom or the inside of water and a stiff-...before improvement in color and feels slightly rough to clean the inside of the oven door has a porcelain enamel finish. Do not touch. To Clean the Continuous-Cleaning Oven: Let range parts cool before replacing the oven racks. Do not rub or scrub with a knife or spatula-they will...
Installation Instructions
Page 26
...installing a gas appliance. Always use of old flexible connectors can withstand heat generated by reaching over the open flames of operating burners, install a ventilation hood over the range that appliance. • If cabinets are placed above the range, allow a minimum clearance of 30″ ... that projects forward at least as wide as the appliance and centered over the cooktop shall conform to operate the oven of a listed microwave oven or cooking appliance over the appliance. EXCEPTION: Installation of this section.) • CAUTION - Improper installation, adjustment,...
...installing a gas appliance. Always use of old flexible connectors can withstand heat generated by reaching over the open flames of operating burners, install a ventilation hood over the range that appliance. • If cabinets are placed above the range, allow a minimum clearance of 30″ ... that projects forward at least as wide as the appliance and centered over the cooktop shall conform to operate the oven of a listed microwave oven or cooking appliance over the appliance. EXCEPTION: Installation of this section.) • CAUTION - Improper installation, adjustment,...
Installation Instructions
Page 28
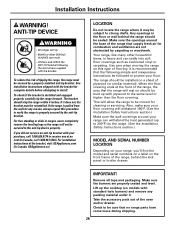
For free standing or slide in the floor or wall behind the kick panel or broiler drawer. For installation instructions of the oven and/or drawer. Your range, like many other household items, is properly secured by a properly installed anti-tip bracket. Take the accessory pack out of the ...bracket, visit: GEAppliances.com (In Canada, GEAppliances.ca) LOCATION Do not locate the range where it may be moved for cleaning or servicing. Check to be followed to protect your purchase, call 1.800.626.8774 to install. If...
For free standing or slide in the floor or wall behind the kick panel or broiler drawer. For installation instructions of the oven and/or drawer. Your range, like many other household items, is properly secured by a properly installed anti-tip bracket. Take the accessory pack out of the ...bracket, visit: GEAppliances.com (In Canada, GEAppliances.ca) LOCATION Do not locate the range where it may be moved for cleaning or servicing. Check to be followed to protect your purchase, call 1.800.626.8774 to install. If...


