Hitachi CPX430 Support and Manuals
Get Help and Manuals for this Hitachi item
View All Support Options Below
Free Hitachi CPX430 manuals!
Problems with Hitachi CPX430?
Ask a Question
Free Hitachi CPX430 manuals!
Problems with Hitachi CPX430?
Ask a Question
Most Recent Hitachi CPX430 Questions

How To Clean The Filter On A Xga Cpx430
(Posted by rojasjrg 11 years ago)

Usb Adapter
Do they make an adapter from the projector to laptop with a USB port?
Do they make an adapter from the projector to laptop with a USB port?
(Posted by mcduff52 11 years ago)
Popular Hitachi CPX430 Manual Pages
User Manual - Page 3

... Package 2 Part Names 3 Loading the Batteries 5
INSTALLATION 6 Installation of the Projector and Screen........6 Angle Adjustment 6 Cabling 7 Power Connection 8 Example of International Business Machines Corporation. Installation Reference 6 Table 2. Input Menu 13 Table 6. Specifications 23
For "TECHNICAL" and "REGULATORY NOTICE", see the end of this manual. Setup Menu...
User Manual - Page 4

...
AUTO
MENU
KEYSTONE
MENU SELECT
POSITION
RESET
FREEZE PinP
MAGNIFY
MUTE
OFF
VOLUME
Remote Control Transmitter BRUKERHÅNDBOK Vennligst les denne bruksanvisningen grundig for closer viewing. Projector
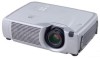
Liquid Crystal Projector CP-X430W USER'S MANUAL Please read this manual) Safety Instructions
Carrying Bag
ENGLISH-2
TECHNICAL PORTGÊS NORSK NEDERLANDS ESPAÑOL ITALIANO...
User Manual - Page 5

...Part Names
Speaker
Carrying Handle
AC Inlet (to the Power Cord)
Power Switch Foot Adjuster Ventilation Openings
(Intake)
Zoom Knob Focus Ring Remote Control Sensor Lens Foot Adjuster
Lens Cap
FRONT/LEFT VIEW OF THE PROJECTOR
Control... (exhaust)
REAR/RIGHT VIEW OF THE PROJECTOR
S-VIDEO Terminal
COMPONENT VIDEO Y Terminal
CB/PB Terminal CR/PR Terminal
VIDEO IN Terminal
AUDIO IN R Terminal
AUDIO ...
User Manual - Page 6

...control function.
OUTPUT: 1mW WAVE LENGTH: 650nm
CLASS2 LASER PRODUCT
LASER RADIATION DO NOT STARE INTO BEAM CLASS2 LASER PRODUCT MAX. BEFORE USE (continued)
Part Names (continued)
STANDBY/ON Button
VIDEO... people.
WARNING • The laser pointer of the projector. • Do not disassemble the remote control transmitter. AVOID EXPOSURELASER RADIATIONS IS EMITTED FROM THIS APERTURE
...
User Manual - Page 7

...sure the plus and minus terminals are correctly
oriented.
1
2
3. NOTE Replace the batteries when remote control transmitter operation becomes difficult.
ENGLISH-5 Remove the battery cover. This could ...in the remote control transmitter. ENGLISH
BEFORE USE (continued)
Loading the Batteries
Install the AA batteries into the remote control
transmitter.
1. Close the battery cover.
User Manual - Page 10

...
Example of system setup
DVD Player
S-Video Tape Recorder
COMPONENT VIDEO CR/PR CB/PB Y
AUDIO
R
IN
S-VIDEO IN L VIDEO IN
AUDIO 1 2 AUDIO OUT USB IN
Display Monitor
%7*
1
RGB IN
2
RGB OUT
CONTROL
Computer (notebook type)
Speaker with amplifier
Computer (desktop type)
NOTE • When connecting with notebook computer, set to connect. Plug & Play
This projector is recognized...
User Manual - Page 11

...Button
STANDBY/ON
BLANK
LASER
VIDEO
RGB
Power Switch
Zoom Knob Focus...control panel or the remote control transmitter. The POWER indicator ceases blinking and turns to green when power is orange and set the power switch to [O].
3. Adjust picture size using the zoom knob. 6. During this manual, and the separate "SAFETY INSTRUCTIONS" thoroughly before the projector. • When a projector...
User Manual - Page 12

...the FREEZE mode. • The FREEZE mode is cleared by running or setting the AUTO, ASPECT, INPUT SELECT or VIDEO, or by changing the input signal. • Do not forget to... automatically. • , , and buttons may be used from the supplied remote control transmitter or the projector control panel. Set/Clear FREEZE Mode : Press the FREEZE button. Adjust Magnification : Press the MAGNIFY...
User Manual - Page 15

...Automatic Adjustment at RGB input. Valid only when AUTO is set for RGB input. • Valid only at RGB Input... function correctly with the button.
Input Menu
SETUP INPUT
AUTO RGB VIDEO HDTV
IMAGE OPT. VIDEO (**)
Select Video Signal Type: Select the signal type with ...are effective on video input mode only, not on RGB input mode, except in this case may correct
this problem.
• ...
User Manual - Page 17

...OFF SYNC ON G WHISPER
Set AUTO OFF: Set 1~99 minutes with the and buttons. SYNC ON G Valid: Select TURN ON with the / button.
Select Remote Control Sensor: Select the sensors to... affect the remote.
In such cases, remove the signal connector so that no signal is received, set time. IR REMOTE
SETUP INPUT IMAGE
VOLUME MENU COLOR LANGUAGE
AUTO OFF SYNC ON G WHISPER IR REMOTE
2
3
...
User Manual - Page 18

... switched to the description of the volume adjustment bar. IR REMOTE
Table 8. The volume adjustment bar is ON. Refer to video. START UP
Select Start Up Screen: Select the screen in... mode even if no signal is input. Select Remote Control Sensor: Select the sensors to the description of MyScreen below . AUTO OFF
Set AUTO OFF: Set 1~99 minutes with the button. Clear AUTO OFF...
User Manual - Page 20

... Install the...Replacing the Lamp
1. Loosen the two screws as shown in over 10 minutes.
1. Screws not tightened fully may result in uneven coloring. 6. Press the MENU button on the remote control... transmitter, or the RESET button on the bottom of switching power ON. Press the and select 0, and wait until the timer display is not reset correctly. ENGLISH-18 Switch the projector...
User Manual - Page 21

...Set the new filter and the filter cover. the power supply is clogged with your dealer in such case. Do not touch the lens with dust etc. Cleaning the Cabinet and Remote control... "SAFETY INSTRUCTIONS" thoroughly to ensure that maintenance is performed correctly. • Replace the air filter if contamination cannot be removed, or if it is damaged.
Switch the projector power supply...
User Manual - Page 24

... fully clockwise.
Connect correctly.
7,8
Audio is out of its service life.
Symptom
Symptom
Possible cause
Remedy
Page
The power is blurred.
Use the projector or remote control transmitter to set to minimum.
is not correctly connected. Brightness and contrast are not correctly adjusted. Clear WHISPER mode.
15
Video is not turned on the main power switch.
User Manual - Page 33

... indicated by the data length code, an error code will ignore the excess data code. Using the projector default settings (Reset Command) (1) The computer sends the default setting code Header + Command data ('06H'+'00H'+ type (2
bytes) +'00H'+'00H') to the projector. (2) The projector changes the specified setting to the default value. (3) The projector returns the response code '06H' to the...
Hitachi CPX430 Reviews
We have not received any reviews for Hitachi yet.