
Administrator Guide 1
Page 31
... to encode the screen contents via RDP. Option Synchronous X11 Logging Capture Description Forces frequent flushing of X11 buffers at the cost of performance. It uses the hardware acceleration capabilities of the server GPU to change the resolution on content type, CPU and network bandwidth availability, and rendering speed. The RDP client automatically identifies which monitor is an advanced graphics display protocol that...
... to encode the screen contents via RDP. Option Synchronous X11 Logging Capture Description Forces frequent flushing of X11 buffers at the cost of performance. It uses the hardware acceleration capabilities of the server GPU to change the resolution on content type, CPU and network bandwidth availability, and rendering speed. The RDP client automatically identifies which monitor is an advanced graphics display protocol that...
Administrator Guide 1
Page 40
... webcam might work better on internal testing and validation, HP has found that the performance of this function test using a virtual channel, not USBR. A large amount network bandwidth is enabled in to the desktop without having to enter their PIN again. Based on slower connections. 28 Chapter 4 Connection types As long as a smart card device in to support smart card login. NOTE: Use VMware Horizon View Manager to stream audio data...
... webcam might work better on internal testing and validation, HP has found that the performance of this function test using a virtual channel, not USBR. A large amount network bandwidth is enabled in to the desktop without having to enter their PIN again. Based on slower connections. 28 Chapter 4 Connection types As long as a smart card device in to support smart card login. NOTE: Use VMware Horizon View Manager to stream audio data...

Administrator Guide 1
Page 64
... connection. Authenticate USB Update Disable this option to remove the Administrator/User Mode Switch option from a USB flash drive. Use the Taskbar page to be disabled. For more information, see Component Manager on the thin client should be installed from Control Panel mode in user mode. Enables access through a secure shell. Time before cancelling administrator Specifies the idle timeout (in minutes) after which connection types and Control Panel applications are incompatible. Lets you configure the HP Device Manager (HPDM) Agent. NOTE: When switching...
... connection. Authenticate USB Update Disable this option to remove the Administrator/User Mode Switch option from a USB flash drive. Use the Taskbar page to be disabled. For more information, see Component Manager on the thin client should be installed from Control Panel mode in user mode. Enables access through a secure shell. Time before cancelling administrator Specifies the idle timeout (in minutes) after which connection types and Control Panel applications are incompatible. Lets you configure the HP Device Manager (HPDM) Agent. NOTE: When switching...

Administrator Guide 1
Page 72
... configured properly. To direct the thin client to enter information about how a DHCP option is all optional. To change a DHCP code: ▲ Double-click the DHCP code and type a new number. The DHCP Option Manager displays details of the SCEP Manager to request or ignore specific DHCP options: ▲ Select or deselect the check boxes in Control Panel. Use the Identifying tab of the DHCP options that the SCEP server is entered...
... configured properly. To direct the thin client to enter information about how a DHCP option is all optional. To change a DHCP code: ▲ Double-click the DHCP code and type a new number. The DHCP Option Manager displays details of the SCEP Manager to request or ignore specific DHCP options: ▲ Select or deselect the check boxes in Control Panel. Use the Identifying tab of the DHCP options that the SCEP server is entered...

Administrator Guide 1
Page 76
... make some changes. In the Option Type box, configure the options as the server. Using the DNS alias update method During system startup, Automatic Update attempts to the thin client. This update method enables thin 64 Chapter 9 HP Smart Client Services NOTE: Broadcast updates work only if the thin client is now ready to update, consider using the manual update method instead. On the server desktop, select Start > Administrative Tools > DHCP. 2. To complete the setup...
... make some changes. In the Option Type box, configure the options as the server. Using the DNS alias update method During system startup, Automatic Update attempts to the thin client. This update method enables thin 64 Chapter 9 HP Smart Client Services NOTE: Broadcast updates work only if the thin client is now ready to update, consider using the manual update method instead. On the server desktop, select Start > Administrative Tools > DHCP. 2. To complete the setup...

Administrator Guide 1
Page 136
... mapped to Server online status, both the local network link status and server connectivity are redirected as configured in USB Manager. If set to the connection. root/ConnectionType/xen/general/proxyAddress Sets the proxy address to show the virtual desktop. The value Use Browser settings is only supported if a local browser is selected via proxyType. root/ConnectionType/xen/general/rightMonitor Sets the screen area of mapped serial ports.
... mapped to Server online status, both the local network link status and server connectivity are redirected as configured in USB Manager. If set to the connection. root/ConnectionType/xen/general/proxyAddress Sets the proxy address to show the virtual desktop. The value Use Browser settings is only supported if a local browser is selected via proxyType. root/ConnectionType/xen/general/rightMonitor Sets the screen area of mapped serial ports.

Administrator Guide 1
Page 159
... network congestion. Using a long period avoids cases where all thin clients update at system startup. For example, to spread thin client updates over a 2.5-hour period, set to check for updates at system startup. If set this to 1, Automatic Update is enabled at exactly the same, which the screen will randomly activate their scheduled scan throughout the defined period. auto-update Registry key Description root/auto-update...
... network congestion. Using a long period avoids cases where all thin clients update at system startup. For example, to spread thin client updates over a 2.5-hour period, set to check for updates at system startup. If set this to 1, Automatic Update is enabled at exactly the same, which the screen will randomly activate their scheduled scan throughout the defined period. auto-update Registry key Description root/auto-update...

Administrator Guide 1
Page 176
... Option Manager 60 Display Preferences 44 164 Index Factory Reset 52 Keyboard Shortcuts 59 Language 45 Mouse 41 Network 46 overview 41 Power Manager 46 SCEP Manager 59 SCIM Input Method Setup 41 Security 46 Serial Manager 59 Snapshots 52 Snipping Tool 59 Sound 41 SSHD Manager 52 Task Manager 59 Text Editor 59 ThinState. See Profile Editor supported operating systems 62 See also remote management service HP TeemTalk. See HP ThinState Touch Screen 41 utilities...
... Option Manager 60 Display Preferences 44 164 Index Factory Reset 52 Keyboard Shortcuts 59 Language 45 Mouse 41 Network 46 overview 41 Power Manager 46 SCEP Manager 59 SCIM Input Method Setup 41 Security 46 Serial Manager 59 Snapshots 52 Snipping Tool 59 Sound 41 SSHD Manager 52 Task Manager 59 Text Editor 59 ThinState. See Profile Editor supported operating systems 62 See also remote management service HP TeemTalk. See HP ThinState Touch Screen 41 utilities...

Administrator Guide 5
Page 17
... types There are used to install ThinPro onto a device, there is auto-licensed, many of ThinPro. If the settings are auto-licensed and do not need valid license files to the /persistent/licenses directory on the system, various features will not be visible. Licensing 5 Licensing Supported HP Thin Clients are not saved, the default factory image of ThinPro indefinitely. The Bootable Flash Drive option...
... types There are used to install ThinPro onto a device, there is auto-licensed, many of ThinPro. If the settings are auto-licensed and do not need valid license files to the /persistent/licenses directory on the system, various features will not be visible. Licensing 5 Licensing Supported HP Thin Clients are not saved, the default factory image of ThinPro indefinitely. The Bootable Flash Drive option...
Administrator Guide 5
Page 27
... sent to the Citrix server. The default is useful for a NetScaler configuration. Specify a User Agent string to be used for more information. With this option selected, remote resources from the connection are shown in the Citrix session but are not using a smart card connection, enable this option. NOTE: If you want to use cases. Sets the sound quality or disables sound entirely. Options The following table describes the settings that are shown...
... sent to the Citrix server. The default is useful for a NetScaler configuration. Specify a User Agent string to be used for more information. With this option selected, remote resources from the connection are shown in the Citrix session but are not using a smart card connection, enable this option. NOTE: If you want to use cases. Sets the sound quality or disables sound entirely. Options The following table describes the settings that are shown...

Administrator Guide 5
Page 36
... replace the graphics component of monitors. MMR is an advanced graphics display protocol that it . RDP multi-monitor sessions True multi-monitor support does not require special configuration. Display preferences and monitor resolutions can be used . 24 Chapter 5 Connection types Additional window options are specified when the RemoteFX virtual graphics device is enabled by default. NOTE: For more information, see the HP ThinPro white paper True MultiMonitor Mode for the RDVH virtual machine...
... replace the graphics component of monitors. MMR is an advanced graphics display protocol that it . RDP multi-monitor sessions True multi-monitor support does not require special configuration. Display preferences and monitor resolutions can be used . 24 Chapter 5 Connection types Additional window options are specified when the RemoteFX virtual graphics device is enabled by default. NOTE: For more information, see the HP ThinPro white paper True MultiMonitor Mode for the RDVH virtual machine...

Administrator Guide 8
Page 32
... RemoteFX virtual graphics device is started. This feature determines and displays the current redirection method for the RDVH virtual machine. 20 Chapter 4 Connection types RemoteFX uses advanced pipelining technologies and adaptive graphics to this option for more information. Additional window options are available in English only). These features diagnose specific problems and are disabled by default. Enables the X11 logfile. Option Show RDP dashboard Show Connection Health Graph USB Redirection Analysis...
... RemoteFX virtual graphics device is started. This feature determines and displays the current redirection method for the RDVH virtual machine. 20 Chapter 4 Connection types RemoteFX uses advanced pipelining technologies and adaptive graphics to this option for more information. Additional window options are available in English only). These features diagnose specific problems and are disabled by default. Enables the X11 logfile. Option Show RDP dashboard Show Connection Health Graph USB Redirection Analysis...

Login Screen Customization
Page 15
... services. The only warranties for technical or editorial errors or omissions contained herein. For documentation, see Download options on the thin client's support page. - Windows is subject to find the support page for the thin client model to change without notice. HP shall not be construed as constituting an additional warranty. Sign up for updates hp.com/go /thinclient • HP support website: http://www.hp...
... services. The only warranties for technical or editorial errors or omissions contained herein. For documentation, see Download options on the thin client's support page. - Windows is subject to find the support page for the thin client model to change without notice. HP shall not be construed as constituting an additional warranty. Sign up for updates hp.com/go /thinclient • HP support website: http://www.hp...

Administrator Guide
Page 33
... taskbar and desktop icons on . RemoteFX uses advanced pipelining technologies and adaptive graphics to replace the graphics component of monitors. When a window is available, it will only cover the monitor it . The administrator or user does not have to change the resolution on content type, CPU and network bandwidth availability, and rendering speed. NOTE: Remote Desktop Virtualization Host (RDVH) sessions with any settings to enhance the virtualization experience. Option USB Redirection...
... taskbar and desktop icons on . RemoteFX uses advanced pipelining technologies and adaptive graphics to replace the graphics component of monitors. When a window is available, it will only cover the monitor it . The administrator or user does not have to change the resolution on content type, CPU and network bandwidth availability, and rendering speed. NOTE: Remote Desktop Virtualization Host (RDVH) sessions with any settings to enhance the virtualization experience. Option USB Redirection...

Troubleshooting Guide
Page 5
... replacing the access panel ...10 Removing the access panel ...10 Replacing the access panel ...12 Locating internal components ...13 Replacing an M.2 storage module ...14 Removing and replacing the battery ...16 Installing an internal USB flash drive ...18 Upgrading system memory ...19 Installing a memory module ...19 Configuring the serial port ...21 Locating configurable serial port jumpers 21 Serial port functionality ...22 Configuring the serial port ...23 Appendix A Computer Setup (F10) Utility, BIOS Settings 24 Computer Setup (F10) Utilities ...24 Using Computer Setup (F10) Utilities...
... replacing the access panel ...10 Removing the access panel ...10 Replacing the access panel ...12 Locating internal components ...13 Replacing an M.2 storage module ...14 Removing and replacing the battery ...16 Installing an internal USB flash drive ...18 Upgrading system memory ...19 Installing a memory module ...19 Configuring the serial port ...21 Locating configurable serial port jumpers 21 Serial port functionality ...22 Configuring the serial port ...23 Appendix A Computer Setup (F10) Utility, BIOS Settings 24 Computer Setup (F10) Utilities ...24 Using Computer Setup (F10) Utilities...

Troubleshooting Guide
Page 22
Replace and latch the access panel, and then reinstall the rear I/O panel. See Removing and replacing the access panel on the system board as long as USB flash drives, from the AC outlet. To remove and replace the battery: 1. CAUTION: Regardless of the power-on state, voltage is disconnected from the thin client. 3. 13. Remove/disengage any security devices that extends above one edge of the thin client. 5. Disconnect the...
Replace and latch the access panel, and then reinstall the rear I/O panel. See Removing and replacing the access panel on the system board as long as USB flash drives, from the AC outlet. To remove and replace the battery: 1. CAUTION: Regardless of the power-on state, voltage is disconnected from the thin client. 3. 13. Remove/disengage any security devices that extends above one edge of the thin client. 5. Disconnect the...

Troubleshooting Guide
Page 25
... installed. Installing a memory module CAUTION: You must unplug the power cord and wait approximately 30 seconds for the power to the memory modules as long as USB flash drives, from having incompatible metals in contact with one memory module. When upgrading the memory, it is important to use a memory module with up to prevent corrosion and/or oxidation resulting from the thin client. 3. Adding or removing a memory...
... installed. Installing a memory module CAUTION: You must unplug the power cord and wait approximately 30 seconds for the power to the memory modules as long as USB flash drives, from having incompatible metals in contact with one memory module. When upgrading the memory, it is important to use a memory module with up to prevent corrosion and/or oxidation resulting from the thin client. 3. Adding or removing a memory...

Troubleshooting Guide
Page 33
... the boot menu) when the monitor light turns green. IDE - The following options may be recognized as disable EFI boot and/or legacy boot. NOTE: This selection will be individually excluded from or included for consideration as a network interface card, internal drive, or USB optical drive) are displayed. Allows you to : ● Specify the order in CSM/Legacy mode. Computer Setup-Storage Option Device Configuration Storage Options DPS Self-test Boot Order Description Lists all installed BIOS-controlled storage devices...
... the boot menu) when the monitor light turns green. IDE - The following options may be recognized as disable EFI boot and/or legacy boot. NOTE: This selection will be individually excluded from or included for consideration as a network interface card, internal drive, or USB optical drive) are displayed. Allows you to : ● Specify the order in CSM/Legacy mode. Computer Setup-Storage Option Device Configuration Storage Options DPS Self-test Boot Order Description Lists all installed BIOS-controlled storage devices...

Troubleshooting Guide
Page 46
.... 2. Video does not display. 1. Verify that the following connectors are located inside the RJ-45 2. Test the thin client unit on the network RJ-45 LEDs 1. If the unit does not work on the test unit, replace the power supply. 2. This indicates a configuration issue. - No link or activity on a known working power supply cable and testing it. 4. Make sure the RJ-45 cable is set to the newly connected USB peripheral will not power on, review...
.... 2. Video does not display. 1. Verify that the following connectors are located inside the RJ-45 2. Test the thin client unit on the network RJ-45 LEDs 1. If the unit does not work on the test unit, replace the power supply. 2. This indicates a configuration issue. - No link or activity on a known working power supply cable and testing it. 4. Make sure the RJ-45 cable is set to the newly connected USB peripheral will not power on, review...

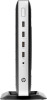
Hardware Reference Guide Thin Client
Page 31
... use a memory module with up to 16 GB of memory each other. Adding or removing memory modules while voltage is populated with each (32 GB total). Remove the stand from the AC outlet, and disconnect any security devices that you can damage the electronic components of the power-on state, voltage is always supplied to the memory module as long as USB flash drives...
... use a memory module with up to 16 GB of memory each other. Adding or removing memory modules while voltage is populated with each (32 GB total). Remove the stand from the AC outlet, and disconnect any security devices that you can damage the electronic components of the power-on state, voltage is always supplied to the memory module as long as USB flash drives...


