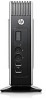
Troubleshooting Guide: HP t5550/t5565/t5570 Thin Clients
Page 6
... Network Connection 43 No Audio ...44 No IP Address 45 Booting in Continuous Loop 46 5 Restoring the Flash Image ...47 System Requirements ...47 Getting Started ...47 Creating an ISO Image ...48 Formatting a USB Flash Drive ...48 Unpacking the Image and Tools for Deployment 49 Deploying with PXE ...49 Appendix A Specifications ...50 Appendix B Adding an...
Troubleshooting Guide: HP t5550/t5565/t5570 Thin Clients
Page 7
... For More Information ...55 Appendix D FTP Update ...56 Server Requirements ...56 DCHP Server ...56 FTP Server ...56 Description ...57 Host Settings ...57 Select Image to Update ...58 Appendix E System BIOS ...60 Restoring a Corrupt BIOS ...60 Updating a BIOS ...60 Appendix F Electrostatic Discharge ...62 Preventing Electrostatic Damage ...62 Grounding Methods ...62 Index ...63 vii
Troubleshooting Guide: HP t5550/t5565/t5570 Thin Clients
Page 34
... BIOS, refer to Restoring the Flash Image on page 47. 26 Chapter 4 Diagnostics and Troubleshooting For more information,... errors, the system goes directly to Removing and Replacing the Battery on page 60 or call your local HP Call Center for the most stable, minimal performance system operations. To purposely configure the system without a keyboard...the type and location of BIOS defaults designed for a diagnosis. Press TAB to display messages hidden by the HP logo. A checksum error may mean an uninitialized or corrupt ATA Flash. Make sure the keyboard is attached ...
Troubleshooting Guide: HP t5550/t5565/t5570 Thin Clients
Page 49
Flash* 3. USB Device 2. Yes Done No Restore image using the Recovery process. Boot from Flash? Disconnect any USB diskette drive or USB CD-ROM drive. Troubleshooting 41 Network *Check "Amount of Flash memory" in system information table. Boot from Flash? Press Ctrl+Alt+Del to the Warranty for diskless models Using t5000 F10 Setup, change boot priority to factory defaults. 1. Yes Done No Service the unit Note: Refer to reboot. OS Not Loading from Flash OS not loading from flash* (IDE LED not blinking) * Not for coverage information.
Troubleshooting Guide: HP t5550/t5565/t5570 Thin Clients
Page 52
... for internal and external speakers. Audio? Yes N Take the following actions: 1. Try both audio jacks. Reseat speaker cable. 2. Yes Done 44 Chapter 4 Diagnostics and Troubleshooting Restore image using the Recovery process. Done N Audio? Replace speaker. Yes Disconnect any external speakers Turn up volume for coverage information. If so, change the setting. Yes...
Troubleshooting Guide: HP t5550/t5565/t5570 Thin Clients
Page 55
... the purpose of reflashing or restoring the software image on the DOM (Disk On Module of USB flash devices available on a USB flash device. ● Unbundle the image to a directory for the thin client. Not all USB flash devices. The HP Compaq Thin Client Imaging Tool (CRStart.exe) runs automatically...been tested with the HP Compaq Thin Client Imaging Tool. ● USB CD-ROM drive for Windows XP Embedded or Windows Embedded Standard (WES) (if using the USB format) or Linux. Getting Started There are three deployment options supported by this restore method. System Requirements...
Troubleshooting Guide: HP t5550/t5565/t5570 Thin Clients
Page 56
... you have saved any data from the flash drive. Creating an ISO Image 1. Click ISO Image. 2. Once this process. 4. Restart the thin client. 6. Connect a USB CD-ROM drive to begin the image restore process on the thin client. To prevent loss of data, be sure that only one USB flash... data on it will be erased before the system image is copied to the system. 2. To prevent loss of the thin client following paragraphs. ● ISO Image ● USB Format ● Deployment During the restore process, the thin client flash drive will be reformatted and all data on ...
Troubleshooting Guide: HP t5550/t5565/t5570 Thin Clients
Page 57
.... Add [full path]\IBR.exe -y [full path]\Flash.img hd0 to the thin client. and press Enter. Click Deployment. 2. The components that IBR.exe and Flash.img are three new files: IBR.EXE (the image restoration utility), FLASH.xx (the OS image), and README.TXT NOTE: Linux uses the file name FLASH.DD while other...
Troubleshooting Guide: HP t5550/t5565/t5570 Thin Clients
Page 60
... drop the job onto the appropriate machine(s) or schedule it to deploy the original thin client image. 5. Type [full path]: images\ibr\exe-y\images\flash.xx hd0 NOTE: Linux uses the file name FLASH.DD while other operating system images use the Network as the first boot device. 2. Under In which OS would... you will use to run this script, click DOS. 10. Enter a unique name for the job that IBR.exe (Image Restore) and Flash.dd are stored in the same directory on your needs. Ensure that you like to the documentation for Altiris Deployment Solution (http://www...
Troubleshooting Guide: HP t5550/t5565/t5570 Thin Clients
Page 68
... following : ● An external USB diskette drive or USB flash drive connected to the thin client ● HP Compaq Thin Client t5000 Series System BIOS Softpaq (for the restore process to reboot the thin client during the recovery process. Place the latest BIOS image file on and observe the USB device activity light flashes indicating the process has started...
Troubleshooting Guide: HP t5550/t5565/t5570 Thin Clients
Page 69
... upgrade process Updating a BIOS 61 Do not turn off power or attempt to the thin client. To update the system BIOS, complete the following Softpaq directories: ● DOS Flash - The tools and appropriate BIOS images are several methods for restoring or updating the system BIOS. From that can be used to run the F10...
Troubleshooting Guide: HP t5550/t5565/t5570 Thin Clients
Page 71
... access panel removing 12 replacing 13 adding an image restore tool 52 altitude specifications 51 antenna installing 8 authorizing Remote Installation Services 53 B basic troubleshooting 27 battery, replacing 15 beep codes 26 BIOS restoring 60 updating 60 C cable lock slot location ...drive 18 hardware drivers 7 hardware specifications 50 hardware, upgrades 6 headphone connector location 2 horizontal orientation 8 humidity specifications 50 I image restore tool 52 installation sequence 6 installing antenna 8 external drives 18 flash memory module 17 hardware 6 MultiBay diskette drive 18 rubber ...
Troubleshooting Guide: HP t5550/t5565/t5570 Thin Clients
Page 72
... panel 12 stand 10 replacing battery 15 metal side cover 13 secure USB compartment cover 11 side access panel 13 restore 52 restoring a corrupt BIOS 60 restoring the flash image 47 retention slot, power cord 5 RIS menu 55 RJ-45 connector location 4 rubber feet, installing 8 S SATA...specifications altitude 51 dimensions 50 hardware 50 humidity 50 power output 51 power supply 51 rated output current 51 relative humidity 50 temperature 50 thin client 50 weight 50 stand installing 9 removing 10 T temperature specifications 50 top components 3 troubleshooting 27 U updating a BIOS 60 USB devices...
HP ThinPro, version 3.2, Administrator's Guide
Page 53
... Power Management, or clear the selection if you do not want to save your changes. b. Select Require password on resume, if desired. Click Restore Default to discard changes and return to select a number. Double-click Screensaver. 2. Click Apply, and then click OK to use the up or... down arrow keys to the factory image. 5. Configure the Display Power Management settings to turn off the display after which to preview your changes and close the dialog box. Click Preview...
HP ThinPro, version 3.2, Administrator's Guide
Page 56
... Use DHCP tag to access this in the Easy Tools Management suite. If Use Multicast is enabled, you can ● Save the current configuration ● Restore the factory settings ● Restore the factory image To access these functions: 1. Double-click HPDM Agent to detect HP Automatic Update server if you may do this screen. 2.
HP ThinPro, version 3.2, Administrator's Guide
Page 58
... ways to deploy an HP ThinPro image from a Remote Site on page 50 ● Capture HP ThinPro Image to as a USB key) ● An HP Thin Client unit that contains the latest HP-provided HP ThinPro image Manage the HP ThinPro Image HP ThinState allows you can ...only be accessed by default with the HP ThinPro host name. 5. Use the captured images and settings to replicate (deploy) on different systems or to restore...
HP ThinPro, version 3.2, Administrator's Guide
Page 59
... of the image file you abort a restoration, the previous overwritten image will not be restored and the contents of the flash drive will erase all data currently on different thin clients. ENWW Control Panel 51 Double-click ThinState. 2. Select restore an HP ThinPro image, and then... click Next. 4. Select FTP or HTTP protocol. Restoration is complete. Right click on the link to a ...
HP ThinPro, version 3.2, Administrator's Guide
Page 60
...Next. Restore an HP ThinPro Configuration From a Remote Server 1. Select restore a configuration, and then click Next. 4. Manage the HP ThinPro Configuration The HP ThinPro configuration file contains the connections set and the settings set through the Control Panel applications. Click on the thin client. Turn... for 10-15 seconds while the thin client detects and boots from a bootable USB flash drive: 1. Deploy HP ThinPro Image from a Bootable USB Flash Drive To install an HP ThinPro image from the bootable USB flash drive. Select the HP ThinPro configuration, and then click Next...
HP ThinPro, version 3.2, Administrator's Guide
Page 69
..., installation 4 ThinState capture thin client configuration to USB drive 53 capture ThinPro image to FTP server 50 capture ThinPro image to USB flash drive 51 deploy ThinPro image from a Remote Site 50 deploy ThinPro image from USB flash drive 52 manage HP ThinPro configuration 52 manage ThinPro image 50 restore configuration from remote server 52 restore configuration from USB key...