HP t5565 Usb - Thin Client
Related Manual Pages


Similar Questions

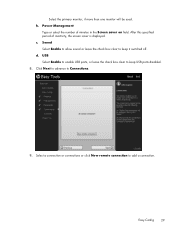
Hp Thin Client T5565 Remote Desktop How To Avtivate The Usb Ports
(Posted by gmcygscomp 10 years ago)

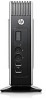
Usb Manager Settings What Does Local Do On A T5565
(Posted by mx512rhu 10 years ago)


How To Connect Usb Printer To Hp T5335z Thin Client
hai i am connect the hp 1007 usb printer to hp t5335z thin client install the drivers from server i ...
hai i am connect the hp 1007 usb printer to hp t5335z thin client install the drivers from server i ...
(Posted by suriya5100 11 years ago)

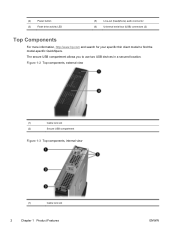
Card Reader Has Stopped Working. Is It A Card Reader Issue Or A Usb Issue?
External card reader plugged into USB ports only works when plugged into back USB ports butnot into ...
External card reader plugged into USB ports only works when plugged into back USB ports butnot into ...
(Posted by macevedo 12 years ago)