HP Image Manager 5.0: Quick Setup Guide
Page 35
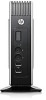
...BIOS settings have a first boot device of the TFTP Server, and Tag 067 set to the boot file name (mPXELdr.bin). ● If your DHCP scope is specific to PXE boot, but the specified file does not exist. If the HP IM PXE Server has been deliberately disabled, then check that the client... occurs in secure environments), make sure that the options specified in the Image Manager server directory (typically C:\Program Files\HP Image Manager\Server). Booting the Thin Clients When a Thin Client is not running , but it doesn't get an IP address 4. Make sure that there isn't a Flash boot...
...BIOS settings have a first boot device of the TFTP Server, and Tag 067 set to the boot file name (mPXELdr.bin). ● If your DHCP scope is specific to PXE boot, but the specified file does not exist. If the HP IM PXE Server has been deliberately disabled, then check that the client... occurs in secure environments), make sure that the options specified in the Image Manager server directory (typically C:\Program Files\HP Image Manager\Server). Booting the Thin Clients When a Thin Client is not running , but it doesn't get an IP address 4. Make sure that there isn't a Flash boot...

Microsoft® Windows Embedded Standard 2009 (WES) v. 5.1.910 and later Quick Reference Guide
Page 34
... the write filter prior to another HP thin client of the F10 System BIOS to USB. If the default Boot order settings have ? ● An HP WES 2009-based thin client that contains the latest HP-provided image ● An HP-qualified USB flash drive (Disk-On-Key). HP ThinState Capture To perform an HP ThinState capture: 1. WARNING! What do not...
... the write filter prior to another HP thin client of the F10 System BIOS to USB. If the default Boot order settings have ? ● An HP WES 2009-based thin client that contains the latest HP-provided image ● An HP-qualified USB flash drive (Disk-On-Key). HP ThinState Capture To perform an HP ThinState capture: 1. WARNING! What do not...

Microsoft® Windows Embedded Standard 2009 (WES) v. 5.1.910 and later Quick Reference Guide
Page 38
... size. This process can take 3-5 minutes, depending on -screen instructions. For a list of all content, including a built-in the F10 System BIOS to the system, the image will unbundle. Do not interrupt or cycle power to hide them from view or obscure other windows. Internet Explorer has...this process. HP ThinState Deploy To perform an HP ThinState deployment: 1. You may access another browser through an ICA or RDP account if you wish to deploy the captured image to manage pop-up windows. Set the boot order in facility to , and then power on the thin client. The Internet...
... size. This process can take 3-5 minutes, depending on -screen instructions. For a list of all content, including a built-in the F10 System BIOS to the system, the image will unbundle. Do not interrupt or cycle power to hide them from view or obscure other windows. Internet Explorer has...this process. HP ThinState Deploy To perform an HP ThinState deployment: 1. You may access another browser through an ICA or RDP account if you wish to deploy the captured image to manage pop-up windows. Set the boot order in facility to , and then power on the thin client. The Internet...

Troubleshooting Guide: HP t5400 Thin Client
Page 5
... Access Panel 9 Replacing the Side Access Panel 10 Installing Thin Client Options ...10 Removing and Replacing the Battery 10 External Drives ...11 Configuring Powered Serial Ports ...12 3 BIOS Settings, (F10) Utility ...22 Using the BIOS Settings ...22 Changing BIOS Settings from the repset utility 22 Changing BIOS Settings Using the F10 Utility 23 Setup Utility-System...
... Access Panel 9 Replacing the Side Access Panel 10 Installing Thin Client Options ...10 Removing and Replacing the Battery 10 External Drives ...11 Configuring Powered Serial Ports ...12 3 BIOS Settings, (F10) Utility ...22 Using the BIOS Settings ...22 Changing BIOS Settings from the repset utility 22 Changing BIOS Settings Using the F10 Utility 23 Setup Utility-System...

Troubleshooting Guide: HP t5400 Thin Client
Page 7
For More Information ...57 Appendix C FTP Update ...58 Server Requirements ...58 DCHP Server ...58 FTP Server ...58 Description ...59 Host Settings ...59 Select Image to Update ...60 Appendix D System BIOS ...62 Restoring a Corrupt BIOS ...62 Updating a BIOS ...62 Appendix E Electrostatic Discharge ...64 Preventing Electrostatic Damage ...64 Grounding Methods ...64 Appendix F Specifications ...65 Index ...67 vii
For More Information ...57 Appendix C FTP Update ...58 Server Requirements ...58 DCHP Server ...58 FTP Server ...58 Description ...59 Host Settings ...59 Select Image to Update ...60 Appendix D System BIOS ...62 Restoring a Corrupt BIOS ...62 Updating a BIOS ...62 Appendix E Electrostatic Discharge ...64 Preventing Electrostatic Damage ...64 Grounding Methods ...64 Appendix F Specifications ...65 Index ...67 vii

Troubleshooting Guide: HP t5400 Thin Client
Page 30
... this method. This table identifies the items that can be changed locally within the operating system without having to go through the F10 utility1. BIOS Setting 1st Boot Device 2nd Boot Device 3rd Boot Device Boot Up NumLock F12 Boot Integrated Audio Network Controller Serial Port 1 Serial Port 2 ...Serial Port 3 Serial Port 4 Parallel Port PWRON After PWR-Fail Wake-on-PME BIOS Wake Up Asset Tag No Setup Password Default Value USB ATA Flash Network Off Enabled Enabled Enabled 3F8/IRQ4, other values = 2F8/IRQ3, 3E8/...
... this method. This table identifies the items that can be changed locally within the operating system without having to go through the F10 utility1. BIOS Setting 1st Boot Device 2nd Boot Device 3rd Boot Device Boot Up NumLock F12 Boot Integrated Audio Network Controller Serial Port 1 Serial Port 2 ...Serial Port 3 Serial Port 4 Parallel Port PWRON After PWR-Fail Wake-on-PME BIOS Wake Up Asset Tag No Setup Password Default Value USB ATA Flash Network Off Enabled Enabled Enabled 3F8/IRQ4, other values = 2F8/IRQ3, 3E8/...

Troubleshooting Guide: HP t5400 Thin Client
Page 31
... computer only after exiting the F10 Setup screen. It is turned on, press F10 when the "press F10" prompt appears on or restart the thin client. 2. Changing BIOS Settings Using the F10 Utility 1. Turn on the screen to apply the setting changes. When the F10 POST Screen display is set to zero seconds... by sending the client an Altiris job that you must restart the thin client and again press F10 when the F10=Setup message displays in the task bar at the bottom of the screen. If you have made changes that uses the repset tool to enter the Setup Utility. Using the BIOS Settings 23
... computer only after exiting the F10 Setup screen. It is turned on, press F10 when the "press F10" prompt appears on or restart the thin client. 2. Changing BIOS Settings Using the F10 Utility 1. Turn on the screen to apply the setting changes. When the F10 POST Screen display is set to zero seconds... by sending the client an Altiris job that you must restart the thin client and again press F10 when the F10=Setup message displays in the task bar at the bottom of the screen. If you have made changes that uses the repset tool to enter the Setup Utility. Using the BIOS Settings 23
Troubleshooting Guide: HP t5400 Thin Client
Page 32
...view only) Asset Tag Enter asset tracking number. Table 3-1 Setup (F10) Utility Main Menu Heading System Information Standard CMOS Features Advanced BIOS Features Integrated Peripherals Power Management Setup Table Setup Utility-System Information on page 24 Setup Utility-Standard CMOS Features on page 24 Setup ...Utility-Advanced BIOS Features on page 25 Setup Utility-Integrated Peripherals on page 25 Setup Utility-Power Management Setup on page 26 Setup Utility-...
...view only) Asset Tag Enter asset tracking number. Table 3-1 Setup (F10) Utility Main Menu Heading System Information Standard CMOS Features Advanced BIOS Features Integrated Peripherals Power Management Setup Table Setup Utility-System Information on page 24 Setup Utility-Standard CMOS Features on page 24 Setup ...Utility-Advanced BIOS Features on page 25 Setup Utility-Integrated Peripherals on page 25 Setup Utility-Power Management Setup on page 26 Setup Utility-...

Troubleshooting Guide: HP t5400 Thin Client
Page 33
...mode of 1 or 3 if parallel is required every time the system boots or only when you enter Setup. Using the BIOS Settings 25 Setup Utility-Integrated Peripherals Table 3-5 Setup Utility-Integrated Peripherals Option Description Integrated Audio Enable or Disable Onboard AC97 Audio ...enabled. Default is ATA Flash. 3rd Boot Device Select Boot Device Priority. Default is OFF. Setup Utility-Advanced BIOS Features Table 3-4 Setup Utility-Advanced BIOS Features Option Description Quick Power-on state for Numlock. Default is 3F8/IRQ4 Serial Port 2 Select serial port ...
...mode of 1 or 3 if parallel is required every time the system boots or only when you enter Setup. Using the BIOS Settings 25 Setup Utility-Integrated Peripherals Table 3-5 Setup Utility-Integrated Peripherals Option Description Integrated Audio Enable or Disable Onboard AC97 Audio ...enabled. Default is ATA Flash. 3rd Boot Device Select Boot Device Priority. Default is OFF. Setup Utility-Advanced BIOS Features Table 3-4 Setup Utility-Advanced BIOS Features Option Description Quick Power-on state for Numlock. Default is 3F8/IRQ4 Serial Port 2 Select serial port ...

Troubleshooting Guide: HP t5400 Thin Client
Page 34
... provides read-only access to CMOS, then exit the Setup Utility. Save & Exit Setup Saves data to Setup options. Default is enabled. BIOS Wake up Enable RTC alarm wakeup. Setup Utility-Utility Task Actions Table 3-7 Setup (F10) Utility Task Actions Heading Table Load Factory Defaults Select... should go to the user's setup. Default is disabled. Exit without Saving Exit the Setup Utility without saving any changes. 26 Chapter 3 BIOS Settings, (F10) Utility Options are Off, On, and Former-Sts. Time of Day Select the alarm RTC wakeup time of Sunday through Saturday...
... provides read-only access to CMOS, then exit the Setup Utility. Save & Exit Setup Saves data to Setup options. Default is enabled. BIOS Wake up Enable RTC alarm wakeup. Setup Utility-Utility Task Actions Table 3-7 Setup (F10) Utility Task Actions Heading Table Load Factory Defaults Select... should go to the user's setup. Default is disabled. Exit without Saving Exit the Setup Utility without saving any changes. 26 Chapter 3 BIOS Settings, (F10) Utility Options are Off, On, and Former-Sts. Time of Day Select the alarm RTC wakeup time of Sunday through Saturday...

Troubleshooting Guide: HP t5400 Thin Client
Page 37
... is set to Removing and Replacing the Battery on page 62 or call your local HP Call Center for the most stable, minimal performance system operations. For phone numbers of BIOS defaults designed for a diagnosis. If no hard drives are pressed during POST. Keyboard ... enabled - Beep Code 1 long, 2 short 1 long, 3 short 2 long, 2 short 2 long, 3 short Description A video error has occurred and the BIOS cannot initialize the video screen to skip the full memory test. Replace the battery if necessary. Memory Test This message displays during memory testing, additional...
... is set to Removing and Replacing the Battery on page 62 or call your local HP Call Center for the most stable, minimal performance system operations. For phone numbers of BIOS defaults designed for a diagnosis. If no hard drives are pressed during POST. Keyboard ... enabled - Beep Code 1 long, 2 short 1 long, 3 short 2 long, 2 short 2 long, 3 short Description A video error has occurred and the BIOS cannot initialize the video screen to skip the full memory test. Replace the battery if necessary. Memory Test This message displays during memory testing, additional...

Troubleshooting Guide: HP t5400 Thin Client
Page 38
Table 4-3 POST Error Messages (continued) Press TAB to show POST screen Press the Tab key during POST to Restoring the Flash Image on page 51. 30 Chapter 4 Diagnostics and Troubleshooting For the t5000 Series, this may mean an uninitialized or corrupt ATA Flash. For more information, refer to display messages hidden by the HP logo. Error: Non-System disk or disk error The BIOS was unable to find a suitable boot device. Reflash the unit.
Table 4-3 POST Error Messages (continued) Press TAB to show POST screen Press the Tab key during POST to Restoring the Flash Image on page 51. 30 Chapter 4 Diagnostics and Troubleshooting For the t5000 Series, this may mean an uninitialized or corrupt ATA Flash. For more information, refer to display messages hidden by the HP logo. Error: Non-System disk or disk error The BIOS was unable to find a suitable boot device. Reflash the unit.

Troubleshooting Guide: HP t5400 Thin Client
Page 68
When ready, you click Yes, the HP FTP Image Update Client confirms that the flash drive has at least 200MB free to host the WinPE image. If you can choose any of the listed images to ... DHCP, then click the Refresh Image List button to make the applet query the FTP share for all WES images whose targeted BIOS families match the one of the current thin client system, and fill in the drop-list combo box to the left of the WinPE image, modifies the boot loader to...
When ready, you click Yes, the HP FTP Image Update Client confirms that the flash drive has at least 200MB free to host the WinPE image. If you can choose any of the listed images to ... DHCP, then click the Refresh Image List button to make the applet query the FTP share for all WES images whose targeted BIOS families match the one of the current thin client system, and fill in the drop-list combo box to the left of the WinPE image, modifies the boot loader to...
Troubleshooting Guide: HP t5400 Thin Client
Page 70
...for the restore process to the thin client ● HP Compaq Thin Client t5000 Series System BIOS Softpaq (for the product being restored) on diskette or USB flash drive NOTE: The BIOS recovery procedure works the same from the HP Web site at: http://www.hp.com/, select Software and Driver ...Downloads, and then enter the model number of your thin client. 62 Appendix D System BIOS WARNING! Updating a BIOS To update the system BIOS, download the Softpaq (...
...for the restore process to the thin client ● HP Compaq Thin Client t5000 Series System BIOS Softpaq (for the product being restored) on diskette or USB flash drive NOTE: The BIOS recovery procedure works the same from the HP Web site at: http://www.hp.com/, select Software and Driver ...Downloads, and then enter the model number of your thin client. 62 Appendix D System BIOS WARNING! Updating a BIOS To update the system BIOS, download the Softpaq (...

Troubleshooting Guide: HP t5400 Thin Client
Page 71
...on the thin client, press F10 during the upgrade process Updating a BIOS 63 The Softpaq contains utilities for changing or updating the BIOS version on your hard drive. Windows-based utility used locally or with a Preboot eXecution Environment (PXE) management application to update the system BIOS. ●... utility to a diskette or USB flash drive to transfer to locally update the system BIOS on individual PCs through the CE.net environment. ● LFlash - Included in the Softpaq are contained in the following instructions: 1. From that can be used to the thin client.
...on the thin client, press F10 during the upgrade process Updating a BIOS 63 The Softpaq contains utilities for changing or updating the BIOS version on your hard drive. Windows-based utility used locally or with a Preboot eXecution Environment (PXE) management application to update the system BIOS. ●... utility to a diskette or USB flash drive to transfer to locally update the system BIOS on individual PCs through the CE.net environment. ● LFlash - Included in the Softpaq are contained in the following instructions: 1. From that can be used to the thin client.
Troubleshooting Guide: HP t5400 Thin Client
Page 75
... restore tool 54 altitude specifications 65 authorizing Remote Installation Services 55 B basic troubleshooting 31 battery, replacing 10 beep codes 29 BIOS restoring 62 updating 62 C cable routing slot 4 cautions static electricity 8 changing BIOS settings in the repset utility 22 using the F10 utility 23 components front panel 3 rear panel 4 configuring a PXE server...
... restore tool 54 altitude specifications 65 authorizing Remote Installation Services 55 B basic troubleshooting 31 battery, replacing 10 beep codes 29 BIOS restoring 62 updating 62 C cable routing slot 4 cautions static electricity 8 changing BIOS settings in the repset utility 22 using the F10 utility 23 components front panel 3 rear panel 4 configuring a PXE server...

Troubleshooting Guide: HP t5400 Thin Client
Page 76
...connector location 4 serial connectors 12 serial number location 2 setting user permissions on the Active Directory Server 56 Setup Utility Advanced BIOS Features 25 Integrated Peripherals 25 Main Menu 24 Power Management Setup 26 Standard CMOS Features 24 System Information 24 Utility Task ... hardware 65 humidity 65 power output 66 power supply 66 rated output current 66 relative humidity 65 temperature 65 thin client 65 weight 65 stand installing 6 removing 7 troubleshooting 31 U updating a BIOS 62 USB drive options 11 USB ports location 3, 4 V vertical orientation 6 VESA mounting holes 5 VGA...
...connector location 4 serial connectors 12 serial number location 2 setting user permissions on the Active Directory Server 56 Setup Utility Advanced BIOS Features 25 Integrated Peripherals 25 Main Menu 24 Power Management Setup 26 Standard CMOS Features 24 System Information 24 Utility Task ... hardware 65 humidity 65 power output 66 power supply 66 rated output current 66 relative humidity 65 temperature 65 thin client 65 weight 65 stand installing 6 removing 7 troubleshooting 31 U updating a BIOS 62 USB drive options 11 USB ports location 3, 4 V vertical orientation 6 VESA mounting holes 5 VGA...

HP Thin Clients - Creating and Restoring Images on the HP Thin Client with Altiris Deployment Server v6.5
Page 2
... limitations and the correct procedures for imaging the HP WES- Additionally, imaging requires the following: ROM version 1.05 or higher is similar to an HP thin client. and XPe-based thin clients. Imaging an HP thin client with Altiris RapiDeploy is required for the boot ...images. Conflicts with the write filter partition and current imaging technology can do this locally through BIOS setup or remotely by script execution of the HP Compaq Thin Client Boot Order Change Utility through Altiris Deployment Server. Table of Contents: Introduction ...2 Prerequisites 2 Creating...
... limitations and the correct procedures for imaging the HP WES- Additionally, imaging requires the following: ROM version 1.05 or higher is similar to an HP thin client. and XPe-based thin clients. Imaging an HP thin client with Altiris RapiDeploy is required for the boot ...images. Conflicts with the write filter partition and current imaging technology can do this locally through BIOS setup or remotely by script execution of the HP Compaq Thin Client Boot Order Change Utility through Altiris Deployment Server. Table of Contents: Introduction ...2 Prerequisites 2 Creating...


