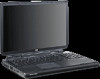
HP USB Digital Drive
Page 3
Insert the SD memory card into the SD slot 2 with the notched corner positioned on the lower left as shown. Installing the SD Memory Card 1. If the SD memory card does not slide in properly, gently pull it out and reinsert it. 2 User Guide Remove the cap 1 of the Digital Drive. 2.
HP USB Digital Drive
Page 10
User Guide 9 Removing the SD Memory Card ✎ Do not attempt to pull the SD memory card out when the status light on the Digital Drive is flashing. » After you disconnect the Digital Drive from your computer, gently pull the SD memory card from the Digital Drive.
Startup and Reference Guide: Enhanced for Accessibility
Page 50
...notebook system is changed during a battery pack calibration. Ä CAUTION: If Hibernation is in Hibernation: ■ Do not add or remove memory modules. ■ Do not insert or remove the hard drive. ■ Do not connect or disconnect external devices. ■ Do not insert or remove a CD or DVD. ■ Do not insert a PC Card, SD Memory... Card, Memory Stick, Smart ...
Startup and Reference Guide: Enhanced for Accessibility
Page 70
... are plugged into an external power source. ■ Stop or remove a PC Card you are not using them. ■ Disconnect from the notebook any external devices that use power from the Turn Off Monitor drop-down the notebook. ■ Select a short wait time, 5 minutes or less..., for the monitor timeout. For more information, refer to the "Using a PC Card," section in Chapter 8. ■ Disable or remove a digital memory card (SD Memory Card, MultiMediaCard, Memory Stick, or SmartMedia) you are not...
Startup and Reference Guide: Enhanced for Accessibility
Page 111
... a USB Device 8-3 Using a USB Device 8-4 Using a PC Card 8-4 Selecting a PC Card 8-5 Configuring a PC Card 8-5 Inserting a PC Card 8-6 Stopping and Removing a PC Card 8-7 Using Digital Media 8-8 Using the Digital Media Light 8-9 Inserting Digital Memory Cards 8-10 Removing Digital Memory Cards 8-11 Disabling or Restarting Digital Memory Cards. . . . 8-12 Increasing Memory 8-12 Displaying Memory Information 8-13 Removing or Inserting a Memory Module 8-14 Connecting an Optional Cable...
Startup and Reference Guide: Enhanced for Accessibility
Page 121
Pull the card out of the slot 2. Releasing and removing a digital memory card Startup and Reference Guide-Part 2 8-11 Hardware Options and Upgrades Removing Digital Memory Cards To remove a digital memory card: 1. Complete all activities that are supported by the card (such as a data transfer) and close all applications. 2. Push the card in until it is released 1. 3.
Startup and Reference Guide: Enhanced for Accessibility
Page 122
... amount of RAM (random access memory) in the notebook with a vacant memory slot. Some notebook models are shipped with an optional memory module approved by HP. To disable an inserted digital memory card, select the My Computer icon on the Windows Desktop, right-click the drive assigned to "Inserting Digital Memory Cards," and "Removing Digital Memory Cards," in use. For...
Startup and Reference Guide: Enhanced for Accessibility
Page 124
..., refer to the "Electrostatic Discharge" section of static electricity by an HP authorized service provider. Å WARNING: To prevent exposure to electrical shock and damage to the notebook, shut down the notebook, unplug the power cord, and remove the battery pack before installing a memory module. Ä CAUTION: To prevent damage to electronic components: before beginning...
Startup and Reference Guide: Enhanced for Accessibility
Page 125
Slide the memory compartment cover toward the notebook display hinges and lift up to remove 2. Hardware Options and Upgrades 5. Remove the 2 memory compartment screws 1. 7. Turn the notebook upside down. 6. Opening the memory compartment Startup and Reference Guide-Part 2 8-15
Startup and Reference Guide: Enhanced for Accessibility
Page 126
Grasp the edges of the module and gently pull the module out of the module 1. (The module tilts upward.) b. To protect a memory module after removal, place it in an electrostatic-safe container. c. Removing a memory module 8-16 Startup and Reference Guide-Part 2 To remove a memory module: a. Remove or insert the memory module. Pull away the retention clips on each side of the memory slot 2. Hardware Options and Upgrades 8.
Startup and Reference Guide: Enhanced for Accessibility
Page 128
Reinsert and tighten the 2 memory compartment screws 2. 11. Replace the battery pack (if you removed a battery pack at the beginning of the notebook 1. 10. Hardware Options and Upgrades 9. Closing the memory compartment 8-18 Startup and Reference Guide-Part 2 Align the tabs on the memory compartment cover with the cover slots on the notebook, and then lower the cover and slide it toward the front of this procedure), reconnect external power, and then restart the notebook.
Startup and Reference Guide: Enhanced for Accessibility
Page 147
...13, 2-18 Index-2 Startup and Reference Guide See memory, modules supported; Index BIOS (basic input/output system) 9-2 boot order 5-14 buttons media 3-10 mute 2-6, 6-2 optical drive release 2-12 PC Card eject 2-12, 8-7 picture 3-10 power/...PC Card 8-5 card. See drives CDs creating 6-12 Driver Recovery 9-11 inserting 5-9 Operating System 9-9 playing with Windows Media Player 6-9 playing with WinDVD 6-10 removing 5-10, 5-11 starting from 5-14 See also drive media Certificate of Authenticity label 2-15, 9-9 charging battery pack 1-6 closing the notebook display 4-13 compartment, memory...
Startup and Reference Guide: Enhanced for Accessibility
Page 148
... shutdown procedures 4-10 enablers, PC Card 8-5 End User License Agreement 1-8 environmental specifications A-1 Startup and Reference Guide Index-3 Index D date, setting 1-9 digital media light 8-9 Digital Media slot, identifying 2-12 digital memory cards disabling 8-12 inserting 8-10 inserting, removing 8-8 Memory Stick (MS) 8-8 MultiMediaCard (MMC) 8-8 removing 8-11 restarting 8-12 Secure Digital (SD) 8-8 SmartMedia (SM) 8-8 dimensions, notebook A-1 discs, diskettes 5-2 display...
Startup and Reference Guide: Enhanced for Accessibility
Page 151
...on 5-12 caring for 5-3 displaying contents of 5-12 inserting CD or DVD 5-9 interrupted by Standby or Hibernation 4-7 optical 5-9 overview 5-2 removing CD or DVD 5-10, 5-11 See also drives media button 3-10 media hotkeys 3-8 Media Player, Windows 6-9 media tray 5-9, 5-10... media, drive displaying contents of 5-12 memory displaying amount of 8-13 increasing 8-12 module, removing or inserting 8-14 modules supported 8-12 memory compartment 2-13 microphone jack 2-10 identifying 6-5 using 6-6 microphones 6-6 Microsoft Certificate of Authenticity label...