Reference Guide
Page 2
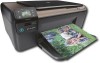
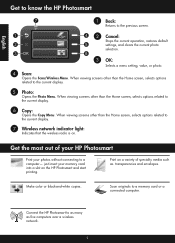
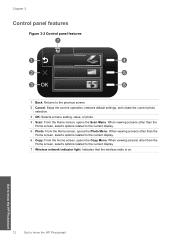
...Photo: Opens the Photo Menu. Connect the HP Photosmart to a computer- Print on a variety of your HP Photosmart Print your memory card into a slot on . just insert your photos without connecting to as many as transparencies and envelopes. Scan originals to the current display. 6 Copy:...default settings, and clears the current photo selection. 3 OK: Selects a menu setting, value, or photo. 4 Scan: Opens the Scan/Wireless Menu. English Get to know the HP Photosmart 1 Back: Returns to the current display. 7 Wireless network indicator light: Indicates that the wireless radio is on...
...Photo: Opens the Photo Menu. Connect the HP Photosmart to a computer- Print on a variety of your HP Photosmart Print your memory card into a slot on . just insert your photos without connecting to as many as transparencies and envelopes. Scan originals to the current display. 6 Copy:...default settings, and clears the current photo selection. 3 OK: Selects a menu setting, value, or photo. 4 Scan: Opens the Scan/Wireless Menu. English Get to know the HP Photosmart 1 Back: Returns to the current display. 7 Wireless network indicator light: Indicates that the wireless radio is on...
Reference Guide
Page 5
... the following any instructions provided. Press button next to Wireless Settings. 4. Press button next to Scan. 2. The uninstaller does not remove components that are shared by running the Wireless Network Test and following troubleshooting steps. Disconnect the HP Photosmart from your computer. 2. Open the Applications: Hewlett-Packard folder. 3. Wireless connections Step 1: Determine if...
... the following any instructions provided. Press button next to Wireless Settings. 4. Press button next to Scan. 2. The uninstaller does not remove components that are shared by running the Wireless Network Test and following troubleshooting steps. Disconnect the HP Photosmart from your computer. 2. Open the Applications: Hewlett-Packard folder. 3. Wireless connections Step 1: Determine if...

Reference Guide
Page 7
...the following instructions: 1. Use the advanced search option available during software installation, then click on in the exceptions list of the HP Photosmart from the network configuration report. 3. Sometimes, cycling the power will recover a network communication issue. • If the previous ...Menu. 3. Press button next to Scan. 2. Identify the IP address of the firewall: • C:\Program Files\Hp\Digital maging\bin\hpqtra08.exe. • C:\Program Files\Hp\Digital Imaging\bin\hpqscnvw.exe or hpiscnapp.exe. • C:\Program Files\Hp\Digital Imaging\bin\hpqdstcp.exe. To ...
...the following instructions: 1. Use the advanced search option available during software installation, then click on in the exceptions list of the HP Photosmart from the network configuration report. 3. Sometimes, cycling the power will recover a network communication issue. • If the previous ...Menu. 3. Press button next to Scan. 2. Identify the IP address of the firewall: • C:\Program Files\Hp\Digital maging\bin\hpqtra08.exe. • C:\Program Files\Hp\Digital Imaging\bin\hpqscnvw.exe or hpiscnapp.exe. • C:\Program Files\Hp\Digital Imaging\bin\hpqdstcp.exe. To ...
User Guide
Page 3
Contents Contents 1 HP Photosmart C4700 series Help 3 2 Finish setting up the HP Photosmart Add the HP Photosmart to a network 5 Set up a USB connection ...10 3 Get to know the HP Photosmart Printer parts ...11 Control panel features ...12 4 How do I?...13 6 Print Print documents ...21 Print photos ...22 Print envelopes ...27 Print on specialty media ...28 Print a Web page ...29 7 Scan Scan to...
Contents Contents 1 HP Photosmart C4700 series Help 3 2 Finish setting up the HP Photosmart Add the HP Photosmart to a network 5 Set up a USB connection ...10 3 Get to know the HP Photosmart Printer parts ...11 Control panel features ...12 4 How do I?...13 6 Print Print documents ...21 Print photos ...22 Print envelopes ...27 Print on specialty media ...28 Print a Web page ...29 7 Scan Scan to...
User Guide
Page 5
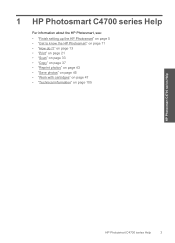
on page 13 • "Print" on page 21 • "Scan" on page 33 • "Copy" on page 37 • "Reprint photos" on page 43 • "Save photos" on page 45 • "Work with cartridges" on page 47 • "Technical information" on page 11 • "How do I?" 1 HP Photosmart C4700 series Help For information about the HP Photosmart, see: • "Finish setting up the HP Photosmart" on page 5 • "Get to know the HP Photosmart" on page 105 HP Photosmart C4700 series Help HP Photosmart C4700 series Help 3
on page 13 • "Print" on page 21 • "Scan" on page 33 • "Copy" on page 37 • "Reprint photos" on page 43 • "Save photos" on page 45 • "Work with cartridges" on page 47 • "Technical information" on page 11 • "How do I?" 1 HP Photosmart C4700 series Help For information about the HP Photosmart, see: • "Finish setting up the HP Photosmart" on page 5 • "Get to know the HP Photosmart" on page 105 HP Photosmart C4700 series Help HP Photosmart C4700 series Help 3
User Guide
Page 7
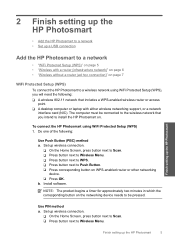
... WiFi Protected Setup (WPS), you intend to install the HP Photosmart on the networking device needs to be connected to Wireless Menu. Set up the HP Photosmart 5 Finish setting up wireless connection. ❑ On the Home Screen, press button next to Scan. ❑ Press button next to the wireless network that includes a WPS-enabled wireless...
... WiFi Protected Setup (WPS), you intend to install the HP Photosmart on the networking device needs to be connected to Wireless Menu. Set up the HP Photosmart 5 Finish setting up wireless connection. ❑ On the Home Screen, press button next to Scan. ❑ Press button next to the wireless network that includes a WPS-enabled wireless...
User Guide
Page 14
Get to know the HP Photosmart 12 Get to the previous screen. 2 Cancel: Stops the current operation, restores default settings, and clears the current photo selection. 3 OK: Selects a menu setting, value, or photo. 4 Scan: From the Home screen, opens the Scan Menu. When viewing screens...Home screen, opens the Photo Menu. Chapter 3 Control panel features Figure 3-2 Control panel features 7 2. 1 Back: Returns to know the HP Photosmart When viewing screens other than the Home screen, selects options related to the current display. 7 Wireless network indicator light: Indicates that the ...
Get to know the HP Photosmart 12 Get to the previous screen. 2 Cancel: Stops the current operation, restores default settings, and clears the current photo selection. 3 OK: Selects a menu setting, value, or photo. 4 Scan: From the Home screen, opens the Scan Menu. When viewing screens...Home screen, opens the Photo Menu. Chapter 3 Control panel features Figure 3-2 Control panel features 7 2. 1 Back: Returns to know the HP Photosmart When viewing screens other than the Home screen, selects options related to the current display. 7 Wireless network indicator light: Indicates that the ...
User Guide
Page 55
...Can you are in Europe, the Middle East, and Africa, go to provide the following information: • Product name (HP Photosmart C4700 series) • Serial number (located on the back or bottom of the computer and the product. This section contains the ...following topics: • HP support • Setup troubleshooting • Print troubleshooting • Print quality troubleshooting • Memory card troubleshooting • Copy troubleshooting • Scan troubleshooting • Errors HP support • HP support by phone • Additional warranty options HP support by phone Phone ...
...Can you are in Europe, the Middle East, and Africa, go to provide the following information: • Product name (HP Photosmart C4700 series) • Serial number (located on the back or bottom of the computer and the product. This section contains the ...following topics: • HP support • Setup troubleshooting • Print troubleshooting • Print quality troubleshooting • Memory card troubleshooting • Copy troubleshooting • Scan troubleshooting • Errors HP support • HP support by phone • Additional warranty options HP support by phone Phone ...
User Guide
Page 64
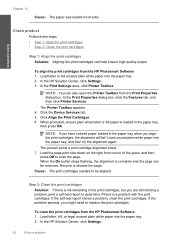
...Settings. 3. If the problem persists, you align the print cartridges, the alignment will fail. NOTE: You can also open the Printer Toolbox from the HP Photosmart Software 1. Click Align the Print Cartridges. 6. NOTE: If you have colored paper loaded in the paper tray, then press OK.... In the Print Settings area, click Printer Toolbox. The product prints a print cartridge alignment sheet. 7. Cause: The print cartridges needed to scan the ...
...Settings. 3. If the problem persists, you align the print cartridges, the alignment will fail. NOTE: You can also open the Printer Toolbox from the HP Photosmart Software 1. Click Align the Print Cartridges. 6. NOTE: If you have colored paper loaded in the paper tray, then press OK.... In the Print Settings area, click Printer Toolbox. The product prints a print cartridge alignment sheet. 7. Cause: The print cartridges needed to scan the ...
User Guide
Page 71
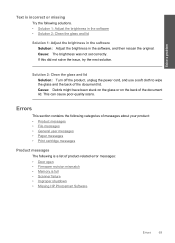
... brightness in the software Solution: Adjust the brightness in the software, and then rescan the original. Solve a problem Text is full • Scanner failure • Improper shutdown • Missing HP Photosmart Software Errors 69 Cause: Debris might have been stuck on the glass or on the back of the document lid. This can...
... brightness in the software Solution: Adjust the brightness in the software, and then rescan the original. Solve a problem Text is full • Scanner failure • Improper shutdown • Missing HP Photosmart Software Errors 69 Cause: Debris might have been stuck on the glass or on the back of the document lid. This can...


