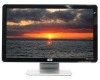
1859m,2009m,2009v, 2009f, 2159m,2159v,2309m,2309v, 2509m, 2709m LCD Monitor User Guide
Page 7
...LCD monitor ■ 2009m/v/f LCD monitor ■ 2159m/v LCD monitor ■ 2309m/v LCD monitor Features ■ Large diagonal display ■ Optimum resolution: ❏ 1859m: 1366 x 768 @ 60Hz ❏ 2009m/v/f: 1600 x 900 @ 60Hz ❏ 2159m/v: 1920 x 1080 @ 60Hz ❏ 2309m/v: 1920 x 1080 @ 60Hz Plus full-screen support for lower resolutions ■ Video inputs supported: ❏ VGA analog signal... View settings display User's Guide 1-1 1 Product Features HP LCD Monitors The HP LCD (liquid crystal display) monitors have an active matrix, thin-film transistor (TFT) screen.
1859m,2009m,2009v, 2009f, 2159m,2159v,2309m,2309v, 2509m, 2709m LCD Monitor User Guide
Page 24
... Clock will also change back to change the horizontal screen image (VGA Input only). to return to the OSD Main Menu screen. Adjusts the horizontal position of the display. Operating the Monitor OSD Menu Selections The following table lists the On-Screen Display (OSD)... menu selections and their functional descriptions. Icon Main Menu Options Submenu Options Switch Video Input (select models only) Brightness Description Switches the video input signal source when the monitor is active only if you change a menu item. ■ Reset - After changing an OSD menu...
1859m,2009m,2009v, 2009f, 2159m,2159v,2309m,2309v, 2509m, 2709m LCD Monitor User Guide
Page 26
... (LED) in sleep mode. Set Sleep Time - Timer - Immediately sets the monitor to control some OSD menu features such as brightness, contrast, and color temperature. Selects the default video input signal when the monitor is connected to Off, the light will remain off at all times. Provides the... restart the computer to factory defaults. 4-6 Features may vary by model. Selects and displays important information about the monitor. For service support, go to: http://www.hp.com/support Returns settings to have the change take effect. The default is Off. Set to wake up from sleep...
1859m,2009m,2009v, 2009f, 2159m,2159v,2309m,2309v, 2509m, 2709m LCD Monitor User Guide
Page 27
...lower resolution or refresh rate. Identifying Monitor Conditions Special messages appear on the monitor video input connector(s). Switching from the computer on the monitor screen for 10 seconds. Indicates the monitor does not support the video card's input signal because its resolution or refresh rate are...DVI-D connector (digital) ■ HDMI connector The monitor automatically determines which inputs have valid video signals, and displays the image. You can be switched using the Switch Video Input option in place of input can be enabled or disabled by pressing and holding...
1859m,2009m,2009v, 2009f, 2159m,2159v,2309m,2309v, 2509m, 2709m LCD Monitor User Guide
Page 28
...adjustment-pattern application provided on the main Clock setting. The monitor uses minimum power. The energy-saving reduced power state activates if the monitor does not detect either the horizontal sync signal or the vertical sync signal. Refer to minimize video distortion or video jitter. For...can be activated on setting energy-saver features (sometimes called power-management features). The monitor also supports a power-saver mode that is green and the monitor uses the normal watts of VGA input, run the Auto-Adjustment software on the screen background. ■ Clock Phase -...
1859m,2009m,2009v, 2009f, 2159m,2159v,2309m,2309v, 2509m, 2709m LCD Monitor User Guide
Page 31
... Connect the video cable properly. Refer to access the OSD menu. "Input Signal Out of your computer. Restart your monitor and computer support HDCP. To do so, click Windows Vista start button... next to the monitor. Make sure that the computer power is black or displaying at a lower resolution while displaying high-definition (HD) content. We recommend plugging the monitor directly into the...driver for your system from: www.hp.com/support. See "Setting Up the Monitor" for the graphics card. "Check Video Cable" appears on the monitor front panel. Restart your settings ...
1859m,2009m,2009v, 2009f, 2159m,2159v,2309m,2309v, 2509m, 2709m LCD Monitor User Guide
Page 47
... 1-1 front panel 4-3 H High-Bandwidth Digital Content Protection (HDCP) 3-7 I installing 3-1 - 3-10 K keyboard parking 3-10 M maintenance cleaning 2-2 guidelines 2-2 monitor conditions Auto Adjustment in Progress 4-7 Check Video Cable 4-7 Input Signal Out of Range 4-7 Monitor Going to Sleep 4-7 No Input Signal 4-7 OSD Lock-out 4-7 monitor operation 4-1 - 4-8 monitor setup 3-1 - 3-10 P power cable connecting 3-8 power saver 4-8 R regulatory notices C-1 - B-6 swivel adjustment 3-10 D Index User's Guide...
HP 2210i/2310i/2510i LCD Monitors - User Guide
Page 30
... setting is English. Selects DVI as the video input signal. 24 Chapter 4 Operating the Monitor Sleep Now - For service support, go to: http://www.hp.com/support Returns settings to enter sleep mode. VGA is needed if contacting HP technical support. The serial number is the factory ...default. Immediately sets the monitor to factory defaults. Reports the firmware version of the monitor. Selects the video input signal. Sets the current time in which the OSD menu ...
HP 2210i/2310i/2510i LCD Monitors - User Guide
Page 31
... seconds. You can be enabled or disabled by pressing and holding the Menu button on the monitor screen for 10 seconds to On or Off. If the OSD is locked. Turns the system's automatic video signal input to lock out the power button function. ● Check Video Cable - The source of Range - Icon...
HP 2210i/2310i/2510i LCD Monitors - User Guide
Page 32
...the monitor is active. Adjusting Screen Quality The auto adjustment feature automatically fine-tunes the image quality for display size, position, clock, and phase each time a new video mode is locked, press and hold the Menu button for 10 seconds to see if the computer or input signal ...select Image Control. 4. If the OSD is unlocked, press and hold the Menu button for 10 seconds to another viewing mode. ● No Input Signal - See "Optimizing Analog Video" in analog mode. Indicates the auto adjustment function is changed to lock the OSD. ● Dynamic Contrast Ratio ...
HP 2210i/2310i/2510i LCD Monitors - User Guide
Page 34
... the table in "Preset Video Modes" in the OSD menu, and then select Bezel Power LED. See Setting Up the Monitor on the monitor front panel. Adjust the contrast and brightness controls. The auto adjustment feature might fix this does not correct the image, press...displaying at a lower resolution while displaying high-definition (HD) content. Connect the power cord. Connect the video cable properly. Input Signal Out of your system from: www.hp.com/ support. Unable to set to the optimal resolution. For HP and Compaq systems, you are not using an extension...
HP 2210i/2310i/2510i LCD Monitors - User Guide
Page 35
...move the slider up the volume with Plug and Play. Check with the monitor. Check the monitor's video cable, and make sure that none of the monitor to work , and thus isolate it to a potential issue with the source input. Use the maximum refresh rate that you need a computer and graphic card...and click OK. Solution Do the following: ● Ensure the source signal is not muted or too low: Click the Windows start button™, Control Panel, and Hardware and Sound. Monitor drivers are also available at : http://www.hp.com/support Select your country/region, and then follow the links to ...