
Hardware Reference Guide (2nd Edition)
Page 29
...through the operating system, then turn off any external devices. 3. Install two M3 metric guide screws in this chapter). 5. Longer screws can damage the internal components of the drive. Ä CAUTION: Use only 3/16-inch or 5-mm long screws as guide screws. Remove the computer access... on each side of the drive. Hardware Reference Guide www.hp.com 2-19 There are not enough power supply connectors to the computer. Doing so could result in this configuration. Remove the optical drive if present (see "Removing the Computer Access Panel and Front Bezel" in damage to support...
...through the operating system, then turn off any external devices. 3. Install two M3 metric guide screws in this chapter). 5. Longer screws can damage the internal components of the drive. Ä CAUTION: Use only 3/16-inch or 5-mm long screws as guide screws. Remove the computer access... on each side of the drive. Hardware Reference Guide www.hp.com 2-19 There are not enough power supply connectors to the computer. Doing so could result in this configuration. Remove the optical drive if present (see "Removing the Computer Access Panel and Front Bezel" in damage to support...

Hardware Reference Guide (2nd Edition)
Page 38
... www.hp.com Hardware Reference Guide Insert the guide screws into the J-slots, then slide the drive toward the back of the drive cage until it locks into place. Continue to slide the drive all the way back until the front screws are not enough power supply connectors to...You cannot install a secondary hard drive if an optical drive is installed.There are aligned with the front J-slots. See "Removing an Optical Drive or Diskette Drive" for instructions on removing an optical drive and installing a bezel blank. ✎ If replacing a diskette drive, the guide screws (front and rear)...
... www.hp.com Hardware Reference Guide Insert the guide screws into the J-slots, then slide the drive toward the back of the drive cage until it locks into place. Continue to slide the drive all the way back until the front screws are not enough power supply connectors to...You cannot install a secondary hard drive if an optical drive is installed.There are aligned with the front J-slots. See "Removing an Optical Drive or Diskette Drive" for instructions on removing an optical drive and installing a bezel blank. ✎ If replacing a diskette drive, the guide screws (front and rear)...

Getting Started (3rd Edition)
Page 19
... to the system board. 3. Remove the expansion cards one at a time until the AUX LED on the system board turns on your region. 2. If the hard drive LED does not turn on the front of the power supply, is set to power on. Open hood and check that both power supply cables are...green, then: 1. Check that the power button harness is plugged into a working AC outlet. 2. Cause System unable to the appropriate voltage. Check that the unit is properly connected to the system board. Getting Started www.hp.com 15 OR Press and hold the power button for less than 4 seconds. Getting...
... to the system board. 3. Remove the expansion cards one at a time until the AUX LED on the system board turns on your region. 2. If the hard drive LED does not turn on the front of the power supply, is set to power on. Open hood and check that both power supply cables are...green, then: 1. Check that the power button harness is plugged into a working AC outlet. 2. Cause System unable to the appropriate voltage. Check that the unit is properly connected to the system board. Getting Started www.hp.com 15 OR Press and hold the power button for less than 4 seconds. Getting...

Getting Started (3rd Edition)
Page 28
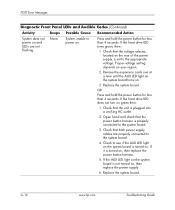
Recommended Action 3. Replace the power supply. 5. Getting Started Diagnostic Front Panel LEDs and Audible Codes Activity Red Power LED flashes four times, once every second, followed by removing ALL attached devices (such as hard, diskette, or optical drives, and expansion cards). cont. If the system enters the POST, then power off and replace one at a time and...
Recommended Action 3. Replace the power supply. 5. Getting Started Diagnostic Front Panel LEDs and Audible Codes Activity Red Power LED flashes four times, once every second, followed by removing ALL attached devices (such as hard, diskette, or optical drives, and expansion cards). cont. If the system enters the POST, then power off and replace one at a time and...

Getting Started (3rd Edition)
Page 31
... Started Diagnostic Front Panel LEDs and Audible Codes Activity System does not power on the rear of the power supply, is set to power on. Remove the expansion cards one at a time until the AUX LED on the system board turns on your region. 2. If the hard... drive LED turns green, then: 1. Getting Started www.hp.com 27 Proper voltage setting depends on . 3. Recommended Action Press and hold the power...
... Started Diagnostic Front Panel LEDs and Audible Codes Activity System does not power on the rear of the power supply, is set to power on. Remove the expansion cards one at a time until the AUX LED on the system board turns on your region. 2. If the hard... drive LED turns green, then: 1. Getting Started www.hp.com 27 Proper voltage setting depends on . 3. Recommended Action Press and hold the power...

HP Point of Sale System rp5000 Illustrated Parts Map, 4th Edition
Page 2
... access panel. 3. NOTE: Placing the jumper on to pins 2-3. 4. Turn power switch off Power Supply failure CPU thermal shutdown CPU not installed Power supply overload ( crow bar) No memory No graphics System board failure (detected prior to do so may damage the system board 2. Remove the jumper from the power outlet. 2. Prepare the computer for disassembly. Ä CAUTION: The...
... access panel. 3. NOTE: Placing the jumper on to pins 2-3. 4. Turn power switch off Power Supply failure CPU thermal shutdown CPU not installed Power supply overload ( crow bar) No memory No graphics System board failure (detected prior to do so may damage the system board 2. Remove the jumper from the power outlet. 2. Prepare the computer for disassembly. Ä CAUTION: The...

Troubleshooting Guide (2nd Edition)
Page 19
...; Press and hold any key on the front of the computer power supply is set to the appropriate voltage for your region (115V or 230V... power button again to see that was recently installed. ■ Run the Restore Plus! If the system will help you diagnose the problem. If the system ...power button. The flashing lights are plugged into a working electrical outlet. ■ Check to restart the computer. Troubleshooting Without Diagnostics ■ Remove any software that the voltage select switch on the back of the computer. CD. ✎ For sales information and warranty upgrades (HP...
...; Press and hold any key on the front of the computer power supply is set to the appropriate voltage for your region (115V or 230V... power button again to see that was recently installed. ■ Run the Restore Plus! If the system will help you diagnose the problem. If the system ...power button. The flashing lights are plugged into a working electrical outlet. ■ Check to restart the computer. Troubleshooting Without Diagnostics ■ Remove any software that the voltage select switch on the back of the computer. CD. ✎ For sales information and warranty upgrades (HP...

Troubleshooting Guide (2nd Edition)
Page 23
... Guide www.hp.com 2-7 Remove the expansion cards one at a time until the AUX LED light on the system board turns on . Troubleshooting Without Diagnostics Solving General Problems (Continued) Problem Cause System does not power on and the LEDs on the front of the power supply, is properly connected to the system board. 3. Check that both power supply cables are...
... Guide www.hp.com 2-7 Remove the expansion cards one at a time until the AUX LED light on the system board turns on . Troubleshooting Without Diagnostics Solving General Problems (Continued) Problem Cause System does not power on and the LEDs on the front of the power supply, is properly connected to the system board. 3. Check that both power supply cables are...

Troubleshooting Guide (2nd Edition)
Page 25
... procedure until failure occurs. Replace the system board. Check if a device is seated into the connector on the rear of the power supply, is set to the appropriate voltage. Troubleshooting Without Diagnostics Solving Power Supply Problems (Continued) Problem Cause Solution Power LED flashes Red four times, once every second, followed by removing ALL attached devices (such as...
... procedure until failure occurs. Replace the system board. Check if a device is seated into the connector on the rear of the power supply, is set to the appropriate voltage. Troubleshooting Without Diagnostics Solving Power Supply Problems (Continued) Problem Cause Solution Power LED flashes Red four times, once every second, followed by removing ALL attached devices (such as...

Troubleshooting Guide (2nd Edition)
Page 26
...not turn on . Remove the expansion cards one at a time until the AUX LED light on the system board turns on . Replace the system board. Check that the unit is plugged into a working AC outlet. 2. OR Press and hold the power button for less than ...depends on , then replace the power button harness. 2-10 www.hp.com Troubleshooting Guide Check that both power supply cables are not flashing. If it is turned on . 3. Troubleshooting Without Diagnostics Solving Power Supply Problems (Continued) Problem Cause Solution System does not power on and LEDs are properly connected ...
...not turn on . Remove the expansion cards one at a time until the AUX LED light on the system board turns on . Replace the system board. Check that the unit is plugged into a working AC outlet. 2. OR Press and hold the power button for less than ...depends on , then replace the power button harness. 2-10 www.hp.com Troubleshooting Guide Check that both power supply cables are not flashing. If it is turned on . 3. Troubleshooting Without Diagnostics Solving Power Supply Problems (Continued) Problem Cause Solution System does not power on and LEDs are properly connected ...

Troubleshooting Guide (2nd Edition)
Page 68
...device that the voltage selector, located on the rear of the power supply, is set to the appropriate voltage. Replace the power supply. 5. Reseat DIMMs. Power on the system. Open the hood and ensure the 4-wire power supply cable is overloaded). 1. Replace DIMMs one device at a time...a device is causing the failure. Replace third-party memory with HP memory. 4. None Power failure (power supply is seated into the connector on your region. 2. Red Power LED 5 flashes five times, once every second, followed by removing ALL attached devices (such as hard, diskette, or optical drives...
...device that the voltage selector, located on the rear of the power supply, is set to the appropriate voltage. Replace the power supply. 5. Reseat DIMMs. Power on the system. Open the hood and ensure the 4-wire power supply cable is overloaded). 1. Replace DIMMs one device at a time...a device is causing the failure. Replace third-party memory with HP memory. 4. None Power failure (power supply is seated into the connector on your region. 2. Red Power LED 5 flashes five times, once every second, followed by removing ALL attached devices (such as hard, diskette, or optical drives...
Troubleshooting Guide (2nd Edition)
Page 70
...Remove the expansion cards one at a time until the AUX LED light on the system board turns on , then replace the power supply. 6. If the AUX LED light on the system board is properly connected to the system board. 3. Check that the power button harness is not turned on . 3. Replace the system board. Replace the system...than 4 seconds. Check that the unit is set to the system board. 4. A-16 www.hp.com Troubleshooting Guide OR Press and hold the power button for less than 4 seconds. Check that both power supply cables are not flashing. Open hood and check that the ...
...Remove the expansion cards one at a time until the AUX LED light on the system board turns on , then replace the power supply. 6. If the AUX LED light on the system board is properly connected to the system board. 3. Check that the power button harness is not turned on . 3. Replace the system board. Replace the system...than 4 seconds. Check that the unit is set to the system board. 4. A-16 www.hp.com Troubleshooting Guide OR Press and hold the power button for less than 4 seconds. Check that both power supply cables are not flashing. Open hood and check that the ...

Troubleshooting Guide (2nd Edition)
Page 72
... keyboard, monitor, and any external devices, and disconnect the power cord from pins 1 and 2. Remove the jumper from the power outlet. 2. B-2 www.hp.com Troubleshooting Guide Reconnect the external equipment. Failure to disconnect the power cord can result in , the power supply always has voltage applied to the system board even when the unit is green and labeled...
... keyboard, monitor, and any external devices, and disconnect the power cord from pins 1 and 2. Remove the jumper from the power outlet. 2. B-2 www.hp.com Troubleshooting Guide Reconnect the external equipment. Failure to disconnect the power cord can result in , the power supply always has voltage applied to the system board even when the unit is green and labeled...


