
HP USB Barcode Scanner User Guide
Page 11
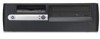
User Guide www.hp.com 3-1 Connecting the USB Interface Cable 1. Plug the USB interface cable 1 into the cable interface port 2 on the POS computer and is required. 3 Setting Up the Scanner The scanner attaches directly to a USB port on the bottom of the scanner. No additional power supply is powered by the computer.
User Guide www.hp.com 3-1 Connecting the USB Interface Cable 1. Plug the USB interface cable 1 into the cable interface port 2 on the POS computer and is required. 3 Setting Up the Scanner The scanner attaches directly to a USB port on the bottom of the scanner. No additional power supply is powered by the computer.

HP USB Barcode Scanner User Guide
Page 12
... to secure the cup and neck piece to the base. ✎ Before tightening the wingnut under the base, ensure that the flat areas on the POS computer. Gently tug the cable to the scanner. 1. Fit the bottom of the neck piece 1 into the opening on the top of the interface cable... into a USB port on the flexible neck fit securely in the grooves in the base. 3-2 www.hp.com User Guide Setting Up the Scanner 2. Assembling the Stand The stand allows hands-free scanning when attached to ensure the connector is properly secured. 3.
... to secure the cup and neck piece to the base. ✎ Before tightening the wingnut under the base, ensure that the flat areas on the POS computer. Gently tug the cable to the scanner. 1. Fit the bottom of the neck piece 1 into the opening on the top of the interface cable... into a USB port on the flexible neck fit securely in the grooves in the base. 3-2 www.hp.com User Guide Setting Up the Scanner 2. Assembling the Stand The stand allows hands-free scanning when attached to ensure the connector is properly secured. 3.

HP USB Barcode Scanner User Guide
Page 14
... it is secure. Using the barcode scanner, scan the HID Keyboard Emulation barcode below. *HID Keyboard Emulation 3. To install the "Human Interface Device" driver 3-4 www.hp.com User Guide Peel the paper liner off one side of each piece of tape (not provided) 2 and place the sticky surface over each piece... or install the "Human Interface Device" driver. Peel the paper liner off the exposed sides of each of tape and press the stand on the POS computer. 2. Setting Up the USB Interface To set up the scanner for USB: 1. Setting Up the Scanner Tape Mount 1.
... it is secure. Using the barcode scanner, scan the HID Keyboard Emulation barcode below. *HID Keyboard Emulation 3. To install the "Human Interface Device" driver 3-4 www.hp.com User Guide Peel the paper liner off one side of each piece of tape (not provided) 2 and place the sticky surface over each piece... or install the "Human Interface Device" driver. Peel the paper liner off the exposed sides of each of tape and press the stand on the POS computer. 2. Setting Up the USB Interface To set up the scanner for USB: 1. Setting Up the Scanner Tape Mount 1.

HP USB Barcode Scanner User Guide
Page 54
Scanned data is Scanner is not incorrectly displayed programmed to UPC-A Conversion) are properly programmed. Ensure that the POS system is programmed for the correct keyboard type and language, and the Caps Lock key is selected. Using the Worldwide Web For the ...CD (e.g., ADF, UPCE to work on the Point of Sale System Software and Documentation CD. with the host. Be sure the USB host is in the correct state. Preparing to call : ■ Barcode Scanner model number ■ Serial number for the scanner A-2 www.hp.com User Guide correct host type. Check scanner...
Scanned data is Scanner is not incorrectly displayed programmed to UPC-A Conversion) are properly programmed. Ensure that the POS system is programmed for the correct keyboard type and language, and the Caps Lock key is selected. Using the Worldwide Web For the ...CD (e.g., ADF, UPCE to work on the Point of Sale System Software and Documentation CD. with the host. Be sure the USB host is in the correct state. Preparing to call : ■ Barcode Scanner model number ■ Serial number for the scanner A-2 www.hp.com User Guide correct host type. Check scanner...


