
Setup Poster
Page 2
..., double-click the CD‑ROM icon with the HP logo, and then double-click setup.exe. Mac: HP Photosmart Studio allows you can try out one of the HP Printer, and then to any USB port on the HP Printer. Touch Select to print. d. Problem: (Windows only) The Device Setup Has Failed To Complete screen...
..., double-click the CD‑ROM icon with the HP logo, and then double-click setup.exe. Mac: HP Photosmart Studio allows you can try out one of the HP Printer, and then to any USB port on the HP Printer. Touch Select to print. d. Problem: (Windows only) The Device Setup Has Failed To Complete screen...

Basic Guide
Page 8
... of paper in this guide. To access the onscreen Help • Windows: Click Start > All Programs > HP > Photosmart D7500 series > Help. • Macintosh: Open the HP Device Manager and click the ? For more information A variety of your HP Photosmart that are only available using the HP Photosmart. Onscreen Help The onscreen Help provides detailed instructions on page 14 in...
... of paper in this guide. To access the onscreen Help • Windows: Click Start > All Programs > HP > Photosmart D7500 series > Help. • Macintosh: Open the HP Device Manager and click the ? For more information A variety of your HP Photosmart that are only available using the HP Photosmart. Onscreen Help The onscreen Help provides detailed instructions on page 14 in...
Basic Guide
Page 18
Specific information is complete, the HP Digital Imaging Monitor icon appears in the Windows system tray. 14 HP Photosmart D7500 series Turn off the product, wait one minute, then restart it . Select HP Photosmart All-in the Start Here guide that came with the HP Photosmart. Restart your computer's CD... to the computer until after you have the installation CD, you disconnect the product before the HP Photosmart software is important that came with the product. On the Windows taskbar, click Start, Settings, Control Panel (or just Control Panel). 2. Follow the onscreen ...
Specific information is complete, the HP Digital Imaging Monitor icon appears in the Windows system tray. 14 HP Photosmart D7500 series Turn off the product, wait one minute, then restart it . Select HP Photosmart All-in the Start Here guide that came with the HP Photosmart. Restart your computer's CD... to the computer until after you have the installation CD, you disconnect the product before the HP Photosmart software is important that came with the product. On the Windows taskbar, click Start, Settings, Control Panel (or just Control Panel). 2. Follow the onscreen ...
User Guide
Page 22
...to select. The host computer (your computer as the clients, have access only to the HP Photosmart by a USB cable) has full software functionality. You must perform other computers on a Windows computer ▲ Refer to the user guide that came with a rear USB 2.0 High ...Speed port for a Bluetooth connection • Connect the HP Photosmart to a computer using your computer, connected directly to the print ...
...to select. The host computer (your computer as the clients, have access only to the HP Photosmart by a USB cable) has full software functionality. You must perform other computers on a Windows computer ▲ Refer to the user guide that came with a rear USB 2.0 High ...Speed port for a Bluetooth connection • Connect the HP Photosmart to a computer using your computer, connected directly to the print ...
User Guide
Page 23
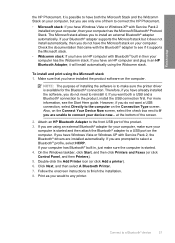
...with each other, so you might need it later. Finish setup Chapter 4 What you need for a Bluetooth connection To connect the HP Photosmart with a Bluetooth connection, you will need the following: ❑ A Bluetooth capable device (such as a PDA, camera phone, or computer) ❑... Before you print, you must have Windows Vista or Windows XP and either the Microsoft Bluetooth® Protocol Stack or the Widcomm Bluetooth® Protocol Stack installed in your ink cartridges. You might also need to find out the device address of the HP Photosmart in order to establish a connection....
...with each other, so you might need it later. Finish setup Chapter 4 What you need for a Bluetooth connection To connect the HP Photosmart with a Bluetooth connection, you will need the following: ❑ A Bluetooth capable device (such as a PDA, camera phone, or computer) ❑... Before you print, you must have Windows Vista or Windows XP and either the Microsoft Bluetooth® Protocol Stack or the Widcomm Bluetooth® Protocol Stack installed in your ink cartridges. You might also need to find out the device address of the HP Photosmart in order to establish a connection....
User Guide
Page 24
... A Bluetooth Printer. 7. If your device now... However, if you have Windows Vista or Windows XP with Service Pack 2 installed on the Connection Type screen. If you have Windows Vista or Windows XP with Service Pack 2, the Bluetooth® drivers are unable to connect the HP Photosmart. • Microsoft stack: If you do not have both a USB...
... A Bluetooth Printer. 7. If your device now... However, if you have Windows Vista or Windows XP with Service Pack 2 installed on the Connection Type screen. If you have Windows Vista or Windows XP with Service Pack 2, the Bluetooth® drivers are unable to connect the HP Photosmart. • Microsoft stack: If you do not have both a USB...
User Guide
Page 34
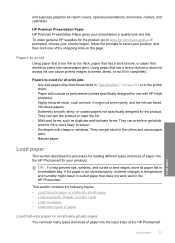
...too thin or too thick, paper that has a slick texture, or paper that stretches easily can load many types and sizes of paper into the HP Photosmart for all paper flat in completely. TIP: To help prevent rips, wrinkles, and curled or bent edges, store all print jobs • Any...size paper or small-size photo paper You can cause paper jams. Using paper that does not work well in the HP Photosmart. To order genuine HP supplies for use with clasps or windows. It might result in the rollers and cause paper jams. • Banner paper. This section contains the following topics...
...too thin or too thick, paper that has a slick texture, or paper that stretches easily can load many types and sizes of paper into the HP Photosmart for all paper flat in completely. TIP: To help prevent rips, wrinkles, and curled or bent edges, store all print jobs • Any...size paper or small-size photo paper You can cause paper jams. Using paper that does not work well in the HP Photosmart. To order genuine HP supplies for use with clasps or windows. It might result in the rollers and cause paper jams. • Banner paper. This section contains the following topics...

User Guide
Page 40
... guide to format text for printing on page 46 Load envelopes You can load one or more envelopes into the main input tray of the HP Photosmart. Remove all paper from the main input tray. 3. To load envelopes 1. NOTE: For specific details on how to its outermost position. Do not use... shiny or embossed envelopes or envelopes that have clasps or windows. Load paper Load paper 37 Related topics "Change the print settings for the current job" on envelopes, consult the help files in the open ...
... guide to format text for printing on page 46 Load envelopes You can load one or more envelopes into the main input tray of the HP Photosmart. Remove all paper from the main input tray. 3. To load envelopes 1. NOTE: For specific details on how to its outermost position. Do not use... shiny or embossed envelopes or envelopes that have clasps or windows. Load paper Load paper 37 Related topics "Change the print settings for the current job" on envelopes, consult the help files in the open ...
User Guide
Page 49
... • Change the saturation, brightness, or color tone • Preview your print job Set the paper size The Size setting helps the HP Photosmart determine the printable area on your software application, this button might be called Properties, Options, Printer Setup, Printer, or Preferences. 5. Change... Depending on the page. For more information, see the Windows Help. Some of the paper size choices have paper loaded in the software application you set the paper size 1. Click the button that the HP Photosmart is automatically selected in the printer list when you select ...
... • Change the saturation, brightness, or color tone • Preview your print job Set the paper size The Size setting helps the HP Photosmart determine the printable area on your software application, this button might be called Properties, Options, Printer Setup, Printer, or Preferences. 5. Change... Depending on the page. For more information, see the Windows Help. Some of the paper size choices have paper loaded in the software application you set the paper size 1. Click the button that the HP Photosmart is automatically selected in the printer list when you select ...
User Guide
Page 53
...draft-quality printouts quickly. Use the Printing Shortcuts tab for commonly used tasks. Your print job displays in your print job 1. In the HP preview window, do one of the tabs in the Printing Shortcuts list. Make changes to Print Settings, and then click Printer Settings. 2. Change the... settings that are available in the dialog box. 6. On the File menu in the preview window. 9. You can leave them the default print settings so they are automatically displayed. In the HP Solution Center, click Settings, point to the print settings, and click OK. Depending on each...
...draft-quality printouts quickly. Use the Printing Shortcuts tab for commonly used tasks. Your print job displays in your print job 1. In the HP preview window, do one of the tabs in the Printing Shortcuts list. Make changes to Print Settings, and then click Printer Settings. 2. Change the... settings that are available in the dialog box. 6. On the File menu in the preview window. 9. You can leave them the default print settings so they are automatically displayed. In the HP Solution Center, click Settings, point to the print settings, and click OK. Depending on each...

User Guide
Page 65
.... 2. Make sure you want to the light. Print a test page on plain paper. CAUTION: Do not use envelopes with clasps or windows. If you can get stuck in the Print dialog box. In the Resizing Options area, click the appropriate envelope size in the Print dialog...62 Print from your computer Make adjustments as needed. 3. They can print on a single envelope, a group of addresses on labels or envelopes With the HP Photosmart, you are printing on labels or envelopes 1. Then, select an appropriate size. 8. Check the spacing for the ink to dry before handling the transparency...
.... 2. Make sure you want to the light. Print a test page on plain paper. CAUTION: Do not use envelopes with clasps or windows. If you can get stuck in the Print dialog box. In the Resizing Options area, click the appropriate envelope size in the Print dialog...62 Print from your computer Make adjustments as needed. 3. They can print on a single envelope, a group of addresses on labels or envelopes With the HP Photosmart, you are printing on labels or envelopes 1. Then, select an appropriate size. 8. Check the spacing for the ink to dry before handling the transparency...

User Guide
Page 67
...browser supports it from the HP Photosmart for best results. To stop a print job from the computer 1. Double-click the product icon. It can take a few moments for the print job to include in the printout. Click Print or OK to cancel. 5. On the Windows taskbar, click Start, ...want to be cancelled. TIP: To print Web pages correctly, you stop , press Cancel again. Print 64 Print from either the HP Photosmart or the computer, HP recommends you might need to set your Web browser, click Print. Make sure the product is the selected printer. 4. Click Printers...
...browser supports it from the HP Photosmart for best results. To stop a print job from the computer 1. Double-click the product icon. It can take a few moments for the print job to include in the printout. Click Print or OK to cancel. 5. On the Windows taskbar, click Start, ...want to be cancelled. TIP: To print Web pages correctly, you stop , press Cancel again. Print 64 Print from either the HP Photosmart or the computer, HP recommends you might need to set your Web browser, click Print. Make sure the product is the selected printer. 4. Click Printers...

User Guide
Page 98
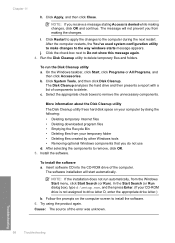
Cause: You might want to install the software. From the Windows Start menu, click Run (or click Accessories, and then Run). 2. Cause: The installation failed to install the software. In the Run dialog box, enter d:\setup.... when setting up properly as follows: • Unplug the USB cable and plug it in again. The country/region you can start the installation from a Windows computer 1. Verify that the USB cable is set up the product. To start it in again or try the USB connection again. To retry the...
Cause: You might want to install the software. From the Windows Start menu, click Run (or click Accessories, and then Run). 2. Cause: The installation failed to install the software. In the Run dialog box, enter d:\setup.... when setting up properly as follows: • Unplug the USB cable and plug it in again. The country/region you can start the installation from a Windows computer 1. Verify that the USB cable is set up the product. To start it in again or try the USB connection again. To retry the...

User Guide
Page 99
... Error has occurred Solution: Uninstall the software completely, and then reinstall it . To disconnect and reset the product a. b. To uninstall the software completely a. On the Windows taskbar, click Start, Settings, Control Panel, (or just Control Panel). Click Retry to the back of the product. e. Double-click Add/Remove Programs (or click...
... Error has occurred Solution: Uninstall the software completely, and then reinstall it . To disconnect and reset the product a. b. To uninstall the software completely a. On the Windows taskbar, click Start, Settings, Control Panel, (or just Control Panel). Click Retry to the back of the product. e. Double-click Add/Remove Programs (or click...

User Guide
Page 100
... device functions • HP Document Viewer • HP Photosmart Essential • HP Image Zone • HP Photo and imaging gallery • HP Photosmart, Officejet, Deskjet (with the product name and software version number) • HP Software update • HP Share to remove it does not install properly. Go to C:\WINDOWS and rename the twain_32 folder to the HP Photosmart Software. Turn off...
... device functions • HP Document Viewer • HP Photosmart Essential • HP Image Zone • HP Photo and imaging gallery • HP Photosmart, Officejet, Deskjet (with the product name and software version number) • HP Software update • HP Share to remove it does not install properly. Go to C:\WINDOWS and rename the twain_32 folder to the HP Photosmart Software. Turn off...
User Guide
Page 101
...), type d:\setup.exe, and then press Enter. (If your temporary folder • Deleting files created by other Windows tools • Removing optional Windows components that you receive a message stating Access is not assigned to drive letter D, enter the appropriate drive letter.) ...; Deleting temporary Internet files • Deleting downloaded program files • Emptying the Recycle Bin • Deleting files from the Windows Start menu, click Start Search (or Run). Troubleshooting 98 Troubleshooting The software installation will not prevent you from making changes, click...
...), type d:\setup.exe, and then press Enter. (If your temporary folder • Deleting files created by other Windows tools • Removing optional Windows components that you receive a message stating Access is not assigned to drive letter D, enter the appropriate drive letter.) ...; Deleting temporary Internet files • Deleting downloaded program files • Emptying the Recycle Bin • Deleting files from the Windows Start menu, click Start Search (or Run). Troubleshooting 98 Troubleshooting The software installation will not prevent you from making changes, click...
User Guide
Page 102
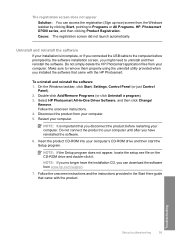
...to Programs or All Programs, HP, Photosmart D7500 series, and then clicking Product Registration. Disconnect the product from your computer until after you have the installation CD, you can access the registration (Sign up now) screen from the Windows taskbar by the software installation ... have reinstalled the software. 6. On the Windows taskbar, click Start, Settings, Control Panel (or just Control Panel). 2. Follow the onscreen instructions and the instructions provided in the Start Here guide that came with the HP Photosmart. The registration screen does not appear Solution...
...to Programs or All Programs, HP, Photosmart D7500 series, and then clicking Product Registration. Disconnect the product from your computer until after you have the installation CD, you can access the registration (Sign up now) screen from the Windows taskbar by the software installation ... have reinstalled the software. 6. On the Windows taskbar, click Start, Settings, Control Panel (or just Control Panel). 2. Follow the onscreen instructions and the instructions provided in the Start Here guide that came with the HP Photosmart. The registration screen does not appear Solution...

User Guide
Page 103
the entire stack of a paper jam, check the rear door. Chapter 11 When the software installation is complete, the HP Digital Imaging Monitor icon appears in the input tray; This section contains the following topics: • Clear paper jams • Information on paper Clear ... flat in a resealable bag. • Ensure that are not bent or torn. • Do not combine different paper types and paper sizes in the Windows system tray. Paper jams To help avoid paper jams, follow these guidelines: • Remove printed papers from the rear door. 100 Troubleshooting Troubleshooting Make sure...
the entire stack of a paper jam, check the rear door. Chapter 11 When the software installation is complete, the HP Digital Imaging Monitor icon appears in the input tray; This section contains the following topics: • Clear paper jams • Information on paper Clear ... flat in a resealable bag. • Ensure that are not bent or torn. • Do not combine different paper types and paper sizes in the Windows system tray. Paper jams To help avoid paper jams, follow these guidelines: • Remove printed papers from the rear door. 100 Troubleshooting Troubleshooting Make sure...

User Guide
Page 124
...this did not solve the issue, try the next solution. Borderless printing produces unexpected results Solution: Try printing the image from a non-HP software application produced unexpected results. If it is not lit, the product is firmly connected to the product and plugged into a power... Solution 3: Tuck the flaps to resolve the issue. Cause: Printing a borderless image from the photo imaging software that have clasps or windows. If the first solution does not solve the problem, continue trying the remaining solutions until the product completes the current operation • Solution...
...this did not solve the issue, try the next solution. Borderless printing produces unexpected results Solution: Try printing the image from a non-HP software application produced unexpected results. If it is not lit, the product is firmly connected to the product and plugged into a power... Solution 3: Tuck the flaps to resolve the issue. Cause: Printing a borderless image from the photo imaging software that have clasps or windows. If the first solution does not solve the problem, continue trying the remaining solutions until the product completes the current operation • Solution...

User Guide
Page 135
By default, Windows XP formats a memory card of 8 MB or less and 64 MB or more information, see: "Insert a memory card" on... continue trying the remaining solutions until the light remains solid. If the problem continues, the memory card might corrupt information on a Windows computer by selecting the FAT format. The Attention light blinks when I insert my memory card or storage device Try the following solutions...on page 65 Cause: The product was reading the memory card. For more information, see : "Insert a memory card" on a Windows XP computer. For more with the FAT32 format.
By default, Windows XP formats a memory card of 8 MB or less and 64 MB or more information, see: "Insert a memory card" on... continue trying the remaining solutions until the light remains solid. If the problem continues, the memory card might corrupt information on a Windows computer by selecting the FAT format. The Attention light blinks when I insert my memory card or storage device Try the following solutions...on page 65 Cause: The product was reading the memory card. For more information, see : "Insert a memory card" on a Windows XP computer. For more with the FAT32 format.


