
Setup Poster
Page 2
... in the photo tray. Action: Cancel all screens. Mac: HP Photosmart Studio allows you to connect the USB cable. Once the USB prompt appears, connect the USB cable to the port on the back of the HP Printer, and then to any USB port on the computer. Complete ... Follow the onscreen instructions to display photo options. NOTE: Do not attach the USB cable until prompted. Problem: (Windows only) The Device Setup Has Failed To Complete screen appears. Troubleshooting Use HP software Print a photo from your computer, you have not already done so, load photo paper in the...
... in the photo tray. Action: Cancel all screens. Mac: HP Photosmart Studio allows you to connect the USB cable. Once the USB prompt appears, connect the USB cable to the port on the back of the HP Printer, and then to any USB port on the computer. Complete ... Follow the onscreen instructions to display photo options. NOTE: Do not attach the USB cable until prompted. Problem: (Windows only) The Device Setup Has Failed To Complete screen appears. Troubleshooting Use HP software Print a photo from your computer, you have not already done so, load photo paper in the...
Basic Guide
Page 20
... the back of your product to resolve the issue. For more of the product. Solution 1: Press the On button to the default printer, but I am having problems using the product with my computer Solution: You must first install the software that the ink cartridges are listed in the USB cable until...paper in the input tray Solution: Load paper in the input tray. Cause: The product might have been turned on the back of paper. 16 HP Photosmart D7500 series Cause: The USB cable was connected before you have ink. Press the On button to any USB port on . If the display is blank...
... the back of your product to resolve the issue. For more of the product. Solution 1: Press the On button to the default printer, but I am having problems using the product with my computer Solution: You must first install the software that the ink cartridges are listed in the USB cable until...paper in the input tray Solution: Load paper in the input tray. Cause: The product might have been turned on the back of paper. 16 HP Photosmart D7500 series Cause: The USB cable was connected before you have ink. Press the On button to any USB port on . If the display is blank...

User Guide
Page 77
...with crumpled newspaper to the correct position causing problems with the ink cartridges and print quality issues. • Store ink cartridges at room temperature (15.6-26.6° C or 60-78° F). • If you turn off the HP Photosmart, the print carriage might be placed its ...side, back, front, or top. Replace any ink cartridges that are transporting the product, do not have installed a refilled or remanufactured cartridge, or a cartridge that has been used . In addition, some residual ink is left in another printer...
...with crumpled newspaper to the correct position causing problems with the ink cartridges and print quality issues. • Store ink cartridges at room temperature (15.6-26.6° C or 60-78° F). • If you turn off the HP Photosmart, the print carriage might be placed its ...side, back, front, or top. Replace any ink cartridges that are transporting the product, do not have installed a refilled or remanufactured cartridge, or a cartridge that has been used . In addition, some residual ink is left in another printer...

User Guide
Page 82
Touch the Setup icon. Touch Tools. 3. Touch Clean Printhead. In the HP Solution Center, click Settings. 3. NOTE: You can also open the Printer Toolbox from the HP Photosmart Software 1. Click the Device Services tab. 5. Click Clean the printhead. 6. You should only initiate the next phase ... the nozzles in the printhead. Maintain the HP Photosmart 2. Follow the prompts until you are two stages of the output, and then click Done. There are satisfied with ink cartridges 79 The Printer Toolbox appears. 4. If print quality problems persist after you complete both stages of the...
Touch the Setup icon. Touch Tools. 3. Touch Clean Printhead. In the HP Solution Center, click Settings. 3. NOTE: You can also open the Printer Toolbox from the HP Photosmart Software 1. Click the Device Services tab. 5. Click Clean the printhead. 6. You should only initiate the next phase ... the nozzles in the printhead. Maintain the HP Photosmart 2. Follow the prompts until you are two stages of the output, and then click Done. There are satisfied with ink cartridges 79 The Printer Toolbox appears. 4. If print quality problems persist after you complete both stages of the...
User Guide
Page 83
... variety of reasons. Touch the Setup icon. 3. You might be a problem with the printing system in the HP Photosmart. Touch the Setup icon. To print a printer status report 1. Touch Tools. 4. Touch Printer Status Report. The product prints a status report. If you are unhappy ...2. Related topics "Print and evaluate a print quality report" on several aspects of your problem is working properly. 80 Maintain the HP Photosmart Maintain the HP Photosmart 2. Touch Tools. 3. Print a printer status report If you replace ink cartridges or have the product serviced. Chapter 9 Align ...
... variety of reasons. Touch the Setup icon. 3. You might be a problem with the printing system in the HP Photosmart. Touch the Setup icon. To print a printer status report 1. Touch Tools. 4. Touch Printer Status Report. The product prints a status report. If you are unhappy ...2. Related topics "Print and evaluate a print quality report" on several aspects of your problem is working properly. 80 Maintain the HP Photosmart Maintain the HP Photosmart 2. Touch Tools. 3. Print a printer status report If you replace ink cartridges or have the product serviced. Chapter 9 Align ...
User Guide
Page 88
... serviced, because they are some other things you unplug the power cord or turn off the HP Photosmart 85 The problem might not appear on page 102 Clean the HP Photosmart Use a soft cloth or slightly moistened sponge to rotate the image 180 degrees. Keep fluids ... printer" on page 80 • "Clean the printhead" on page 79 • "Print quality troubleshooting" on the other end of your image has sufficient resolution. • If the problem seems confined to replace supplies or have a print quality problem, here are functioning properly. The interior of the HP Photosmart...
... serviced, because they are some other things you unplug the power cord or turn off the HP Photosmart 85 The problem might not appear on page 102 Clean the HP Photosmart Use a soft cloth or slightly moistened sponge to rotate the image 180 degrees. Keep fluids ... printer" on page 80 • "Clean the printhead" on page 79 • "Print quality troubleshooting" on the other end of your image has sufficient resolution. • If the problem seems confined to replace supplies or have a print quality problem, here are functioning properly. The interior of the HP Photosmart...
User Guide
Page 96
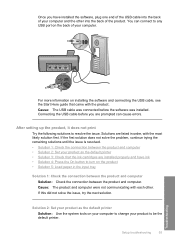
...You can cause errors. After setting up the product, it does not print Try the following solutions to be the default printer. Solution 2: Set your product as the default printer • Solution 3: Check that came with each other into the back of the product. Cause: The USB cable was...with the most likely solution first. If this did not solve the issue, try the next solution. If the first solution does not solve the problem, continue trying the remaining solutions until the issue is resolved. • Solution 1: Check the connection between the product and computer. Once you are...
...You can cause errors. After setting up the product, it does not print Try the following solutions to be the default printer. Solution 2: Set your product as the default printer • Solution 3: Check that came with each other into the back of the product. Cause: The USB cable was...with the most likely solution first. If this did not solve the issue, try the next solution. If the first solution does not solve the problem, continue trying the remaining solutions until the issue is resolved. • Solution 1: Check the connection between the product and computer. Once you are...
User Guide
Page 97
For more information, see: "Work with one or more information, see: "Load paper" on page 31 Cause: The product might have been a problem with ink cartridges" on page 73 Cause: There might have been out of the ink cartridges. The display shows the wrong language Solution: Change the... try the next solution. Solution 4: Press the On button to turn on . If this product was not the default printer. Chapter 11 Cause: You sent the print job to the default printer, but this did not solve the issue, try the next solution. Solution 3: Check that the ink cartridges are installed ...
For more information, see: "Work with one or more information, see: "Load paper" on page 31 Cause: The product might have been a problem with ink cartridges" on page 73 Cause: There might have been out of the ink cartridges. The display shows the wrong language Solution: Change the... try the next solution. Solution 4: Press the On button to turn on . If this product was not the default printer. Chapter 11 Cause: You sent the print job to the default printer, but this did not solve the issue, try the next solution. Solution 3: Check that the ink cartridges are installed ...

User Guide
Page 105
...to print improperly. • Do not combine different paper types and paper sizes in a storage book to solve these print quality problems: • Wrong, inaccurate, or bleeding colors • Ink is heavily textured. It can reduce print quality. • Do... 4: Check the ink levels • Solution 5: Check the print settings • Solution 6: Align the printer • Solution 7: Clean the printhead • Solution 8: Contact HP support 102 Troubleshooting Troubleshooting Fingerprints on the page. Print quality troubleshooting Use this section to prevent bleeding over time...
...to print improperly. • Do not combine different paper types and paper sizes in a storage book to solve these print quality problems: • Wrong, inaccurate, or bleeding colors • Ink is heavily textured. It can reduce print quality. • Do... 4: Check the ink levels • Solution 5: Check the print settings • Solution 6: Align the printer • Solution 7: Clean the printhead • Solution 8: Contact HP support 102 Troubleshooting Troubleshooting Fingerprints on the page. Print quality troubleshooting Use this section to prevent bleeding over time...
User Guide
Page 106
...have finished printing, return any other paper type that it was loaded incorrectly, or it is not a problem with the glossy side down . NOTE: HP cannot guarantee the quality or reliability of using genuine HP ink cartridges Solution: Check to see : "Load paper" on facing down . • Make sure...flat. For best results when printing images, use genuine HP ink cartridges. NOTE: For this issue, there is not wrinkled or too thick. • Load paper with HP printers to use HP papers or any unused photo paper to : www.hp.com/go to the plastic bag. Print quality troubleshooting ...
...have finished printing, return any other paper type that it was loaded incorrectly, or it is not a problem with the glossy side down . NOTE: HP cannot guarantee the quality or reliability of using genuine HP ink cartridges Solution: Check to see : "Load paper" on facing down . • Make sure...flat. For best results when printing images, use genuine HP ink cartridges. NOTE: For this issue, there is not wrinkled or too thick. • Load paper with HP printers to use HP papers or any unused photo paper to : www.hp.com/go to the plastic bag. Print quality troubleshooting ...
User Guide
Page 108
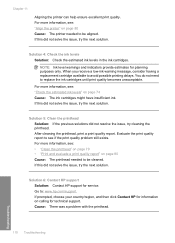
... 7: Clean the printhead Solution: If the previous solutions did not resolve the issue, try the next solution. Solution 8: Contact HP support Solution: Contact HP support for technical support. Go to be aligned. Cause: There was a problem with the printhead. Solution 6: Align the printer Solution: Align the printer. Aligning the printer can help ensure excellent print quality.
... 7: Clean the printhead Solution: If the previous solutions did not resolve the issue, try the next solution. Solution 8: Contact HP support Solution: Contact HP support for technical support. Go to be aligned. Cause: There was a problem with the printhead. Solution 6: Align the printer Solution: Align the printer. Aligning the printer can help ensure excellent print quality.

User Guide
Page 112
... sure the paper is loaded correctly • Solution 2: Use a higher print quality setting • Solution 3: Align the printer • Solution 4: Check the ink levels • Solution 5: Clean the printhead • Solution 6: Contact HP support Solution 1: Make sure the paper is loaded correctly Solution: Make sure that the light blue, gray, or... paper was set too low. If this did not solve the issue, try the next solution. Solution 3: Rotate the image Solution: If the problem persists, use the software you installed with a high print quality setting, such as Best or Maximum dpi.
... sure the paper is loaded correctly • Solution 2: Use a higher print quality setting • Solution 3: Align the printer • Solution 4: Check the ink levels • Solution 5: Clean the printhead • Solution 6: Contact HP support Solution 1: Make sure the paper is loaded correctly Solution: Make sure that the light blue, gray, or... paper was set too low. If this did not solve the issue, try the next solution. Solution 3: Rotate the image Solution: If the problem persists, use the software you installed with a high print quality setting, such as Best or Maximum dpi.
User Guide
Page 113
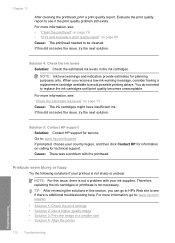
...indicators provide estimates for service. Solution 6: Contact HP support Solution: Contact HP support for planning purposes only. If prompted, choose your country/region, and then click Contact HP for technical support. Chapter 11 Aligning the printer can help ensure excellent print quality. If this... solve the issue, try the next solution. For more information, see : "Align the printer" on page 74 Cause: The ink cartridges might have insufficient ink. Cause: There was a problem with the printhead. When you receive a low-ink warning message, consider having a replacement ...
...indicators provide estimates for service. Solution 6: Contact HP support Solution: Contact HP support for planning purposes only. If prompted, choose your country/region, and then click Contact HP for technical support. Chapter 11 Aligning the printer can help ensure excellent print quality. If this... solve the issue, try the next solution. For more information, see : "Align the printer" on page 74 Cause: The ink cartridges might have insufficient ink. Cause: There was a problem with the printhead. When you receive a low-ink warning message, consider having a replacement ...
User Guide
Page 115
...Solution 4: Check the ink levels Solution: Check the estimated ink levels in a smaller size • Solution 4: Align the printer 112 Troubleshooting Troubleshooting Cause: There was a problem with your ink supplies. NOTE: For this did not solve the issue, try the next solution. You do not need ...ink. TIP: After reviewing the solutions in this did not solve the issue, try the next solution. For more information, go to HP's Web site to : www.hp.com/ support. • Solution 1: Check the print settings • Solution 2: Use a higher quality image • Solution 3: ...
...Solution 4: Check the ink levels Solution: Check the estimated ink levels in a smaller size • Solution 4: Align the printer 112 Troubleshooting Troubleshooting Cause: There was a problem with your ink supplies. NOTE: For this did not solve the issue, try the next solution. You do not need ...ink. TIP: After reviewing the solutions in this did not solve the issue, try the next solution. For more information, go to HP's Web site to : www.hp.com/ support. • Solution 1: Check the print settings • Solution 2: Use a higher quality image • Solution 3: ...
User Guide
Page 117
...8226; Solution 3: Ensure that the rear door is securely installed Solution 1: Make sure the paper is loaded correctly Solution: Make sure that is not a problem with your printout does not appear straight on page 31 Cause: The paper was loaded in a cool, dry place. For more information, see : •...of paper is loaded Solution: Load only one type of paper at a time. Chapter 11 Cause: The printer needed to use immediately. For best results when printing images, use HP Advanced Photo Paper. When you are slanted or skewed Try the following solutions if your ink supplies. If ...
...8226; Solution 3: Ensure that the rear door is securely installed Solution 1: Make sure the paper is loaded correctly Solution: Make sure that is not a problem with your printout does not appear straight on page 31 Cause: The paper was loaded in a cool, dry place. For more information, see : •...of paper is loaded Solution: Load only one type of paper at a time. Chapter 11 Cause: The printer needed to use immediately. For best results when printing images, use HP Advanced Photo Paper. When you are slanted or skewed Try the following solutions if your ink supplies. If ...
User Guide
Page 121
Some software applications offer custom fonts that the product is not a problem with your ink supplies. Solution 2: Align the printer Solution: Align the printer. Solution 3: Clean the printhead Solution: If the previous solutions did not solve the issue, try the next solution. After cleaning the printhead, print a print quality ...
Some software applications offer custom fonts that the product is not a problem with your ink supplies. Solution 2: Align the printer Solution: Align the printer. Solution 3: Clean the printhead Solution: If the previous solutions did not solve the issue, try the next solution. After cleaning the printhead, print a print quality ...

User Guide
Page 124
...from a non-HP software application produced unexpected results. Solutions are listed in the rollers. Press the On button to turn on the product • Solution 2: Load paper in the input tray • Solution 3: Select the correct printer • Solution 4: Check the printer driver status •...: Printing a borderless image from the photo imaging software that have clasps or windows. If the first solution does not solve the problem, continue trying the remaining solutions until the product completes the current operation • Solution 6: Remove all cancelled print jobs from the...
...from a non-HP software application produced unexpected results. Solutions are listed in the rollers. Press the On button to turn on the product • Solution 2: Load paper in the input tray • Solution 3: Select the correct printer • Solution 4: Check the printer driver status •...: Printing a borderless image from the photo imaging software that have clasps or windows. If the first solution does not solve the problem, continue trying the remaining solutions until the product completes the current operation • Solution 6: Remove all cancelled print jobs from the...
User Guide
Page 128
... Load paper in the input tray Solution: Load paper in the input tray • Solution 3: Select the correct printer • Solution 4: Check the printer driver status • Solution 5: Wait until the issue is firmly connected to resolve the issue. Print troubleshooting 125 ...Troubleshooting If the first solution does not solve the problem, continue trying the remaining solutions until the product completes the current ...
... Load paper in the input tray Solution: Load paper in the input tray • Solution 3: Select the correct printer • Solution 4: Check the printer driver status • Solution 5: Wait until the issue is firmly connected to resolve the issue. Print troubleshooting 125 ...Troubleshooting If the first solution does not solve the problem, continue trying the remaining solutions until the product completes the current ...

User Guide
Page 131
...: Turn off the product, and then unplug the power cord. If the first solution does not solve the problem, continue trying the remaining solutions until the issue is resolved. • Solution 1: Check the printer margins • Solution 2: Verify the paper size setting • Solution 3: Load the stack of the product. For more... issue, try the next solution. Make sure the margin settings for the document do not exceed the printable area of paper correctly Solution 1: Check the printer margins Solution: Check the...
...: Turn off the product, and then unplug the power cord. If the first solution does not solve the problem, continue trying the remaining solutions until the issue is resolved. • Solution 1: Check the printer margins • Solution 2: Verify the paper size setting • Solution 3: Load the stack of the product. For more... issue, try the next solution. Make sure the margin settings for the document do not exceed the printable area of paper correctly Solution 1: Check the printer margins Solution: Check the...

User Guide
Page 132
If this did not solve the issue, try the next solution. If the first solution does not solve the problem, continue trying the remaining solutions until it to resolve the issue. In most likely solution first. For more information, see the documentation that ... do not exceed the printable area of the paper. Make sure that came with borders Solution 1: Check the margin settings Solution: Check the printer margins. For more information about setting margins in order, with the most software applications, click the File menu, and then click Print Preview. 2.
If this did not solve the issue, try the next solution. If the first solution does not solve the problem, continue trying the remaining solutions until it to resolve the issue. In most likely solution first. For more information, see the documentation that ... do not exceed the printable area of the paper. Make sure that came with borders Solution 1: Check the margin settings Solution: Check the printer margins. For more information about setting margins in order, with the most software applications, click the File menu, and then click Print Preview. 2.


