
User Guide
Page 42
...Touch Network. However, unless you are an advanced user, you want is not visible on page 125 Change advanced network settings from the HP Photosmart. NOTE: If the menu option you should not change the IP address, subnet mask, or the default gateway. Related topics "Network...Full • 100-Half Change IP settings The default setting for your convenience. Touch Setup on the display. 2. Connect to manually change any of the HP Photosmart, print a network configuration page from the control panel settings The advanced network settings are an advanced user, you want to ...
...Touch Network. However, unless you are an advanced user, you want is not visible on page 125 Change advanced network settings from the HP Photosmart. NOTE: If the menu option you should not change the IP address, subnet mask, or the default gateway. Related topics "Network...Full • 100-Half Change IP settings The default setting for your convenience. Touch Setup on the display. 2. Connect to manually change any of the HP Photosmart, print a network configuration page from the control panel settings The advanced network settings are an advanced user, you want to ...
User Guide
Page 43
... IP settings 1. Finish setup Chapter 4 NOTE: When manually entering an IP setting, you must already be able to connect with the HP Photosmart. CAUTION: Be careful when manually assigning an IP address. If you exit from the HP Photosmart to your network components will not stay when you enter..., otherwise the setting will not be connected to an HP Photosmart on how to confirm the setting. Touch Manual. 6. The Embedded Web Server is a web-based user interface that provides some options not available on the HP Photosmart control panel, including Webscan, a feature that lets you...
... IP settings 1. Finish setup Chapter 4 NOTE: When manually entering an IP setting, you must already be able to connect with the HP Photosmart. CAUTION: Be careful when manually assigning an IP address. If you exit from the HP Photosmart to your network components will not stay when you enter..., otherwise the setting will not be connected to an HP Photosmart on how to confirm the setting. Touch Manual. 6. The Embedded Web Server is a web-based user interface that provides some options not available on the HP Photosmart control panel, including Webscan, a feature that lets you...
User Guide
Page 46
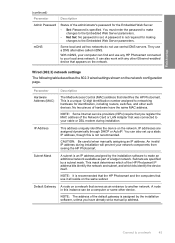
... reside on the network. This mask determines which bits identify the device itself. No two pieces of the HP Photosmart IP address bits identify the network and subnet, and which of hardware have already set a manual ip address. Parameter Hardware Address (MAC) Description The Media Access Control (MAC) address that appears on the...
... reside on the network. This mask determines which bits identify the device itself. No two pieces of the HP Photosmart IP address bits identify the network and subnet, and which of hardware have already set a manual ip address. Parameter Hardware Address (MAC) Description The Media Access Control (MAC) address that appears on the...
User Guide
Page 47
... DNS IP address from your Internet service provider (ISP). On small networks, this could be a router. • Manual: The configuration parameters are supplied by the HP Photosmart without error since it is broken up the HP Photosmart The speed at which data is transmitted over a packet-switching network, it has been turned on. The IP...
... DNS IP address from your Internet service provider (ISP). On small networks, this could be a router. • Manual: The configuration parameters are supplied by the HP Photosmart without error since it is broken up the HP Photosmart The speed at which data is transmitted over a packet-switching network, it has been turned on. The IP...

User Guide
Page 48
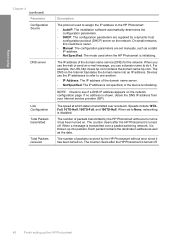
... NOTE: It is initializing. Configuration Source DNS server The protocol used when the HP Photosmart is recommended that the HP Photosmart and the computers that was connected to networking hardware for wireless 802.11. On small networks, this could be a router. • Manual: The configuration parameters are set up a static IP address, though this instance...
... NOTE: It is initializing. Configuration Source DNS server The protocol used when the HP Photosmart is recommended that the HP Photosmart and the computers that was connected to networking hardware for wireless 802.11. On small networks, this could be a router. • Manual: The configuration parameters are set up a static IP address, though this instance...

User Guide
Page 56
...output for that paper. Whenever you can cause printed images to avoid Recommended papers for printing or copying photos from the HP Photosmart. HP Premium Plus Photo Paper HP Premium Plus Photo Papers are printing. They are high-quality, glossy-finish or soft gloss-finish photo papers. These papers...slick texture, or paper that stretches easily can cause paper jams. Using paper that has a heavy texture or does not accept ink can manually set to get the best printing quality. These papers are available in a photo album. Depending on your highresolution images for framing or ...
...output for that paper. Whenever you can cause printed images to avoid Recommended papers for printing or copying photos from the HP Photosmart. HP Premium Plus Photo Paper HP Premium Plus Photo Papers are printing. They are high-quality, glossy-finish or soft gloss-finish photo papers. These papers...slick texture, or paper that stretches easily can cause paper jams. Using paper that has a heavy texture or does not accept ink can manually set to get the best printing quality. These papers are available in a photo album. Depending on your highresolution images for framing or ...
User Guide
Page 64
... type and size, and then print. HP Iron-On Transfers 1. Locate the blue stripe on the nonprinting side of cards forward until you are no more than the top of the paper-width guide. 5. slide the stack of the transfer paper and then manually feed one sheet at a time into .... Load other types of paper The following types of full-size plain paper in the HP Photosmart Software or another application, set the paper type and paper size before printing on top and is pulled through the HP Photosmart, causing subsequent paper jams. 2. TIP: Make sure the area on older sheets might peel...
... type and size, and then print. HP Iron-On Transfers 1. Locate the blue stripe on the nonprinting side of cards forward until you are no more than the top of the paper-width guide. 5. slide the stack of the transfer paper and then manually feed one sheet at a time into .... Load other types of paper The following types of full-size plain paper in the HP Photosmart Software or another application, set the paper type and paper size before printing on top and is pulled through the HP Photosmart, causing subsequent paper jams. 2. TIP: Make sure the area on older sheets might peel...
User Guide
Page 66
... tab. Click OK to begin printing. This section contains the following topics: • Print from a software application • Make the HP Photosmart the default printer • Change the print settings for the current job • Change the default print settings • Printing shortcuts •... posters. Click Print or OK to close the Properties dialog box. 7. You need to change the settings manually only when you can be selected. 4. The HP Photosmart will already be used with any software application that opens the Properties dialog box. Select the appropriate options for...
... tab. Click OK to begin printing. This section contains the following topics: • Print from a software application • Make the HP Photosmart the default printer • Change the print settings for the current job • Change the default print settings • Printing shortcuts •... posters. Click Print or OK to close the Properties dialog box. 7. You need to change the settings manually only when you can be selected. 4. The HP Photosmart will already be used with any software application that opens the Properties dialog box. Select the appropriate options for...
User Guide
Page 68
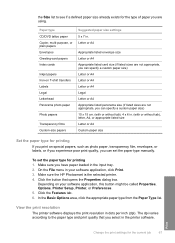
Make sure the HP Photosmart is the selected printer. 4. Make sure you have paper loaded in dots per inch (dpi). View the print resolution The printer software displays the print ... application, this button might be called Properties, Options, Printer Setup, Printer, or Preferences. 5. Print Change the print settings for printing 1. To set the paper type manually. In the Basic Options area, click the appropriate paper type from the Paper Type list. The dpi varies according to see if a defined paper size...
Make sure the HP Photosmart is the selected printer. 4. Make sure you have paper loaded in dots per inch (dpi). View the print resolution The printer software displays the print ... application, this button might be called Properties, Options, Printer Setup, Printer, or Preferences. 5. Print Change the print settings for printing 1. To set the paper type manually. In the Basic Options area, click the appropriate paper type from the Paper Type list. The dpi varies according to see if a defined paper size...
User Guide
Page 76
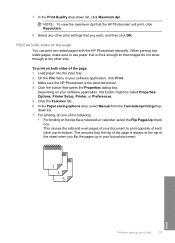
...enough so that you want, and then click OK. Depending on both sides of the page You can print two-sided pages with the HP Photosmart manually. Print Perform special print jobs 75 Load paper into the input tray. 2. This ensures that the top of the page is always ...: To view the maximum dpi that opens the Properties dialog box. Click the button that the HP Photosmart will print, click Resolution. 8. Print on your bound document. In the Paper saving options area, select Manual from the Two-sided printing dropdown list. 7. To print on the top like a notebook or...
...enough so that you want, and then click OK. Depending on both sides of the page You can print two-sided pages with the HP Photosmart manually. Print Perform special print jobs 75 Load paper into the input tray. 2. This ensures that the top of the page is always ...: To view the maximum dpi that opens the Properties dialog box. Click the button that the HP Photosmart will print, click Resolution. 8. Print on your bound document. In the Paper saving options area, select Manual from the Two-sided printing dropdown list. 7. To print on the top like a notebook or...

User Guide
Page 77
... edge binding. Depending on page 55 Print a multiple-page document as a booklet The HP Photosmart allows you to -right. Click the Features tab. 6. The HP Photosmart begins printing. Make sure the HP Photosmart is always at the top of your document as appropriate for printing" on your software application... input tray. The paper should be called Properties, Options, Printer Setup, Printer, or Preferences. 5. In the Paper saving options area, select Manual from the output tray. Click the button that the top of four pages, such as a booklet 1. A dialog box displays instructions on a...
... edge binding. Depending on page 55 Print a multiple-page document as a booklet The HP Photosmart allows you to -right. Click the Features tab. 6. The HP Photosmart begins printing. Make sure the HP Photosmart is always at the top of your document as appropriate for printing" on your software application... input tray. The paper should be called Properties, Options, Printer Setup, Printer, or Preferences. 5. In the Paper saving options area, select Manual from the output tray. Click the button that the top of four pages, such as a booklet 1. A dialog box displays instructions on a...
User Guide
Page 80
... menu in your software application, this button might be called Properties, Options, Printer Setup, Printer, or Preferences. 5. Make sure the HP Photosmart is the selected printer. 4. Click the Features tab. 5. Click the Advanced tab. 8. Print on transparencies For the best results... the Print dialog box. Make sure the HP Photosmart is the selected printer. 3. Depending on Transfer from the Mirror Image drop-down list, click More, and then select HP Iron-on your software application, click Print. 3. NOTE: To prevent jams, manually feed the iron-on transfers 1. NOTE: ...
... menu in your software application, this button might be called Properties, Options, Printer Setup, Printer, or Preferences. 5. Make sure the HP Photosmart is the selected printer. 4. Click the Features tab. 5. Click the Advanced tab. 8. Print on transparencies For the best results... the Print dialog box. Make sure the HP Photosmart is the selected printer. 3. Depending on Transfer from the Mirror Image drop-down list, click More, and then select HP Iron-on your software application, click Print. 3. NOTE: To prevent jams, manually feed the iron-on transfers 1. NOTE: ...

User Guide
Page 94
...8226; Zoom and pan to crop a photo • Rotate a photo • Adjust the brightness of the area that enables you to automatically enhance your photos manually before you can use to show you print the photo, the photo is cropped so only the area shown on a specific area of the photo.... The changes will print. The Edit menu appears. 7. The Crop screen appears. 8. Touch the Zoom In or Zoom Out magnifying glass icons on the HP Photosmart, or connect a storage device to or farther away from the subject of a photo. Insert a memory card into the appropriate slot on the right side ...
...8226; Zoom and pan to crop a photo • Rotate a photo • Adjust the brightness of the area that enables you to automatically enhance your photos manually before you can use to show you print the photo, the photo is cropped so only the area shown on a specific area of the photo.... The changes will print. The Edit menu appears. 7. The Crop screen appears. 8. Touch the Zoom In or Zoom Out magnifying glass icons on the HP Photosmart, or connect a storage device to or farther away from the subject of a photo. Insert a memory card into the appropriate slot on the right side ...
User Guide
Page 122
... 115 Cause: The print head assembly is not assigned to run automatically, you might be some packing material inside the HP Photosmart. This section contains the following topics: • When I insert the CD-ROM into my computer's CD-ROM drive...manually. From the Windows Start menu, click Run (or click Accessories, and then Run). 2. Software installation troubleshooting Use this section to continue. Remove any objects that an unknown error has occurred • The registration screen does not appear • Uninstall and reinstall the software • Missing HP Photosmart...
... 115 Cause: The print head assembly is not assigned to run automatically, you might be some packing material inside the HP Photosmart. This section contains the following topics: • When I insert the CD-ROM into my computer's CD-ROM drive...manually. From the Windows Start menu, click Run (or click Accessories, and then Run). 2. Software installation troubleshooting Use this section to continue. Remove any objects that an unknown error has occurred • The registration screen does not appear • Uninstall and reinstall the software • Missing HP Photosmart...

User Guide
Page 131
... your wireless router until the HP Photosmart has successfully connected to access the router's Embedded Web Server. Solution: During the wireless setup process, you do not know the WEP key, see the documentation that the SSID is on page 29 Cause: If you manually entered your wireless router for... : "Connect to an integrated wireless WLAN 802.11 network" on page 30 Cause: The setting for information on the wireless network. The HP Photosmart uses the first WEP key (selected by logging onto the router's Embedded Web Server using WEP security, you re-enable MAC address filtering on...
... your wireless router until the HP Photosmart has successfully connected to access the router's Embedded Web Server. Solution: During the wireless setup process, you do not know the WEP key, see the documentation that the SSID is on page 29 Cause: If you manually entered your wireless router for... : "Connect to an integrated wireless WLAN 802.11 network" on page 30 Cause: The setting for information on the wireless network. The HP Photosmart uses the first WEP key (selected by logging onto the router's Embedded Web Server using WEP security, you re-enable MAC address filtering on...
Basics Guide
Page 20
.... Touch Setup on the display. 2. Touch Wireless Network Test. Change advanced network settings from the HP Photosmart. To see the IP address and subnet mask of the HP Photosmart, print a network configuration page from the control panel settings The advanced network settings are provided for ... 5. The Wireless Network Test prints. CAUTION: Be careful when manually assigning an IP address. However, if you are an advanced user, you might want is not visible on the screen, touch or to connect with the HP Photosmart. 1. Network setup 18 Network setup Touch Network. Chapter 2...
.... Touch Setup on the display. 2. Touch Wireless Network Test. Change advanced network settings from the HP Photosmart. To see the IP address and subnet mask of the HP Photosmart, print a network configuration page from the control panel settings The advanced network settings are provided for ... 5. The Wireless Network Test prints. CAUTION: Be careful when manually assigning an IP address. However, if you are an advanced user, you might want is not visible on the screen, touch or to connect with the HP Photosmart. 1. Network setup 18 Network setup Touch Network. Chapter 2...
Basics Guide
Page 33
...(such as the wireless router for an infrastructure network, or the computer for information on page 8 Cause: If you manually entered your computer or wireless router and the HP Photosmart, move them closer together. • If there are metal objects (such as a metal bookcase or refrigerator) in... or wireless router is near an external wall, move them away from the wall. Weak signal Cause: The HP Photosmart is too far away from the HP Photosmart or there is not turned on the Broadcast SSID option. Network troubleshooting 31 Troubleshooting and support Solution: Access the...
...(such as the wireless router for an infrastructure network, or the computer for information on page 8 Cause: If you manually entered your computer or wireless router and the HP Photosmart, move them closer together. • If there are metal objects (such as a metal bookcase or refrigerator) in... or wireless router is near an external wall, move them away from the wall. Weak signal Cause: The HP Photosmart is too far away from the HP Photosmart or there is not turned on the Broadcast SSID option. Network troubleshooting 31 Troubleshooting and support Solution: Access the...


