
Basic Guide
Page 29
...Windows system tray. CAUTION: Do not connect the USB cable to the computer until after you have already installed it). 3. Make sure to remove them properly using a USB cable before the software installation screen prompts you to do so, you must follow these steps: Troubleshooting common setup issues 1. Select HP Photosmart All-In-One...CD-ROM drive and double-click it . 5. On the Windows taskbar, click Start, Settings, Control Panel (or just Control Panel). 2. NOTE: If you no longer have the installation CD, you can download the software from the computer. 2. To verify that came ...
...Windows system tray. CAUTION: Do not connect the USB cable to the computer until after you have already installed it). 3. Make sure to remove them properly using a USB cable before the software installation screen prompts you to do so, you must follow these steps: Troubleshooting common setup issues 1. Select HP Photosmart All-In-One...CD-ROM drive and double-click it . 5. On the Windows taskbar, click Start, Settings, Control Panel (or just Control Panel). 2. NOTE: If you no longer have the installation CD, you can download the software from the computer. 2. To verify that came ...
User Guide
Page 150
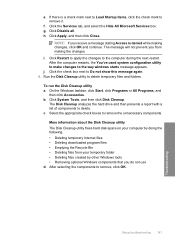
...: • Deleting temporary Internet files • Deleting downloaded program files • Emptying the Recycle Bin • Deleting files from your temporary folder • Deleting files created by other Windows tools • Removing optional Windows components that you from making changes, click OK and continue...Load Startup Items, click the check mark to Do not show this message again. 4. j. c. After selecting the components to the way windows starts message appears. g. The message will not prevent you do not use d. Click Apply, and then click Close. After the computer ...
...: • Deleting temporary Internet files • Deleting downloaded program files • Emptying the Recycle Bin • Deleting files from your temporary folder • Deleting files created by other Windows tools • Removing optional Windows components that you from making changes, click OK and continue...Load Startup Items, click the check mark to Do not show this message again. 4. j. c. After selecting the components to the way windows starts message appears. g. The message will not prevent you do not use d. Click Apply, and then click Close. After the computer ...
User Guide
Page 152
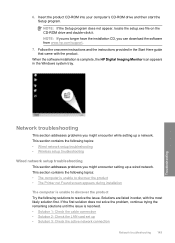
... Wired network setup troubleshooting • Wireless setup troubleshooting Wired network setup troubleshooting This section addresses problems you can download the software from www.hp.com/support. 7. Network troubleshooting This section addresses problems you might encounter setting up a network. This section ...The computer is unable to discover the product • The Printer not Found screen appears during installation The computer is complete, the HP Digital Imaging Monitor icon appears in the Windows system tray. Follow the onscreen instructions and the instructions provided in...
... Wired network setup troubleshooting • Wireless setup troubleshooting Wired network setup troubleshooting This section addresses problems you can download the software from www.hp.com/support. 7. Network troubleshooting This section addresses problems you might encounter setting up a network. This section ...The computer is unable to discover the product • The Printer not Found screen appears during installation The computer is complete, the HP Digital Imaging Monitor icon appears in the Windows system tray. Follow the onscreen instructions and the instructions provided in...
User Guide
Page 213
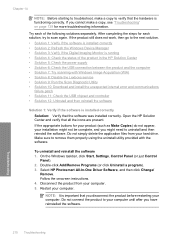
..., try to remove them properly using the uninstall utility provided with Windows Image Acquisition (WIA) • Solution 8: Disable the Lexbces service • Solution 9: Run the Scan Diagnostic Utility • Solution 10: Download and install the unexpected internal error and communications failure patch •... computer • Solution 7: Try scanning with the software. Follow the onscreen instructions. 4. Select HP Photosmart All-In-One Driver Software, and then click Change/ Remove. Open the HP Solution Center and verify that all the icons are present. Make sure to scan again. To ...
..., try to remove them properly using the uninstall utility provided with Windows Image Acquisition (WIA) • Solution 8: Disable the Lexbces service • Solution 9: Run the Scan Diagnostic Utility • Solution 10: Download and install the unexpected internal error and communications failure patch •... computer • Solution 7: Try scanning with the software. Follow the onscreen instructions. 4. Select HP Photosmart All-In-One Driver Software, and then click Change/ Remove. Open the HP Solution Center and verify that all the icons are present. Make sure to scan again. To ...
User Guide
Page 214
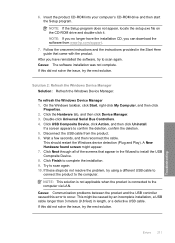
... via LAN. Insert the product CD-ROM into your computer's CD-ROM drive and then start the Setup program. After you can download the software from the product. 6. If these steps do not resolve the problem, try the next solution. If this error to ...1. Solution 2: Refresh the Windows Device Manager Solution: Refresh the Windows Device Manager. Follow the onscreen instructions and the instructions provided in the Wizard to complete the installation. 9. 6. Click USB Composite Device, click Action, and then click Uninstall. Disconnect the USB cable from www.hp.com/support. 7. NOTE...
... via LAN. Insert the product CD-ROM into your computer's CD-ROM drive and then start the Setup program. After you can download the software from the product. 6. If these steps do not resolve the problem, try the next solution. If this error to ...1. Solution 2: Refresh the Windows Device Manager Solution: Refresh the Windows Device Manager. Follow the onscreen instructions and the instructions provided in the Wizard to complete the installation. 9. 6. Click USB Composite Device, click Action, and then click Uninstall. Disconnect the USB cable from www.hp.com/support. 7. NOTE...
User Guide
Page 226
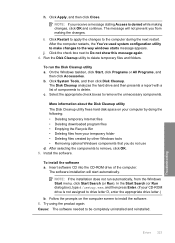
... you do not use d. To run automatically, from your computer by other Windows tools • Removing optional Windows components that you receive a message stating Access is not assigned to install the software. 6. On the Windows taskbar, click Start, click Programs or All Programs, and then click Accessories....your temporary folder • Deleting files created by doing the following: • Deleting temporary Internet files • Deleting downloaded program files • Emptying the Recycle Bin • Deleting files from the Windows Start menu, click Start Search (or Run). h.
... you do not use d. To run automatically, from your computer by other Windows tools • Removing optional Windows components that you receive a message stating Access is not assigned to install the software. 6. On the Windows taskbar, click Start, click Programs or All Programs, and then click Accessories....your temporary folder • Deleting files created by doing the following: • Deleting temporary Internet files • Deleting downloaded program files • Emptying the Recycle Bin • Deleting files from the Windows Start menu, click Start Search (or Run). h.


