HP Pavilion zd8000 Notebook PC - Maintenance and Service Guide
Page 1
troubleshooting notebook problems; and performing notebook disassembly procedures. Maintenance and Service Guide HP Pavilion zd8000 Notebook PC Document Part Number: 372712-002 February 2008 This guide is a troubleshooting reference used for maintaining and servicing the notebook. It provides comprehensive information on identifying notebook features, components, and spare parts;
troubleshooting notebook problems; and performing notebook disassembly procedures. Maintenance and Service Guide HP Pavilion zd8000 Notebook PC Document Part Number: 372712-002 February 2008 This guide is a troubleshooting reference used for maintaining and servicing the notebook. It provides comprehensive information on identifying notebook features, components, and spare parts;
HP Pavilion zd8000 Notebook PC - Maintenance and Service Guide
Page 2
... herein is a trademark of Microsoft Corporation. HP shall not be construed as constituting an additional warranty. Maintenance and Service Guide HP Pavilion zd8000 Notebook PC Second Edition: February 2008 First Edition: January 2005 Document Part Number: 372712-002 © Copyright 2005-2008 Hewlett-Packard Development Company, L.P. Nothing herein should be liable for HP products and services are set forth in the United States and...
... herein is a trademark of Microsoft Corporation. HP shall not be construed as constituting an additional warranty. Maintenance and Service Guide HP Pavilion zd8000 Notebook PC Second Edition: February 2008 First Edition: January 2005 Document Part Number: 372712-002 © Copyright 2005-2008 Hewlett-Packard Development Company, L.P. Nothing herein should be liable for HP products and services are set forth in the United States and...
HP Pavilion zd8000 Notebook PC - Maintenance and Service Guide
Page 5
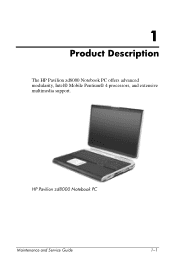
HP Pavilion zd8000 Notebook PC Maintenance and Service Guide 1-1 1 Product Description The HP Pavilion zd8000 Notebook PC offers advanced modularity, Intel® Mobile Pentium® 4 processors, and extensive multimedia support.
HP Pavilion zd8000 Notebook PC Maintenance and Service Guide 1-1 1 Product Description The HP Pavilion zd8000 Notebook PC offers advanced modularity, Intel® Mobile Pentium® 4 processors, and extensive multimedia support.
HP Pavilion zd8000 Notebook PC - Maintenance and Service Guide
Page 8
...). 2. Replace the RTC battery and reassemble the notebook. 5. All passwords and all CMOS settings have been cleared. 1.3 Power Management The notebook comes with power management features that extend battery operating time and conserve power. These steps also clear CMOS: 1. Prepare the notebook for disassembly (refer to Section 5.16, "System Board," for setting the level of performance ■ Battery calibration ■ Lid switch standby/resume ■ Power/standby button ■ Advanced Configuration and Power Management (ACPM) compliance 1-4 Maintenance and Service Guide
...). 2. Replace the RTC battery and reassemble the notebook. 5. All passwords and all CMOS settings have been cleared. 1.3 Power Management The notebook comes with power management features that extend battery operating time and conserve power. These steps also clear CMOS: 1. Prepare the notebook for disassembly (refer to Section 5.16, "System Board," for setting the level of performance ■ Battery calibration ■ Lid switch standby/resume ■ Power/standby button ■ Advanced Configuration and Power Management (ACPM) compliance 1-4 Maintenance and Service Guide
HP Pavilion zd8000 Notebook PC - Maintenance and Service Guide
Page 90
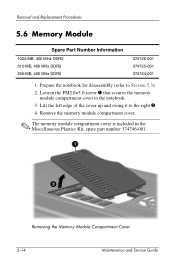
Remove the memory module compartment cover. ✎ The memory module compartment cover is included in the Miscellaneous Plastics Kit, spare part number 374746-001. Removing the Memory Module Compartment Cover 5-14 Maintenance and Service Guide Lift the left edge of the cover up and swing it to the notebook. 3. Loosen the PM2.0×5.0 screw 1 that secures the memory module compartment cover to the right 2. 4. Removal and Replacement Procedures 5.6 Memory Module Spare Part Number Information 1024-MB, 400 MHz...
Remove the memory module compartment cover. ✎ The memory module compartment cover is included in the Miscellaneous Plastics Kit, spare part number 374746-001. Removing the Memory Module Compartment Cover 5-14 Maintenance and Service Guide Lift the left edge of the cover up and swing it to the notebook. 3. Loosen the PM2.0×5.0 screw 1 that secures the memory module compartment cover to the right 2. 4. Removal and Replacement Procedures 5.6 Memory Module Spare Part Number Information 1024-MB, 400 MHz...
HP Pavilion zd8000 Notebook PC - Maintenance and Service Guide
Page 188
...15 interrupts 6-13 memory map 6-18 notebook 6-1 static shielding materials 4-8 S-Video-out jack location 1-9 pin assignments A-2 switch cover removal 5-18 spare part numbers 3-3, 3-19, 3-20, 5-18 system board removal 5-40 spare part numbers 3-5, 5-40 system memory map 6-18 T tools required 4-1 top cover removal 5-30 spare part number 3-3, 3-18, 5-30 TouchPad 1-15 TouchPad button 1-15 TouchPad left/right buttons 1-15 TouchPad light 1-15 TouchPad scroll zone 1-15 transporting precautions 4-5 troubleshooting audio 2-21 Computer Setup 2-1 expansion base 2-14 Index-6 Maintenance and Service Guide
...15 interrupts 6-13 memory map 6-18 notebook 6-1 static shielding materials 4-8 S-Video-out jack location 1-9 pin assignments A-2 switch cover removal 5-18 spare part numbers 3-3, 3-19, 3-20, 5-18 system board removal 5-40 spare part numbers 3-5, 5-40 system memory map 6-18 T tools required 4-1 top cover removal 5-30 spare part number 3-3, 3-18, 5-30 TouchPad 1-15 TouchPad button 1-15 TouchPad left/right buttons 1-15 TouchPad light 1-15 TouchPad scroll zone 1-15 transporting precautions 4-5 troubleshooting audio 2-21 Computer Setup 2-1 expansion base 2-14 Index-6 Maintenance and Service Guide
HP Dual TV Tuner/Digital Video Recorder - Hardware Setup
Page 8
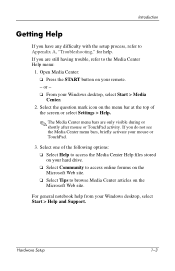
... Tips to browse Media Center articles on your mouse or TouchPad. 3. For general notebook help . Hardware Setup 1-3 Introduction Getting Help If you have any difficulty with the setup process, refer to Appendix A, "Troubleshooting," for help from your Windows desktop, select Start > Media Center. 2. If you do not see the Media Center menu bars, briefly activate your remote. - Open Media Center: ❏ Press the START button on the Microsoft...
... Tips to browse Media Center articles on your mouse or TouchPad. 3. For general notebook help . Hardware Setup 1-3 Introduction Getting Help If you have any difficulty with the setup process, refer to Appendix A, "Troubleshooting," for help from your Windows desktop, select Start > Media Center. 2. If you do not see the Media Center menu bars, briefly activate your remote. - Open Media Center: ❏ Press the START button on the Microsoft...
Getting Started - Enhanced for Accessibility
Page 29
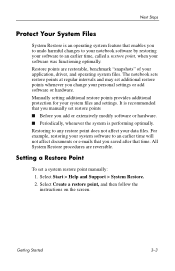
Getting Started 3-3 Select Create a restore point, and then follow the instructions on the screen. Restore points are reversible. Manually setting additional restore points provides additional protection for your personal settings or add software or hardware. All System Restore procedures are restorable, benchmark "snapshots" of your software was functioning optimally. The notebook sets restore points at regular intervals and may set additional restore points whenever you saved after that time. It is recommended...
Getting Started 3-3 Select Create a restore point, and then follow the instructions on the screen. Restore points are reversible. Manually setting additional restore points provides additional protection for your personal settings or add software or hardware. All System Restore procedures are restorable, benchmark "snapshots" of your software was functioning optimally. The notebook sets restore points at regular intervals and may set additional restore points whenever you saved after that time. It is recommended...
Getting Started - Enhanced for Accessibility
Page 36
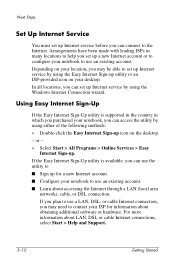
... can set up a new Internet account or to configure your ISP for a new Internet account. ■ Configure your notebook, you may be able to set up . If the Easy Internet Sign-Up utility is supported in the country in many locations to use an existing account. For more information about LAN, DSL or cable Internet connections, select Start > Help and Support. 3-10 Getting Started In all locations, you set up Internet service by using either of...
... can set up a new Internet account or to configure your ISP for a new Internet account. ■ Configure your notebook, you may be able to set up . If the Easy Internet Sign-Up utility is supported in the country in many locations to use an existing account. For more information about LAN, DSL or cable Internet connections, select Start > Help and Support. 3-10 Getting Started In all locations, you set up Internet service by using either of...
Hardware Software Guide
Page 8
...Modem 8-2 Network 8-2 Connecting a Network Cable 8-3 Turning a Network Connection Off and On 8-3 Accessing the Network at Startup 8-3 Wireless Function (Select Models Only 8-4 802.11 Wireless Technology 8-5 Bluetooth Wireless Technology 8-5 Turning On the Wireless Function 8-6 Setting Up Your Own Wireless Network or Connecting to an Existing Wireless Network . . . . 8-6 Using Wireless Security Features 8-7 WLAN Software 8-7 9 Software Updates, Restorations and Utilities Software Updates 9-1 Preparing for Software Updates 9-2 Downloading and Installing an Update 9-4 System Restore...
...Modem 8-2 Network 8-2 Connecting a Network Cable 8-3 Turning a Network Connection Off and On 8-3 Accessing the Network at Startup 8-3 Wireless Function (Select Models Only 8-4 802.11 Wireless Technology 8-5 Bluetooth Wireless Technology 8-5 Turning On the Wireless Function 8-6 Setting Up Your Own Wireless Network or Connecting to an Existing Wireless Network . . . . 8-6 Using Wireless Security Features 8-7 WLAN Software 8-7 9 Software Updates, Restorations and Utilities Software Updates 9-1 Preparing for Software Updates 9-2 Downloading and Installing an Update 9-4 System Restore...
Hardware Software Guide
Page 51
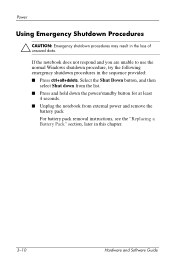
...; Unplug the notebook from external power and remove the battery pack For battery pack removal instructions, see the "Replacing a Battery Pack" section, later in the sequence provided: ■ Press ctrl+alt+delete. If the notebook does not respond and you are unable to use the normal Windows shutdown procedure, try the following emergency shutdown procedures in this chapter. 3-10 Hardware and Software Guide Power Using Emergency Shutdown Procedures...
...; Unplug the notebook from external power and remove the battery pack For battery pack removal instructions, see the "Replacing a Battery Pack" section, later in the sequence provided: ■ Press ctrl+alt+delete. If the notebook does not respond and you are unable to use the normal Windows shutdown procedure, try the following emergency shutdown procedures in this chapter. 3-10 Hardware and Software Guide Power Using Emergency Shutdown Procedures...
Hardware Software Guide
Page 95
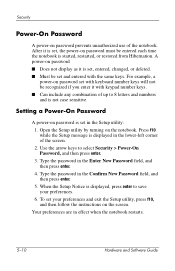
... Password A power-on password set with keyboard number keys will not be recognized if you enter it is set, entered, changed, or deleted. ■ Must be entered each time the notebook is started, restarted, or restored from Hibernation. Type the password in effect when the notebook restarts. 5-10 Hardware and Software Guide Use the arrow keys to save your preferences and exit the Setup utility, press f10, and then follow the instructions on the notebook. Open the Setup utility by turning...
... Password A power-on password set with keyboard number keys will not be recognized if you enter it is set, entered, changed, or deleted. ■ Must be entered each time the notebook is started, restarted, or restored from Hibernation. Type the password in effect when the notebook restarts. 5-10 Hardware and Software Guide Use the arrow keys to save your preferences and exit the Setup utility, press f10, and then follow the instructions on the notebook. Open the Setup utility by turning...

Hardware Software Guide
Page 98
... information about coordinating HP passwords with Windows passwords, see the "Coordinating HP and Windows Passwords" section, earlier in the Setup utility. Hardware and Software Guide 5-13 The HP administrator Setup password ■ Is not interchangeable with a Windows administrator password. For example, an HP administrator Setup password set and entered with the same keys. After an HP administrator Setup password is set, it must be entered to 8 letters and numbers and is set, entered, changed, or deleted. ■ Must be set with keyboard number keys will not...
... information about coordinating HP passwords with Windows passwords, see the "Coordinating HP and Windows Passwords" section, earlier in the Setup utility. Hardware and Software Guide 5-13 The HP administrator Setup password ■ Is not interchangeable with a Windows administrator password. For example, an HP administrator Setup password set and entered with the same keys. After an HP administrator Setup password is set, it must be entered to 8 letters and numbers and is set, entered, changed, or deleted. ■ Must be set with keyboard number keys will not...
Hardware Software Guide
Page 124
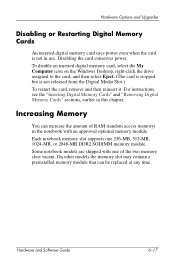
For instructions, see the "Inserting Digital Memory Cards" and "Removing Digital Memory Cards" sections, earlier in use. Some notebook models are shipped with an approved optional memory module. Hardware Options and Upgrades Disabling or Restarting Digital Memory Cards An inserted digital memory card uses power even when the card is not released from the Digital Media Slot.) To restart the card, remove and then reinsert it. To disable an inserted digital memory card, select the My Computer icon on the Windows Desktop...
For instructions, see the "Inserting Digital Memory Cards" and "Removing Digital Memory Cards" sections, earlier in use. Some notebook models are shipped with an approved optional memory module. Hardware Options and Upgrades Disabling or Restarting Digital Memory Cards An inserted digital memory card uses power even when the card is not released from the Digital Media Slot.) To restart the card, remove and then reinsert it. To disable an inserted digital memory card, select the My Computer icon on the Windows Desktop...
Hardware Software Guide
Page 135
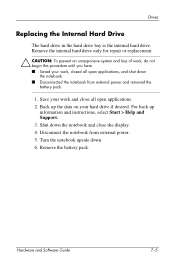
... the notebook. ■ Disconnected the notebook from external power. 5. Turn the notebook upside down the notebook and close all open applications. 2. Back up information and instructions, select Start > Help and Support. 3. Shut down . 6. Hardware and Software Guide 7-5 Save your work , do not begin this procedure until you have ■ Saved your hard drive if desired. Drives Replacing the Internal Hard Drive The hard drive in the hard drive bay is the internal hard drive. Remove the internal hard drive only for repair or replacement. Ä...
... the notebook. ■ Disconnected the notebook from external power. 5. Turn the notebook upside down the notebook and close all open applications. 2. Back up information and instructions, select Start > Help and Support. 3. Shut down . 6. Hardware and Software Guide 7-5 Save your work , do not begin this procedure until you have ■ Saved your hard drive if desired. Drives Replacing the Internal Hard Drive The hard drive in the hard drive bay is the internal hard drive. Remove the internal hard drive only for repair or replacement. Ä...

Hardware Software Guide
Page 145
... SD Memory Card. You can use it with the USB digital drive cable either retracted or extended. Hardware and Software Guide 7-15 You can purchase an SD Memory Card from a diskette drive or flash device connected to a USB port on your notebook model, you can also boot from a computer or electronics retailer. Set startup preferences in the Setup utility. The Setup utility is not a Windows utility and does not support the TouchPad. Depending on your notebook. You can set the notebook to the USB port...
... SD Memory Card. You can use it with the USB digital drive cable either retracted or extended. Hardware and Software Guide 7-15 You can purchase an SD Memory Card from a diskette drive or flash device connected to a USB port on your notebook model, you can also boot from a computer or electronics retailer. Set startup preferences in the Setup utility. The Setup utility is not a Windows utility and does not support the TouchPad. Depending on your notebook. You can set the notebook to the USB port...

Hardware Software Guide
Page 156
... use wireless access points, which also may be referred to as wireless LANs, WLANs, or hotspots) in your home, and in a wireless network composed of Bluetooth wireless technology enabled devices such as notebooks, cellular phones, cameras, headphones, and handhelds. Communications 802.11 Wireless Technology An 802.11 wireless notebook can connect to wireless networks (which can handle a large number of computers and accessories and can separate critical network functions. This quick-to the Internet...
... use wireless access points, which also may be referred to as wireless LANs, WLANs, or hotspots) in your home, and in a wireless network composed of Bluetooth wireless technology enabled devices such as notebooks, cellular phones, cameras, headphones, and handhelds. Communications 802.11 Wireless Technology An 802.11 wireless notebook can connect to wireless networks (which can handle a large number of computers and accessories and can separate critical network functions. This quick-to the Internet...
Hardware Software Guide
Page 159
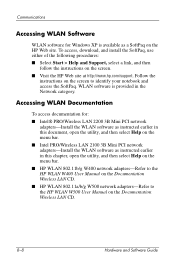
... User Manual on the Documentation Wireless LAN CD. ■ HP WLAN 802.11a/b/g W500 network adapters-Refer to identify your notebook and access the SoftPaq. To access, download, and install the SoftPaq, use either of the following procedures: ■ Select Start > Help and Support, select a link, and then follow the instructions on the screen to the HP WLAN W500 User Manual on the Documentation Wireless LAN CD. 8-8 Hardware and Software Guide Follow the instructions on the screen...
... User Manual on the Documentation Wireless LAN CD. ■ HP WLAN 802.11a/b/g W500 network adapters-Refer to identify your notebook and access the SoftPaq. To access, download, and install the SoftPaq, use either of the following procedures: ■ Select Start > Help and Support, select a link, and then follow the instructions on the screen to the HP WLAN W500 User Manual on the Documentation Wireless LAN CD. 8-8 Hardware and Software Guide Follow the instructions on the screen...
Hardware Software Guide
Page 167
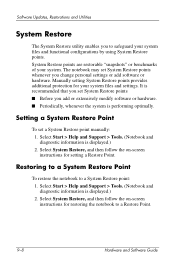
... your system files and settings. It is performing optimally. Setting a System Restore Point To set System Restore points ■ Before you change personal settings or add software or hardware. Select Start > Help and Support > Tools. (Notebook and diagnostic information is displayed.) 2. Select Start > Help and Support > Tools. (Notebook and diagnostic information is displayed.) 2. Software Updates, Restorations and Utilities System Restore The System Restore utility enables you to safeguard your system files and functional configurations by using System Restore points.
... your system files and settings. It is performing optimally. Setting a System Restore Point To set System Restore points ■ Before you change personal settings or add software or hardware. Select Start > Help and Support > Tools. (Notebook and diagnostic information is displayed.) 2. Select Start > Help and Support > Tools. (Notebook and diagnostic information is displayed.) 2. Software Updates, Restorations and Utilities System Restore The System Restore utility enables you to safeguard your system files and functional configurations by using System Restore points.
Hardware Software Guide
Page 182
... specifications A-1 error message, Playback of content from 7-15 See also CDs; See digital memory cards fn key 1-3, 2-4 See also function keys function keys changing Standby function 3-13 identifying 1-3, 2-4 See also fn key H hard drive DriveLock 5-17 hard drive activity light 1-7, 7-4 hard drive bay identifying 1-14 installing hard drive 7-7 replacing hard drive 7-5 hard drive cover 7-6, 7-9 Index-4 Hardware and Software Guide discs; See optical drives DVDs creating with WinDVD 4-16 hotkeys 2-9, 2-10 inserting 7-10 playing 4-12 playing, with WinDVD 4-12 region settings 4-13 removing...
... specifications A-1 error message, Playback of content from 7-15 See also CDs; See digital memory cards fn key 1-3, 2-4 See also function keys function keys changing Standby function 3-13 identifying 1-3, 2-4 See also fn key H hard drive DriveLock 5-17 hard drive activity light 1-7, 7-4 hard drive bay identifying 1-14 installing hard drive 7-7 replacing hard drive 7-5 hard drive cover 7-6, 7-9 Index-4 Hardware and Software Guide discs; See optical drives DVDs creating with WinDVD 4-16 hotkeys 2-9, 2-10 inserting 7-10 playing 4-12 playing, with WinDVD 4-12 region settings 4-13 removing...


