Hardware and Software Guide
Page 5
...3-18 Charging a Battery Pack 3-18 Monitoring the Charge in a Battery Pack 3-19 Managing Low-Battery Conditions 3-21 Calibrating a Battery Pack 3-22 Conserving Battery Pack Power 3-26 Replacing a Battery Pack 3-28 Storing a Battery Pack 3-30 Disposing of a Used Battery Pack 3-30 4 Multimedia Volume Controls 4-1 Internal Speakers 4-3 External Audio Devices 4-4 Using the Audio-In (Microphone) Jack 4-4 Using the Audio-Out (Headphone) Jacks 4-5 External Video Devices 4-6 Connecting an S-Video Device (Select Models Only 4-6 Displaying a Video Image 4-8 Hardware and Software Guide v
...3-18 Charging a Battery Pack 3-18 Monitoring the Charge in a Battery Pack 3-19 Managing Low-Battery Conditions 3-21 Calibrating a Battery Pack 3-22 Conserving Battery Pack Power 3-26 Replacing a Battery Pack 3-28 Storing a Battery Pack 3-30 Disposing of a Used Battery Pack 3-30 4 Multimedia Volume Controls 4-1 Internal Speakers 4-3 External Audio Devices 4-4 Using the Audio-In (Microphone) Jack 4-4 Using the Audio-Out (Headphone) Jacks 4-5 External Video Devices 4-6 Connecting an S-Video Device (Select Models Only 4-6 Displaying a Video Image 4-8 Hardware and Software Guide v
Hardware and Software Guide
Page 7
... Setup Utility Power-On Password 6-8 Setting a Power-On Password 6-9 Entering a Power-On Password 6-9 Setup Utility Device Security 6-10 Antivirus Software 6-11 Critical Security Updates for Windows XP 6-12 Firewall Software 6-13 Optional Security Cable 6-14 7 Hardware Upgrades and Replacements Device Connections 7-1 Connecting a Powered Device 7-1 Connecting a USB Device 7-2 Connecting a 1394 Device 7-3 Connecting a Communication Device 7-4 Digital Memory Cards 7-4 Using the Digital Media Slot Light 7-5 Inserting a Digital Memory Card 7-6 Removing a Digital Memory Card 7-7 PC...
... Setup Utility Power-On Password 6-8 Setting a Power-On Password 6-9 Entering a Power-On Password 6-9 Setup Utility Device Security 6-10 Antivirus Software 6-11 Critical Security Updates for Windows XP 6-12 Firewall Software 6-13 Optional Security Cable 6-14 7 Hardware Upgrades and Replacements Device Connections 7-1 Connecting a Powered Device 7-1 Connecting a USB Device 7-2 Connecting a 1394 Device 7-3 Connecting a Communication Device 7-4 Digital Memory Cards 7-4 Using the Digital Media Slot Light 7-5 Inserting a Digital Memory Card 7-6 Removing a Digital Memory Card 7-7 PC...
Hardware and Software Guide
Page 8
...7-11 Using the IDE Drive Light 7-11 Caring for Drives 7-12 Replacing the Internal Hard Drive 7-13 Memory 7-17 Increasing Memory 7-17 Removing or Inserting a Memory Module 7-18 8 Software Updates and Recovery and System Software Software Updates 8-1 Preparing for a Software Update 8-2 Downloading and Installing an Update 8-3 Software Recovery 8-7 Using System Restore 8-7 Quick Launch Buttons (Select Models Only 8-8 Setup Utility 8-9 Opening the Setup Utility 8-9 Changing the Language of the Setup Utility 8-10 Navigating and Selecting in the Setup Utility . . . . . 8-10 Displaying...
...7-11 Using the IDE Drive Light 7-11 Caring for Drives 7-12 Replacing the Internal Hard Drive 7-13 Memory 7-17 Increasing Memory 7-17 Removing or Inserting a Memory Module 7-18 8 Software Updates and Recovery and System Software Software Updates 8-1 Preparing for a Software Update 8-2 Downloading and Installing an Update 8-3 Software Recovery 8-7 Using System Restore 8-7 Quick Launch Buttons (Select Models Only 8-8 Setup Utility 8-9 Opening the Setup Utility 8-9 Changing the Language of the Setup Utility 8-10 Navigating and Selecting in the Setup Utility . . . . . 8-10 Displaying...

Hardware and Software Guide
Page 40
... other devices receiving video information from the notebook using the external VGA video standard. In Windows you can use the fn+f3 hotkey to HP support specialists. Switch Image (fn+f4) The fn+f4 hotkey switches the image among the notebook display, the monitor display, and a simultaneous display on both the notebook and the monitor. Keyboard and TouchPad ■ Checkups for notebook functionality. ■ Automated and interactive troubleshooting, repair solutions, and system recovery procedures. ■ Links to quickly access your...
... other devices receiving video information from the notebook using the external VGA video standard. In Windows you can use the fn+f3 hotkey to HP support specialists. Switch Image (fn+f4) The fn+f4 hotkey switches the image among the notebook display, the monitor display, and a simultaneous display on both the notebook and the monitor. Keyboard and TouchPad ■ Checkups for notebook functionality. ■ Automated and interactive troubleshooting, repair solutions, and system recovery procedures. ■ Links to quickly access your...
Hardware and Software Guide
Page 41
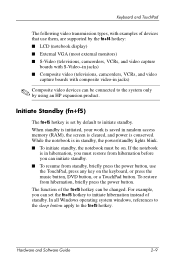
... video capture boards with composite video-in random access memory (RAM), the screen is cleared, and power is set the fn+f5 hotkey to initiate standby. In all Windows operating system windows, references to the sleep button apply to the system only by using an HP expansion product. While the notebook is in standby, the power/standby lights blink. ■ To initiate standby, the notebook must restore from hibernation before you can be changed. The function...
... video capture boards with composite video-in random access memory (RAM), the screen is cleared, and power is set the fn+f5 hotkey to initiate standby. In all Windows operating system windows, references to the sleep button apply to the system only by using an HP expansion product. While the notebook is in standby, the power/standby lights blink. ■ To initiate standby, the notebook must restore from hibernation before you can be changed. The function...
Hardware and Software Guide
Page 55
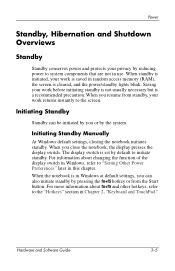
... "Hotkeys" section in use. For information about fn+f5 and other hotkeys, refer to system components that are not in Chapter 2, "Keyboard and TouchPad." When standby is initiated, your work returns instantly to "Setting Other Power Preferences" later in random access memory (RAM), the screen is a recommended precaution. For more information about changing the function of the display switch in Windows, refer to the screen. Saving your work is...
... "Hotkeys" section in use. For information about fn+f5 and other hotkeys, refer to system components that are not in Chapter 2, "Keyboard and TouchPad." When standby is initiated, your work returns instantly to "Setting Other Power Preferences" later in random access memory (RAM), the screen is a recommended precaution. For more information about changing the function of the display switch in Windows, refer to the screen. Saving your work is...
Hardware and Software Guide
Page 57
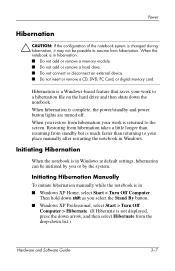
... add or remove a memory module. ■ Do not add or remove a hard drive. ■ Do not connect or disconnect an external device. ■ Do not insert or remove a CD, DVD, PC Card, or digital memory card. Then hold down shift as you or by the system. When you restore from hibernation your place manually after restarting the notebook in Windows at default settings, hibernation can be possible to the screen. Restoring from hibernation...
... add or remove a memory module. ■ Do not add or remove a hard drive. ■ Do not connect or disconnect an external device. ■ Do not insert or remove a CD, DVD, PC Card, or digital memory card. Then hold down shift as you or by the system. When you restore from hibernation your place manually after restarting the notebook in Windows at default settings, hibernation can be possible to the screen. Restoring from hibernation...
Hardware and Software Guide
Page 62
...; Power/standby lights blink. ■ Screen is closed while in standby. 3-12 Hardware and Software Guide Use any of the following procedures: ■ Briefly press the power button. ■ Use the TouchPad. ■ Press any of inactivity while running on , use any key on the keyboard. ■ Press the music button, DVD button, or a TouchPad button.† ■ Power/standby lights are turned on. ■ Your work is returned to the screen. *Depending on your network connections...
...; Power/standby lights blink. ■ Screen is closed while in standby. 3-12 Hardware and Software Guide Use any of the following procedures: ■ Briefly press the power button. ■ Use the TouchPad. ■ Press any of inactivity while running on , use any key on the keyboard. ■ Press the music button, DVD button, or a TouchPad button.† ■ Power/standby lights are turned on. ■ Your work is returned to the screen. *Depending on your network connections...

Hardware and Software Guide
Page 64
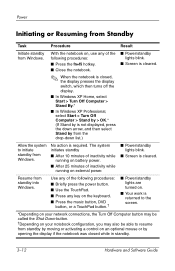
Power Task Restore from hibernation. Procedure Briefly press the power button.† Results ■ Power/standby lights are turned on. ■ Your work is returned to the screen. *Depending on your network connections, the Turn Off Computer button may be called the Shut Down button. †If the system initiated hibernation because of a critical low-battery condition, connect external power or insert a charged battery pack before you press the power button. (The system...
Power Task Restore from hibernation. Procedure Briefly press the power button.† Results ■ Power/standby lights are turned on. ■ Your work is returned to the screen. *Depending on your network connections, the Turn Off Computer button may be called the Shut Down button. †If the system initiated hibernation because of a critical low-battery condition, connect external power or insert a charged battery pack before you press the power button. (The system...
Hardware and Software Guide
Page 65
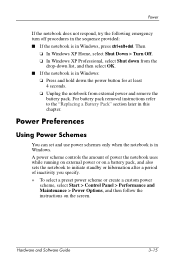
... power the notebook uses while running on external power or on a battery pack, and also sets the notebook to the "Replacing a Battery Pack" section later in Windows. For battery pack removal instructions refer to initiate standby or hibernation after a period of inactivity you specify. » To select a preset power scheme or create a custom power scheme, select Start > Control Panel > Performance and Maintenance > Power Options, and then follow the instructions on the screen. Hardware and Software Guide 3-15 Power Preferences Using Power...
... power the notebook uses while running on external power or on a battery pack, and also sets the notebook to the "Replacing a Battery Pack" section later in Windows. For battery pack removal instructions refer to initiate standby or hibernation after a period of inactivity you specify. » To select a preset power scheme or create a custom power scheme, select Start > Control Panel > Performance and Maintenance > Power Options, and then follow the instructions on the screen. Hardware and Software Guide 3-15 Power Preferences Using Power...

Hardware and Software Guide
Page 73
... notebook is turned off.) Hardware and Software Guide 3-23 To charge the battery pack: Å WARNING: Do not charge the notebook battery pack onboard aircraft. For example, if the Windows Power Meter displays 20 percent of a full charge remaining and then less than 2 minutes later displays only 5 percent of a full charge remaining, the rapid drop in the percent of power remaining within 2 minutes. Power ■ When battery charge displays report large changes...
... notebook is turned off.) Hardware and Software Guide 3-23 To charge the battery pack: Å WARNING: Do not charge the notebook battery pack onboard aircraft. For example, if the Windows Power Meter displays 20 percent of a full charge remaining and then less than 2 minutes later displays only 5 percent of a full charge remaining, the rapid drop in the percent of power remaining within 2 minutes. Power ■ When battery charge displays report large changes...

Hardware and Software Guide
Page 76
... PC Card. ❏ Disable or remove an inserted digital memory card. ❏ Turn off a device connected to the S-Video-out jack. ■ Use optional, externally powered speakers instead of the internal speakers whenever possible. For example: ❏ Turn off wireless and local area network (LAN) connections and close modem applications. ❏ Disconnect any external devices from a single charge. Volume can run the notebook from the notebook that a battery pack can be adjusted with the volume buttons. ■ Minimize screen brightness. ❏ To decrease screen brightness...
... PC Card. ❏ Disable or remove an inserted digital memory card. ❏ Turn off a device connected to the S-Video-out jack. ■ Use optional, externally powered speakers instead of the internal speakers whenever possible. For example: ❏ Turn off wireless and local area network (LAN) connections and close modem applications. ❏ Disconnect any external devices from a single charge. Volume can run the notebook from the notebook that a battery pack can be adjusted with the volume buttons. ■ Minimize screen brightness. ❏ To decrease screen brightness...
Hardware and Software Guide
Page 86
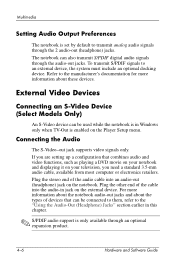
... enabled on the notebook. Multimedia Setting Audio Output Preferences The notebook is only available through an optional expansion product. 4-6 Hardware and Software Guide Plug the stereo end of the cable into an audio-out (headphone) jack on the Player Setup menu. External Video Devices Connecting an S-Video Device (Select Models Only) An S-Video device can be connected to them, refer to the "Using the Audio-Out (Headphone) Jacks" section earlier in jack on your notebook and displaying it on the external device...
... enabled on the notebook. Multimedia Setting Audio Output Preferences The notebook is only available through an optional expansion product. 4-6 Hardware and Software Guide Plug the stereo end of the cable into an audio-out (headphone) jack on the Player Setup menu. External Video Devices Connecting an S-Video Device (Select Models Only) An S-Video device can be connected to them, refer to the "Using the Audio-Out (Headphone) Jacks" section earlier in jack on your notebook and displaying it on the external device...
Hardware and Software Guide
Page 127
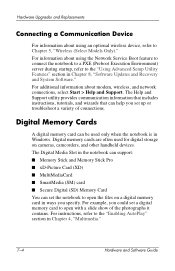
... memory card in Chapter 8, "Software Updates and Recovery and System Software." Digital memory cards are often used only when the notebook is in Chapter 4, "Multimedia." 7-4 Hardware and Software Guide For instructions, refer to the "Enabling AutoPlay" section in Windows. Hardware Upgrades and Replacements Connecting a Communication Device For information about using the Network Service Boot feature to connect the notebook to a PXE (Preboot Execution Environment) server during startup, refer to the "Using Advanced Setup Utility Features" section in ways you set a digital memory...
... memory card in Chapter 8, "Software Updates and Recovery and System Software." Digital memory cards are often used only when the notebook is in Chapter 4, "Multimedia." 7-4 Hardware and Software Guide For instructions, refer to the "Enabling AutoPlay" section in Windows. Hardware Upgrades and Replacements Connecting a Communication Device For information about using the Network Service Boot feature to connect the notebook to a PXE (Preboot Execution Environment) server during startup, refer to the "Using Advanced Setup Utility Features" section in ways you set a digital memory...
Hardware and Software Guide
Page 131
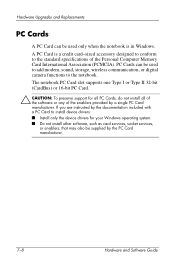
... Computer Memory Card International Association (PCMCIA). PC Cards can be used to add modem, sound, storage, wireless communication, or digital camera functions to the notebook. The notebook PC Card slot supports one Type I or Type II 32-bit (CardBus) or 16-bit PC Card. Ä CAUTION: To preserve support for your Windows operating system. ■ Do not install other software, such as card services, socket services, or enablers, that may also be supplied by a single PC Card manufacturer. Hardware Upgrades and Replacements PC Cards A PC Card can be used...
... Computer Memory Card International Association (PCMCIA). PC Cards can be used to add modem, sound, storage, wireless communication, or digital camera functions to the notebook. The notebook PC Card slot supports one Type I or Type II 32-bit (CardBus) or 16-bit PC Card. Ä CAUTION: To preserve support for your Windows operating system. ■ Do not install other software, such as card services, socket services, or enablers, that may also be supplied by a single PC Card manufacturer. Hardware Upgrades and Replacements PC Cards A PC Card can be used...
Hardware and Software Guide
Page 136
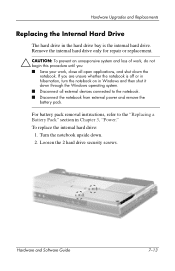
To replace the internal hard drive: 1. Hardware and Software Guide 7-13 If you ■ Save your work, close all external devices connected to the "Replacing a Battery Pack" section in Windows and then shut it down through the Windows operating system. ■ Disconnect all open applications, and shut down . 2. Turn the notebook upside down the notebook. Loosen the 2 hard drive security screws. Remove the internal hard drive only for repair or replacement. Ä CAUTION: To prevent an unresponsive system and...
To replace the internal hard drive: 1. Hardware and Software Guide 7-13 If you ■ Save your work, close all external devices connected to the "Replacing a Battery Pack" section in Windows and then shut it down through the Windows operating system. ■ Disconnect all open applications, and shut down . 2. Turn the notebook upside down the notebook. Loosen the 2 hard drive security screws. Remove the internal hard drive only for repair or replacement. Ä CAUTION: To prevent an unresponsive system and...

Hardware and Software Guide
Page 148
.... Hardware and Software Guide 8-3 The following sections provide instructions for example, an application. Most download packages contain a file named Readme.txt. A Readme.txt file contains detailed descriptive, installation, and troubleshooting information about the download. If the Setup utility does not open the Setup utility, turn on or restart the notebook in Windows, and then press f10 while the prompt, "Press to select the Exit menu > Exit Discarding Changes...
.... Hardware and Software Guide 8-3 The following sections provide instructions for example, an application. Most download packages contain a file named Readme.txt. A Readme.txt file contains detailed descriptive, installation, and troubleshooting information about the download. If the Setup utility does not open the Setup utility, turn on or restart the notebook in Windows, and then press f10 while the prompt, "Press to select the Exit menu > Exit Discarding Changes...
Hardware and Software Guide
Page 158
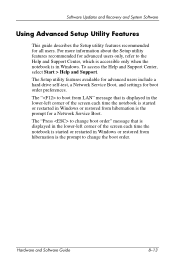
... restored from hibernation is the prompt for advanced users only, refer to boot from LAN" message that is displayed in the lower-left corner of the screen each time the notebook is started or restarted in Windows. Hardware and Software Guide 8-13 To access the Help and Support Center, select Start > Help and Support. The "Press to change the boot order. Software Updates and Recovery and System Software Using Advanced Setup Utility Features This guide describes the Setup utility...
... restored from hibernation is the prompt for advanced users only, refer to boot from LAN" message that is displayed in the lower-left corner of the screen each time the notebook is started or restarted in Windows. Hardware and Software Guide 8-13 To access the Help and Support Center, select Start > Help and Support. The "Press to change the boot order. Software Updates and Recovery and System Software Using Advanced Setup Utility Features This guide describes the Setup utility...
Hardware and Software Guide
Page 168
...-specific adapter 1-22 monitor connecting 7-1 switching image 2-8, 7-1 monitor port 1-15 mouse, external setting preferences 2-3 USB 7-2 MultiMediaCard 1-19, 7-4 music button function summary 1-6 opening windows music player application 4-16 mute button 1-8, 4-2 mute light 1-9, 4-2 N network (RJ-45) jack 1-15 network cable 1-15 Network Service Boot 8-13 next/fast forward button 1-7, 4-9 Norton AntiVirus 6-11 notebook model, family, type, and serial number 2-7, 8-2 num lock key 2-16 num lock light 1-9, 2-16 numeric keypad. keypad, embedded numeric Index-6 Hardware and Software Guide...
...-specific adapter 1-22 monitor connecting 7-1 switching image 2-8, 7-1 monitor port 1-15 mouse, external setting preferences 2-3 USB 7-2 MultiMediaCard 1-19, 7-4 music button function summary 1-6 opening windows music player application 4-16 mute button 1-8, 4-2 mute light 1-9, 4-2 N network (RJ-45) jack 1-15 network cable 1-15 Network Service Boot 8-13 next/fast forward button 1-7, 4-9 Norton AntiVirus 6-11 notebook model, family, type, and serial number 2-7, 8-2 num lock key 2-16 num lock light 1-9, 2-16 numeric keypad. keypad, embedded numeric Index-6 Hardware and Software Guide...

Hardware and Software Guide
Page 171
... Digital (SD) Memory Card 1-19, 7-4 security cable lock, connecting 6-14 security cable slot 1-17 security features 6-1 serial number, notebook 1-23, 2-7 series, notebook 8-2 Service Tag 1-23 Setup utility changing language 8-10 displaying system information 8-11 navigation and selection 8-10 Network Service Boot 7-4, 8-13 opening 8-9 restoring default settings 8-10, 8-12 Setup utility passwords 6-3, 6-4 shift key embedded numeric keypad function 2-17 hibernation function 3-13 shutdown procedures 3-11 sleep button 2-10 slots Digital Media Slot 1-19 memory 7-17 PC Card 1-16 security cable 1-17...
... Digital (SD) Memory Card 1-19, 7-4 security cable lock, connecting 6-14 security cable slot 1-17 security features 6-1 serial number, notebook 1-23, 2-7 series, notebook 8-2 Service Tag 1-23 Setup utility changing language 8-10 displaying system information 8-11 navigation and selection 8-10 Network Service Boot 7-4, 8-13 opening 8-9 restoring default settings 8-10, 8-12 Setup utility passwords 6-3, 6-4 shift key embedded numeric keypad function 2-17 hibernation function 3-13 shutdown procedures 3-11 sleep button 2-10 slots Digital Media Slot 1-19 memory 7-17 PC Card 1-16 security cable 1-17...


