
User Manual
Page 3
... 2-2 Cleaning the Monitor 2-3 Shipping the Monitor 2-3 3 Setting Up the Monitor Installing the Monitor Pedestal 3-1 Connecting the Monitor 3-3 Removing the Monitor Base 3-6 Mounting the Monitor 3-7 Locating the Rating Labels 3-8 4 Operating the Monitor Software and Utilities 4-1 The Information File 4-1 The Image Color Matching File 4-2 Installing the .INF and .ICM Files 4-2 Installing from the CD 4-2 Downloading from the Worldwide Web 4-3 Front Panel Controls 4-4 Adjusting Monitor Settings 4-5 Using the On-Screen Display 4-6 Adjusting Screen Quality 4-8 User Guide iii
... 2-2 Cleaning the Monitor 2-3 Shipping the Monitor 2-3 3 Setting Up the Monitor Installing the Monitor Pedestal 3-1 Connecting the Monitor 3-3 Removing the Monitor Base 3-6 Mounting the Monitor 3-7 Locating the Rating Labels 3-8 4 Operating the Monitor Software and Utilities 4-1 The Information File 4-1 The Image Color Matching File 4-2 Installing the .INF and .ICM Files 4-2 Installing from the CD 4-2 Downloading from the Worldwide Web 4-3 Front Panel Controls 4-4 Adjusting Monitor Settings 4-5 Using the On-Screen Display 4-6 Adjusting Screen Quality 4-8 User Guide iii
User Manual
Page 4
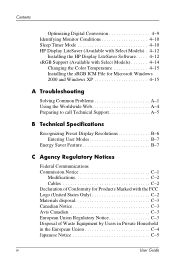
Contents Optimizing Digital Conversion 4-9 Identifying Monitor Conditions 4-10 Sleep Timer Mode 4-10 HP Display LiteSaver (Available with Select Models) . 4-12 Installing the HP Display LiteSaver Software. . . . . 4-12 sRGB Support (Available with Select Models 4-14 Changing the Color Temperature 4-15 Installing the sRGB ICM File for Microsoft Windows 2000 and Windows XP 4-15 A Troubleshooting Solving Common Problems A-1 Using the Worldwide Web A-4 Preparing to call Technical Support A-5 B Technical Specifications Recognizing Preset Display Resolutions B-6 Entering User Modes B-7 ...
Contents Optimizing Digital Conversion 4-9 Identifying Monitor Conditions 4-10 Sleep Timer Mode 4-10 HP Display LiteSaver (Available with Select Models) . 4-12 Installing the HP Display LiteSaver Software. . . . . 4-12 sRGB Support (Available with Select Models 4-14 Changing the Color Temperature 4-15 Installing the sRGB ICM File for Microsoft Windows 2000 and Windows XP 4-15 A Troubleshooting Solving Common Problems A-1 Using the Worldwide Web A-4 Preparing to call Technical Support A-5 B Technical Specifications Recognizing Preset Display Resolutions B-6 Entering User Modes B-7 ...
User Manual
Page 7
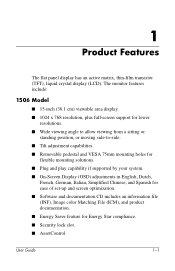
...-inch (38.1 cm) viewable area display. ■� 1024 x 768 resolution, plus full-screen support for lower resolutions. ■� Wide viewing angle to allow viewing from a sitting or standing position, or moving side-to-side. ■� Tilt adjustment capabilities. ■� Removable pedestal and VESA 75mm mounting holes for flexible mounting solutions. ■� Plug and play capability if supported by your system. ■� On-Screen Display (OSD) adjustments in English...
...-inch (38.1 cm) viewable area display. ■� 1024 x 768 resolution, plus full-screen support for lower resolutions. ■� Wide viewing angle to allow viewing from a sitting or standing position, or moving side-to-side. ■� Tilt adjustment capabilities. ■� Removable pedestal and VESA 75mm mounting holes for flexible mounting solutions. ■� Plug and play capability if supported by your system. ■� On-Screen Display (OSD) adjustments in English...

User Manual
Page 8
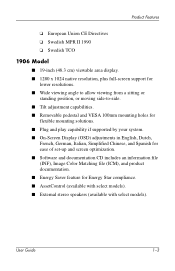
...;� 1280 × 1024 native resolution, plus full-screen support for lower resolutions. ■� Wide viewing angle to allow viewing from a sitting or standing position, or moving side-to-side. ■� Tilt adjustment capabilities. ■� Removable pedestal and VESA 100mm mounting holes for flexible mounting solutions. ■� Plug and play capability if supported by your system. ■� On-Screen Display (OSD) adjustments in English, Dutch, French, German, Italian...
...;� 1280 × 1024 native resolution, plus full-screen support for lower resolutions. ■� Wide viewing angle to allow viewing from a sitting or standing position, or moving side-to-side. ■� Tilt adjustment capabilities. ■� Removable pedestal and VESA 100mm mounting holes for flexible mounting solutions. ■� Plug and play capability if supported by your system. ■� On-Screen Display (OSD) adjustments in English, Dutch, French, German, Italian...
User Manual
Page 9
...-inch (48.3 cm) viewable area display. ■� 1280 x 1024 native resolution, plus full-screen support for lower resolutions. ■� Wide viewing angle to allow viewing from a sitting or standing position, or moving side-to-side. ■� Tilt adjustment capabilities. ■� Removable pedestal and VESA 100mm mounting holes for flexible mounting solutions. ■� Plug and play capability if supported by your system. ■� On-Screen Display (OSD) adjustments in English...
...-inch (48.3 cm) viewable area display. ■� 1280 x 1024 native resolution, plus full-screen support for lower resolutions. ■� Wide viewing angle to allow viewing from a sitting or standing position, or moving side-to-side. ■� Tilt adjustment capabilities. ■� Removable pedestal and VESA 100mm mounting holes for flexible mounting solutions. ■� Plug and play capability if supported by your system. ■� On-Screen Display (OSD) adjustments in English...
User Manual
Page 12
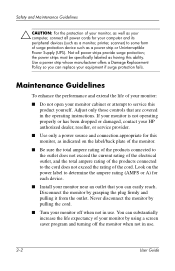
... cord. Disconnect the monitor by using a screen saver program and turning off when not in use . 2-2 User Guide Not all power cords for this monitor, as indicated on the power label to determine the ampere rating (AMPS or A) for each device. ■� Install your HP authorized dealer, reseller, or service provider. ■� Use only a power source and connection appropriate for your monitor off the monitor when not in the operating instructions. Use a power...
... cord. Disconnect the monitor by using a screen saver program and turning off when not in use . 2-2 User Guide Not all power cords for this monitor, as indicated on the power label to determine the ampere rating (AMPS or A) for each device. ■� Install your HP authorized dealer, reseller, or service provider. ■� Use only a power source and connection appropriate for your monitor off the monitor when not in the operating instructions. Use a power...

User Manual
Page 19
... your comfort using the monitor's tilt adjustment capability. Press the power switch to turn off the monitor when it is a condition that may occur on monitors that display the same static image on screen for a prolonged period of time. Image retention is not in image damage may occur on the monitor. Ä CAUTION: Burn-in use for a prolonged period of time. Adjust the monitor as needed for your monitor screen, you...
... your comfort using the monitor's tilt adjustment capability. Press the power switch to turn off the monitor when it is a condition that may occur on monitors that display the same static image on screen for a prolonged period of time. Image retention is not in image damage may occur on the monitor. Ä CAUTION: Burn-in use for a prolonged period of time. Adjust the monitor as needed for your monitor screen, you...

User Manual
Page 20
Setting Up the Monitor Removing the Monitor Base You can remove the monitor base to mount the monitor on a soft area to disassemble the monitor, be sure the monitor is in the upright position. Disconnect and remove the signal and power cables from the monitor while the monitor is turned off and the power and signal cables are both disconnected. If your monitor has a connected audio cable, disconnect it from getting scratched, defaced, or broken. 1. Read the Caution and...
Setting Up the Monitor Removing the Monitor Base You can remove the monitor base to mount the monitor on a soft area to disassemble the monitor, be sure the monitor is in the upright position. Disconnect and remove the signal and power cables from the monitor while the monitor is turned off and the power and signal cables are both disconnected. If your monitor has a connected audio cable, disconnect it from getting scratched, defaced, or broken. 1. Read the Caution and...

User Manual
Page 21
Refer to be used for mounting flat panel displays. Remove the monitor base 3 from the monitor. 4. Mounting the Monitor 1. Remove the monitor base. After the base is positioned over a table or desktop before removing the base from the monitor. Setting Up the Monitor 3. User Guide 3-7 Remove the three screws 2 as shown in the previous section. These mounting holes are 100mm apart and are exposed on the monitor back panel to "Removing the Monitor Base" steps in the following illustration. Removing the Monitor Base Ä CAUTION: Ensure...
Refer to be used for mounting flat panel displays. Remove the monitor base 3 from the monitor. 4. Mounting the Monitor 1. Remove the monitor base. After the base is positioned over a table or desktop before removing the base from the monitor. Setting Up the Monitor 3. User Guide 3-7 Remove the three screws 2 as shown in the previous section. These mounting holes are 100mm apart and are exposed on the monitor back panel to "Removing the Monitor Base" steps in the following illustration. Removing the Monitor Base Ä CAUTION: Ensure...
User Manual
Page 22
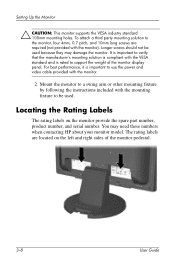
... part number, product number, and serial number. Mount the monitor to a swing arm or other mounting fixture by following the instructions included with the monitor). Locating the Rating Labels The rating labels on the left and right sides of the monitor display panel. You may damage the monitor. For best performance, it is rated to be used . Longer screws should not be used because they may need these numbers when contacting HP about your monitor model...
... part number, product number, and serial number. Mount the monitor to a swing arm or other mounting fixture by following the instructions included with the monitor). Locating the Rating Labels The rating labels on the left and right sides of the monitor display panel. You may damage the monitor. For best performance, it is rated to be used . Longer screws should not be used because they may need these numbers when contacting HP about your monitor model...
User Manual
Page 24
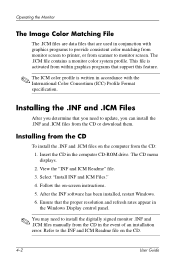
... used in conjunction with the International Color Consortium (ICC) Profile Format specification. The .ICM file contains a monitor color system profile. Installing the .INF and .ICM Files After you determine that the proper resolution and refresh rates appear in the Windows Display control panel. ✎ You may need to update, you need to the INF and ICM Readme file on -screen instructions. 5. The CD menu displays. 2. Follow the on the CD. 4-2 User Guide View...
... used in conjunction with the International Color Consortium (ICC) Profile Format specification. The .ICM file contains a monitor color system profile. Installing the .INF and .ICM Files After you determine that the proper resolution and refresh rates appear in the Windows Display control panel. ✎ You may need to update, you need to the INF and ICM Readme file on -screen instructions. 5. The CD menu displays. 2. Follow the on the CD. 4-2 User Guide View...

User Manual
Page 26
Navigates forward through the OSD menu and decreases adjustment levels. • If the OSD menu is inactive, activates the auto adjustment feature to optimize the screen image. Sleep Timer mode = Flashing Amber. Sleep mode = Amber. Turns the monitor on or off. 4-4 User Guide Fully powered = Green. Operating the Monitor Front Panel Controls ' Control 1 Menu 2 - (Minus button) 3 + (Plus button) 4 Power LED 5 Power Function Opens, selects or exits the OSD menu. • Navigates backward through the OSD menu and increases adjustment levels.
Navigates forward through the OSD menu and decreases adjustment levels. • If the OSD menu is inactive, activates the auto adjustment feature to optimize the screen image. Sleep Timer mode = Flashing Amber. Sleep mode = Amber. Turns the monitor on or off. 4-4 User Guide Fully powered = Green. Operating the Monitor Front Panel Controls ' Control 1 Menu 2 - (Minus button) 3 + (Plus button) 4 Power LED 5 Power Function Opens, selects or exits the OSD menu. • Navigates backward through the OSD menu and increases adjustment levels.

User Manual
Page 32
... at 60 Hz. The Sleep Timer has five settings: ■� Set Current Time ■� Set Sleep Time 4-10 User Guide Indicates the video cable is entering a sleep mode. ■� Check Video Cable- This also extends the life of Range- For 17" and 19" monitors, set higher than the monitor supports. Indicates the monitor does not support the input signal because the resolution and/or refresh rate are set the resolution and refresh rate for 1280 x 1024 at...
... at 60 Hz. The Sleep Timer has five settings: ■� Set Current Time ■� Set Sleep Time 4-10 User Guide Indicates the video cable is entering a sleep mode. ■� Check Video Cable- This also extends the life of Range- For 17" and 19" monitors, set higher than the monitor supports. Indicates the monitor does not support the input signal because the resolution and/or refresh rate are set the resolution and refresh rate for 1280 x 1024 at...

User Manual
Page 34
... time, leaving a shadow of the image on the CD, that increases monitor life and saves energy. Select "Install HP Display LiteSaver Software." 3. Set the Timer mode to On to exit the menu. It allows you are finished, select Save and Return to activate the Sleep Timer settings. 14. This helps protect the LCD panel against image retention. from the pop-up menu. 4-12 User Guide Image retention can occur when the...
... time, leaving a shadow of the image on the CD, that increases monitor life and saves energy. Select "Install HP Display LiteSaver Software." 3. Set the Timer mode to On to exit the menu. It allows you are finished, select Save and Return to activate the Sleep Timer settings. 14. This helps protect the LCD panel against image retention. from the pop-up menu. 4-12 User Guide Image retention can occur when the...
User Manual
Page 35
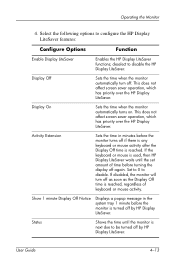
.... Display On Sets the time when the monitor automatically turns on. If the keyboard or mouse is used, then HP Display LiteSaver waits until the monitor is reached, regardless of time before the monitor is reached. User Guide 4-13 Select the following options to disable. deselect to be turned off . Operating the Monitor 4. This does not affect screen saver operation, which has priority over the HP Display...
.... Display On Sets the time when the monitor automatically turns on. If the keyboard or mouse is used, then HP Display LiteSaver waits until the monitor is reached, regardless of time before the monitor is reached. User Guide 4-13 Select the following options to disable. deselect to be turned off . Operating the Monitor 4. This does not affect screen saver operation, which has priority over the HP Display...

User Manual
Page 39
... panel power button. Refer to inactivate the screen blanking utility. Press any key on the keyboard or move the mouse to Chapter 3, Setting Up the Monitor, for more information. Turn the master power switch to On. Screen blanking utility is disconnected. User Guide A-1 A Troubleshooting Solving Common Problems The following table lists possible problems, the possible cause of the monitor is turned off. Possible Cause Power cord is active. Connect the video cable properly. Video cable...
... panel power button. Refer to inactivate the screen blanking utility. Press any key on the keyboard or move the mouse to Chapter 3, Setting Up the Monitor, for more information. Turn the master power switch to On. Screen blanking utility is disconnected. User Guide A-1 A Troubleshooting Solving Common Problems The following table lists possible problems, the possible cause of the monitor is turned off. Possible Cause Power cord is active. Connect the video cable properly. Video cable...

User Manual
Page 42
... driver is not compatible with your computer system. The monitor's power saving control is disabled. The monitor screen should be set to enable to allow the monitor to enter into a low-power sleep mode. A-4 User Guide Using the Worldwide Web For online access to technical support information, self-solve tools, online assistance, community forums of IT experts, broad multivendor knowledge base, monitoring and diagnostic tools, go to enter into low-power modes. Troubleshooting Problem...
... driver is not compatible with your computer system. The monitor's power saving control is disabled. The monitor screen should be set to enable to allow the monitor to enter into a low-power sleep mode. A-4 User Guide Using the Worldwide Web For online access to technical support information, self-solve tools, online assistance, community forums of IT experts, broad multivendor knowledge base, monitoring and diagnostic tools, go to enter into low-power modes. Troubleshooting Problem...

User Manual
Page 51
... the absence of power and the Power light is not preset if: ■ You are not using a standard graphics adapter. ■ You are not using the on-screen display. Upon detecting the absence of these modes and saved in its normal operating mode, the monitor uses less than 40 watts of either the horizontal sync signal and/or the vertical sync signal. The monitor automatically stores the new setting, then recognizes...
... the absence of power and the Power light is not preset if: ■ You are not using a standard graphics adapter. ■ You are not using the on-screen display. Upon detecting the absence of these modes and saved in its normal operating mode, the monitor uses less than 40 watts of either the horizontal sync signal and/or the vertical sync signal. The monitor automatically stores the new setting, then recognizes...
User Manual
Page 52
... the reduced power state, the Power light blinks amber. Refer to your computer manual for instructions on setting energy saver features (sometimes called power management features). ✎ The above energy saver feature only works when connected to enter into the reduced power state at a predetermined time. When the monitor's Energy Saver utility causes the monitor to its normal operating mode. When the monitor is in...
... the reduced power state, the Power light blinks amber. Refer to your computer manual for instructions on setting energy saver features (sometimes called power management features). ✎ The above energy saver feature only works when connected to enter into the reduced power state at a predetermined time. When the monitor's Energy Saver utility causes the monitor to its normal operating mode. When the monitor is in...

User Manual
Page 58
... attention should be greater than the voltage and current rating marked on the product's electrical ratings label. The voltage and current rating of the cord must be walked on any other products. C-6 User Guide Agency Regulatory Notices The power cord set (flexible cord or wall plug) received with the monitor meets the requirements for use in that country. In addition, the cross-sectional area...
... attention should be greater than the voltage and current rating marked on the product's electrical ratings label. The voltage and current rating of the cord must be walked on any other products. C-6 User Guide Agency Regulatory Notices The power cord set (flexible cord or wall plug) received with the monitor meets the requirements for use in that country. In addition, the cross-sectional area...


