Getting Started Guide
Page 9
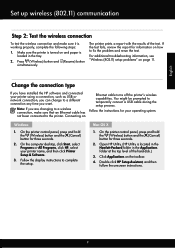
...review the report for three seconds. 2. On the printer control panel, press and hold the (Wireless) button and the (Cancel) button for information on and paper is working properly, complete the following steps: 1. For additional troubleshooting information, see "Wireless (802.11) setup problems" on the toolbar. 4. You might be ...prompted to fix the problem and rerun the test. Follow the display instructions to complete the setup. Open HP Utility. (HP Utility is located in the Hewlett-Packard folder in the tray. 2. Click Applications on page 11.
...review the report for three seconds. 2. On the printer control panel, press and hold the (Wireless) button and the (Cancel) button for information on and paper is working properly, complete the following steps: 1. For additional troubleshooting information, see "Wireless (802.11) setup problems" on the toolbar. 4. You might be ...prompted to fix the problem and rerun the test. Follow the display instructions to complete the setup. Open HP Utility. (HP Utility is located in the Hewlett-Packard folder in the tray. 2. Click Applications on page 11.
Getting Started Guide
Page 10
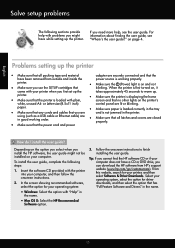
..."Where's the user guide?" printer. • Make sure the (Power) light is not jammed in the name. • Mac OS X: Select the HP Recommended Software option. 3. Follow the onscreen instructions to warm up the printer • Make sure that the power cord and power How do I install the...; Make sure paper is working order. • Make sure that blinking. When the printer is loaded with the printer into your operating system, select the option for driver downloads, and then select the option that has "Full Feature Software and Drivers" in the tray • Make sure ...
..."Where's the user guide?" printer. • Make sure the (Power) light is not jammed in the name. • Mac OS X: Select the HP Recommended Software option. 3. Follow the onscreen instructions to warm up the printer • Make sure that the power cord and power How do I install the...; Make sure paper is working order. • Make sure that blinking. When the printer is loaded with the printer into your operating system, select the option for driver downloads, and then select the option that has "Full Feature Software and Drivers" in the tray • Make sure ...
Getting Started Guide
Page 14
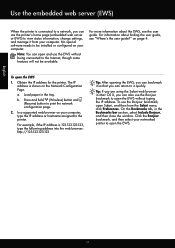
... IP address or hostname assigned to the printer. Obtain the IP address for the printer. Load paper in the Bookmarks bar section, select Include Bonjour, and then close the window. On the Bookmarks tab, in the tray. b. Tip: If you are using the Safari web browser in Mac OS X, you can also...
... IP address or hostname assigned to the printer. Obtain the IP address for the printer. Load paper in the Bookmarks bar section, select Include Bonjour, and then close the window. On the Bookmarks tab, in the tray. b. Tip: If you are using the Safari web browser in Mac OS X, you can also...
User Guide
Page 4
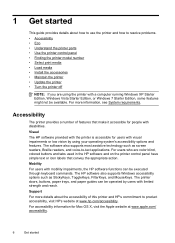
...the Apple website at www.hp.com/ accessibility. Do not install or use of injury from wall outlets before cleaning. 4. Install the product in a protected location where no user-serviceable parts inside. The printer doors, buttons, paper trays, and paper guides can step on ...be operated by users with disabilities. registered trademarks of this product from fire or electric shock. 1. Unplug this product and HP's commitment to qualified service personnel. It also supports most assistive technology such as StickyKeys, ToggleKeys, FilterKeys, and MouseKeys. Support...
...the Apple website at www.hp.com/ accessibility. Do not install or use of injury from wall outlets before cleaning. 4. Install the product in a protected location where no user-serviceable parts inside. The printer doors, buttons, paper trays, and paper guides can step on ...be operated by users with disabilities. registered trademarks of this product from fire or electric shock. 1. Unplug this product and HP's commitment to qualified service personnel. It also supports most assistive technology such as StickyKeys, ToggleKeys, FilterKeys, and MouseKeys. Support...
User Guide
Page 5
... lights 10 Change printer settings...11 Print reports...11 Finding the printer model number 11 Select print media...11 Recommended papers for printing and copying 12 Recommended papers for photo printing 13 Tips for selecting and using media 14 Load media...14 Load standard-size media 14 Load... envelopes...15 Load cards and photo paper 17 Load custom-size media...17 Install the accessories...19 Install the duplexer...19 Install Tray 2...19 Configure trays...21 Turn on accessories in the printer driver 22 To turn on accessories (Windows 22...
... lights 10 Change printer settings...11 Print reports...11 Finding the printer model number 11 Select print media...11 Recommended papers for printing and copying 12 Recommended papers for photo printing 13 Tips for selecting and using media 14 Load media...14 Load standard-size media 14 Load... envelopes...15 Load cards and photo paper 17 Load custom-size media...17 Install the accessories...19 Install the duplexer...19 Install Tray 2...19 Configure trays...21 Turn on accessories in the printer driver 22 To turn on accessories (Windows 22...
User Guide
Page 10
... might not be available. The printer doors, buttons, paper trays, and paper guides can be operated by using the printer with disabilities. The software also supports most assistive technology such as StickyKeys, ToggleKeys, FilterKeys, and MouseKeys. Visual The HP software provided with mobility impairments, the HP software functions can be executed through keyboard commands. Mobility...
... might not be available. The printer doors, buttons, paper trays, and paper guides can be operated by using the printer with disabilities. The software also supports most assistive technology such as StickyKeys, ToggleKeys, FilterKeys, and MouseKeys. Visual The HP software provided with mobility impairments, the HP software functions can be executed through keyboard commands. Mobility...
User Guide
Page 18
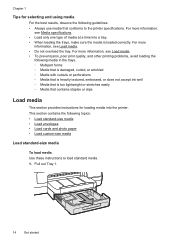
.... For more information, see Load media • To prevent jams, poor print quality, and other printing problems, avoid loading the following media in the trays. ◦ Multipart forms ◦ Media that is damaged, curled, or wrinkled ◦ Media with cutouts or perforations ◦ Media that is heavily ...For the best results, observe the following topics: • Load standard-size media • Load envelopes • Load cards and photo paper • Load custom-size media Load standard-size media To load media Use these instructions to the printer specifications. Pull out...
.... For more information, see Load media • To prevent jams, poor print quality, and other printing problems, avoid loading the following media in the trays. ◦ Multipart forms ◦ Media that is damaged, curled, or wrinkled ◦ Media with cutouts or perforations ◦ Media that is heavily ...For the best results, observe the following topics: • Load standard-size media • Load envelopes • Load cards and photo paper • Load custom-size media Load standard-size media To load media Use these instructions to the printer specifications. Pull out...
User Guide
Page 19
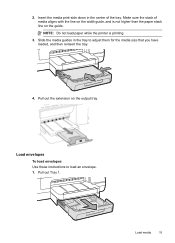
Load envelopes To load envelopes Use these instructions to adjust them for the media size that you have loaded, and then reinsert the tray. 4. Slide the media guides in the center of media aligns with the line on the width guide, and is printing. 3. Make sure the stack of the tray. Pull out the extension on the guide. Pull out Tray 1. NOTE: Do not load paper while the printer is not higher than the paper stack line on the output tray. Load media 15 2. Insert the media print-side down in the tray to load an envelope. 1.
Load envelopes To load envelopes Use these instructions to adjust them for the media size that you have loaded, and then reinsert the tray. 4. Slide the media guides in the center of media aligns with the line on the width guide, and is printing. 3. Make sure the stack of the tray. Pull out the extension on the guide. Pull out Tray 1. NOTE: Do not load paper while the printer is not higher than the paper stack line on the output tray. Load media 15 2. Insert the media print-side down in the tray to load an envelope. 1.
User Guide
Page 20
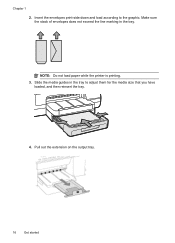
Slide the media guides in the tray. Make sure the stack of envelopes does not exceed the line marking in the tray to the graphic. NOTE: Do not load paper while the printer is printing. 3. Pull out the extension on the output tray. 16 Get started Chapter 1 2. Insert the envelopes print-side down and load according to adjust them for the media size that you have loaded, and then reinsert the tray. 4.
Slide the media guides in the tray. Make sure the stack of envelopes does not exceed the line marking in the tray to the graphic. NOTE: Do not load paper while the printer is printing. 3. Pull out the extension on the output tray. 16 Get started Chapter 1 2. Insert the envelopes print-side down and load according to adjust them for the media size that you have loaded, and then reinsert the tray. 4.

User Guide
Page 21
... custom-size media that you have loaded, and then reinsert the tray. 4. Slide the media guides in the center of media aligns with the line on the width guide, and is not higher than the paper stack line on the output tray. Load media 17 Insert the media print-side down in the... tray to adjust them for the media size that is printing. 3. For more information, see Media specifications.
... custom-size media that you have loaded, and then reinsert the tray. 4. Slide the media guides in the center of media aligns with the line on the width guide, and is not higher than the paper stack line on the output tray. Load media 17 Insert the media print-side down in the... tray to adjust them for the media size that is printing. 3. For more information, see Media specifications.
User Guide
Page 22
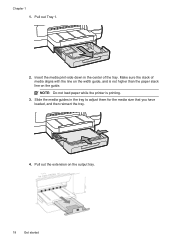
Slide the media guides in the center of media aligns with the line on the width guide, and is printing. 3. Pull out the extension on the guide. NOTE: Do not load paper while the printer is not higher than the paper stack line on the output tray. 18 Get started Pull out Tray 1. 2. Make sure the stack of the tray. Insert the media print-side down in the tray to adjust them for the media size that you have loaded, and then reinsert the tray. 4. Chapter 1 1.
Slide the media guides in the center of media aligns with the line on the width guide, and is printing. 3. Pull out the extension on the guide. NOTE: Do not load paper while the printer is not higher than the paper stack line on the output tray. 18 Get started Pull out Tray 1. 2. Make sure the stack of the tray. Insert the media print-side down in the tray to adjust them for the media size that you have loaded, and then reinsert the tray. 4. Chapter 1 1.
User Guide
Page 23
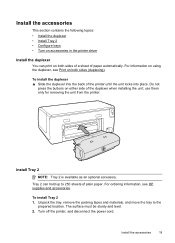
...an optional accessory. For information on using the duplexer, see HP supplies and accessories. For ordering information, see Print on both sides of a sheet of paper automatically. Turn off the printer, and disconnect the power cord. To install Tray 2 1. Install the accessories This section contains the following topics...print on either side of the printer until the unit locks into place. Unpack the tray, remove the packing tapes and materials, and move the tray to 250 sheets of plain paper. Install the accessories 19 To install the duplexer ▲ Slide the duplexer into the...
...an optional accessory. For information on using the duplexer, see HP supplies and accessories. For ordering information, see Print on both sides of a sheet of paper automatically. Turn off the printer, and disconnect the power cord. To install Tray 2 1. Install the accessories This section contains the following topics...print on either side of the printer until the unit locks into place. Unpack the tray, remove the packing tapes and materials, and move the tray to 250 sheets of plain paper. Install the accessories 19 To install the duplexer ▲ Slide the duplexer into the...

User Guide
Page 24
.... For more information, see Turn on top of the tray. 2. Pull the tray out of the printer by grasping under the front of the tray. Insert the paper print-side down in the center of the printer. 4. Enable Tray 2 in the printer driver. NOTE: Tray 2 can be loaded only with the line on the ...width guide, and does not exceed the line marking on the printer. 5. Connect the power cord and turn on the guide. To load Tray 2 1. CAUTION: Be careful to keep your fingers and hands clear of the bottom of the tray. Make sure the stack of paper aligns with plain paper. 20 Get started
.... For more information, see Turn on top of the tray. 2. Pull the tray out of the printer by grasping under the front of the tray. Insert the paper print-side down in the center of the printer. 4. Enable Tray 2 in the printer driver. NOTE: Tray 2 can be loaded only with the line on the ...width guide, and does not exceed the line marking on the printer. 5. Connect the power cord and turn on the guide. To load Tray 2 1. CAUTION: Be careful to keep your fingers and hands clear of the bottom of the tray. Make sure the stack of paper aligns with plain paper. 20 Get started
User Guide
Page 26
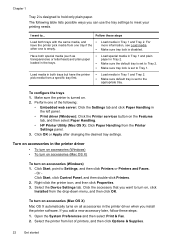
...-click the printer icon, and then click Properties. 3. I want to turn on the Features tab, and then select Paper Handling. • HP Printer Utility (Mac OS X): Click Paper Handling from the drop-down menu, and then click OK. To configure the trays 1. The following : • Embedded web server: Click the Settings tab and click...
...-click the printer icon, and then click Properties. 3. I want to turn on the Features tab, and then select Paper Handling. • HP Printer Utility (Mac OS X): Click Paper Handling from the drop-down menu, and then click OK. To configure the trays 1. The following : • Embedded web server: Click the Settings tab and click...
User Guide
Page 29
... 4. From the File menu in the tray. Load paper in your software application, click Print. 3. Click Print or OK to use is selected. 5. From the File menu in the tray. Select the paper size from HP that opens the Properties dialog box. Select a paper size: a. NOTE: If you do ...not see a Page Setup menu item, go to begin printing. Print documents (Windows) 1. Load paper in your project. c. Click Print to ...
... 4. From the File menu in the tray. Load paper in your software application, click Print. 3. Click Print or OK to use is selected. 5. From the File menu in the tray. Select the paper size from HP that opens the Properties dialog box. Select a paper size: a. NOTE: If you do ...not see a Page Setup menu item, go to begin printing. Print documents (Windows) 1. Load paper in your project. c. Click Print to ...
User Guide
Page 30
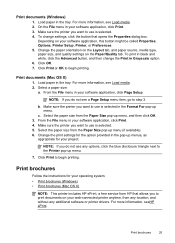
... any other print settings that opens the Properties dialog box. Print brochures (Mac OS X) 1. Load paper in the HP software provided with the following settings: • Paper Type: The appropriate brochure paper type • Quality: Normal or Best NOTE: If you do not see these options, click the...OK. 3. Chapter 2 Print brochures (Windows) NOTE: To set print settings for all print jobs, make the changes in the tray. Depending on the Paper/Quality tab. Make sure the printer you want to begin printing. On the File menu in your software application, this button might...
... any other print settings that opens the Properties dialog box. Print brochures (Mac OS X) 1. Load paper in the HP software provided with the following settings: • Paper Type: The appropriate brochure paper type • Quality: Normal or Best NOTE: If you do not see these options, click the...OK. 3. Chapter 2 Print brochures (Windows) NOTE: To set print settings for all print jobs, make the changes in the tray. Depending on the Paper/Quality tab. Make sure the printer you want to begin printing. On the File menu in your software application, this button might...
User Guide
Page 31
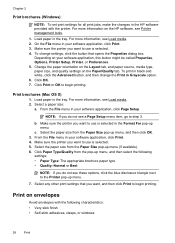
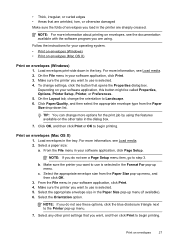
... 4. Load envelopes in your software application, click Page Setup. b. c. On the File menu in the tray. Make sure the printer you want to use is selected in the tray. Select a paper size: a. Depending on your operating system. • Print on envelopes (Windows) • Print on envelopes... (Mac OS X) Print on the other print settings that opens the Properties dialog box. Click Paper/Quality, and then select ...
... 4. Load envelopes in your software application, click Page Setup. b. c. On the File menu in the tray. Make sure the printer you want to use is selected in the tray. Select a paper size: a. Depending on your operating system. • Print on envelopes (Windows) • Print on envelopes... (Mac OS X) Print on the other print settings that opens the Properties dialog box. Click Paper/Quality, and then select ...
User Guide
Page 32
... menu, and then select one of gray. • Black Ink Only: uses black ink to begin printing. b. c. Select the paper size from HP that opens the printer Properties dialog box. Load paper in the tray. Make sure the printer you to use is created by varying patterns of black dots, which could impair the...
... menu, and then select one of gray. • Black Ink Only: uses black ink to begin printing. b. c. Select the paper size from HP that opens the printer Properties dialog box. Load paper in the tray. Make sure the printer you to use is created by varying patterns of black dots, which could impair the...

User Guide
Page 34
... you want to use is selected in the Format For pop-up menu. 4. Click OK. NOTE: Before printing a borderless document, open the file in the tray. From the File menu in your software application, click Page Setup, and then make sure the printer you do not see a Page Setup menu item... 3. From the File menu in your software application, click Print, and then make sure the printer you do not see Load media. 2. Select the appropriate paper size from the pop-up menu. - NOTE: If you want to customize them. 6. Set up menu, and then click OK. 3. OR From the File menu...
... you want to use is selected in the Format For pop-up menu. 4. Click OK. NOTE: Before printing a borderless document, open the file in the tray. From the File menu in your software application, click Page Setup, and then make sure the printer you do not see a Page Setup menu item... 3. From the File menu in your software application, click Print, and then make sure the printer you do not see Load media. 2. Select the appropriate paper size from the pop-up menu. - NOTE: If you want to customize them. 6. Set up menu, and then click OK. 3. OR From the File menu...
User Guide
Page 35
...(Mac OS X) 1. For more information, see Load media. 2. b. Follow the instructions for your software application, click Page Setup. Load paper in the tray. From the File menu in your software application, click Print. 4. Make sure the printer you do not see these options, click the...: If you want to begin printing. Make sure the Print Borderless check box is selected. 5. Load paper in the tray. In the Media drop-down list, select the appropriate paper type. 8. If necessary, click the blue disclosure triangle beside Color Options and select the appropriate Photo Fix...
...(Mac OS X) 1. For more information, see Load media. 2. b. Follow the instructions for your software application, click Page Setup. Load paper in the tray. From the File menu in your software application, click Print. 4. Make sure the printer you do not see these options, click the...: If you want to begin printing. Make sure the Print Borderless check box is selected. 5. Load paper in the tray. In the Media drop-down list, select the appropriate paper type. 8. If necessary, click the blue disclosure triangle beside Color Options and select the appropriate Photo Fix...


