
Getting Started - Windows 7
Page 32
... enabling or disabling Windows Firewall, choose to enable the firewall. The following wireless devices: ● Wireless local area network (WLAN) device ● HP Mobile Broadband Module, a wireless wide area network (WWAN) device ● Bluetooth device For more information on wireless technology and connecting to a wireless network, refer to the HP Notebook Reference Guide and information and Web site links provided in Help and Support. 24 Chapter 4 Networking Connecting to purchase Internet service and a modem. To set up a new Internet account or configure...
... enabling or disabling Windows Firewall, choose to enable the firewall. The following wireless devices: ● Wireless local area network (WLAN) device ● HP Mobile Broadband Module, a wireless wide area network (WWAN) device ● Bluetooth device For more information on wireless technology and connecting to a wireless network, refer to the HP Notebook Reference Guide and information and Web site links provided in Help and Support. 24 Chapter 4 Networking Connecting to purchase Internet service and a modem. To set up a new Internet account or configure...
Getting Started - Windows 7
Page 40
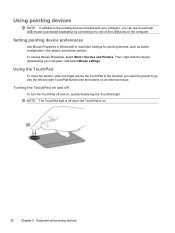
... pointing devices, such as button configuration, click speed, and pointer options. NOTE: The TouchPad light is on an external mouse. Setting pointing device preferences Use Mouse Properties in the direction you can use an external USB mouse (purchased separately) by connecting it to one finger across the TouchPad in Windows® to go. Using pointing devices NOTE: In addition to the pointing devices included with your computer, and select Mouse settings. To access Mouse Properties, select Start > Devices...
... pointing devices, such as button configuration, click speed, and pointer options. NOTE: The TouchPad light is on an external mouse. Setting pointing device preferences Use Mouse Properties in the direction you can use an external USB mouse (purchased separately) by connecting it to one finger across the TouchPad in Windows® to go. Using pointing devices NOTE: In addition to the pointing devices included with your computer, and select Mouse settings. To access Mouse Properties, select Start > Devices...
Getting Started - Windows 7
Page 66
... support 52 D Digital Media Slot, identifying 9 display image, switching 30 drive light 11 drivers and programs, updating 46 E esc key, identifying 7 F f11 49 fn key, identifying 7, 29 full system recovery 47 H hard drive installing 42 removing 42 hard drive, replacing 42 headphone (audio-out) jack 11 Help and Support action key 30 hotkey description 29 I input power 56 integrated webcam light, identifying 12 internal microphones, identifying 12 Internet connection setup 26 ISP, using 24 J jacks audio-in (microphone) 11 audio-out (headphone) 11 network 10 RJ-45 (network) 10 K keyboard hotkey...
... support 52 D Digital Media Slot, identifying 9 display image, switching 30 drive light 11 drivers and programs, updating 46 E esc key, identifying 7 F f11 49 fn key, identifying 7, 29 full system recovery 47 H hard drive installing 42 removing 42 hard drive, replacing 42 headphone (audio-out) jack 11 Help and Support action key 30 hotkey description 29 I input power 56 integrated webcam light, identifying 12 internal microphones, identifying 12 Internet connection setup 26 ISP, using 24 J jacks audio-in (microphone) 11 audio-out (headphone) 11 network 10 RJ-45 (network) 10 K keyboard hotkey...
Getting Started - Windows 7
Page 67
... drivers, updating 46 turn off 22 turn on 22 QuickWeb software 14 R recovering a program or driver 47 recovery discs 47, 48 Recovery Manager 47, 48 recovery partition 47 recovery, system 48 regulatory information regulatory label 54 wireless certification labels 54 restore points 51 RJ-45 (network) jack, identifying 10 rotating TouchPad gesture 36 S screen brightness keys 30 screen image, switching 30 scrolling TouchPad gesture 35 security cable slot, identifying 10 serial number 54 serial number, computer 54 setup of WLAN 26 slots Digital Media 9 security cable...
... drivers, updating 46 turn off 22 turn on 22 QuickWeb software 14 R recovering a program or driver 47 recovery discs 47, 48 Recovery Manager 47, 48 recovery partition 47 recovery, system 48 regulatory information regulatory label 54 wireless certification labels 54 restore points 51 RJ-45 (network) jack, identifying 10 rotating TouchPad gesture 36 S screen brightness keys 30 screen image, switching 30 scrolling TouchPad gesture 35 security cable slot, identifying 10 serial number 54 serial number, computer 54 setup of WLAN 26 slots Digital Media 9 security cable...
HP Mini 210 - Maintenance and Service Guide
Page 83
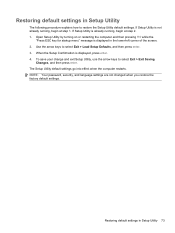
Use the arrow keys to select Exit > Exit Saving Changes, and then press enter. Restoring default settings in Setup Utility The following procedure explains how to restore the Setup Utility default settings. Open Setup Utility by turning on or restarting the computer and then pressing f10 while the "Press ESC key for startup menu" message is displayed, press enter. 4. NOTE: Your password, security, and language settings are not changed when you restore the factory default settings. If Setup Utility is not already running...
Use the arrow keys to select Exit > Exit Saving Changes, and then press enter. Restoring default settings in Setup Utility The following procedure explains how to restore the Setup Utility default settings. Open Setup Utility by turning on or restarting the computer and then pressing f10 while the "Press ESC key for startup menu" message is displayed, press enter. 4. NOTE: Your password, security, and language settings are not changed when you restore the factory default settings. If Setup Utility is not already running...
HP Mini 210 - Maintenance and Service Guide
Page 86
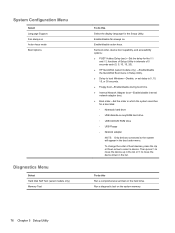
...-test on -key/lUSB hard drive ◦ USB CD/DVD ROM drive ◦ USB Floppy ◦ Network adapter NOTE: Only devices connected to select a device. Set boot order, device boot capability, and accessibility options: ● POST Hotkey Delay (sec)―Set the delay for the Setup Utility. Enable/disable fan always on Action keys mode Boot Options Diagnostics Menu Select Hard Disk Self Test (select models only) Memory Test To do this Select the display language for the f10 and f12 functions of Setup Utility in intervals of boot devices, press the...
...-test on -key/lUSB hard drive ◦ USB CD/DVD ROM drive ◦ USB Floppy ◦ Network adapter NOTE: Only devices connected to select a device. Set boot order, device boot capability, and accessibility options: ● POST Hotkey Delay (sec)―Set the delay for the Setup Utility. Enable/disable fan always on Action keys mode Boot Options Diagnostics Menu Select Hard Disk Self Test (select models only) Memory Test To do this Select the display language for the f10 and f12 functions of Setup Utility in intervals of boot devices, press the...
HP Mini 210 - Maintenance and Service Guide
Page 88
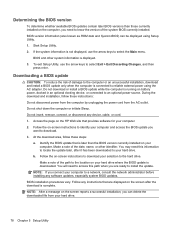
... to the hard drive. Follow the on -screen instructions to download your selection to a network, consult the network administrator before installing any software updates, especially system BIOS updates. Start Setup Utility. 2. Access the page on the screen after it has been downloaded to select Exit > Exit Discarding Changes, and then press enter. Identify the BIOS update that provides software for your hard drive. You will need this path when you can be displayed using the AC adapter. NOTE: After...
... to the hard drive. Follow the on -screen instructions to download your selection to a network, consult the network administrator before installing any software updates, especially system BIOS updates. Start Setup Utility. 2. Access the page on the screen after it has been downloaded to select Exit > Exit Discarding Changes, and then press enter. Identify the BIOS update that provides software for your hard drive. You will need this path when you can be displayed using the AC adapter. NOTE: After...
HP Mini 210 - Maintenance and Service Guide
Page 107
... creating recovery discs 86 HP Recovery Manager 85 performing a recovery 87 restoring to previous date and time 84 system restore points 84 using recovery discs 87 Windows Backup and Restore 83 base enclosure, spare part numbers 18, 23 battery replacing 33 spare part numbers 18, 22 battery bay, identifying 13 battery light, identifying 10 battery locking latch, identifying 13 battery release latch, identifying 13 BIOS determining version 78 downloading an update 78 updating (Windows) 77 boot options 76 Broadband GPS Mini Card, spare part number 23 buttons left TouchPad 6 right TouchPad...
... creating recovery discs 86 HP Recovery Manager 85 performing a recovery 87 restoring to previous date and time 84 system restore points 84 using recovery discs 87 Windows Backup and Restore 83 base enclosure, spare part numbers 18, 23 battery replacing 33 spare part numbers 18, 22 battery bay, identifying 13 battery light, identifying 10 battery locking latch, identifying 13 battery release latch, identifying 13 BIOS determining version 78 downloading an update 78 updating (Windows) 77 boot options 76 Broadband GPS Mini Card, spare part number 23 buttons left TouchPad 6 right TouchPad...
HP Mini 210 - Maintenance and Service Guide
Page 108
..., product description 3 power switch, identifying 9 processor, product description 1 product description audio 2 chipset 1 display 1 Ethernet 2 external media cards 3 graphics 1 hard drive 2 internal media cards 3 keyboard 3 memory module 1 modem 2 operating system 4 optical drive 2 pointing device 3 ports 3 power requirements 3 processors 1 product name 1 security 3 serviceability 4 video 2 wireless 2 product name 1 R recycling battery 91 display 91 removal/replacement preliminaries 27 procedures 32 restoring default settings in Setup Utility 73 RJ-45 (network) jack, identifying 10 98...
..., product description 3 power switch, identifying 9 processor, product description 1 product description audio 2 chipset 1 display 1 Ethernet 2 external media cards 3 graphics 1 hard drive 2 internal media cards 3 keyboard 3 memory module 1 modem 2 operating system 4 optical drive 2 pointing device 3 ports 3 power requirements 3 processors 1 product name 1 security 3 serviceability 4 video 2 wireless 2 product name 1 R recycling battery 91 display 91 removal/replacement preliminaries 27 procedures 32 restoring default settings in Setup Utility 73 RJ-45 (network) jack, identifying 10 98...
HP Mini 210 - Maintenance and Service Guide
Page 109
... device 79 display 80, 81 hard drive 82 starting Setup Utility 69 static-shielding materials 31 system board removal 63 spare part numbers 17, 24, 25, 63 System Configuration Menu, Setup Utility 76 system information 72, 75 T tools required 27 top cover removal 51 spare part numbers 51 TouchPad buttons 6 TouchPad light 6 TouchPad zone, identifying 6 transporting guidelines 30 U USB ports, identifying 9, 11 using Setup Utility 70 V vents, identifying 10 video, product description 2 W webcam light, identifying 12 webcam, identifying 12 Windows applications key, identifying 8 Windows logo key...
... device 79 display 80, 81 hard drive 82 starting Setup Utility 69 static-shielding materials 31 system board removal 63 spare part numbers 17, 24, 25, 63 System Configuration Menu, Setup Utility 76 system information 72, 75 T tools required 27 top cover removal 51 spare part numbers 51 TouchPad buttons 6 TouchPad light 6 TouchPad zone, identifying 6 transporting guidelines 30 U USB ports, identifying 9, 11 using Setup Utility 70 V vents, identifying 10 video, product description 2 W webcam light, identifying 12 webcam, identifying 12 Windows applications key, identifying 8 Windows logo key...
HP Notebook Reference Guide - Windows 7
Page 27
... select Start > Control Panel > Sounds, Speech, and Audio Devices > Sounds and Audio Devices. You can utilize your computer, follow these steps: 1. NOTE: For best results when recording, speak directly into the microphone. Webcam (select models only) Some computers include an integrated webcam, located at the top of background noise. For information on using the webcam, select Start > Help and Support. Using SkyRoom (select models only) HP SkyRoom is an analog display interface that...
... select Start > Control Panel > Sounds, Speech, and Audio Devices > Sounds and Audio Devices. You can utilize your computer, follow these steps: 1. NOTE: For best results when recording, speak directly into the microphone. Webcam (select models only) Some computers include an integrated webcam, located at the top of background noise. For information on using the webcam, select Start > Help and Support. Using SkyRoom (select models only) HP SkyRoom is an analog display interface that...
HP Notebook Reference Guide - Windows 7
Page 32
... reading from external power and remove the battery. With the computer on the keyboard. ● Tap or swipe the TouchPad. 22 Chapter 4 Power management Windows XP-Select Start > Turn Off Computer > Stand By. If the computer is set at the factory: Sleep and Hibernation. Your work is initiated, the power lights blink and the screen clears. To exit Sleep: ● Briefly press the power button. ● If the display is saved to memory, letting you...
... reading from external power and remove the battery. With the computer on the keyboard. ● Tap or swipe the TouchPad. 22 Chapter 4 Power management Windows XP-Select Start > Turn Off Computer > Stand By. If the computer is set at the factory: Sleep and Hibernation. Your work is initiated, the power lights blink and the screen clears. To exit Sleep: ● Briefly press the power button. ● If the display is saved to memory, letting you...
HP Notebook Reference Guide - Windows 7
Page 36
... Support > Troubleshoot > Power, Thermal and Mechanical. 3. NOTE: For additional information about the power meter, refer to work properly. 2. NOTE: The computer must be changed using Power Options do not affect lights. Managing low battery levels The information in this section describes the alerts and system responses set using Power Options in Windows Control Panel. Identifying low battery levels When a battery that is not being used or charged. ● Store the battery in a cool, dry location...
... Support > Troubleshoot > Power, Thermal and Mechanical. 3. NOTE: For additional information about the power meter, refer to work properly. 2. NOTE: The computer must be changed using Power Options do not affect lights. Managing low battery levels The information in this section describes the alerts and system responses set using Power Options in Windows Control Panel. Identifying low battery levels When a battery that is not being used or charged. ● Store the battery in a cool, dry location...

HP Notebook Reference Guide - Windows 7
Page 43
... Card eject button (1). The PC Card slot may contain a protective insert. The insert must be removed before you are instructed by the PC Card manufacturer. CAUTION: To reduce the risk of support for other software, such as card services, socket services, or enablers, supplied by the PC Card manufacturer to install device drivers: ● Install only the device drivers for your operating system. ● Do not install other PC Cards during configuration, install only the software...
... Card eject button (1). The PC Card slot may contain a protective insert. The insert must be removed before you are instructed by the PC Card manufacturer. CAUTION: To reduce the risk of support for other software, such as card services, socket services, or enablers, supplied by the PC Card manufacturer to install device drivers: ● Install only the device drivers for your operating system. ● Do not install other PC Cards during configuration, install only the software...
HP Notebook Reference Guide - Windows 7
Page 52
... device is turned off and the AC power cord is unplugged. 1. To disconnect an unpowered external device, turn off the device, and then disconnect it from the computer. USB drives include the following types: ● 1.44-megabyte diskette drive ● Hard drive module (a hard drive with an adapter attached) ● External optical drive (CD, DVD, and Blu-ray) ● MultiBay device Using the expansion port (select models only) The expansion port connects the computer to the powered USB port...
... device is turned off and the AC power cord is unplugged. 1. To disconnect an unpowered external device, turn off the device, and then disconnect it from the computer. USB drives include the following types: ● 1.44-megabyte diskette drive ● Hard drive module (a hard drive with an adapter attached) ● External optical drive (CD, DVD, and Blu-ray) ● MultiBay device Using the expansion port (select models only) The expansion port connects the computer to the powered USB port...
HP Notebook Reference Guide - Windows 7
Page 55
... your permission or password for the hard drive, usually listed as installing software, running utilities, or changing Windows settings. To run during the night or at least once a month. For additional information, access the Disk Defragmenter software Help. Windows XP- You may set it works without supervision. You may want to set Disk Defragmenter to run Disk Defragmenter on -screen instructions. Select Start > All Programs > Accessories > System Tools > Disk Cleanup. 2. Using hard drives 45 NOTE: It...
... your permission or password for the hard drive, usually listed as installing software, running utilities, or changing Windows settings. To run during the night or at least once a month. For additional information, access the Disk Defragmenter software Help. Windows XP- You may set it works without supervision. You may want to set Disk Defragmenter to run Disk Defragmenter on -screen instructions. Select Start > All Programs > Accessories > System Tools > Disk Cleanup. 2. Using hard drives 45 NOTE: It...
HP Notebook Reference Guide - Windows 7
Page 70
...such as disk drives, display, keyboard, mouse, and printer). When a confirmation prompt with Setup Utility only if USB legacy support is displayed, press enter. 5. Press f10 to select a language, and then press enter. 4. NOTE: Use extreme care when making changes in Setup Utility. Starting Setup Utility NOTE: An external keyboard or mouse connected to a USB port can prevent the computer from operating properly. To start Setup Utility, follow these steps: 1. Use the arrow keys to enter Setup Utility. Setup Utility includes settings for Startup Menu" message is displayed at the...
...such as disk drives, display, keyboard, mouse, and printer). When a confirmation prompt with Setup Utility only if USB legacy support is displayed, press enter. 5. Press f10 to select a language, and then press enter. 4. NOTE: Use extreme care when making changes in Setup Utility. Starting Setup Utility NOTE: An external keyboard or mouse connected to a USB port can prevent the computer from operating properly. To start Setup Utility, follow these steps: 1. Use the arrow keys to enter Setup Utility. Setup Utility includes settings for Startup Menu" message is displayed at the...
HP Notebook Reference Guide - Windows 7
Page 73
...hard drive designation. If no instructions are displayed on -screen instructions. - Follow any instructions that is running on your hard drive. Double-click your computer and access the BIOS update you are already in an optional docking device, or connected to a network, consult the network administrator before installing any device, cable, or cord. 1. Windows XP-Select Start > Help and Support, and then select the software and drivers update. 2. Windows 7-Open Windows Explorer by selecting Start > My Computer. 2. Start Setup Utility. 2. Do not insert, remove...
...hard drive designation. If no instructions are displayed on -screen instructions. - Follow any instructions that is running on your hard drive. Double-click your computer and access the BIOS update you are already in an optional docking device, or connected to a network, consult the network administrator before installing any device, cable, or cord. 1. Windows XP-Select Start > Help and Support, and then select the software and drivers update. 2. Windows 7-Open Windows Explorer by selecting Start > My Computer. 2. Start Setup Utility. 2. Do not insert, remove...

HP Notebook Reference Guide - Windows 7
Page 80
... media activity controls 15 media hotkeys 15 MediaSmart 20 modems connecting a modem cable 10 connecting a modem cable adapter 10 selecting a location setting 11 N network cable, connecting 13 network icon 2 inserting 33 removing 34 removing insert 33 software and drivers 33 supported types 32 ports DisplayPort 18 expansion 42 external monitor 17 HDMI 18 Intel Wireless Display 19 VGA 17 power battery 25 conserving 27 options 22 power button 21 power meter 23 power plans customizing 24 selecting 24 viewing current 23 power switch 21 power-on password creating 55 entering 55 managing...
... media activity controls 15 media hotkeys 15 MediaSmart 20 modems connecting a modem cable 10 connecting a modem cable adapter 10 selecting a location setting 11 N network cable, connecting 13 network icon 2 inserting 33 removing 34 removing insert 33 software and drivers 33 supported types 32 ports DisplayPort 18 expansion 42 external monitor 17 HDMI 18 Intel Wireless Display 19 VGA 17 power battery 25 conserving 27 options 22 power button 21 power meter 23 power plans customizing 24 selecting 24 viewing current 23 power switch 21 power-on password creating 55 entering 55 managing...

HP Notebook Hard Drives & Solid State Drives Identifying, Preventing, Diagnosing and Recovering from Drive Failures Care and Mai
Page 6
... mode Adding SATA drivers using WinPE can be located at the following URL: http://bizsupport2.austin.hp.com/bc/docs/support/SupportManual/c01600726/c01600726.pdf. Intel Matrix Storage Technology driver HP offers the Intel Matrix Storage Manager driver for notebook PC models that are released to address known issues. Updates to the Intel Matrix Storage Manager driver are configured with Serial ATA hard disk drives. Procedures for the SATA Advanced Host Controller...
... mode Adding SATA drivers using WinPE can be located at the following URL: http://bizsupport2.austin.hp.com/bc/docs/support/SupportManual/c01600726/c01600726.pdf. Intel Matrix Storage Technology driver HP offers the Intel Matrix Storage Manager driver for notebook PC models that are released to address known issues. Updates to the Intel Matrix Storage Manager driver are configured with Serial ATA hard disk drives. Procedures for the SATA Advanced Host Controller...


