Getting Started - Windows 7
Page 66
... support 52 D Digital Media Slot, identifying 9 display image, switching 30 drive light 11 drivers and programs, updating 46 E esc key, identifying 7 F f11 49 fn key, identifying 7, 29 full system recovery 47 H hard drive installing 42 removing 42 hard drive, replacing 42 headphone (audio-out) jack 11 Help and Support action key 30 hotkey description 29 I input power 56 integrated webcam light, identifying 12 internal microphones, identifying 12 Internet connection setup 26 ISP, using 24 J jacks audio-in (microphone) 11 audio-out (headphone) 11 network 10 RJ-45 (network) 10 K keyboard hotkey...
... support 52 D Digital Media Slot, identifying 9 display image, switching 30 drive light 11 drivers and programs, updating 46 E esc key, identifying 7 F f11 49 fn key, identifying 7, 29 full system recovery 47 H hard drive installing 42 removing 42 hard drive, replacing 42 headphone (audio-out) jack 11 Help and Support action key 30 hotkey description 29 I input power 56 integrated webcam light, identifying 12 internal microphones, identifying 12 Internet connection setup 26 ISP, using 24 J jacks audio-in (microphone) 11 audio-out (headphone) 11 network 10 RJ-45 (network) 10 K keyboard hotkey...
Getting Started - Windows 7
Page 67
... drivers, updating 46 turn off 22 turn on 22 QuickWeb software 14 R recovering a program or driver 47 recovery discs 47, 48 Recovery Manager 47, 48 recovery partition 47 recovery, system 48 regulatory information regulatory label 54 wireless certification labels 54 restore points 51 RJ-45 (network) jack, identifying 10 rotating TouchPad gesture 36 S screen brightness keys 30 screen image, switching 30 scrolling TouchPad gesture 35 security cable slot, identifying 10 serial number 54 serial number, computer 54 setup of WLAN 26 slots Digital Media 9 security cable...
... drivers, updating 46 turn off 22 turn on 22 QuickWeb software 14 R recovering a program or driver 47 recovery discs 47, 48 Recovery Manager 47, 48 recovery partition 47 recovery, system 48 regulatory information regulatory label 54 wireless certification labels 54 restore points 51 RJ-45 (network) jack, identifying 10 rotating TouchPad gesture 36 S screen brightness keys 30 screen image, switching 30 scrolling TouchPad gesture 35 security cable slot, identifying 10 serial number 54 serial number, computer 54 setup of WLAN 26 slots Digital Media 9 security cable...
HP Mini 2102, HP Mini 210, and Compaq Mini 210 - Maintenance and Service Guide
Page 12
... HP QuickWeb √ √ FreeDOS (No support for HP QuickWeb) √ End-user replaceable parts: AC adapter √ √ Battery (system) √ √ Hard drive √ √ Memory module √ √ WLAN module √ √ WWAN module √ √ 4 Chapter 1 Product description TouchPad with 2 TouchPad buttons and 2-way scrolling (taps enabled and some gestures enabled by default) TouchPad on/off button with LED indicator 40-W UMA AC adapter (non-Smart) with multi-touch/gesture support √ No numeric pad supported...
... HP QuickWeb √ √ FreeDOS (No support for HP QuickWeb) √ End-user replaceable parts: AC adapter √ √ Battery (system) √ √ Hard drive √ √ Memory module √ √ WLAN module √ √ WWAN module √ √ 4 Chapter 1 Product description TouchPad with 2 TouchPad buttons and 2-way scrolling (taps enabled and some gestures enabled by default) TouchPad on/off button with LED indicator 40-W UMA AC adapter (non-Smart) with multi-touch/gesture support √ No numeric pad supported...
HP Mini 2102, HP Mini 210, and Compaq Mini 210 - Maintenance and Service Guide
Page 18
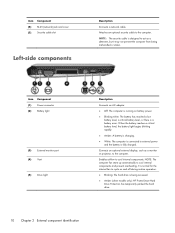
... fan starts up automatically to cool internal components. item Component (6) RJ-45 (network) jack and cover (7) Security cable slot Left-side components Description Connects a network cable. Attaches an optional security cable to the computer. item Component (1) Power connector (2) Battery light (3) External monitor port (4) Vent (5) Drive light Description Connects an AC adapter. ● Off: The computer is running on and off during routine operation. ● Blinking: The hard drive is fully charged. When the battery reaches a critical battery level, the battery light...
... fan starts up automatically to cool internal components. item Component (6) RJ-45 (network) jack and cover (7) Security cable slot Left-side components Description Connects a network cable. Attaches an optional security cable to the computer. item Component (1) Power connector (2) Battery light (3) External monitor port (4) Vent (5) Drive light Description Connects an AC adapter. ● Off: The computer is running on and off during routine operation. ● Blinking: The hard drive is fully charged. When the battery reaches a critical battery level, the battery light...
HP Mini 2102, HP Mini 210, and Compaq Mini 210 - Maintenance and Service Guide
Page 86
... not functioning, you start the backup process. Save and close all open documents and close any open programs. 2. Click Yes to confirm your computer. Using the Instant Restore utility when the operating system is not functioning To recover information when the operating system is displayed on -screen instructions. When the computer logo is not functioning, follow these steps: 1. NOTE: Windows includes the User Account Control feature to AC power before...
... not functioning, you start the backup process. Save and close all open documents and close any open programs. 2. Click Yes to confirm your computer. Using the Instant Restore utility when the operating system is not functioning To recover information when the operating system is displayed on -screen instructions. When the computer logo is not functioning, follow these steps: 1. NOTE: Windows includes the User Account Control feature to AC power before...
HP Mini 2102, HP Mini 210, and Compaq Mini 210 - Maintenance and Service Guide
Page 108
... 2 internal media cards 3 keyboard 3 memory module 1 modem 2 operating system 4 optical drive 2 panels 1 pointing device 3 ports 3 power requirements 4 processors 1 product name 1 security 4 serviceability 4 video 2 wireless 3 product name 1 R recycling battery 92 display 92 removal/replacement preliminaries 32 procedures 37 restoring default settings in Setup Utility 72 RJ-45 jack connector pinout 89 location 10 RTC battery removal 51 spare part numbers 19, 27, 51 Rubber Kit, spare part numbers 19, 26 S Screw Kit, spare part numbers 24, 28 security cable slot 10 Security Menu, Setup Utility...
... 2 internal media cards 3 keyboard 3 memory module 1 modem 2 operating system 4 optical drive 2 panels 1 pointing device 3 ports 3 power requirements 4 processors 1 product name 1 security 4 serviceability 4 video 2 wireless 3 product name 1 R recycling battery 92 display 92 removal/replacement preliminaries 32 procedures 37 restoring default settings in Setup Utility 72 RJ-45 jack connector pinout 89 location 10 RTC battery removal 51 spare part numbers 19, 27, 51 Rubber Kit, spare part numbers 19, 26 S Screw Kit, spare part numbers 24, 28 security cable slot 10 Security Menu, Setup Utility...
HP Notebook User Guide - SuSE Linux
Page 7
... Connecting a USB device 36 Removing a USB device ...36 Using optional external devices ...36 Using optional external drives 37 9 Memory modules ...38 10 Security ...41 Protecting the computer ...41 Using passwords ...41 Setting a password in the operating system 41 Setting passwords in Setup Utility 42 Managing an administrator password 42 Entering an administrator password 43 Managing a power-on password 43 Entering a power-on password 43 Installing an optional security cable ...43 11 Backup and recovery ...45 Performing a system recovery ...45 12 Setup Utility (BIOS) ...46 Starting...
... Connecting a USB device 36 Removing a USB device ...36 Using optional external devices ...36 Using optional external drives 37 9 Memory modules ...38 10 Security ...41 Protecting the computer ...41 Using passwords ...41 Setting a password in the operating system 41 Setting passwords in Setup Utility 42 Managing an administrator password 42 Entering an administrator password 43 Managing a power-on password 43 Entering a power-on password 43 Installing an optional security cable ...43 11 Backup and recovery ...45 Performing a system recovery ...45 12 Setup Utility (BIOS) ...46 Starting...
HP Notebook User Guide - SuSE Linux
Page 29
... external power, and then remove the battery. 6 Power management ● Shutting down the computer ● Setting power options ● Using battery power ● Using external AC power Shutting down the computer CAUTION: Unsaved information will be lost when the computer is saved to memory. CAUTION: To prevent possible audio and video degradation, loss of audio or video playback functionality, or loss of the following emergency procedures in Sleep, turn the computer on by opening...
... external power, and then remove the battery. 6 Power management ● Shutting down the computer ● Setting power options ● Using battery power ● Using external AC power Shutting down the computer CAUTION: Unsaved information will be lost when the computer is saved to memory. CAUTION: To prevent possible audio and video degradation, loss of audio or video playback functionality, or loss of the following emergency procedures in Sleep, turn the computer on by opening...
HP Notebook User Guide - SuSE Linux
Page 56
... a network connection is not displayed, use the arrow keys to select the Main menu. BIOS and other identifier. Access the page on -screen instructions to identify your computer and access the BIOS update you need this information to locate the update later, after it has been downloaded to reliable external power using Setup Utility. 1. Make a note of the BIOS may need to the hard drive. 48 Chapter 12 Setup Utility (BIOS) Determining the BIOS version To determine whether available BIOS updates contain later BIOS...
... a network connection is not displayed, use the arrow keys to select the Main menu. BIOS and other identifier. Access the page on -screen instructions to identify your computer and access the BIOS update you need this information to locate the update later, after it has been downloaded to reliable external power using Setup Utility. 1. Make a note of the BIOS may need to the hard drive. 48 Chapter 12 Setup Utility (BIOS) Determining the BIOS version To determine whether available BIOS updates contain later BIOS...
HP Notebook User Guide - SuSE Linux
Page 65
... Media Slot, identifying 6 display image, switching 16 drive light 7 drive media 21 drives external 37 handling 29 hard 37 optical 37 E electrostatic discharge 56 entering a power-on password 43 entering an administrator password 43 esc key, identifying 5 external devices 36 external drive 37 external monitor port 19 F factory settings, restoring 47 fn key, identifying 5 H hard drive external 37 installing 32 removing 30 headphone (audio-out) jack 7 help MeeGo 2 hotkey description 15 hubs 35 I icons network 10 wired network 10 wireless 10 input power 55 integrated webcam light, identifying...
... Media Slot, identifying 6 display image, switching 16 drive light 7 drive media 21 drives external 37 handling 29 hard 37 optical 37 E electrostatic discharge 56 entering a power-on password 43 entering an administrator password 43 esc key, identifying 5 external devices 36 external drive 37 external monitor port 19 F factory settings, restoring 47 fn key, identifying 5 H hard drive external 37 installing 32 removing 30 headphone (audio-out) jack 7 help MeeGo 2 hotkey description 15 hubs 35 I icons network 10 wired network 10 wireless 10 input power 55 integrated webcam light, identifying...
HP Notebook User Guide - SuSE Linux
Page 66
...10 network jack, identifying 6 network panel 11 noise suppression circuitry network cable 13 O operating environment 55 operating system, password set in 41 optical drive 37 optional external devices, using 36 optional security cable 43 P passwords set in operating system 41 set in Setup Utility 42 ports external monitor 19 USB 6, 7, 35 VGA 19 power conserving 26 power connector, identifying 7 power light, identifying 6 power switch, identifying 6 power-on password creating 43 entering 43 managing 43 product name and number, computer 53 public WLAN connection 12 R readable media 21 recovery 45...
...10 network jack, identifying 6 network panel 11 noise suppression circuitry network cable 13 O operating environment 55 operating system, password set in 41 optical drive 37 optional external devices, using 36 optional security cable 43 P passwords set in operating system 41 set in Setup Utility 42 ports external monitor 19 USB 6, 7, 35 VGA 19 power conserving 26 power connector, identifying 7 power light, identifying 6 power switch, identifying 6 power-on password creating 43 entering 43 managing 43 product name and number, computer 53 public WLAN connection 12 R readable media 21 recovery 45...
HP Mini 210 - Maintenance and Service Guide
Page 83
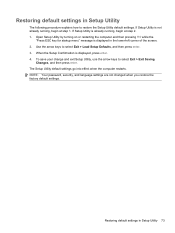
... password, security, and language settings are not changed when you restore the factory default settings. Restoring default settings in Setup Utility The following procedure explains how to restore the Setup Utility default settings. Use the arrow keys to select Exit > Exit Saving Changes, and then press enter. Open Setup Utility by turning on or restarting the computer and then pressing f10 while the "Press ESC key for startup menu" message is already running , begin at step 1. Restoring default settings in Setup Utility 73...
... password, security, and language settings are not changed when you restore the factory default settings. Restoring default settings in Setup Utility The following procedure explains how to restore the Setup Utility default settings. Use the arrow keys to select Exit > Exit Saving Changes, and then press enter. Open Setup Utility by turning on or restarting the computer and then pressing f10 while the "Press ESC key for startup menu" message is already running , begin at step 1. Restoring default settings in Setup Utility 73...
HP Mini 210 - Maintenance and Service Guide
Page 86
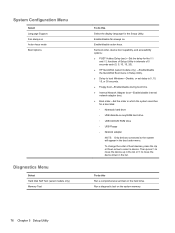
... Hard Disk Self Test (select models only) Memory Test To do this Select the display language for the f10 and f12 functions of Setup Utility in intervals of boot devices, press the Up or Down arrow to move the device up in the boot order menu. System Configuration Menu Select Language Support Fan always on the hard drive. Then press f5 to move the device down in the list. Enable/disable action keys. Set boot order, device boot capability, and accessibility options...
... Hard Disk Self Test (select models only) Memory Test To do this Select the display language for the f10 and f12 functions of Setup Utility in intervals of boot devices, press the Up or Down arrow to move the device up in the boot order menu. System Configuration Menu Select Language Support Fan always on the hard drive. Then press f5 to move the device down in the list. Enable/disable action keys. Set boot order, device boot capability, and accessibility options...
HP Mini 210 - Maintenance and Service Guide
Page 88
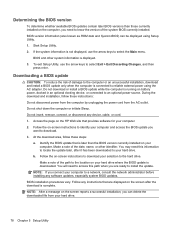
... the Main menu. If the system information is not displayed, use the arrow keys to select Exit > Exit Discarding Changes, and then press enter. Follow the on the screen after it has been downloaded to reliable external power using Setup Utility. 1. Do not shut down the computer or initiate Sleep. You may need to access this information to locate the update later, after the download is complete. Downloading a BIOS update CAUTION: To...
... the Main menu. If the system information is not displayed, use the arrow keys to select Exit > Exit Discarding Changes, and then press enter. Follow the on the screen after it has been downloaded to reliable external power using Setup Utility. 1. Do not shut down the computer or initiate Sleep. You may need to access this information to locate the update later, after the download is complete. Downloading a BIOS update CAUTION: To...
HP Mini 210 - Maintenance and Service Guide
Page 107
... creating recovery discs 86 HP Recovery Manager 85 performing a recovery 87 restoring to previous date and time 84 system restore points 84 using recovery discs 87 Windows Backup and Restore 83 base enclosure, spare part numbers 18, 23 battery replacing 33 spare part numbers 18, 22 battery bay, identifying 13 battery light, identifying 10 battery locking latch, identifying 13 battery release latch, identifying 13 BIOS determining version 78 downloading an update 78 updating (Windows) 77 boot options 76 Broadband GPS Mini Card, spare part number 23 buttons left TouchPad 6 right TouchPad...
... creating recovery discs 86 HP Recovery Manager 85 performing a recovery 87 restoring to previous date and time 84 system restore points 84 using recovery discs 87 Windows Backup and Restore 83 base enclosure, spare part numbers 18, 23 battery replacing 33 spare part numbers 18, 22 battery bay, identifying 13 battery light, identifying 10 battery locking latch, identifying 13 battery release latch, identifying 13 BIOS determining version 78 downloading an update 78 updating (Windows) 77 boot options 76 Broadband GPS Mini Card, spare part number 23 buttons left TouchPad 6 right TouchPad...
HP Mini 210 - Maintenance and Service Guide
Page 108
..., product description 3 power switch, identifying 9 processor, product description 1 product description audio 2 chipset 1 display 1 Ethernet 2 external media cards 3 graphics 1 hard drive 2 internal media cards 3 keyboard 3 memory module 1 modem 2 operating system 4 optical drive 2 pointing device 3 ports 3 power requirements 3 processors 1 product name 1 security 3 serviceability 4 video 2 wireless 2 product name 1 R recycling battery 91 display 91 removal/replacement preliminaries 27 procedures 32 restoring default settings in Setup Utility 73 RJ-45 (network) jack, identifying 10 98...
..., product description 3 power switch, identifying 9 processor, product description 1 product description audio 2 chipset 1 display 1 Ethernet 2 external media cards 3 graphics 1 hard drive 2 internal media cards 3 keyboard 3 memory module 1 modem 2 operating system 4 optical drive 2 pointing device 3 ports 3 power requirements 3 processors 1 product name 1 security 3 serviceability 4 video 2 wireless 2 product name 1 R recycling battery 91 display 91 removal/replacement preliminaries 27 procedures 32 restoring default settings in Setup Utility 73 RJ-45 (network) jack, identifying 10 98...
HP Mini 210 - Maintenance and Service Guide
Page 109
... device 79 display 80, 81 hard drive 82 starting Setup Utility 69 static-shielding materials 31 system board removal 63 spare part numbers 17, 24, 25, 63 System Configuration Menu, Setup Utility 76 system information 72, 75 T tools required 27 top cover removal 51 spare part numbers 51 TouchPad buttons 6 TouchPad light 6 TouchPad zone, identifying 6 transporting guidelines 30 U USB ports, identifying 9, 11 using Setup Utility 70 V vents, identifying 10 video, product description 2 W webcam light, identifying 12 webcam, identifying 12 Windows applications key, identifying 8 Windows logo key...
... device 79 display 80, 81 hard drive 82 starting Setup Utility 69 static-shielding materials 31 system board removal 63 spare part numbers 17, 24, 25, 63 System Configuration Menu, Setup Utility 76 system information 72, 75 T tools required 27 top cover removal 51 spare part numbers 51 TouchPad buttons 6 TouchPad light 6 TouchPad zone, identifying 6 transporting guidelines 30 U USB ports, identifying 9, 11 using Setup Utility 70 V vents, identifying 10 video, product description 2 W webcam light, identifying 12 webcam, identifying 12 Windows applications key, identifying 8 Windows logo key...
HP Notebook Reference Guide - Windows 7
Page 32
... audio and video degradation, loss of audio or video playback functionality, or loss of inactivity when running on battery power or on the keyboard. ● Tap or swipe the TouchPad. 22 Chapter 4 Power management NOTE: You cannot initiate any computer functions while the computer is unresponsive and you can be changed using Power Options in Windows® Control Panel. Power settings and timeouts can initiate Sleep in any of networking connection or perform any type...
... audio and video degradation, loss of audio or video playback functionality, or loss of inactivity when running on battery power or on the keyboard. ● Tap or swipe the TouchPad. 22 Chapter 4 Power management NOTE: You cannot initiate any computer functions while the computer is unresponsive and you can be changed using Power Options in Windows® Control Panel. Power settings and timeouts can initiate Sleep in any of networking connection or perform any type...
HP Notebook Reference Guide - Windows 7
Page 55
... the size of fragmented files, Disk Defragmenter may set it works without supervision. To run more than an hour to complete. Connect the computer to AC power. 2. Refer to Help and Support for the hard drive, usually listed as installing software, running utilities, or changing Windows settings. Select Start > All Programs > Accessories > System Tools > Disk Cleanup. 2. Under Volume, click the listing for more efficiently. HP recommends defragmenting your computer. Depending...
... the size of fragmented files, Disk Defragmenter may set it works without supervision. To run more than an hour to complete. Connect the computer to AC power. 2. Refer to Help and Support for the hard drive, usually listed as installing software, running utilities, or changing Windows settings. Select Start > All Programs > Accessories > System Tools > Disk Cleanup. 2. Under Volume, click the listing for more efficiently. HP recommends defragmenting your computer. Depending...
HP Notebook Reference Guide - Windows 7
Page 73
... before installing any device, cable, or cord. 1. NOTE: If you are displayed, follow these steps: 1. BIOS installation procedures vary. Windows XP-Open Windows Explorer by using the AC adapter. Make a note of the path to install the update. or - Make a note of the date, name, or other identifier. Follow the on-screen instructions to download your hard drive designation. The hard drive designation is downloaded. Do not insert, remove, connect, or disconnect any software updates, especially system BIOS updates. Using Setup Utility...
... before installing any device, cable, or cord. 1. NOTE: If you are displayed, follow these steps: 1. BIOS installation procedures vary. Windows XP-Open Windows Explorer by using the AC adapter. Make a note of the path to install the update. or - Make a note of the date, name, or other identifier. Follow the on-screen instructions to download your hard drive designation. The hard drive designation is downloaded. Do not insert, remove, connect, or disconnect any software updates, especially system BIOS updates. Using Setup Utility...


