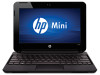
Getting Started - Windows 7
Page 6
Using the TouchPad ...25 Navigating ...25 Selecting ...26 6 Maintenance Inserting or removing the battery ...27 Replacing or upgrading the hard drive 29 Removing the hard drive ...29 Installing a hard drive ...30 Adding or replacing memory modules 31 Updating programs ...
Getting Started - Windows 7
Page 8
... driver, and BIOS (Setup Utility) updates ● Accessories available for the computer ● How to identify computer components HP Notebook Reference Guide ● Power management features To access this guide: ● Electrical and mechanical safety information Select Start >...Environmental Notices ● Regulatory and safety information To access the notices, select Start > Help and Support > User Guides. ● Battery disposal information Safety & Comfort Guide ● Proper workstation setup, posture, health, and work habits To access this guide, select Start...
Getting Started - Windows 7
Page 15
... monitor port Description Connects an AC adapter. ● White: The computer is connected to external power and the battery is fully charged. ● Amber: The computer is connected to external power and the battery is charging. ● Off: The computer is not connected to cool internal components. Connects an external VGA monitor...
Getting Started - Windows 7
Page 17
Bottom Component (1) Battery release latches (2) (2) Battery bay Description Release the battery from the battery bay. Holds the battery. Bottom 11
Getting Started - Windows 7
Page 22
Icon Function Launches the Power Control dialog box to see information about battery capacity: ● When the computer is connected to AC power, the icon appears with an AC power cord. ● When the computer is indicated by the color of the battery icon: ● Green: charged ● Yellow: low ● Red: critically low Launches the QuickWeb software Help. 16 Chapter 3 HP QuickWeb (select models only) The state of charge is running on battery power, the icon appears as only a battery.
Getting Started - Windows 7
Page 33
... the computer through Windows before removing the battery. 1. 6 Maintenance Inserting or removing the battery NOTE: For additional information on using the battery, refer to release the battery. To remove the battery: CAUTION: Removing a battery that is seated. Inserting or removing the battery 27 To prevent loss of information. Slide the battery release latches (1) to the HP Notebook Reference Guide.
Getting Started - Windows 7
Page 34
Remove the battery from the computer (2). 28 Chapter 6 Maintenance 2.
Getting Started - Windows 7
Page 35
... shut down the computer. 2. Save your work and shut down the computer through the operating system. b. Unplug the power cord from the computer. Remove the battery from the AC outlet. 4. Remove the 4 hard drive screws (1). 8. Remove the vanity cover: a. Removing the hard drive 1. Turn the computer upside down the computer before... Hibernation, turn the computer on , in the Sleep state, or in Hibernation. Disconnect all external devices connected to the previous section, Inserting or removing the battery on a flat surface. 5.
Getting Started - Windows 7
Page 36
With the battery bay toward you, position the vanity cover at a 45-degree angle from the surface of the computer so that the tabs on the underside of the hard drive bay. 9. Lift the hard drive (3) out of the panel align with the matching slots on the computer (1). 30 Chapter 6 Maintenance Replace the vanity cover: a. Installing a hard drive 1. Insert the hard drive into place. 3. Replace the 4 hard drive screws (3). 4. Pull the hard drive tab (2) to the left until the hard drive snaps into the hard drive bay (1). 2.
Getting Started - Windows 7
Page 37
... Electrostatic discharge (ESD) can be upgraded by replacing the existing memory module in Hibernation, turn the computer on page 27. Disconnect all batteries before adding or replacing memory modules. WARNING! NOTE: For more information, refer to both the left and right edges of static electricity ...a memory module: CAUTION: To prevent information loss or an unresponsive system: Shut down , applying pressure to the section Inserting or removing the battery on by touching a grounded metal object. If you are not sure whether the computer is located on , in the Sleep state, or ...
Getting Started - Windows 7
Page 40
Tighten the 2 memory bracket screws (2). 13. Replace the memory bracket (1). 12. With the battery bay toward you, position the vanity cover at a 45-degree angle from the surface of the computer so that the tabs on the underside of the panel align with the matching slots on the computer (1). 34 Chapter 6 Maintenance Replace the vanity cover: a. 11.
Getting Started - Windows 7
Page 41
Turn the computer right-side up, and then reconnect external power and external devices. 16. Gently press the vanity cover (2) down, applying pressure to both the left and right edges of the panel, until it snaps into place. 14. Adding or replacing memory modules 35 Turn on the computer. Replace the battery. 15. b.
Getting Started - Windows 7
Page 48
...Product number (p/n) (4) Warranty period (5) Model description (select models only) Have this information when traveling internationally. ◦ The serial number of your HP Mobile Broadband Module (select models only). You may be a wireless local area network (WLAN) device, a wireless wide-area network (WWAN) device,... or an optional Bluetooth® device. The serial number label is located inside the battery bay of the countries or regions in your computer, refer to update or troubleshoot the operating system. To access this certificate in...
Getting Started - Windows 7
Page 50
...audio-out (headphone) jack, identifying 9 B backing up customized window, toolbar, and menu bar settings 39 personal files 39 battery bay 11 battery release latches 11 battery, replacing 27 buttons left TouchPad 4 right TouchPad 4 C caps lock light, identifying 5 components bottom 11 display 10 front ... 6 arrow 6 esc 6 fn 6 Windows applications 6 Windows logo 6 L labels Microsoft Certificate of Authenticity 42 regulatory 42 serial number 41 latches, battery release 11 lights AC adapter 9 caps lock 5 drive 9 mute 5 power 8 webcam 10 wireless 5 M memory module inserting 33 removing 32 replacing...
HP Mini 110 and Compaq Mini CQ10 - Maintenance and Service Guide
Page 8
... SIM ...39 Service cover ...40 Hard drive ...41 WWAN module ...43 WLAN module ...46 Memory module ...51 RTC battery ...53 Keyboard ...54 Top cover ...57 Speakers ...60 TouchPad ...62 Display assembly ...64 System board ...68 Fan/heat sink assembly 71 Power connector cable 73 5 ...
HP Mini 110 and Compaq Mini CQ10 - Maintenance and Service Guide
Page 9
... points 83 When to create restore points 83 Creating a system restore point 83 Restoring to a previous date and time 83 Backing up and recovering using HP Recovery Manager 84 Backing up your information 84 Creating a set of recovery discs 85 Performing a recovery 86 Recovering using the recovery discs 86 Recovering using... (network) ...93 Universal Serial Bus ...93 8 Power cord set requirements 94 Requirements for all countries 94 Requirements for specific countries and regions 95 9 Recycling ...96 Battery ...96 Display ...96 Index ...102 ix
HP Mini 110 and Compaq Mini CQ10 - Maintenance and Service Guide
Page 13
Category Description HP Mini 110 External media cards Internal media cards Ports Keyboard/ pointing device Power requirements Security Integrated WWAN by default) TouchPad on/off button with LED indicator 30-W ... adapter connector on cable √ 1.0-m (3.28-ft) power cord √ 3-cell Lithium-ion(Li-ion) battery (2.55-Ah, 28-Wh) √ 6-cell Lithium-ion(Li-ion) battery (2.80-Ah, 62-Wh) √ Supports Kensington security lock √ Compaq Mini CQ10 √ √ √ 3 standard aspect video 3-pin AC power √ 93% flat-style...
HP Mini 110 and Compaq Mini CQ10 - Maintenance and Service Guide
Page 21
... monitor port (4) Vent Connects an AC adapter. ● White: The computer is connected to external power and the battery is fully charged. ● Amber: The computer is connected to external power and the battery is charging. ● Off: The computer is connected to act as a deterrent, but it may not prevent the...
HP Mini 110 and Compaq Mini CQ10 - Maintenance and Service Guide
Page 23
Holds the battery. Bottom components 13 Bottom components item Component (1) Battery release latches (2) (2) Battery bay Description Release the battery from the battery bay.
HP Mini 110 and Compaq Mini CQ10 - Maintenance and Service Guide
Page 24
... catalog Service tag When ordering parts or requesting information, provide the computer serial number and model description provided on the service tag: NOTE: The computer battery must be removed to access the service tag. (1) Product name: This is the product name affixed to the front of the warranty period for the...