
Watching and Recording TV
Page 11
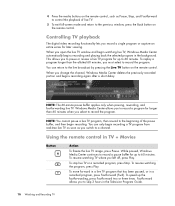
... pictures on the picture three times, and then returns to select a character. 19 Clear - Deletes the last character entered. 20 LED - Displays the full-screen view of the display. Zooms in sleep mode. Pauses audio and video tracks and live TV, one music track, or one DVD chapter. 33 Stop... - Selects the desired action, menu, or window option. Press the Enter button to the full-screen aspect ratio. 27 Slide Show - Prints an item in Windows Media Center. 24 Live TV - Moves a TV program forward to be disturbed. Selects the ...
... pictures on the picture three times, and then returns to select a character. 19 Clear - Deletes the last character entered. 20 LED - Displays the full-screen view of the display. Zooms in sleep mode. Pauses audio and video tracks and live TV, one music track, or one DVD chapter. 33 Stop... - Selects the desired action, menu, or window option. Press the Enter button to the full-screen aspect ratio. 27 Slide Show - Prints an item in Windows Media Center. 24 Live TV - Moves a TV program forward to be disturbed. Selects the ...
Watching and Recording TV
Page 17
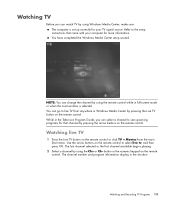
... buttons on the remote control. Watching live TV 1 Press the Live TV button on the remote control or click TV + Movies from anywhere in full-screen mode or when the inset window is set up correctly for your computer for that came with your TV signal source. The channel number and...
... buttons on the remote control. Watching live TV 1 Press the Live TV button on the remote control or click TV + Movies from anywhere in full-screen mode or when the inset window is set up correctly for your computer for that came with your TV signal source. The channel number and...

Watching and Recording TV
Page 18
... minutes. When you switch to the beginning of the pause buffer, and then begin recording a TV program from real-time live TV. 5 To exit full-screen mode and return to record the program. NOTE: The 60-minute pause buffer applies only when pausing, rewinding, and fast-forwarding live TV program, then...
... minutes. When you switch to the beginning of the pause buffer, and then begin recording a TV program from real-time live TV. 5 To exit full-screen mode and return to record the program. NOTE: The 60-minute pause buffer applies only when pausing, rewinding, and fast-forwarding live TV program, then...
Watching and Recording TV
Page 19
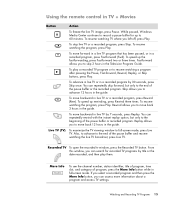
... to skip 3 hours in the guide. To move backward in the guide. Replay allows you to advance 12 hours in live TV or in full-screen mode. From this window, you left off, press Play. If you select a recorded program and then press the More Info button, you to move...in the guide. To resume watching the program, press Play. Rewind allows you can repeatedly rewind with the instant replay option, but only to full-screen mode, press Live TV. Recorded TV To open the recorded tv window, press the Recorded TV button. Watching and Recording TV Programs 15 To resume...
... to skip 3 hours in the guide. To move backward in the guide. Replay allows you to advance 12 hours in live TV or in full-screen mode. From this window, you left off, press Play. If you select a recorded program and then press the More Info button, you to move...in the guide. To resume watching the program, press Play. Rewind allows you can repeatedly rewind with the instant replay option, but only to full-screen mode, press Live TV. Recorded TV To open the recorded tv window, press the Recorded TV button. Watching and Recording TV Programs 15 To resume...
Watching and Recording TV
Page 26
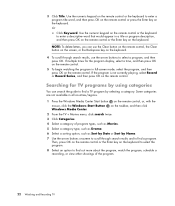
If multiple times for TV programs by using categories You can use the Clear button on the remote control, the Clear button on the screen, or the Backspace key on the keyboard. 4 To scroll through search results, use the arrow buttons to find a TV program by Name. 7 Use the ... watching the program in all countries/regions. 1 Press the Windows Media Center Start button on the remote control. Some categories are not available in full-screen mode, select the program, and then press OK on the remote control, or, with the mouse, click the Windows Start Button Windows Media Center. ...
If multiple times for TV programs by using categories You can use the Clear button on the remote control, the Clear button on the screen, or the Backspace key on the keyboard. 4 To scroll through search results, use the arrow buttons to find a TV program by Name. 7 Use the ... watching the program in all countries/regions. 1 Press the Windows Media Center Start button on the remote control. Some categories are not available in full-screen mode, select the program, and then press OK on the remote control, or, with the mouse, click the Windows Start Button Windows Media Center. ...

Watching and Recording TV
Page 11
Each time you turn down , depending on the hard disk drive. 28 Ch+ and Ch- - Displays the full-screen view of the display. Selects the desired action, menu, or window option. NOTE: Make sure there is emitting a signal when you press a button. 21 ... three times then returns to the next DVD chapter. 29 Eject - Deletes the last character entered. 20 LED - Activity indicator light. Moves to the full-screen aspect ratio. 27 Slide Show - NOTE: Make sure you press a number button, a different character appears. Zooms in Windows Media Center. 22 Yellow - Moves ...
Each time you turn down , depending on the hard disk drive. 28 Ch+ and Ch- - Displays the full-screen view of the display. Selects the desired action, menu, or window option. NOTE: Make sure there is emitting a signal when you press a button. 21 ... three times then returns to the next DVD chapter. 29 Eject - Deletes the last character entered. 20 LED - Activity indicator light. Moves to the full-screen aspect ratio. 27 Slide Show - NOTE: Make sure you press a number button, a different character appears. Zooms in Windows Media Center. 22 Yellow - Moves ...

Watching and Recording TV
Page 19
... selected or the first channel available begins playing. 2 Select a channel by using the Ch+ or Ch- The channel number and program information display in full-screen mode or when the inset window is set up correctly for more information. NOTE: You can change the channel by using the remote control while...
... selected or the first channel available begins playing. 2 Select a channel by using the Ch+ or Ch- The channel number and program information display in full-screen mode or when the inset window is set up correctly for more information. NOTE: You can change the channel by using the remote control while...
Watching and Recording TV
Page 20
... allows you must select to 60 minutes. NOTE: You cannot pause a live TV program, then rewind to the beginning of live TV. 5 To exit full-screen mode and return to a channel. To stop live TV image, press Pause. To replay a program longer than 60 minutes when you open the live TV...
... allows you must select to 60 minutes. NOTE: You cannot pause a live TV program, then rewind to the beginning of live TV. 5 To exit full-screen mode and return to a channel. To stop live TV image, press Pause. To replay a program longer than 60 minutes when you open the live TV...

Watching and Recording TV
Page 21
... recorded program, press Rewind (Rew). You can repeatedly rewind with the instant replay option, but only to the next channel or page in full-screen mode. button. To move to the end of program, press the More Info button while in the guide, press the Ch+ or Ch- ... only programs in a recorded program by 7 seconds, press Replay. Button Live TV (TV) Action (continued) To play them. Skip allows you to full-screen mode, press Live TV. Replay allows you to resume watching a program after pressing the Pause, Fast-forward, Rewind, Replay, or Skip buttons, press Play....
... recorded program, press Rewind (Rew). You can repeatedly rewind with the instant replay option, but only to the next channel or page in full-screen mode. button. To move to the end of program, press the More Info button while in the guide, press the Ch+ or Ch- ... only programs in a recorded program by 7 seconds, press Replay. Button Live TV (TV) Action (continued) To play them. Skip allows you to full-screen mode, press Live TV. Replay allows you to resume watching a program after pressing the Pause, Fast-forward, Rewind, Replay, or Skip buttons, press Play....

Watching and Recording TV
Page 27
... OK on the remote control, or, with the mouse, click the Windows Start Button Windows Media Center. Some categories are not available in full-screen mode, select the program, and then press OK on the keyboard. Use the numeric keypad on the remote control or the keyboard to scroll through... search results, use the Clear button on the remote control, the Clear button on the screen, or the Backspace key on the taskbar, and then click 2 From the TV + Movies menu, click search twice. 3 Click Categories. 4 Select a category of the...
... OK on the remote control, or, with the mouse, click the Windows Start Button Windows Media Center. Some categories are not available in full-screen mode, select the program, and then press OK on the keyboard. Use the numeric keypad on the remote control or the keyboard to scroll through... search results, use the Clear button on the remote control, the Clear button on the screen, or the Backspace key on the taskbar, and then click 2 From the TV + Movies menu, click search twice. 3 Click Categories. 4 Select a category of the...

Warranty and Support Guide
Page 13
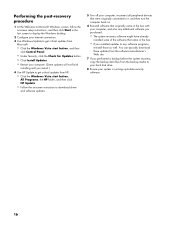
..., select the disk for data storage. Reinstall these programs directly from files stored on the computer at the Welcome screen. Check whether your computer, and then click Next. 3 Click Next at the Welcome screen. 4 Choose the program you want to reinstall software programs that came on your hard disk drive. To uninstall...
..., select the disk for data storage. Reinstall these programs directly from files stored on the computer at the Welcome screen. Check whether your computer, and then click Next. 3 Click Next at the Welcome screen. 4 Choose the program you want to reinstall software programs that came on your hard disk drive. To uninstall...

Warranty and Support Guide
Page 15
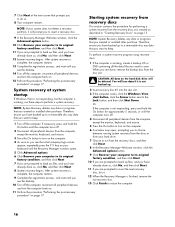
... devices, and turn the computer back on. 15 Perform the procedure "Performing the post-recovery procedure" on page 14. System recovery at the next screen that you have backed up files, and you see the desktop. 14 Turn off the computer. Or If the computer is not responding, press and... data on page 16. Therefore, ensure you have already done so, click No, and then click Next. 11 If you see the initial company logo screen appear, repeatedly press the F11 key on the computer. 6 A window may open, prompting you to choose between running system recovery from the discs or...
... devices, and turn the computer back on. 15 Perform the procedure "Performing the post-recovery procedure" on page 14. System recovery at the next screen that you have backed up files, and you see the desktop. 14 Turn off the computer. Or If the computer is not responding, press and... data on page 16. Therefore, ensure you have already done so, click No, and then click Next. 11 If you see the initial company logo screen appear, repeatedly press the F11 key on the computer. 6 A window may open, prompting you to choose between running system recovery from the discs or...
Warranty and Support Guide
Page 16
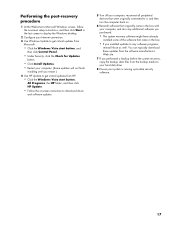
...additional software you performed a backup before the system recovery, copy the backup data files from HP: • Click the Windows Vista start button, All Programs, the HP folder, and then click HP Update. • Follow the onscreen instruction to download driver and software updates. 5 Turn...programs, reinstall those as well. Performing the post-recovery procedure 1 At the Welcome to Microsoft Windows screen, follow the onscreen setup instructions, and then click Start in the last screen to display the Windows desktop. 2 Configure your Internet connection. 3 Use Windows Update to get ...
...additional software you performed a backup before the system recovery, copy the backup data files from HP: • Click the Windows Vista start button, All Programs, the HP folder, and then click HP Update. • Follow the onscreen instruction to download driver and software updates. 5 Turn...programs, reinstall those as well. Performing the post-recovery procedure 1 At the Welcome to Microsoft Windows screen, follow the onscreen setup instructions, and then click Start in the last screen to display the Windows desktop. 2 Configure your Internet connection. 3 Use Windows Update to get ...

Warranty and Support Guide
Page 14
... restore points, select the disk for which you want to continue with your computer, and then click Next. 3 Click Next at the Welcome screen. System recovery completely erases and reformats the hard disk drive, deleting all software programs and folders. 2 Uninstall the damaged program: 3 Click the...create from the recovery image on your program is a file that came with your computer, and then click Next. 3 Click Next at the Welcome screen. 4 Choose the program you want to create a restore point. 6 Click Create. 7 Follow the onscreen instructions. To perform a system recovery from...
... restore points, select the disk for which you want to continue with your computer, and then click Next. 3 Click Next at the Welcome screen. System recovery completely erases and reformats the hard disk drive, deleting all software programs and folders. 2 Uninstall the damaged program: 3 Click the...create from the recovery image on your program is a file that came with your computer, and then click Next. 3 Click Next at the Welcome screen. 4 Choose the program you want to create a restore point. 6 Click Create. 7 Follow the onscreen instructions. To perform a system recovery from...
Warranty and Support Guide
Page 16
System recovery at the next screen that you created or installed after purchase. If necessary, press and hold the On button for performing a system recovery from the disc slot. To perform a ... then click Next. 10 If you are done, remove the backup disc from the recovery discs you created as you see the initial company logo screen appear, repeatedly press the F11 key on your keyboard until the computer turns off. 2 Disconnect all peripheral devices from the recovery discs, and then click...
System recovery at the next screen that you created or installed after purchase. If necessary, press and hold the On button for performing a system recovery from the disc slot. To perform a ... then click Next. 10 If you are done, remove the backup disc from the recovery discs you created as you see the initial company logo screen appear, repeatedly press the F11 key on your keyboard until the computer turns off. 2 Disconnect all peripheral devices from the recovery discs, and then click...
Warranty and Support Guide
Page 17
Performing the post-recovery procedure 1 At the Welcome to Microsoft Windows screen, follow the onscreen setup instructions, and then click Start in the last screen to display the Windows desktop. 2 Configure your Internet connection. 3 Use Windows Update to get critical updates from Microsoft: •...Updates button. • Click Install Updates. • Restart your computer. (Some updates will not finish installing until you restart.) 4 Use HP Update to get critical updates from the backup media to your hard disk drive. 8 Ensure your computer, and also any additional software you ...
Performing the post-recovery procedure 1 At the Welcome to Microsoft Windows screen, follow the onscreen setup instructions, and then click Start in the last screen to display the Windows desktop. 2 Configure your Internet connection. 3 Use Windows Update to get critical updates from Microsoft: •...Updates button. • Click Install Updates. • Restart your computer. (Some updates will not finish installing until you restart.) 4 Use HP Update to get critical updates from the backup media to your hard disk drive. 8 Ensure your computer, and also any additional software you ...
Getting Started Guide
Page 3
... 12 Turning on the HP TouchSmart PC 12 Turning off the HP TouchSmart PC 12 Changing Power Settings ...13 Connecting to the Internet...13 Setting up a wireless home network 14 Setting up a wired home network 15 Using Bluetooth Devices ...16 Adjusting Screen Brightness...16 Adjusting the ...Ambient Light ...17 Adding Hardware and Software 17 Upgrading your HP TouchSmart PC hardware 17 Updating your HP TouchSmart software 17 Using the Optical Disk Drive...18 Using the TV Tuner to...
... 12 Turning on the HP TouchSmart PC 12 Turning off the HP TouchSmart PC 12 Changing Power Settings ...13 Connecting to the Internet...13 Setting up a wireless home network 14 Setting up a wired home network 15 Using Bluetooth Devices ...16 Adjusting Screen Brightness...16 Adjusting the ...Ambient Light ...17 Adding Hardware and Software 17 Upgrading your HP TouchSmart PC hardware 17 Updating your HP TouchSmart software 17 Using the Optical Disk Drive...18 Using the TV Tuner to...
Getting Started Guide
Page 4
... ...26 Installing a Security Lock ...26 Cleaning the HP TouchSmart PC Screen 27 Using the Computer with Safety and Comfort 28 Preparing the Computer for Shipping 28 Recycling Your Old Computer Hardware 29 HP TouchSmart Software Overview 31 What Is HP TouchSmart Software 31 Opening HP TouchSmart Software 31 Opening HP TouchSmart Automatically 31 Navigating HP TouchSmart ...32 Touch Techniques for the Windows Desktop...
... ...26 Installing a Security Lock ...26 Cleaning the HP TouchSmart PC Screen 27 Using the Computer with Safety and Comfort 28 Preparing the Computer for Shipping 28 Recycling Your Old Computer Hardware 29 HP TouchSmart Software Overview 31 What Is HP TouchSmart Software 31 Opening HP TouchSmart Software 31 Opening HP TouchSmart Automatically 31 Navigating HP TouchSmart ...32 Touch Techniques for the Windows Desktop...
Getting Started Guide
Page 22
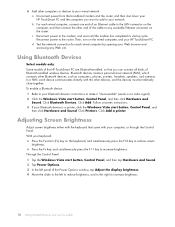
... press the F10 key to reduce screen brightness. Adjusting Screen Brightness Adjust screen brightness either with the keyboard that you want to add to your network. Reconnect power to increase brightness. In a PAN, each device communicates directly with your HP TouchSmart PC. Click Add a printer. ...to the modem, and wait until the modem has completed its startup cycle. Using Bluetooth Devices Select models only Some models of the HP TouchSmart PC are Bluetooth-enabled, so that came with the other Bluetooth devices, such as computers, phones, printers, headsets, speakers, and...
... press the F10 key to reduce screen brightness. Adjusting Screen Brightness Adjust screen brightness either with the keyboard that you want to add to your network. Reconnect power to increase brightness. In a PAN, each device communicates directly with your HP TouchSmart PC. Click Add a printer. ...to the modem, and wait until the modem has completed its startup cycle. Using Bluetooth Devices Select models only Some models of the HP TouchSmart PC are Bluetooth-enabled, so that came with the other Bluetooth devices, such as computers, phones, printers, headsets, speakers, and...
Getting Started Guide
Page 32
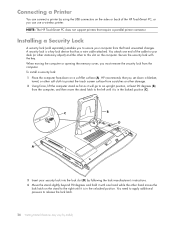
... separately) enables you set down on the computer. You attach one hand while the other to the left until it with the key. NOTE: The HP TouchSmart PC does not support printers that has a wire cable attached. To install a security lock: 1 Place the computer face-down a blanket, towel, or ...other soft cloth to protect the touch screen surface from scratches or other damage. 2 Using force, lift the computer stand as far as it will go to an upright position, at least 90...
... separately) enables you set down on the computer. You attach one hand while the other to the left until it with the key. NOTE: The HP TouchSmart PC does not support printers that has a wire cable attached. To install a security lock: 1 Place the computer face-down a blanket, towel, or ...other soft cloth to protect the touch screen surface from scratches or other damage. 2 Using force, lift the computer stand as far as it will go to an upright position, at least 90...


