

Security - Window Vista and Windows 7
Page 8
... at a Setup Utility prompt. Use the following sections list Windows and Setup Utility passwords and describe their functions. Because most passwords are not displayed as screen-saver passwords, select Start > Help and Support. 2 Chapter 2 Using passwords 2 Using passwords A password is a group of characters that could be easily discovered by the program...
... at a Setup Utility prompt. Use the following sections list Windows and Setup Utility passwords and describe their functions. Because most passwords are not displayed as screen-saver passwords, select Start > Help and Support. 2 Chapter 2 Using passwords 2 Using passwords A password is a group of characters that could be easily discovered by the program...

Security - Window Vista and Windows 7
Page 10
While the "Press the ESC key for Startup Menu" message is displayed in the lower-left corner of the screen, press esc. After this password, follow these steps: 1. Open the Setup Utility by turning on or restarting the computer. After 3 unsuccessful attempts to enter the ... and Confirm New Password fields, and then press enter. ● To change , or delete this password is displayed in the lower-left corner of the screen, press f10. - Open the Setup Utility by turning on or restarting the computer. To save your changes and exit the Setup Utility, use of the...
While the "Press the ESC key for Startup Menu" message is displayed in the lower-left corner of the screen, press esc. After this password, follow these steps: 1. Open the Setup Utility by turning on or restarting the computer. After 3 unsuccessful attempts to enter the ... and Confirm New Password fields, and then press enter. ● To change , or delete this password is displayed in the lower-left corner of the screen, press f10. - Open the Setup Utility by turning on or restarting the computer. To save your changes and exit the Setup Utility, use of the...

Security - Window Vista and Windows 7
Page 11
... Confirm New Password fields, and then press enter. ● To delete a power-on password, type your current password in the lower-left corner of the screen, press f10. - Open the Setup Utility by turning on or restarting the computer. When the Startup Menu is displayed in Setup Utility 5 To save your... Password fields, and then press enter. ● To change , or delete this password, follow these steps: 1. Setting passwords in the lower-left corner of the screen, press esc.
... Confirm New Password fields, and then press enter. ● To delete a power-on password, type your current password in the lower-left corner of the screen, press f10. - Open the Setup Utility by turning on or restarting the computer. When the Startup Menu is displayed in Setup Utility 5 To save your... Password fields, and then press enter. ● To change , or delete this password, follow these steps: 1. Setting passwords in the lower-left corner of the screen, press esc.
Security - Window Vista and Windows 7
Page 18
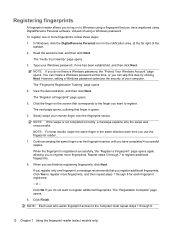
... results, swipe the same finger in the notification area, at this step by clicking Next. Registering fingerprints A fingerprint reader allows you to log on the screen that finger in green. 6. To register one or more fingerprints, and then repeat steps 1 through 9. 12 Chapter 7 Using the fingerprint reader (select models only...
... results, swipe the same finger in the notification area, at this step by clicking Next. Registering fingerprints A fingerprint reader allows you to log on the screen that finger in green. 6. To register one or more fingerprints, and then repeat steps 1 through 9. 12 Chapter 7 Using the fingerprint reader (select models only...

Setup Utility - Windows Vista and Windows 7
Page 5
or - 1. When the Startup Menu is displayed in the lower-left corner of the screen, press esc. 2. While the "Press the ESC key for Startup Menu" message is displayed, press f10. 1 NOTE: The fingerprint reader (select models only) cannot be ...-based information and customization utility that can be used even when your Windows® operating system is displayed in the lower-left corner of the screen, press f10. - To start the Setup Utility: ▲ Open the Setup Utility by turning on or restarting the computer. While the "Press the ESC key...
or - 1. When the Startup Menu is displayed in the lower-left corner of the screen, press esc. 2. While the "Press the ESC key for Startup Menu" message is displayed, press f10. 1 NOTE: The fingerprint reader (select models only) cannot be ...-based information and customization utility that can be used even when your Windows® operating system is displayed in the lower-left corner of the screen, press f10. - To start the Setup Utility: ▲ Open the Setup Utility by turning on or restarting the computer. While the "Press the ESC key...

Setup Utility - Windows Vista and Windows 7
Page 6
2 Using the Setup Utility Changing the language of the Setup Utility The following procedure explains how to change the language of the screen, press f10. - Use the arrow keys to select System Configuration > Language, and then press enter. 3. Navigating and selecting in the lower-left corner ... keystroke. ● To choose a menu or a menu item, use the arrow keys. ● To choose an item in the lower-left corner of the screen, press esc. If the Setup Utility is already running , begin at step 1. To save your language selected is displayed, press f10. 2. While the "Press ...
2 Using the Setup Utility Changing the language of the Setup Utility The following procedure explains how to change the language of the screen, press f10. - Use the arrow keys to select System Configuration > Language, and then press enter. 3. Navigating and selecting in the lower-left corner ... keystroke. ● To choose a menu or a menu item, use the arrow keys. ● To choose an item in the lower-left corner of the screen, press esc. If the Setup Utility is already running , begin at step 1. To save your language selected is displayed, press f10. 2. While the "Press ...

Setup Utility - Windows Vista and Windows 7
Page 7
...Saving Changes, and then press enter. While the "Press the ESC key for Startup Menu" message is displayed in the lower-left corner of the screen, press esc. To save your change and exit the Setup Utility, use the arrow keys to select Exit > Exit Discarding Changes, and then ... at step 2. 1. Restoring default settings in the Setup Utility The following procedure explains how to display system information in the lower-left corner of the screen, press f10. - If the Setup Utility is displayed, press enter. 4. While the "Press the ESC key for Startup Menu" message is displayed in ...
...Saving Changes, and then press enter. While the "Press the ESC key for Startup Menu" message is displayed in the lower-left corner of the screen, press esc. To save your change and exit the Setup Utility, use the arrow keys to select Exit > Exit Discarding Changes, and then ... at step 2. 1. Restoring default settings in the Setup Utility The following procedure explains how to display system information in the lower-left corner of the screen, press f10. - If the Setup Utility is displayed, press enter. 4. While the "Press the ESC key for Startup Menu" message is displayed in ...
Wireless (Select Models Only) - Windows 7
Page 25
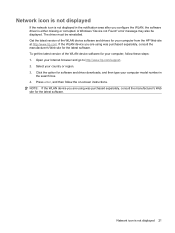
... notification area after you are using was purchased separately, consult the manufacturer's Web site for your computer, follow the on-screen instructions. Select your Internet browser and go to http://www.hp.com/support. 2. If the WLAN device you are using was purchased separately, consult the manufacturer's Web site for the latest...
... notification area after you are using was purchased separately, consult the manufacturer's Web site for your computer, follow the on-screen instructions. Select your Internet browser and go to http://www.hp.com/support. 2. If the WLAN device you are using was purchased separately, consult the manufacturer's Web site for the latest...
Drives - Windows 7
Page 5
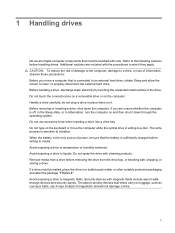
... loss of information, observe these precautions: Before you are unsure whether the computer is connected to an external hard drive, initiate Sleep and allow the screen to temperature or humidity extremes. do not drop a drive or place items on the computer. Avoid exposing a drive to clear, or properly disconnect the external...
... loss of information, observe these precautions: Before you are unsure whether the computer is connected to an external hard drive, initiate Sleep and allow the screen to temperature or humidity extremes. do not drop a drive or place items on the computer. Avoid exposing a drive to clear, or properly disconnect the external...
Drives - Windows 7
Page 12
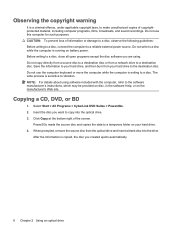
... disc into the optical drive. 3. NOTE: For details about using . Observing the copyright warning It is writing to a disc. CAUTION: To prevent loss of the screen. Do not copy directly from a source disc to a destination disc or from your hard drive to copy into the drive. Insert the disc you created...
... disc into the optical drive. 3. NOTE: For details about using . Observing the copyright warning It is writing to a disc. CAUTION: To prevent loss of the screen. Do not copy directly from a source disc to a destination disc or from your hard drive to copy into the drive. Insert the disc you created...
Drives - Windows 7
Page 16
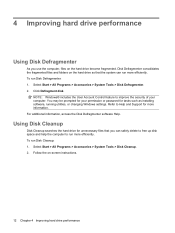
... you can run more efficiently. Disk Defragmenter consolidates the fragmented files and folders on the hard drive so that you use the computer, files on -screen instructions. 12 Chapter 4 Improving hard drive performance To run Disk Cleanup: 1.
... you can run more efficiently. Disk Defragmenter consolidates the fragmented files and folders on the hard drive so that you use the computer, files on -screen instructions. 12 Chapter 4 Improving hard drive performance To run Disk Cleanup: 1.
Drives - Windows 7
Page 22
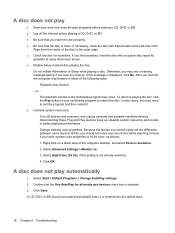
..., or BD. ● Log off printers and scanners, and unplug cameras and portable handheld devices. Wipe from the center of the computer desktop, and select Screen resolution. 2. Click Save. A disc does not play automatically 1.
..., or BD. ● Log off printers and scanners, and unplug cameras and portable handheld devices. Wipe from the center of the computer desktop, and select Screen resolution. 2. Click Save. A disc does not play automatically 1.
Drives - Windows 7
Page 24
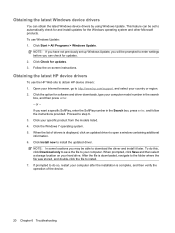
...In some locations you want a specific SoftPaq, enter the SoftPaq number in the search box, and then press enter. - If prompted to http://www.hp.com/support, and select your Internet browser, go to do this, click Download only to save the file to step 6. 3. If you may ...file was stored, and double-click the file to install. 7. To use the HP Web site to open a window containing additional information. 6. When prompted, click Save and then select a storage location on -screen instructions. Obtaining the latest Windows device drivers You can check for the Windows operating system...
...In some locations you want a specific SoftPaq, enter the SoftPaq number in the search box, and then press enter. - If prompted to http://www.hp.com/support, and select your Internet browser, go to do this, click Download only to save the file to step 6. 3. If you may ...file was stored, and double-click the file to install. 7. To use the HP Web site to open a window containing additional information. 6. When prompted, click Save and then select a storage location on -screen instructions. Obtaining the latest Windows device drivers You can check for the Windows operating system...
Pointing Devices and Keyboard - Windows 7
Page 3
... Support (fn+f1 4 Opening the Print Options window (fn+f2 5 Opening a Web browser (fn+f3 5 Switching the screen image (fn+f4 5 Initiating Sleep (fn+f5) ...5 Initiating QuickLock (fn+f6 6 Decreasing screen brightness (fn+f7 6 Increasing screen brightness (fn+f8 6 Playing, pausing or resuming an audio CD, DVD, or BD (fn+f9 6 Stopping an...
... Support (fn+f1 4 Opening the Print Options window (fn+f2 5 Opening a Web browser (fn+f3 5 Switching the screen image (fn+f4 5 Initiating Sleep (fn+f5) ...5 Initiating QuickLock (fn+f6 6 Decreasing screen brightness (fn+f7 6 Increasing screen brightness (fn+f8 6 Playing, pausing or resuming an audio CD, DVD, or BD (fn+f9 6 Stopping an...
Pointing Devices and Keyboard - Windows 7
Page 5
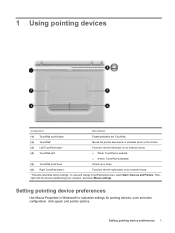
... the right button on an external mouse. ● White: TouchPad is enabled. ● Amber: TouchPad is disabled. 1 Using pointing devices Component Description (1) TouchPad on the screen. Setting pointing device preferences Use Mouse Properties in Windows® to customize settings for pointing devices, such as button configuration, click speed, and pointer options.
... the right button on an external mouse. ● White: TouchPad is enabled. ● Amber: TouchPad is disabled. 1 Using pointing devices Component Description (1) TouchPad on the screen. Setting pointing device preferences Use Mouse Properties in Windows® to customize settings for pointing devices, such as button configuration, click speed, and pointer options.

Pointing Devices and Keyboard - Windows 7
Page 7
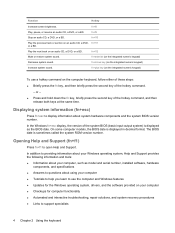
... the asterisk (*), minus sign (-), or plus sign (+) on the f1 through f12 keys represent the hotkey functions. Open the Print Options window. Initiate QuickLock. Decrease screen brightness. Hotkey fn+esc fn+f1 fn+f2 fn+f3 fn+f4 fn+f5 fn+f6 fn+f7 Using hotkeys 3 Switch the...
... the asterisk (*), minus sign (-), or plus sign (+) on the f1 through f12 keys represent the hotkey functions. Open the Print Options window. Initiate QuickLock. Decrease screen brightness. Hotkey fn+esc fn+f1 fn+f2 fn+f3 fn+f4 fn+f5 fn+f6 fn+f7 Using hotkeys 3 Switch the...
Pointing Devices and Keyboard - Windows 7
Page 8
.... Play the next track on the integrated numeric keypad) Increase system sound. fn+minus key (on an audio CD, a DVD, or a BD. Function Hotkey Increase screen brightness.
.... Play the next track on the integrated numeric keypad) Increase system sound. fn+minus key (on an audio CD, a DVD, or a BD. Function Hotkey Increase screen brightness.
Pointing Devices and Keyboard - Windows 7
Page 9
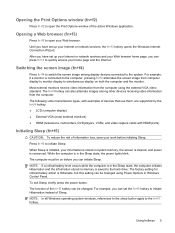
...critical battery level occurs while the computer is in the Sleep state, the computer initiates Hibernation and the information stored in system memory, the screen is cleared, and power is initiated, your home page and the Internet. NOTE: In all Windows operating system windows, references to the ...initiating Sleep. The function of the active Windows application. While the computer is connected to the computer, pressing fn+f4 alternates the screen image from the computer using Power Options in the Sleep state, the power lights blink. Until you can be changed using the external...
...critical battery level occurs while the computer is in the Sleep state, the computer initiates Hibernation and the information stored in system memory, the screen is cleared, and power is initiated, your home page and the Internet. NOTE: In all Windows operating system windows, references to the ...initiating Sleep. The function of the active Windows application. While the computer is connected to the computer, pressing fn+f4 alternates the screen image from the computer using Power Options in the Sleep state, the power lights blink. Until you can be changed using the external...
Pointing Devices and Keyboard - Windows 7
Page 10
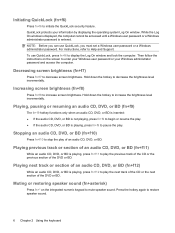
... set a Windows user password or a Windows administrator password. Then follow the instructions on the integrated numeric keypad to decrease screen brightness. Increasing screen brightness (fn+f8) Press fn+f8 to enter your Windows user password or your information by displaying the operating system Log... On window. Muting or restoring speaker sound (fn+asterisk) Press fn+* on the screen to increase screen brightness. Decreasing screen brightness (fn+f7) Press fn+f7 to mute speaker sound. Playing, pausing or resuming an audio CD, DVD, ...
... set a Windows user password or a Windows administrator password. Then follow the instructions on the integrated numeric keypad to decrease screen brightness. Increasing screen brightness (fn+f8) Press fn+f8 to enter your Windows user password or your information by displaying the operating system Log... On window. Muting or restoring speaker sound (fn+asterisk) Press fn+* on the screen to increase screen brightness. Decreasing screen brightness (fn+f7) Press fn+f7 to mute speaker sound. Playing, pausing or resuming an audio CD, DVD, ...
Pointing Devices and Keyboard - Windows 7
Page 14
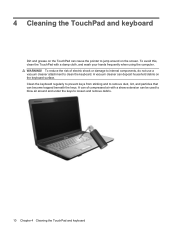
... a vacuum cleaner attachment to clean the keyboard. To avoid this, clean the TouchPad with a straw extension can be used to blow air around on the screen. Clean the keyboard regularly to prevent keys from sticking and to remove dust, lint, and particles that can deposit household debris on the keyboard surface...
... a vacuum cleaner attachment to clean the keyboard. To avoid this, clean the TouchPad with a straw extension can be used to blow air around on the screen. Clean the keyboard regularly to prevent keys from sticking and to remove dust, lint, and particles that can deposit household debris on the keyboard surface...


