Security - Windows Vista
Page 8
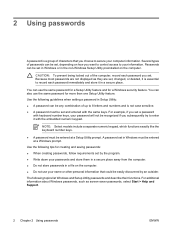
... an outsider. For example, if you set a password with keyboard number keys, your password will not be recognized if you choose to record each password you want to control access to enter it with the same keys. Because most passwords are not displayed as screen-saver passwords, select Start > Help and Support. 2 Chapter 2 Using passwords ENWW Use the following topics list Windows and Setup Utility passwords and describe their functions. 2 Using passwords A password is a group of characters that could...
... an outsider. For example, if you set a password with keyboard number keys, your password will not be recognized if you choose to record each password you want to control access to enter it with the same keys. Because most passwords are not displayed as screen-saver passwords, select Start > Help and Support. 2 Chapter 2 Using passwords ENWW Use the following topics list Windows and Setup Utility passwords and describe their functions. 2 Using passwords A password is a group of characters that could...
Security - Windows Vista
Page 18
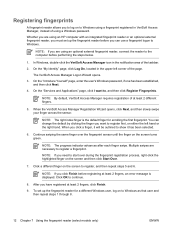
... the right hand. NOTE: The progress indicator advances after each finger swipe. Click a different finger on the screen turns green. The VeriSoft Access Manager Logon Wizard opens. 3. NOTE: By default, VeriSoft Access Manager requires registration of at least 2 fingers, an error message is the default finger for a different Windows user, log on to Windows using an optional external fingerprint reader, connect the reader to show it will be outlined to...
... the right hand. NOTE: The progress indicator advances after each finger swipe. Click a different finger on the screen turns green. The VeriSoft Access Manager Logon Wizard opens. 3. NOTE: By default, VeriSoft Access Manager requires registration of at least 2 fingers, an error message is the default finger for a different Windows user, log on to Windows using an optional external fingerprint reader, connect the reader to show it will be outlined to...
Setup Utility - Windows Vista and XP
Page 8
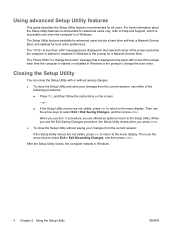
... menu display. The Setup Utility features available for advanced users include a hard drive self-test, a Network Service Boot, and settings for advanced users only, refer to the Setup Utility. Then use the arrow keys to select Exit > Exit Saving Changes, and then press enter. After the Setup Utility closes, the computer restarts in Windows is the prompt for all users. For more information about the Setup Utility features recommended for boot order preferences. Then use the arrow keys...
... menu display. The Setup Utility features available for advanced users include a hard drive self-test, a Network Service Boot, and settings for advanced users only, refer to the Setup Utility. Then use the arrow keys to select Exit > Exit Saving Changes, and then press enter. After the Setup Utility closes, the computer restarts in Windows is the prompt for all users. For more information about the Setup Utility features recommended for boot order preferences. Then use the arrow keys...
Software Updates - Windows Vista
Page 7
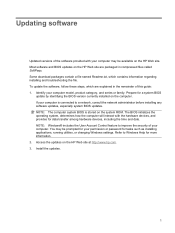
.... Updating software Updated versions of the software provided with the hardware devices, and provides for data transfer among hardware devices, including the time and date. Most software and BIOS updates on the computer. Refer to a network, consult the network administrator before installing any software updates, especially system BIOS updates. Identify your permission or password for your computer model, product category, and series or family. Access the updates on the HP Web site. Install the updates. 1 Prepare...
.... Updating software Updated versions of the software provided with the hardware devices, and provides for data transfer among hardware devices, including the time and date. Most software and BIOS updates on the computer. Refer to a network, consult the network administrator before installing any software updates, especially system BIOS updates. Identify your permission or password for your computer model, product category, and series or family. Access the updates on the HP Web site. Install the updates. 1 Prepare...

Software Updates - Windows Vista
Page 8
... download and install the new BIOS. Follow the instructions on the screen to identify your computer and access the BIOS update you are already in the lower-left corner of the screen. 2. To exit the Setup Utility, use the Setup Utility for your computer: Select Start > Help and Support, and then select the software and drivers update. 2. Follow the instructions on the screen to download your computer. Do not insert, remove, connect, or disconnect any device, cable...
... download and install the new BIOS. Follow the instructions on the screen to identify your computer and access the BIOS update you are already in the lower-left corner of the screen. 2. To exit the Setup Utility, use the Setup Utility for your computer: Select Start > Help and Support, and then select the software and drivers update. 2. Follow the instructions on the screen to download your computer. Do not insert, remove, connect, or disconnect any device, cable...

Drives - Windows Vista
Page 13
... permission or password for unnecessary files that the system can safely delete to free up disk space and help the computer to run more efficiently. Follow the on the hard drive become fragmented. For additional information, access the Disk Defragmenter online Help. Using Disk Cleanup Disk Cleanup searches the hard drive for tasks such as installing applications, running utilities, or changing Windows settings. Using Disk Defragmenter 7 To run Disk Defragmenter: 1. To...
... permission or password for unnecessary files that the system can safely delete to free up disk space and help the computer to run more efficiently. Follow the on the hard drive become fragmented. For additional information, access the Disk Defragmenter online Help. Using Disk Cleanup Disk Cleanup searches the hard drive for tasks such as installing applications, running utilities, or changing Windows settings. Using Disk Defragmenter 7 To run Disk Defragmenter: 1. To...

Drives - Windows Vista
Page 14
Remove the 2 hard drive screws (1). 8 Chapter 5 Replacing the hard drive If you , loosen the 2 hard drive cover screws (1). 8. To remove the hard drive: 1. Turn the computer upside down on by pressing the power button. Then shut down the computer and close the display. 3. Save your work. 2. Unplug the power cord from the computer. 7. Remove the battery from the AC outlet. 5. Shut down the computer through the operating system. With the hard drive bay toward...
Remove the 2 hard drive screws (1). 8 Chapter 5 Replacing the hard drive If you , loosen the 2 hard drive cover screws (1). 8. To remove the hard drive: 1. Turn the computer upside down on by pressing the power button. Then shut down the computer and close the display. 3. Save your work. 2. Unplug the power cord from the computer. 7. Remove the battery from the AC outlet. 5. Shut down the computer through the operating system. With the hard drive bay toward...
Notebook Tour - Windows Vista
Page 15
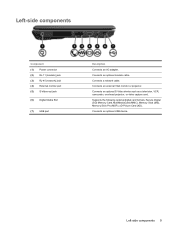
Connects an optional USB device. Connects an optional modem cable. Left-side components 9 Connects an external VGA monitor or projector. Left-side components Component (1) Power connector (2) RJ-11 (modem) jack (3) RJ-45 (network) jack (4) External monitor port (5) S-Video-out jack (6) Digital Media Slot (7) USB port Description Connects an AC adapter. Connects an optional S-Video device such as a television, VCR, camcorder, overhead projector, or video capture card. Connects a network cable. Supports the following optional digital card formats: Secure Digital (SD) Memory Card, ...
Connects an optional USB device. Connects an optional modem cable. Left-side components 9 Connects an external VGA monitor or projector. Left-side components Component (1) Power connector (2) RJ-11 (modem) jack (3) RJ-45 (network) jack (4) External monitor port (5) S-Video-out jack (6) Digital Media Slot (7) USB port Description Connects an AC adapter. Connects an optional S-Video device such as a television, VCR, camcorder, overhead projector, or video capture card. Connects a network cable. Supports the following optional digital card formats: Secure Digital (SD) Memory Card, ...

Pointing Devices and Keyboard - Windows Vista
Page 15
... not function while an external keyboard or numeric keypad is off at the factory.) For example: ● When num lock is on, most keypad keys function like the keys on an external keypad. Using an optional external numeric keypad Keys on most external numeric keypads function differently according to whether num lock is on or off. (Num lock is turned off , most keypad keys type numbers. ● When num lock is connected to...
... not function while an external keyboard or numeric keypad is off at the factory.) For example: ● When num lock is on, most keypad keys function like the keys on an external keypad. Using an optional external numeric keypad Keys on most external numeric keypads function differently according to whether num lock is on or off. (Num lock is turned off , most keypad keys type numbers. ● When num lock is connected to...
Wireless (Select Models Only) - Windows Vista
Page 13
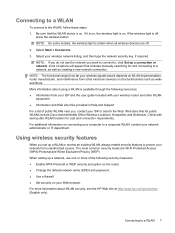
...; Change the default network name (SSID) and password. ● Use a firewall. ● Set security on your ISP and the user guide included with each public WLAN location for and connecting to , click Set up a network, use one or more information about using a WLAN is on . A list of the following resources: ● Information from unauthorized access. Using wireless security features When you set up a WLAN or access an existing WLAN, always enable...
...; Change the default network name (SSID) and password. ● Use a firewall. ● Set security on your ISP and the user guide included with each public WLAN location for and connecting to , click Set up a network, use one or more information about using a WLAN is on . A list of the following resources: ● Information from unauthorized access. Using wireless security features When you set up a WLAN or access an existing WLAN, always enable...
HP G7000 Notebook PC and Compaq Presario C700 Notebook PC - Maintenance and Service Guide
Page 94
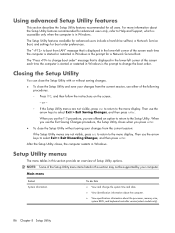
... change boot order" message that is displayed in the lower-left corner of the screen each time the computer is started or restarted in Windows is the prompt to select Exit > Exit Saving Changes, and then press enter. Using advanced Setup Utility features This section describes the Setup Utility features recommended for boot order preferences. For more information about the processor, memory size, system BIOS, and keyboard controller version (select models...
... change boot order" message that is displayed in the lower-left corner of the screen each time the computer is started or restarted in Windows is the prompt to select Exit > Exit Saving Changes, and then press enter. Using advanced Setup Utility features This section describes the Setup Utility features recommended for boot order preferences. For more information about the processor, memory size, system BIOS, and keyboard controller version (select models...
HP G7000 Notebook PC and Compaq Presario C700 Notebook PC - Maintenance and Service Guide
Page 95
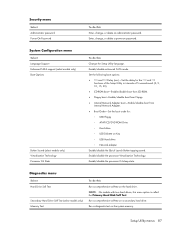
...) Memory Test To do this Change the Setup Utility language. Run a comprehensive self-test on Key ◦ USB Hard drive ◦ Network adapter Enable/disable the Quick Launch Button tapping sound. Enable/disable the processor C4 sleep state. Run a diagnostic test on the hard drive. Enter, change , or delete an administrator password. Security menu Select Administrator password Power-On Password To do this Enter, change , or delete a power-on password. System Configuration menu Select Language Support Enhanced SATA support (select models only) Boot Options Button Sound (select models...
...) Memory Test To do this Change the Setup Utility language. Run a comprehensive self-test on Key ◦ USB Hard drive ◦ Network adapter Enable/disable the Quick Launch Button tapping sound. Enable/disable the processor C4 sleep state. Run a diagnostic test on the hard drive. Enter, change , or delete an administrator password. Security menu Select Administrator password Power-On Password To do this Enter, change , or delete a power-on password. System Configuration menu Select Language Support Enhanced SATA support (select models only) Boot Options Button Sound (select models...
HP G7000 Notebook PC and Compaq Presario C700 Notebook PC - Maintenance and Service Guide
Page 135
... 33 camera cable spare part numbers 31 camera light location 5 camera location 5 camera module removal 60 spare part number 60 spare part numbers 31 caps lock LED board removal 64 spare part number 16, 29, 64 caps lock light 8 card reader board removal 77 spare part number 16, 29, 77 carrying case, spare part number 24, 26 changing the Setup Utility language 84 chipset, product description 1 closing the Setup Utility 86 CMOS clearing 37 components bottom 12 buttons 6 display 5 front 5, 10 key 7 left-side 11 lights 8 right-side 10 TouchPad 9 composite audio and S-Video cable, spare part number...
... 33 camera cable spare part numbers 31 camera light location 5 camera location 5 camera module removal 60 spare part number 60 spare part numbers 31 caps lock LED board removal 64 spare part number 16, 29, 64 caps lock light 8 card reader board removal 77 spare part number 16, 29, 77 carrying case, spare part number 24, 26 changing the Setup Utility language 84 chipset, product description 1 closing the Setup Utility 86 CMOS clearing 37 components bottom 12 buttons 6 display 5 front 5, 10 key 7 left-side 11 lights 8 right-side 10 TouchPad 9 composite audio and S-Video cable, spare part number...
HP G7000 Notebook PC and Compaq Presario C700 Notebook PC - Maintenance and Service Guide
Page 136
... Drive precautions 33 removal 48 spare part number 19, 23, 28, 48 specifications 91 DVD±RW and CD-RW Combo Drive precautions 33 removal 48 spare part numbers 19, 23, 28, 48 specifications 91 E electrostatic discharge 34 enhanced SATA support 87 esc key 7 Ethernet, product description 3 external media cards, product description 3 external monitor port location 11 pin assignments 116 F fan removal 68 spare part number 16, 29, 68 feet locations 39 spare part number 39 fingerprint reader...
... Drive precautions 33 removal 48 spare part number 19, 23, 28, 48 specifications 91 DVD±RW and CD-RW Combo Drive precautions 33 removal 48 spare part numbers 19, 23, 28, 48 specifications 91 E electrostatic discharge 34 enhanced SATA support 87 esc key 7 Ethernet, product description 3 external media cards, product description 3 external monitor port location 11 pin assignments 116 F fan removal 68 spare part number 16, 29, 68 feet locations 39 spare part number 39 fingerprint reader...
HP G7000 Notebook PC and Compaq Presario C700 Notebook PC - Maintenance and Service Guide
Page 137
... audio 3 chipset 1 diskette drive 3 display panel 2 docking support 3 Ethernet 3 external media cards 3 graphics 2 hard drives 2 keyboard 4 memory module 2 microphone 3 modem 3 operating system 4 optical drives 2 pointing devices 4 ports 3 power requirements 4 processors 1 product name 1 security 4 serviceability 4 wireless 3 product name 1 R recovery discs 113 recovery, system 114 remote control, spare part numbers 24, 26 removal/replacement preliminaries 32 procedures 38 restore points 111 RF input adapter cable, spare part number 24, 26 right-side components 10 RJ-11 jack location...
... audio 3 chipset 1 diskette drive 3 display panel 2 docking support 3 Ethernet 3 external media cards 3 graphics 2 hard drives 2 keyboard 4 memory module 2 microphone 3 modem 3 operating system 4 optical drives 2 pointing devices 4 ports 3 power requirements 4 processors 1 product name 1 security 4 serviceability 4 wireless 3 product name 1 R recovery discs 113 recovery, system 114 remote control, spare part numbers 24, 26 removal/replacement preliminaries 32 procedures 38 restore points 111 RF input adapter cable, spare part number 24, 26 right-side components 10 RJ-11 jack location...
HP G7000 Notebook PC and Compaq Presario C700 Notebook PC - Maintenance and Service Guide
Page 138
... hard drive self test 87 security cable slot 10 Security menu 87 security, product description 4 selecting in the Setup Utility 85 serial number 13, 38 service considerations 32 serviceability, product description 4 Setup Utility changing the language 84 Diagnostics menu 87 displaying system information 85 Main menu 86 navigating 85 overview 84 Security menu 87 selecting 85 starting 84 System Configuration menu 87 using advanced features 86 speakers removal 70 spare part number 16, 29, 70 specifications...
... hard drive self test 87 security cable slot 10 Security menu 87 security, product description 4 selecting in the Setup Utility 85 serial number 13, 38 service considerations 32 serviceability, product description 4 Setup Utility changing the language 84 Diagnostics menu 87 displaying system information 85 Main menu 86 navigating 85 overview 84 Security menu 87 selecting 85 starting 84 System Configuration menu 87 using advanced features 86 speakers removal 70 spare part number 16, 29, 70 specifications...

Power Management - Windows Vista
Page 9
... exits Sleep, the power lights turn on external power. Power settings and timeouts can initiate Sleep in any computer functions while the computer is initiated, your work returns to the Lock button, and then click Sleep. With the computer on the remote control (select models only). ● Activate the TouchPad. If the computer is initiated, the power lights blink and the screen clears. Using power-saving states 3 2 Setting power options Using power-saving states The computer has two power-saving states enabled...
... exits Sleep, the power lights turn on external power. Power settings and timeouts can initiate Sleep in any computer functions while the computer is initiated, your work returns to the Lock button, and then click Sleep. With the computer on the remote control (select models only). ● Activate the TouchPad. If the computer is initiated, the power lights blink and the screen clears. Using power-saving states 3 2 Setting power options Using power-saving states The computer has two power-saving states enabled...

Power Management - Windows Vista
Page 21
... a new battery. The battery light on . Select Start > Control Panel > System and Maintenance > Power Options. 2. Change the Turn off or in the notification area, and then click More power options. - It is fully charged. Leave the computer plugged into external power until the battery is also not necessary to an AC adapter, optional power adapter, optional expansion product, or optional docking device, and then plug the adapter or device into the computer. 2. Click Change advanced power settings. 6. NOTE: The battery charges whether...
... a new battery. The battery light on . Select Start > Control Panel > System and Maintenance > Power Options. 2. Change the Turn off or in the notification area, and then click More power options. - It is fully charged. Leave the computer plugged into external power until the battery is also not necessary to an AC adapter, optional power adapter, optional expansion product, or optional docking device, and then plug the adapter or device into the computer. 2. Click Change advanced power settings. 6. NOTE: The battery charges whether...

Power Management - Windows Vista
Page 23
... turns off . 2. or - Click the plus sign next to Sleep, and then click the plus sign next to reenable Hibernation after . 6. Calibrating a battery 17 Click the battery meter icon in the On battery column. 4. When the battery is recharged, the battery light on when the battery is off . If the computer is fully recharged. Select Start > Control Panel > System and Maintenance > Power Options. 2. Click Save changes...
... turns off . 2. or - Click the plus sign next to Sleep, and then click the plus sign next to reenable Hibernation after . 6. Calibrating a battery 17 Click the battery meter icon in the On battery column. 4. When the battery is recharged, the battery light on when the battery is off . If the computer is fully recharged. Select Start > Control Panel > System and Maintenance > Power Options. 2. Click Save changes...
Power Management - Windows Vista
Page 29
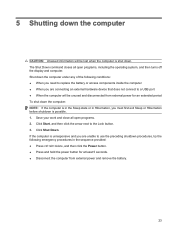
... Sleep or Hibernation before shutdown is unresponsive and you are connecting an external hardware device that does not connect to a USB port ● When the computer will be unused and disconnected from external power for at least 5 seconds. ● Disconnect the computer from external power and remove the battery. 23 The Shut Down command closes all open programs, including the operating system, and then turns off the display...
... Sleep or Hibernation before shutdown is unresponsive and you are connecting an external hardware device that does not connect to a USB port ● When the computer will be unused and disconnected from external power for at least 5 seconds. ● Disconnect the computer from external power and remove the battery. 23 The Shut Down command closes all open programs, including the operating system, and then turns off the display...


