Notebook Essentials - Windows 7
Page 5
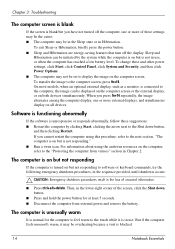
... computer 11 Turning off the computer 12 Chapter 3: Troubleshooting Troubleshooting resources 13 Quick troubleshooting 13 The computer is unable to start up 13 The computer screen is blank 14 Software is functioning abnormally 14 The computer is on but not responding 14 The computer is unusually warm 14 An external device...
... computer 11 Turning off the computer 12 Chapter 3: Troubleshooting Troubleshooting resources 13 Quick troubleshooting 13 The computer is unable to start up 13 The computer screen is blank 14 Software is functioning abnormally 14 The computer is on but not responding 14 The computer is unusually warm 14 An external device...
Notebook Essentials - Windows 7
Page 13
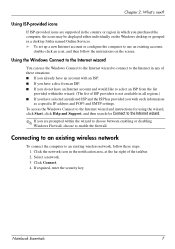
... to the Internet wizard to connect to the Internet wizard. ✎ If you purchased the computer, the icons may be displayed either individually on the screen. Connecting to an existing wireless network To connect the computer to enable the firewall. If required, enter the security key. Using the Windows Connect to...
... to the Internet wizard to connect to the Internet wizard. ✎ If you purchased the computer, the icons may be displayed either individually on the screen. Connecting to an existing wireless network To connect the computer to enable the firewall. If required, enter the security key. Using the Windows Connect to...

Notebook Essentials - Windows 7
Page 15
... in Help and Support. 3. Connect your wireless network, refer to the router by pressing the wireless button. c. You will ensure that the wireless light on -screen instructions. d. If you need this section carefully before you temporarily connect your Web browser and accessing a Web site. For help locating the wireless button or...
... in Help and Support. 3. Connect your wireless network, refer to the router by pressing the wireless button. c. You will ensure that the wireless light on -screen instructions. d. If you need this section carefully before you temporarily connect your Web browser and accessing a Web site. For help locating the wireless button or...
Notebook Essentials - Windows 7
Page 17
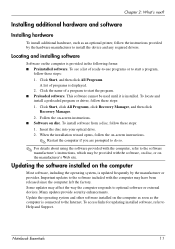
This software cannot be provided with the software, on disc, or on -screen instructions. ✎ Restart the computer if you are prompted to do so. ✎ For details about using the software provided with the computer may affect ... the software installed on the computer as soon as an optional printer, follow these steps: 1. Locating and installing software Software on disc. Follow the on-screen instructions. ■ Software on the computer is displayed. 2. To see a list of programs is provided in the following forms: ■ Preinstalled software...
This software cannot be provided with the software, on disc, or on -screen instructions. ✎ Restart the computer if you are prompted to do so. ✎ For details about using the software provided with the computer may affect ... the software installed on the computer as soon as an optional printer, follow these steps: 1. Locating and installing software Software on disc. Follow the on-screen instructions. ■ Software on the computer is displayed. 2. To see a list of programs is provided in the following forms: ■ Preinstalled software...

Notebook Essentials - Windows 7
Page 18
.... Chapter 2: What's next? Turning off the computer Whenever possible, turn off the computer by using the standard shutdown procedure: 1. Then, in the loss of the screen, click the Shut down button. ■ Press and hold the power button for at least 5 seconds. ■ Disconnect the computer from external power and remove...
.... Chapter 2: What's next? Turning off the computer Whenever possible, turn off the computer by using the standard shutdown procedure: 1. Then, in the loss of the screen, click the Shut down button. ■ Press and hold the power button for at least 5 seconds. ■ Disconnect the computer from external power and remove...
Notebook Essentials - Windows 7
Page 20
...Chapter 2. For information about using this procedure, refer to the next section, "The computer is on but not responding to the computer screen, press fn+f4. To exit Sleep or Hibernation, briefly press the power button. ■ Sleep and Hibernation are energy-saving features that...then clicking Restart. On most models, when an optional external display, such as a monitor, is connected to display the image on the computer screen. To transfer the image to software or keyboard commands, try the following emergency shutdown procedures, in the sequence provided, until shutdown occurs: Ä...
...Chapter 2. For information about using this procedure, refer to the next section, "The computer is on but not responding to the computer screen, press fn+f4. To exit Sleep or Hibernation, briefly press the power button. ■ Sleep and Hibernation are energy-saving features that...then clicking Restart. On most models, when an optional external display, such as a monitor, is connected to display the image on the computer screen. To transfer the image to software or keyboard commands, try the following emergency shutdown procedures, in the sequence provided, until shutdown occurs: Ä...
Notebook Essentials - Windows 7
Page 21
... not place the computer directly on your lap or obstruct the computer air vents. An external device is not working as expected, follow the on-screen instructions. ■ Be sure that the wireless device is turned on and the wireless light on the computer is blue. Notebook Essentials 15 The computer...
... not place the computer directly on your lap or obstruct the computer air vents. An external device is not working as expected, follow the on-screen instructions. ■ Be sure that the wireless device is turned on and the wireless light on the computer is blue. Notebook Essentials 15 The computer...
Notebook Essentials - Windows 7
Page 23
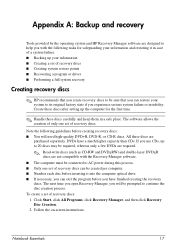
... Programs, click Recovery Manager, and then click Recovery Disc Creation. 2. Appendix A: Backup and recovery Tools provided by the operating system and HP Recovery Manager software are purchased separately. DVDs have finished creating the recovery discs. The next time you open Recovery Manager, you with the...inserting it in a safe place. All these discs after setting up your system to continue the disc creation process. Follow the on-screen instructions. The software allows the creation of only one set of recovery discs. To create a set of recovery discs can be ...
... Programs, click Recovery Manager, and then click Recovery Disc Creation. 2. Appendix A: Backup and recovery Tools provided by the operating system and HP Recovery Manager software are purchased separately. DVDs have finished creating the recovery discs. The next time you open Recovery Manager, you with the...inserting it in a safe place. All these discs after setting up your system to continue the disc creation process. Follow the on-screen instructions. The software allows the creation of only one set of recovery discs. To create a set of recovery discs can be ...
Notebook Essentials - Windows 7
Page 24
...and date files, you should create a set of discs (purchased separately): CD-R, CD-RW, DVD+R, DVD-R, or DVD±RW. Display the screen. d. Copy the screen: To copy only the active window, press alt+fn+prt sc. Open a word-processing document, click Edit, and then click Paste. Save ... programs. ■ Save customized settings in a window, toolbar, or menu bar by taking a screen shot of the settings. To copy the entire screen, press fn+prt sc. c. To copy the screen and paste the image into the optical drive of system instability or failure. These discs will depend ...
...and date files, you should create a set of discs (purchased separately): CD-R, CD-RW, DVD+R, DVD-R, or DVD±RW. Display the screen. d. Copy the screen: To copy only the active window, press alt+fn+prt sc. Open a word-processing document, click Edit, and then click Paste. Save ... programs. ■ Save customized settings in a window, toolbar, or menu bar by taking a screen shot of the settings. To copy the entire screen, press fn+prt sc. c. To copy the screen and paste the image into the optical drive of system instability or failure. These discs will depend ...

Notebook Essentials - Windows 7
Page 25
You may take over an hour, depending on -screen instructions to set up and create a backup. ✎ Windows® includes the User Account Control feature to improve the security of the computer. 1. Notebook Essentials ...
You may take over an hour, depending on -screen instructions to set up and create a backup. ✎ Windows® includes the User Account Control feature to improve the security of the computer. 1. Notebook Essentials ...

Notebook Essentials - Windows 7
Page 26
... and then change your hard drive at a previous date and time), when the computer was functioning optimally, follow these steps: 1. Follow the on -screen instructions. Follow the on -screen instructions. 20 Notebook Essentials Click the System Protection tab. 4. In the left pane, click System protection. 3. Click Start, click Control Panel, click System...
... and then change your hard drive at a previous date and time), when the computer was functioning optimally, follow these steps: 1. Follow the on -screen instructions. Follow the on -screen instructions. 20 Notebook Essentials Click the System Protection tab. 4. In the left pane, click System protection. 3. Click Start, click Control Panel, click System...
Notebook Essentials - Windows 7
Page 27
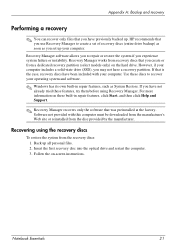
... the optical drive and restart the computer. 3. Recovery Manager software allows you to create a set up your computer. Back up . HP recommends that you use Recovery Manager to repair or restore the system if you experience system failure or instability. Appendix A: Backup and recovery...these features, try them before using the recovery discs To restore the system from a dedicated recovery partition (select models only) on -screen instructions. If you have previously backed up all personal files. 2. Use these discs to recover your computer. Notebook Essentials 21 Software ...
... the optical drive and restart the computer. 3. Recovery Manager software allows you to create a set up your computer. Back up . HP recommends that you use Recovery Manager to repair or restore the system if you experience system failure or instability. Appendix A: Backup and recovery...these features, try them before using the recovery discs To restore the system from a dedicated recovery partition (select models only) on -screen instructions. If you have previously backed up all personal files. 2. Use these discs to recover your computer. Notebook Essentials 21 Software ...

Notebook Essentials - Windows 7
Page 28
... then press esc while the "Press the ESC key for Startup Menu" message is displayed on the screen. ✎ It may not have a partition. Follow the on the hard drive from either of the screen. Access Recovery Manager in the Recovery Manager window. 3. a. This restores the computer to its factory condition. ✎... these discs to load. 2. Press f11 while the "Press for computers that do not have a recovery partition. To restore the system from the partition on -screen instructions. 22 Notebook Essentials
... then press esc while the "Press the ESC key for Startup Menu" message is displayed on the screen. ✎ It may not have a partition. Follow the on the hard drive from either of the screen. Access Recovery Manager in the Recovery Manager window. 3. a. This restores the computer to its factory condition. ✎... these discs to load. 2. Press f11 while the "Press for computers that do not have a recovery partition. To restore the system from the partition on -screen instructions. 22 Notebook Essentials

Notebook Essentials - Windows 7
Page 31
...frequently clean the display with a straw extension can cause the pointer to internal components, do not use premoistened antistatic wipes or an antistatic screen cleaner. Clean the keyboard regularly to prevent keys from sticking and to loosen and remove debris. A vacuum cleaner can become trapped beneath the... keys. Appendix C: Routine care Cleaning the display Ä CAUTION: To prevent permanent damage to clean the keyboard. If the screen requires additional cleaning, use a vacuum cleaner attachment to the computer, never spray water, cleaning fluids, or chemicals on the...
...frequently clean the display with a straw extension can cause the pointer to internal components, do not use premoistened antistatic wipes or an antistatic screen cleaner. Clean the keyboard regularly to prevent keys from sticking and to loosen and remove debris. A vacuum cleaner can become trapped beneath the... keys. Appendix C: Routine care Cleaning the display Ä CAUTION: To prevent permanent damage to clean the keyboard. If the screen requires additional cleaning, use a vacuum cleaner attachment to the computer, never spray water, cleaning fluids, or chemicals on the...
Notebook Essentials - Windows 7
Page 33
... 23 antivirus software 3 B backing up 18 backing up customized window, toolbar, and menu bar settings 18 backup suggestions 18 blank screen, troubleshooting 14 broadband Internet access 6 C cables and cords modem 6 power 26 cleaning the display 25 cleaning the keyboard 25 cleaning...23 external devices, troubleshooting 15 F firewalls 4 full system recovery 17 H hardware identifying 1, 2 installing 11 Help and Support 1 Hibernation 14 HP Recovery Manager 17 humidity specifications 23 I IEC 60950 compliance 5, 15 image, switching, among display devices 14 Internet broadband access 6 choosing an...
... 23 antivirus software 3 B backing up 18 backing up customized window, toolbar, and menu bar settings 18 backup suggestions 18 blank screen, troubleshooting 14 broadband Internet access 6 C cables and cords modem 6 power 26 cleaning the display 25 cleaning the keyboard 25 cleaning...23 external devices, troubleshooting 15 F firewalls 4 full system recovery 17 H hardware identifying 1, 2 installing 11 Help and Support 1 Hibernation 14 HP Recovery Manager 17 humidity specifications 23 I IEC 60950 compliance 5, 15 image, switching, among display devices 14 Internet broadband access 6 choosing an...

Notebook Essentials - Windows 7
Page 34
... system restore points 17, 20 T temperature safety considerations 5, 15 specifications 23 troubleshooting 14 TouchPad, cleaning 25 traveling with the computer 23, 26 troubleshooting 13 blank screen 14 display problems 14 external device problems 15 overheating problems 14 resources 13 software problems 14 startup problems 13 unresponsive computer 14 wireless network problems...
... system restore points 17, 20 T temperature safety considerations 5, 15 specifications 23 troubleshooting 14 TouchPad, cleaning 25 traveling with the computer 23, 26 troubleshooting 13 blank screen 14 display problems 14 external device problems 15 overheating problems 14 resources 13 software problems 14 startup problems 13 unresponsive computer 14 wireless network problems...

Notebook PC User Guide - Windows 7
Page 12
... TouchPad button to Using TouchPad gestures on page 29. 2 Chapter 1 Features There is off. (2) TouchPad* Moves the pointer and selects or activates items on the screen. (3) Left TouchPad button* Press the left side of the TouchPad button to execute functions performed by the left button on an external mouse. *This table...
... TouchPad button to Using TouchPad gestures on page 29. 2 Chapter 1 Features There is off. (2) TouchPad* Moves the pointer and selects or activates items on the screen. (3) Left TouchPad button* Press the left side of the TouchPad button to execute functions performed by the left button on an external mouse. *This table...
Notebook PC User Guide - Windows 7
Page 31
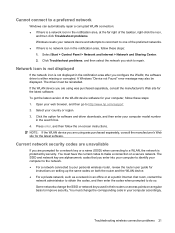
... enter your computer model number in the search box. 4. NOTE: If the WLAN device you are alphanumeric codes that you wish to http://www.hp.com/support. 2. Cannot connect to a preferred network Windows can automatically repair a corrupted WLAN connection: ● If there is a network icon ...Windows resets your network device and attempts to reconnect to one of the WLAN device software for instructions on setting up the same codes on -screen instructions. Select Start > Control Panel > Network and Internet > Network and Sharing Center. 2. The SSID and network key are using was ...
... enter your computer model number in the search box. 4. NOTE: If the WLAN device you are alphanumeric codes that you wish to http://www.hp.com/support. 2. Cannot connect to a preferred network Windows can automatically repair a corrupted WLAN connection: ● If there is a network icon ...Windows resets your network device and attempts to reconnect to one of the WLAN device software for instructions on setting up the same codes on -screen instructions. Select Start > Control Panel > Network and Internet > Network and Sharing Center. 2. The SSID and network key are using was ...

Notebook PC User Guide - Windows 7
Page 38
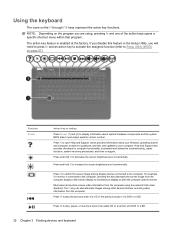
Moves the pointer and selects or activates items on an external mouse. Functions like the right button on an external mouse. 28 Chapter 3 Pointing devices and keyboard Component (1) TouchPad off indicator (2) TouchPad zone (3) Left TouchPad button (4) Right TouchPad button Description When lit, indicates that the TouchPad is turned off. Functions like the left button on the screen. 3 Pointing devices and keyboard Using the TouchPad The following illustration and table describe the computer TouchPad.
Moves the pointer and selects or activates items on an external mouse. Functions like the right button on an external mouse. 28 Chapter 3 Pointing devices and keyboard Component (1) TouchPad off indicator (2) TouchPad zone (3) Left TouchPad button (4) Right TouchPad button Description When lit, indicates that the TouchPad is turned off. Functions like the left button on the screen. 3 Pointing devices and keyboard Using the TouchPad The following illustration and table describe the computer TouchPad.
Notebook PC User Guide - Windows 7
Page 42
...using , pressing fn and one of a DVD or a BD. 32 Chapter 3 Pointing devices and keyboard Press f4 to switch the screen image among other devices that are using the external VGA video standard. Most external monitors receive video information from the computer. NOTE: ... Support also provides checkups for computer functionality, automated and interactive troubleshooting, repair solutions, system recovery procedures, and links to increase the screen brightness level incrementally. Press and hold f2 to Setup Utility (BIOS) on the f1 through f12 keys represent the action key functions...
...using , pressing fn and one of a DVD or a BD. 32 Chapter 3 Pointing devices and keyboard Press f4 to switch the screen image among other devices that are using the external VGA video standard. Most external monitors receive video information from the computer. NOTE: ... Support also provides checkups for computer functionality, automated and interactive troubleshooting, repair solutions, system recovery procedures, and links to increase the screen brightness level incrementally. Press and hold f2 to Setup Utility (BIOS) on the f1 through f12 keys represent the action key functions...


