
Modem and Local Area Network - Windows 7
Page 10
... supports tone dialing. To change the dialing mode in your computer, and click Modem settings. 3. Dial a telephone number, make sure there is usually a digital line. These dialing mode options are dialing and the response of the remote modem. Tones indicate that the telephone line supports pulse dialing. Click the Dialing Rules tab. 4. Click the listing for pulse or tone dialing. Select Start > Devices...
... supports tone dialing. To change the dialing mode in your computer, and click Modem settings. 3. Dial a telephone number, make sure there is usually a digital line. These dialing mode options are dialing and the response of the remote modem. Tones indicate that the telephone line supports pulse dialing. Click the Dialing Rules tab. 4. Click the listing for pulse or tone dialing. Select Start > Devices...

Security - Window Vista and Windows 7
Page 8
... control access to 8 letters and numbers and is a group of passwords can be set, depending on how you set in a file on the computer. CAUTION: To prevent being locked out of up to your computer information. A password set . Use the following sections list Windows and Setup Utility passwords and describe their functions. For additional information about Windows passwords, such as they are not displayed as screen-saver passwords, select Start > Help and Support...
... control access to 8 letters and numbers and is a group of passwords can be set, depending on how you set in a file on the computer. CAUTION: To prevent being locked out of up to your computer information. A password set . Use the following sections list Windows and Setup Utility passwords and describe their functions. For additional information about Windows passwords, such as they are not displayed as screen-saver passwords, select Start > Help and Support...

Setup Utility - Windows Vista and Windows 7
Page 7
... screen, press f10. - Open the Setup Utility by turning on or restarting the computer. When the Setup Confirmation is displayed, press f10. 2. Select the Main menu. If the Setup Utility is not open , begin at step 2. 1. or - NOTE: Your password, security, and language settings are not changed when you restore the factory default settings. Open the Setup Utility by turning on or restarting the computer. To exit the Setup Utility without changing any settings, use the arrow keys...
... screen, press f10. - Open the Setup Utility by turning on or restarting the computer. When the Setup Confirmation is displayed, press f10. 2. Select the Main menu. If the Setup Utility is not open , begin at step 2. 1. or - NOTE: Your password, security, and language settings are not changed when you restore the factory default settings. Open the Setup Utility by turning on or restarting the computer. To exit the Setup Utility without changing any settings, use the arrow keys...

Setup Utility - Windows Vista and Windows 7
Page 10
... on Key ◦ USB Hard drive ◦ Network adapter Diagnostics menu Select Hard Disk Self Test Secondary Hard Disk Self Test (select models only) Memory Test To do this Run a comprehensive self-test on the hard drive. System Configuration menu Select Language Support Button Sound (select models only) Virtualization Technology (select models only) Processor C6 State (select models only) LAN Power Saving (select models only) Card Reader/1394 Power Saving (select models only) Fan Always On Boot Options To do this Change the Setup Utility language. Enable/disable...
... on Key ◦ USB Hard drive ◦ Network adapter Diagnostics menu Select Hard Disk Self Test Secondary Hard Disk Self Test (select models only) Memory Test To do this Run a comprehensive self-test on the hard drive. System Configuration menu Select Language Support Button Sound (select models only) Virtualization Technology (select models only) Processor C6 State (select models only) LAN Power Saving (select models only) Card Reader/1394 Power Saving (select models only) Fan Always On Boot Options To do this Change the Setup Utility language. Enable/disable...
Setup Utility - Windows Vista and Windows 7
Page 11
... options 6 boot order 6 button sound 6 C Card Reader Power Saving 6 changing the Setup Utility language 2 D Diagnostics menu 6 displaying system information 3 drives, boot order 6 E exiting the Setup Utility 4 F fan always on 6 fingerprint reader 1 H hard drive self test 6 L LAN Power Saving 6 language support 6 M Main menu 5 memory test 6 N navigating in the Setup Utility 2 P passwords 5 power-on password 5 Processor C6 State 6 R restoring default settings 3 S secondary hard drive self test 6 Security menu 5 selecting in the Setup Utility 2 starting the Setup Utility 1 System Configuration...
... options 6 boot order 6 button sound 6 C Card Reader Power Saving 6 changing the Setup Utility language 2 D Diagnostics menu 6 displaying system information 3 drives, boot order 6 E exiting the Setup Utility 4 F fan always on 6 fingerprint reader 1 H hard drive self test 6 L LAN Power Saving 6 language support 6 M Main menu 5 memory test 6 N navigating in the Setup Utility 2 P passwords 5 power-on password 5 Processor C6 State 6 R restoring default settings 3 S secondary hard drive self test 6 Security menu 5 selecting in the Setup Utility 2 starting the Setup Utility 1 System Configuration...
Wireless (Select Models Only) - Windows 7
Page 15
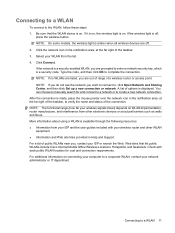
... location for and connect to a network or to manually search for cost and connection requirements. NOTE: If no WLANs are listed, you are out of range of the connection. You can choose to create a new network connection. Web sites that the WLAN device is off . 2. If the network is a security-enabled WLAN, you are prompted to verify the name and status of a wireless router or access...
... location for and connect to a network or to manually search for cost and connection requirements. NOTE: If no WLANs are listed, you are out of range of the connection. You can choose to create a new network connection. Web sites that the WLAN device is off . 2. If the network is a security-enabled WLAN, you are prompted to verify the name and status of a wireless router or access...
Wireless (Select Models Only) - Windows 7
Page 22
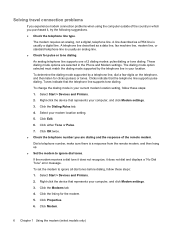
... changed. ● Wireless device is not listed in this chapter to diagnose and repair a computer that does not connect to the network you may add wireless networking capability to the computer by purchasing a wireless networking device. Before working your network connection problem, be sure that device drivers are included with select computer models only. 5 Troubleshooting wireless connection problems Some possible causes for all wireless devices. If wireless networking is not installed correctly or has been disabled. ● Wireless device or router hardware...
... changed. ● Wireless device is not listed in this chapter to diagnose and repair a computer that does not connect to the network you may add wireless networking capability to the computer by purchasing a wireless networking device. Before working your network connection problem, be sure that device drivers are included with select computer models only. 5 Troubleshooting wireless connection problems Some possible causes for all wireless devices. If wireless networking is not installed correctly or has been disabled. ● Wireless device or router hardware...
Wireless (Select Models Only) - Windows 7
Page 23
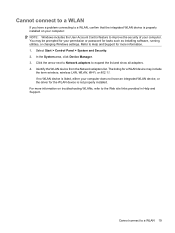
... the term wireless, wireless LAN, WLAN, Wi-Fi, or 802.11. If no WLAN device is listed, either your permission or password for tasks such as installing software, running utilities, or changing Windows settings. Refer to the Web site links provided in Help and Support. In the System area, click Device Manager. 3. Cannot connect to a WLAN If you have an integrated WLAN device, or the driver for the...
... the term wireless, wireless LAN, WLAN, Wi-Fi, or 802.11. If no WLAN device is listed, either your permission or password for tasks such as installing software, running utilities, or changing Windows settings. Refer to the Web site links provided in Help and Support. In the System area, click Device Manager. 3. Cannot connect to a WLAN If you have an integrated WLAN device, or the driver for the...
Pointing Devices and Keyboard - Windows 7
Page 5
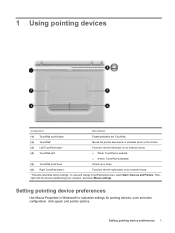
...: TouchPad is disabled. Then, right-click the device representing your computer, and select Mouse settings. Setting pointing device preferences 1 Setting pointing device preferences Use Mouse Properties in Windows® to customize settings for pointing devices, such as button configuration, click speed, and pointer options. To view and change TouchPad preferences, select Start > Devices and Printers. Moves the pointer and selects or activates items on /off button (2) TouchPad* (3) Left TouchPad button* (4) TouchPad light (5) TouchPad scroll zone Enables/disables the TouchPad.
...: TouchPad is disabled. Then, right-click the device representing your computer, and select Mouse settings. Setting pointing device preferences 1 Setting pointing device preferences Use Mouse Properties in Windows® to customize settings for pointing devices, such as button configuration, click speed, and pointer options. To view and change TouchPad preferences, select Start > Devices and Printers. Moves the pointer and selects or activates items on /off button (2) TouchPad* (3) Left TouchPad button* (4) TouchPad light (5) TouchPad scroll zone Enables/disables the TouchPad.
Pointing Devices and Keyboard - Windows 7
Page 6
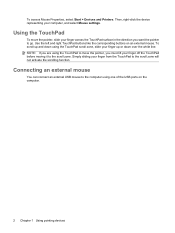
... the pointer to the scroll zone. Use the left and right TouchPad buttons like the corresponding buttons on the computer. 2 Chapter 1 Using pointing devices Connecting an external mouse You can connect an external USB mouse to the scroll zone will not activate the scrolling function. To scroll up and down using one of the USB ports on an external mouse. To access Mouse Properties, select Start > Devices and Printers. NOTE: If you are using the TouchPad to move the pointer...
... the pointer to the scroll zone. Use the left and right TouchPad buttons like the corresponding buttons on the computer. 2 Chapter 1 Using pointing devices Connecting an external mouse You can connect an external USB mouse to the scroll zone will not activate the scrolling function. To scroll up and down using one of the USB ports on an external mouse. To access Mouse Properties, select Start > Devices and Printers. NOTE: If you are using the TouchPad to move the pointer...
Pointing Devices and Keyboard - Windows 7
Page 9
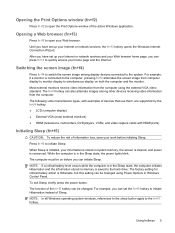
... cleared, and power is connected to the computer, pressing fn+f4 alternates the screen image from the computer using Power Options in memory is stored in the Sleep state, the power lights blink. The computer must be changed using the external VGA video standard. The function of information loss, save your Web browser. For example, you can press fn+f3 to quickly access your Internet or network services, the fn+f3 hotkey opens the Windows Internet Connection...
... cleared, and power is connected to the computer, pressing fn+f4 alternates the screen image from the computer using Power Options in memory is stored in the Sleep state, the power lights blink. The computer must be changed using the external VGA video standard. The function of information loss, save your Web browser. For example, you can press fn+f3 to quickly access your Internet or network services, the fn+f3 hotkey opens the Windows Internet Connection...
Multimedia - Windows 7
Page 3
... 2 Adjusting the volume ...3 Using the media activity functions ...4 Using the media activity hotkeys 4 2 Multimedia software Using DVD Play software ...5 Using other preinstalled multimedia software 5 Installing multimedia software from a disc 5 3 Audio Connecting external audio devices ...7 Checking your audio functions ...7 4 Video Connecting an external monitor or projector 8 Connecting an HDMI device (select models only 9 Configuring audio for HDMI (select models only 10 5 Optical drive Identifying the installed optical drive 11 Using optical discs ...12 Selecting the right disc...
... 2 Adjusting the volume ...3 Using the media activity functions ...4 Using the media activity hotkeys 4 2 Multimedia software Using DVD Play software ...5 Using other preinstalled multimedia software 5 Installing multimedia software from a disc 5 3 Audio Connecting external audio devices ...7 Checking your audio functions ...7 4 Video Connecting an external monitor or projector 8 Connecting an HDMI device (select models only 9 Configuring audio for HDMI (select models only 10 5 Optical drive Identifying the installed optical drive 11 Using optical discs ...12 Selecting the right disc...
Multimedia - Windows 7
Page 13
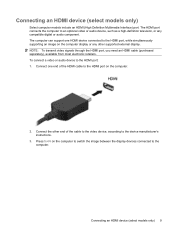
... video signals through the HDMI port, you need an HDMI cable (purchased separately), available from most electronic retailers. The computer can support one end of the cable to the video device, according to the HDMI port, while simultaneously supporting an image on the computer to switch the image between the display devices connected to the HDMI port: 1. Connecting an HDMI device (select models only) 9 To connect a video or audio device to the computer. Connect one HDMI device connected to the device manufacturer's instructions...
... video signals through the HDMI port, you need an HDMI cable (purchased separately), available from most electronic retailers. The computer can support one end of the cable to the video device, according to the HDMI port, while simultaneously supporting an image on the computer to switch the image between the display devices connected to the HDMI port: 1. Connecting an HDMI device (select models only) 9 To connect a video or audio device to the computer. Connect one HDMI device connected to the device manufacturer's instructions...
Multimedia - Windows 7
Page 29
... discs from the models listed. 4. Remove any devices requiring drivers. Then in the following sections. If uninstalling and reinstalling the device drivers does not correct the problem, you want to delete the device, but do this, click Download only to save all open a window containing additional information. 6. Obtaining the latest HP device drivers 1. Click your system for installed hardware and installs default drivers for hardware changes. Windows scans your specific product from the optical drive. 2. Click Install...
... discs from the models listed. 4. Remove any devices requiring drivers. Then in the following sections. If uninstalling and reinstalling the device drivers does not correct the problem, you want to delete the device, but do this, click Download only to save all open a window containing additional information. 6. Obtaining the latest HP device drivers 1. Click your system for installed hardware and installs default drivers for hardware changes. Windows scans your specific product from the optical drive. 2. Click Install...
Multimedia - Windows 7
Page 31
...-ray disc 14 C CD burning 17 inserting 14 removing 18, 21 CD drive 12 checking audio functions 7 D device drivers HP drivers 25 Windows drivers 26 digital dual array microphone, identifying 2 drives, optical drive 12 DVD burning 17 changing region setting 16 inserting 14 removing 18, 21 DVD drive 12 DVD Play 5, 15 DVD region settings 16 E earbuds 2 external audio devices, connecting 7 external monitor port 8 H HDMI connecting 9 HDMI port 9 headphone (audio-out) jack 2 headphones 2 high-definition devices, connecting 9 hotkeys muting/restoring speaker volume 3 HP DVD Play 5 I internal digital...
...-ray disc 14 C CD burning 17 inserting 14 removing 18, 21 CD drive 12 checking audio functions 7 D device drivers HP drivers 25 Windows drivers 26 digital dual array microphone, identifying 2 drives, optical drive 12 DVD burning 17 changing region setting 16 inserting 14 removing 18, 21 DVD drive 12 DVD Play 5, 15 DVD region settings 16 E earbuds 2 external audio devices, connecting 7 external monitor port 8 H HDMI connecting 9 HDMI port 9 headphone (audio-out) jack 2 headphones 2 high-definition devices, connecting 9 hotkeys muting/restoring speaker volume 3 HP DVD Play 5 I internal digital...
Power Management - Windows 7
Page 16
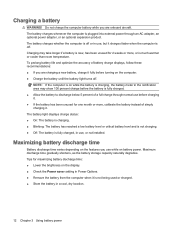
... capacity naturally degrades. The battery light displays charge status: ● On: The battery is charging. ● Blinking: The battery has reached a low battery level or critical battery level and is not charging. ● Off: The battery is plugged into external power through normal use before turning on battery power. Do not charge the computer battery while you use , or not installed. The battery charges whenever the computer is fully charged, in use, but it fully before...
... capacity naturally degrades. The battery light displays charge status: ● On: The battery is charging. ● Blinking: The battery has reached a low battery level or critical battery level and is not charging. ● Off: The battery is plugged into external power through normal use before turning on battery power. Do not charge the computer battery while you use , or not installed. The battery charges whenever the computer is fully charged, in use, but it fully before...
Power Management - Windows 7
Page 19
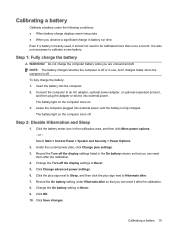
... Start > Control Panel > System and Security > Power Options. 2. Under the current power plan, click Change plan settings. 3. Click Change advanced power settings. 6. It is off or in the notification area, and then click More power options. - Change the Turn off . Click OK. 10. Calibrating a battery Calibrate a battery under Hibernate after so that you can reset it after the calibration. 8. Step 1: Fully charge the battery WARNING! Insert the battery into external power. The battery light on...
... Start > Control Panel > System and Security > Power Options. 2. Under the current power plan, click Change plan settings. 3. Click Change advanced power settings. 6. It is off or in the notification area, and then click More power options. - Change the Turn off . Click OK. 10. Calibrating a battery Calibrate a battery under Hibernate after so that you can reset it after the calibration. 8. Step 1: Fully charge the battery WARNING! Insert the battery into external power. The battery light on...
Power Management - Windows 7
Page 22
... Power Options under System and Security in Windows Control Panel. ● Turn off wireless and local area network (LAN) connections and exit modem applications when you are not using them. ● Disconnect external devices that are not plugged into an external power source, when you are not using them. ● Stop, disable, or remove any external media cards that you always have battery power when you to replace the battery when an internal cell is not charging...
... Power Options under System and Security in Windows Control Panel. ● Turn off wireless and local area network (LAN) connections and exit modem applications when you are not using them. ● Disconnect external devices that are not plugged into an external power source, when you are not using them. ● Stop, disable, or remove any external media cards that you always have battery power when you to replace the battery when an internal cell is not charging...
Power Management - Windows 7
Page 23
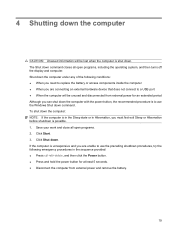
... Windows Shut down the computer with the power button, the recommended procedure is to use the preceding shutdown procedures, try the following conditions: ● When you need to replace the battery or access components inside the computer ● When you are connecting an external hardware device that does not connect to a USB port ● When the computer will be unused and disconnected from external power and remove the battery...
... Windows Shut down the computer with the power button, the recommended procedure is to use the preceding shutdown procedures, try the following conditions: ● When you need to replace the battery or access components inside the computer ● When you are connecting an external hardware device that does not connect to a USB port ● When the computer will be unused and disconnected from external power and remove the battery...

HP Notebook Hard Drives & Solid State Drives Identifying, Preventing, Diagnosing and Recovering from Drive Failures Care and Mai
Page 6
... device driver versions address multiple known issues that provides up to 150MB/sec transfer rate for disk traffic, and provides link power management with Serial ATA hard disk drives. Procedures for lower power consumption on computer systems equipped with Intel® Application Accelerator drivers. To download the latest version of the Intel Matrix Storage Technology driver: http://www8.hp.com/us/en/support-drivers.html Installing SATA drivers...
... device driver versions address multiple known issues that provides up to 150MB/sec transfer rate for disk traffic, and provides link power management with Serial ATA hard disk drives. Procedures for lower power consumption on computer systems equipped with Intel® Application Accelerator drivers. To download the latest version of the Intel Matrix Storage Technology driver: http://www8.hp.com/us/en/support-drivers.html Installing SATA drivers...


