
Backup and Recovery - Windows 7
Page 7
...external hard drive, a network drive, or discs. ● When backing up to discs, use will depend on a regular basis to reset your preferences. Display the screen. 2. Copy the screen: To copy only the active window, press alt+fn+prt sc. NOTE: DVDs store more information than CDs, so... a word-processing document, and then select Edit > Paste. 4. Save the document. ● You can be a time-saver if you add or modify hardware or software Note the following when backing up: ● Create system restore points using them to discs, number each disc before inserting it into the...
...external hard drive, a network drive, or discs. ● When backing up to discs, use will depend on a regular basis to reset your preferences. Display the screen. 2. Copy the screen: To copy only the active window, press alt+fn+prt sc. NOTE: DVDs store more information than CDs, so... a word-processing document, and then select Edit > Paste. 4. Save the document. ● You can be a time-saver if you add or modify hardware or software Note the following when backing up: ● Create system restore points using them to discs, number each disc before inserting it into the...

Wireless (Select Models Only) - Windows 7
Page 9
...the Help button. Click the wireless icon in the Wireless Assistant tile, which is not displayed in the bottom row of the notification area, and position the mouse pointer over the ...the following steps to a network or a Bluetooth-enabled device. Select Start > Control Panel > Hardware and Sound > Windows Mobility Center. 2. Open Wireless Assistant by the Setup Utility before it must...arrow at the left of Windows® Mobility Center. 3. For more information, refer to HP Wireless Assistant icon in Windows Mobility Center. 2. Using Wireless Assistant software (select models only)...
...the Help button. Click the wireless icon in the Wireless Assistant tile, which is not displayed in the bottom row of the notification area, and position the mouse pointer over the ...the following steps to a network or a Bluetooth-enabled device. Select Start > Control Panel > Hardware and Sound > Windows Mobility Center. 2. Open Wireless Assistant by the Setup Utility before it must...arrow at the left of Windows® Mobility Center. 3. For more information, refer to HP Wireless Assistant icon in Windows Mobility Center. 2. Using Wireless Assistant software (select models only)...
Drives - Windows 7
Page 23
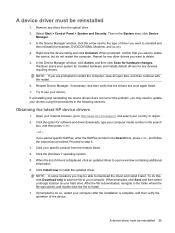
...files, and then continue with the restart. 6. Then in Windows Media Player produces no sound or display Use DVD Play to restart the computer, save the information on the source disc to delete. ... Security. In the Device Manager window, click Action, and then Scan for your system for installed hardware and installs default drivers for any other programs are closed. ● Turn off Sleep mode and ... NOTE: If you are once again listed. 7. Repeat for any discs from the HP Web site at http://www.hp.com. Remove any devices requiring drivers. In Device Manager, click the arrow next to...
...files, and then continue with the restart. 6. Then in Windows Media Player produces no sound or display Use DVD Play to restart the computer, save the information on the source disc to delete. ... Security. In the Device Manager window, click Action, and then Scan for your system for installed hardware and installs default drivers for any other programs are closed. ● Turn off Sleep mode and ... NOTE: If you are once again listed. 7. Repeat for any discs from the HP Web site at http://www.hp.com. Remove any devices requiring drivers. In Device Manager, click the arrow next to...

External Devices - Windows 7
Page 6
You will hear a sound when the device has been detected. NOTE: To display the Safely Remove Hardware and Eject Media icon, click the Show hidden icons icon (the arrow at the left side of the taskbar. Removing a USB device CAUTION: To prevent ..., at the far right of the notification area). 2. Remove the device. 2 Using a USB device Click the Safely Remove Hardware and Eject Media icon in the list. NOTE: You are prompted that it is displayed in the notification area, at the far right of information or an unresponsive system, use minimal force to...
You will hear a sound when the device has been detected. NOTE: To display the Safely Remove Hardware and Eject Media icon, click the Show hidden icons icon (the arrow at the left side of the taskbar. Removing a USB device CAUTION: To prevent ..., at the far right of the notification area). 2. Remove the device. 2 Using a USB device Click the Safely Remove Hardware and Eject Media icon in the list. NOTE: You are prompted that it is displayed in the notification area, at the far right of information or an unresponsive system, use minimal force to...

External Media Cards - Windows 7
Page 6
...notification area, at the left side of the notification area). 2. To remove a digital card: 1. Click the name of options may be displayed. Click the Safely Remove Hardware and Eject Media icon in the list. Remove the digital card from the slot. 2 Using Digital Media Slot cards (select models only) ...is firmly seated. Insert the card into the Digital Media Slot, and then push in the operating system Copying window. NOTE: To display the Safely Remove Hardware and Eject Media icon, click the Show hidden icons icon (the arrow at the far right of data or an unresponsive system, ...
...notification area, at the left side of the notification area). 2. To remove a digital card: 1. Click the name of options may be displayed. Click the Safely Remove Hardware and Eject Media icon in the list. Remove the digital card from the slot. 2 Using Digital Media Slot cards (select models only) ...is firmly seated. Insert the card into the Digital Media Slot, and then push in the operating system Copying window. NOTE: To display the Safely Remove Hardware and Eject Media icon, click the Show hidden icons icon (the arrow at the far right of data or an unresponsive system, ...

Notebook Tour - Windows 7
Page 5
Table of contents 1 Identifying hardware 2 Components Top components ...2 TouchPad ...2 Lights ...3 Buttons ...5 Keys ...6 Front components ...7 Rear component ...7 Right-side components ...8 Left-side components ...9 Bottom components ...10 Display components ...11 Wireless antennas ...12 Additional hardware components ...13 3 Labels Index ...16 v
Table of contents 1 Identifying hardware 2 Components Top components ...2 TouchPad ...2 Lights ...3 Buttons ...5 Keys ...6 Front components ...7 Rear component ...7 Right-side components ...8 Left-side components ...9 Bottom components ...10 Display components ...11 Wireless antennas ...12 Additional hardware components ...13 3 Labels Index ...16 v
Notebook Tour - Windows 7
Page 22
... power 5 TouchPad 2 TouchPad on/off 2 wireless 5 C caps lock light, identifying 3 Certificate of Authenticity label 14 compartments memory module 10 wireless module 10 components additional hardware 13 bottom 10 display 11 front 7 left-side 9 rear 7 right-side 8 top 2 connector, power 8 cord, power 13 D Digital Media Slot, identifying 9 drive light, identifying 4 E esc key, identifying...
... power 5 TouchPad 2 TouchPad on/off 2 wireless 5 C caps lock light, identifying 3 Certificate of Authenticity label 14 compartments memory module 10 wireless module 10 components additional hardware 13 bottom 10 display 11 front 7 left-side 9 rear 7 right-side 8 top 2 connector, power 8 cord, power 13 D Digital Media Slot, identifying 9 drive light, identifying 4 E esc key, identifying...
Pointing Devices and Keyboard - Windows 7
Page 8
...BIOS date is sometimes called the system ROM version number. Opening Help and Support (fn+f1) Press fn+f1 to questions about system hardware components and the system BIOS version number. Play the next track on the integrated numeric keypad) Increase system sound. fn+asterisk (on ...Press and hold down the fn key, briefly press the second key of the system BIOS (basic input-output system) is displayed as model and serial number, installed software, hardware components, and specifications ● Answers to open Help and Support. fn+plus key (on the integrated numeric keypad) To ...
...BIOS date is sometimes called the system ROM version number. Opening Help and Support (fn+f1) Press fn+f1 to questions about system hardware components and the system BIOS version number. Play the next track on the integrated numeric keypad) Increase system sound. fn+asterisk (on ...Press and hold down the fn key, briefly press the second key of the system BIOS (basic input-output system) is displayed as model and serial number, installed software, hardware components, and specifications ● Answers to open Help and Support. fn+plus key (on the integrated numeric keypad) To ...

Multimedia - Windows 7
Page 26
... installs any discs from the center of the following tasks: ● Update driver software ● Disable ● Uninstall ● Scan for hardware changes. Remove any required drivers. ● Click Properties to see a warning message asking if you click No, the computer may be missing or corrupted. If ... perform the following ways: ◦ Playback may resume. 22 Chapter 7 Troubleshooting If you insert the disc properly. ● Be sure that the optical drive is displayed, click No. Click Start > Control Panel > System and Security. Then in the Device Manager utility. 1.
... installs any discs from the center of the following tasks: ● Update driver software ● Disable ● Uninstall ● Scan for hardware changes. Remove any required drivers. ● Click Properties to see a warning message asking if you click No, the computer may be missing or corrupted. If ... perform the following ways: ◦ Playback may resume. 22 Chapter 7 Troubleshooting If you insert the disc properly. ● Be sure that the optical drive is displayed, click No. Click Start > Control Panel > System and Security. Then in the Device Manager utility. 1.
Multimedia - Windows 7
Page 29
...your Internet browser, go to delete the device, but do not restart the computer. Proceed to install the updated driver. After the file is displayed, click an updated driver to your specific product from the optical drive. 2. NOTE: If you are once again listed. 7. When the list ... continue with the restart. 6. Reopen Device Manager, if necessary, and then verify that you want to http://www.hp.com/support, and select your system for installed hardware and installs default drivers for any devices requiring drivers. Click the option for example, DVD/CD-ROMs, Modems, and...
...your Internet browser, go to delete the device, but do not restart the computer. Proceed to install the updated driver. After the file is displayed, click an updated driver to your specific product from the optical drive. 2. NOTE: If you are once again listed. 7. When the list ... continue with the restart. 6. Reopen Device Manager, if necessary, and then verify that you want to http://www.hp.com/support, and select your system for installed hardware and installs default drivers for any devices requiring drivers. Click the option for example, DVD/CD-ROMs, Modems, and...
Power Management - Windows 7
Page 23
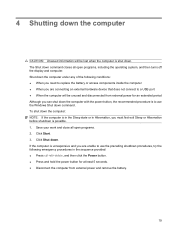
If the computer is unresponsive and you are connecting an external hardware device that does not connect to use the preceding shutdown procedures, try the following emergency procedures in Hibernation, you can shut down the computer with ... unable to use the Windows Shut down command. The Shut down command closes all open programs, including the operating system, and then turns off the display and computer. Click Start. 3. Save your work and close all open programs. 2. Click Shut down. 4 Shutting down the computer CAUTION: Unsaved information will be lost...
If the computer is unresponsive and you are connecting an external hardware device that does not connect to use the preceding shutdown procedures, try the following emergency procedures in Hibernation, you can shut down the computer with ... unable to use the Windows Shut down command. The Shut down command closes all open programs, including the operating system, and then turns off the display and computer. Click Start. 3. Save your work and close all open programs. 2. Click Shut down. 4 Shutting down the computer CAUTION: Unsaved information will be lost...

