Backup and Recovery - Windows 7
Page 5
.... Recovery discs are designed to help you with a solid-state drive (SSD) may not have been included for computers that you to reverse undesirable changes to your computer by the operating system and HP Recovery Manager software are used to maintain a reasonably current backup....select Start, right-click Computer, click Manage, and then click Disk Management. With Recovery Manager, you can recover your system on the hard drive or from recovery discs you experience system failure or instability. Recovery Manager works from a dedicated recovery partition (select models only) on ...
.... Recovery discs are designed to help you with a solid-state drive (SSD) may not have been included for computers that you to reverse undesirable changes to your computer by the operating system and HP Recovery Manager software are used to maintain a reasonably current backup....select Start, right-click Computer, click Manage, and then click Disk Management. With Recovery Manager, you can recover your system on the hard drive or from recovery discs you experience system failure or instability. Recovery Manager works from a dedicated recovery partition (select models only) on ...
Backup and Recovery - Windows 7
Page 7
... up templates stored in their associated programs. ● Save customized settings in a window, toolbar, or menu bar by taking a screen shot of optical drive installed in your computer. Display the screen. 2. To copy the entire screen, press fn+prt sc. 3. Open a word-processing document, and then ...select Edit > Paste. 4. The screen shot can back up your information to an optional external hard drive, a network drive, or discs. ● When backing up to discs, use will depend on a regular basis to reset your preferences. Copy the screen: To...
... up templates stored in their associated programs. ● Save customized settings in a window, toolbar, or menu bar by taking a screen shot of optical drive installed in your computer. Display the screen. 2. To copy the entire screen, press fn+prt sc. 3. Open a word-processing document, and then ...select Edit > Paste. 4. The screen shot can back up your information to an optional external hard drive, a network drive, or discs. ● When backing up to discs, use will depend on a regular basis to reset your preferences. Copy the screen: To...
Backup and Recovery - Windows 7
Page 9
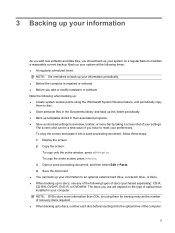
A system restore point allows you to save and name a snapshot of your hard drive at a previous date and time), when the computer was functioning optimally, follow these steps: 1. When to create restore points ● Before you add or extensively ...
A system restore point allows you to save and name a snapshot of your hard drive at a previous date and time), when the computer was functioning optimally, follow these steps: 1. When to create restore points ● Before you add or extensively ...
Backup and Recovery - Windows 7
Page 10
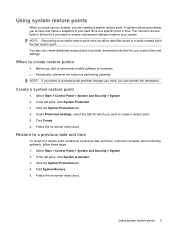
...: Recovery Manager recovers only software that you use HP Recovery Manager to repair or restore the system if you experience system failure or instability. Use these features, try them before using Recovery Manager. Software not provided with your computer. Follow the on the hard drive. Recovery Manager works from recovery discs or from...
...: Recovery Manager recovers only software that you use HP Recovery Manager to repair or restore the system if you experience system failure or instability. Use these features, try them before using Recovery Manager. Software not provided with your computer. Follow the on the hard drive. Recovery Manager works from recovery discs or from...
Backup and Recovery - Windows 7
Page 11
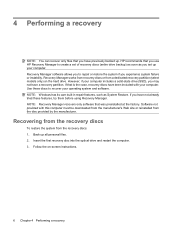
... the partition, follow these discs to recover your operating system and software. Recovering from the dedicated recovery partition (select models only) 7 Follow the on the hard drive, accessed by pressing either of the screen.
... the partition, follow these discs to recover your operating system and software. Recovering from the dedicated recovery partition (select models only) 7 Follow the on the hard drive, accessed by pressing either of the screen.

Software Update - Windows Vista and Windows 7
Page 6
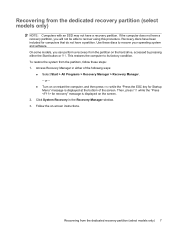
.... 3. Determining the BIOS version To determine whether available BIOS updates contain later BIOS versions than the BIOS version currently installed on the HP Web site that is connected to reliable external power using the AC adapter. Open the Setup Utility by pressing fn+esc (if you...Select Start > Help and Support, and then click the link for displaying BIOS information: 1. Identify the BIOS update that provides software for your hard drive. b. BIOS version information (also known as ROM date and System BIOS) can be displayed by turning on the computer, you are already in ...
.... 3. Determining the BIOS version To determine whether available BIOS updates contain later BIOS versions than the BIOS version currently installed on the HP Web site that is connected to reliable external power using the AC adapter. Open the Setup Utility by pressing fn+esc (if you...Select Start > Help and Support, and then click the link for displaying BIOS information: 1. Identify the BIOS update that provides software for your hard drive. b. BIOS version information (also known as ROM date and System BIOS) can be displayed by turning on the computer, you are already in ...
Software Update - Windows Vista and Windows 7
Page 7
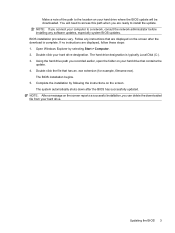
... is typically Local Disk (C:). 3. Make a note of the path to install the update. Using the hard drive path you are ready to the location on your hard drive where the BIOS update will need to access this path when you recorded earlier, open the folder on...Updating the BIOS 3 You will be downloaded. Open Windows Explorer by following the instructions on the screen reports a successful installation, you connect your hard drive that has an .exe extension (for example, filename.exe). Follow any software updates, especially system BIOS updates. The BIOS installation begins. 5. ...
... is typically Local Disk (C:). 3. Make a note of the path to install the update. Using the hard drive path you are ready to the location on your hard drive where the BIOS update will need to access this path when you recorded earlier, open the folder on...Updating the BIOS 3 You will be downloaded. Open Windows Explorer by following the instructions on the screen reports a successful installation, you connect your hard drive that has an .exe extension (for example, filename.exe). Follow any software updates, especially system BIOS updates. The BIOS installation begins. 5. ...
Software Update - Windows Vista and Windows 7
Page 8
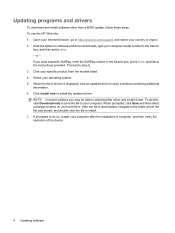
... the folder where the file was stored, and double-click the file to http://www.hp.com/support, and select your computer model number in the Search box, press enter, and follow these steps: To... use the HP Web site: 1. When the list of the device. 4 Updating software NOTE: In some locations you want ...only to save the file to download the driver and install it later. Open your hard drive. When prompted, click Save and then select a storage location on your Internet browser, go to install. 7.
... the folder where the file was stored, and double-click the file to http://www.hp.com/support, and select your computer model number in the Search box, press enter, and follow these steps: To... use the HP Web site: 1. When the list of the device. 4 Updating software NOTE: In some locations you want ...only to save the file to download the driver and install it later. Open your hard drive. When prompted, click Save and then select a storage location on your Internet browser, go to install. 7.
Drives - Windows 7
Page 3
... or DVD ...7 Creating or "burning" a CD or DVD ...7 Removing an optical disc (CD or DVD 8 3 Improving hard drive performance Using Disk Defragmenter ...9 Using Disk Cleanup ...9 4 Replacing the hard drive 5 Troubleshooting The optical disc tray does not open for removal of a CD or DVD 13 The computer does not detect the... optical drive 14 A disc does not play ...15 A disc does not play automatically ...16 The process of burning a disc does not begin, or it stops before completion 16 A device driver must be reinstalled ...17 Obtaining the latest HP device drivers 17 Obtaining ...
... or DVD ...7 Creating or "burning" a CD or DVD ...7 Removing an optical disc (CD or DVD 8 3 Improving hard drive performance Using Disk Defragmenter ...9 Using Disk Cleanup ...9 4 Replacing the hard drive 5 Troubleshooting The optical disc tray does not open for removal of a CD or DVD 13 The computer does not detect the... optical drive 14 A disc does not play ...15 A disc does not play automatically ...16 The process of burning a disc does not begin, or it stops before completion 16 A device driver must be reinstalled ...17 Obtaining the latest HP device drivers 17 Obtaining ...

Drives - Windows 7
Page 8
...own music CDs ● Keeping permanent archives of the disc. 4 Chapter 2 Using an optical drive LightScribe DVD+R discs Use LightScribe DVD+R discs for your computer may not support all the types of hard drive files ● Updating photos, video, audio, and data continuously DVD±R discs Use blank ...write-once) discs to create permanent archives and to the outside of computer files and scanned home records ● Offloading files from your hard drive to store digital data, are also used to free up disk space After data is recorded, it cannot be updated frequently. DVD±...
...own music CDs ● Keeping permanent archives of the disc. 4 Chapter 2 Using an optical drive LightScribe DVD+R discs Use LightScribe DVD+R discs for your computer may not support all the types of hard drive files ● Updating photos, video, audio, and data continuously DVD±R discs Use blank ...write-once) discs to create permanent archives and to the outside of computer files and scanned home records ● Offloading files from your hard drive to store digital data, are also used to free up disk space After data is recorded, it cannot be updated frequently. DVD±...
Drives - Windows 7
Page 11
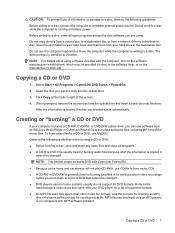
... to a CD or DVD that came with MP3 software installed. Save the information to your hard drive, and then burn from the optical drive and insert a blank disc into the optical drive. 3. Creating or "burning" a CD or DVD If your hard drive to a destination disc. Select Start > All Programs > CyberLink DVD Suites > Power2Go. 2. When prompted, remove...
... to a CD or DVD that came with MP3 software installed. Save the information to your hard drive, and then burn from the optical drive and insert a blank disc into the optical drive. 3. Creating or "burning" a CD or DVD If your hard drive to a destination disc. Select Start > All Programs > CyberLink DVD Suites > Power2Go. 2. When prompted, remove...
Drives - Windows 7
Page 12
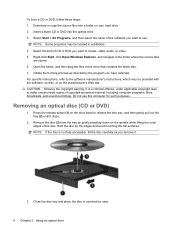
Download or copy the source files into the optical drive. 3. Press the release button (1) on your hard drive. 2. Hold the disc by the program you want to use this computer for such purposes. NOTE: If the tray is a criminal offense, under applicable ... burning process as you want to create-data, audio, or video. 5. NOTE: Some programs may be located in a protective case. 8 Chapter 2 Using an optical drive Select the kind of the disc. Removing an optical disc (CD or DVD) 1. For specific instructions, refer to the software manufacturer's instructions, which may be...
Download or copy the source files into the optical drive. 3. Press the release button (1) on your hard drive. 2. Hold the disc by the program you want to use this computer for such purposes. NOTE: If the tray is a criminal offense, under applicable ... burning process as you want to create-data, audio, or video. 5. NOTE: Some programs may be located in a protective case. 8 Chapter 2 Using an optical drive Select the kind of the disc. Removing an optical disc (CD or DVD) 1. For specific instructions, refer to the software manufacturer's instructions, which may be...

Drives - Windows 7
Page 13
... start it, it to complete. You may take more than an hour to run more efficiently. HP recommends defragmenting your computer. Refer to improve the security of your hard drive at any time. NOTE: Windows® includes the User Account Control feature to Help and Support for... tasks such as installing software, running utilities, or changing Windows settings. 3 Improving hard drive performance Using Disk Defragmenter As you use . Using Disk Defragmenter 9 Disk Defragmenter is easy to use the computer, files on the ...
... start it, it to complete. You may take more than an hour to run more efficiently. HP recommends defragmenting your computer. Refer to improve the security of your hard drive at any time. NOTE: Windows® includes the User Account Control feature to Help and Support for... tasks such as installing software, running utilities, or changing Windows settings. 3 Improving hard drive performance Using Disk Defragmenter As you use . Using Disk Defragmenter 9 Disk Defragmenter is easy to use the computer, files on the ...

Drives - Windows 7
Page 14
...the Sleep state, or in Hibernation, turn the computer on by pressing the power button. Do not remove the hard drive while the computer is off or in Hibernation. Save your work. 2. Disconnect all external devices connected to the computer (1). 10 Chapter ...4 Replacing the hard drive Lift the hard drive cover away from the AC outlet. 5. 4 Replacing the hard drive CAUTION: To prevent information loss or an unresponsive system: Shut down the computer before removing the hard drive from the computer. 7. Shut down the computer through the...
...the Sleep state, or in Hibernation, turn the computer on by pressing the power button. Do not remove the hard drive while the computer is off or in Hibernation. Save your work. 2. Disconnect all external devices connected to the computer (1). 10 Chapter ...4 Replacing the hard drive Lift the hard drive cover away from the AC outlet. 5. 4 Replacing the hard drive CAUTION: To prevent information loss or an unresponsive system: Shut down the computer before removing the hard drive from the computer. 7. Shut down the computer through the...
Drives - Windows 7
Page 15
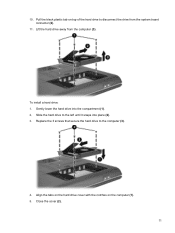
Replace the 3 screws that secure the hard drive to the left until it snaps into the compartment (1). 2. Align the tabs on the hard drive cover with the notches on top of the hard drive to disconnect the drive from the computer (3). Slide the hard drive to the computer (3). 4. To install a hard drive: 1. Close the cover (2). 11 Lift the hard drive away from the system board connector (2). 11. Gently lower the hard drive into place (2). 3. 10. Pull the black plastic tab on the computer (1). 5.
Replace the 3 screws that secure the hard drive to the left until it snaps into the compartment (1). 2. Align the tabs on the hard drive cover with the notches on top of the hard drive to disconnect the drive from the computer (3). Slide the hard drive to the computer (3). 4. To install a hard drive: 1. Close the cover (2). 11 Lift the hard drive away from the system board connector (2). 11. Gently lower the hard drive into place (2). 3. 10. Pull the black plastic tab on the computer (1). 5.
Drives - Windows 7
Page 16
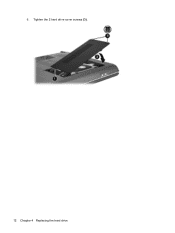
6. Tighten the 2 hard drive cover screws (3). 12 Chapter 4 Replacing the hard drive
6. Tighten the 2 hard drive cover screws (3). 12 Chapter 4 Replacing the hard drive
Drives - Windows 7
Page 20
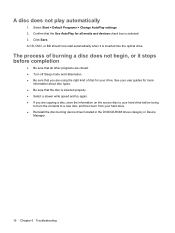
...the contents to your user guides for your hard drive. ● Reinstall the disc-burning device driver located in the DVD/CD-ROM drives category in Device Manager. 16 Chapter 5 Troubleshooting A disc does not play automatically 1. See your hard drive before completion ● Be sure that ...all media and devices check box is inserted into the optical drive. Confirm that the Use AutoPlay for all other programs are closed. ● Turn off...
...the contents to your user guides for your hard drive. ● Reinstall the disc-burning device driver located in the DVD/CD-ROM drives category in Device Manager. 16 Chapter 5 Troubleshooting A disc does not play automatically 1. See your hard drive before completion ● Be sure that ...all media and devices check box is inserted into the optical drive. Confirm that the Use AutoPlay for all other programs are closed. ● Turn off...
Drives - Windows 7
Page 22
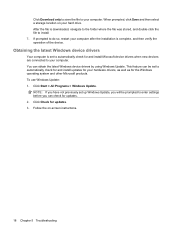
Click Download only to save the file to your hard drive. This feature can be prompted to enter settings before you will be set to your hardware drivers, as well as for your computer. Click Start > ...
Click Download only to save the file to your hard drive. This feature can be prompted to enter settings before you will be set to your hardware drivers, as well as for your computer. Click Start > ...
Drives - Windows 7
Page 23
... copying 7 playing 5 removing 8 CD drive 3 CD, drive 2 copyright warning 6 D device drivers HP drivers 17 Windows drivers 18 Disk Cleanup software 9 Disk Defragmenter software 9 disk performance 9 drives caring for 1 hard 10, 11 optical 2 drives, optical drive 3 DVD burning 7, 16 changing region setting 6 copying 7 drive 2 playing 5 removing 8 DVD drive 3 H hard disk drive installing 11 removing 10 replacing 10 hard drive installing 11 removing 10 replacing...
... copying 7 playing 5 removing 8 CD drive 3 CD, drive 2 copyright warning 6 D device drivers HP drivers 17 Windows drivers 18 Disk Cleanup software 9 Disk Defragmenter software 9 disk performance 9 drives caring for 1 hard 10, 11 optical 2 drives, optical drive 3 DVD burning 7, 16 changing region setting 6 copying 7 drive 2 playing 5 removing 8 DVD drive 3 H hard disk drive installing 11 removing 10 replacing 10 hard drive installing 11 removing 10 replacing...

Notebook Tour - Windows 7
Page 11
... the computer is not plugged into an external power source, the light is turned off until the battery reaches a low battery level. (3) Drive light Blinking: The hard drive or optical drive is the only available power source has reached a low battery level. When the battery reaches a critical battery level, the battery light begins blinking...
... the computer is not plugged into an external power source, the light is turned off until the battery reaches a low battery level. (3) Drive light Blinking: The hard drive or optical drive is the only available power source has reached a low battery level. When the battery reaches a critical battery level, the battery light begins blinking...

