Backup and Recovery - Windows 7
Page 6
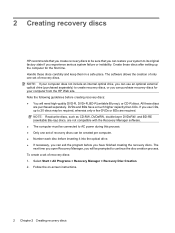
... Recovery Manager software. ● The computer must be connected to AC power during this process. ● Only one set of recovery discs. Follow the on-screen instructions. 2 Chapter 2 Creating recovery discs The next time you open Recovery Manager, you will need high-quality DVD-R, DVD+R, BD-R (writable Blu-ray), or ... an optional external optical drive (purchased separately) to create recovery discs, or you can purchase recovery discs for the first time. 2 Creating recovery discs HP recommends that you create recovery discs to be sure that you can restore your computer from the...
... Recovery Manager software. ● The computer must be connected to AC power during this process. ● Only one set of recovery discs. Follow the on-screen instructions. 2 Chapter 2 Creating recovery discs The next time you open Recovery Manager, you will need high-quality DVD-R, DVD+R, BD-R (writable Blu-ray), or ... an optional external optical drive (purchased separately) to create recovery discs, or you can purchase recovery discs for the first time. 2 Creating recovery discs HP recommends that you create recovery discs to be sure that you can restore your computer from the...
Backup and Recovery - Windows 7
Page 7
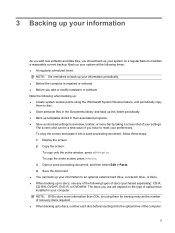
...library and back up this folder periodically. ● Back up templates stored in their associated programs. ● Save customized settings in your computer. The screen shot can back up your information to an optional external hard drive, a network drive, or discs. ● When backing up to discs, use ... Note the following types of optical drive installed in a window, toolbar, or menu bar by taking a screen shot of the computer. 3 To copy the entire screen, press fn+prt sc. 3. Copy the screen: To copy only the active window, press alt+fn+prt sc. 3 Backing up your information As you...
...library and back up this folder periodically. ● Back up templates stored in their associated programs. ● Save customized settings in your computer. The screen shot can back up your information to an optional external hard drive, a network drive, or discs. ● When backing up to discs, use ... Note the following types of optical drive installed in a window, toolbar, or menu bar by taking a screen shot of the computer. 3 To copy the entire screen, press fn+prt sc. 3. Copy the screen: To copy only the active window, press alt+fn+prt sc. 3 Backing up your information As you...
Backup and Recovery - Windows 7
Page 8
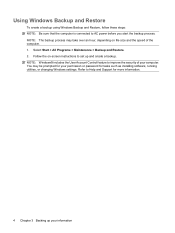
... feature to set up your permission or password for more information. 4 Chapter 3 Backing up and create a backup. You may take over an hour, depending on -screen instructions to improve the security of the computer. 1. Refer to AC power before you start the backup process. Using Windows Backup and Restore To create...
... feature to set up your permission or password for more information. 4 Chapter 3 Backing up and create a backup. You may take over an hour, depending on -screen instructions to improve the security of the computer. 1. Refer to AC power before you start the backup process. Using Windows Backup and Restore To create...
Backup and Recovery - Windows 7
Page 9
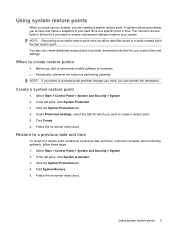
Click the System Protection tab. 4. Select Start > Control Panel > System and Security > System. 2. Using system restore points 5 Follow the on -screen instructions. Follow the on -screen instructions. Select Start > Control Panel > System and Security > System. 2. Click System Restore. 5. NOTE: Recovering to create a restore point. 5. When to create restore points ● Before ...
Click the System Protection tab. 4. Select Start > Control Panel > System and Security > System. 2. Using system restore points 5 Follow the on -screen instructions. Follow the on -screen instructions. Select Start > Control Panel > System and Security > System. 2. Click System Restore. 5. NOTE: Recovering to create a restore point. 5. When to create restore points ● Before ...
Backup and Recovery - Windows 7
Page 10
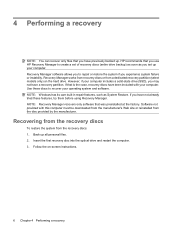
... Restore. Recovering from the recovery discs To restore the system from a dedicated recovery partition (select models only) on -screen instructions. 6 Chapter 4 Performing a recovery HP recommends that you have previously backed up all personal files. 2. Follow the on the hard drive. If you have ... or reinstalled from the disc provided by the manufacturer. 4 Performing a recovery NOTE: You can recover only files that you use HP Recovery Manager to create a set up your computer. Use these features, try them before using Recovery Manager. Recovery Manager software allows...
... Restore. Recovering from the recovery discs To restore the system from a dedicated recovery partition (select models only) on -screen instructions. 6 Chapter 4 Performing a recovery HP recommends that you have previously backed up all personal files. 2. Follow the on the hard drive. If you have ... or reinstalled from the disc provided by the manufacturer. 4 Performing a recovery NOTE: You can recover only files that you use HP Recovery Manager to create a set up your computer. Use these features, try them before using Recovery Manager. Recovery Manager software allows...
Backup and Recovery - Windows 7
Page 11
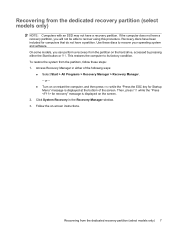
... partition. Access Recovery Manager in the Recovery Manager window. 3. Follow the on the hard drive, accessed by pressing either of the screen. Recovering from the partition, follow these discs to recover your operating system and software. This restores the computer to recover using this procedure...SSD may not have a partition. On some models, you will not be able to its factory condition. or - ● Turn on the screen. 2. To restore the system from the dedicated recovery partition (select models only) 7 Click System Recovery in either the Start button or f11....
... partition. Access Recovery Manager in the Recovery Manager window. 3. Follow the on the hard drive, accessed by pressing either of the screen. Recovering from the partition, follow these discs to recover your operating system and software. This restores the computer to recover using this procedure...SSD may not have a partition. On some models, you will not be able to its factory condition. or - ● Turn on the screen. 2. To restore the system from the dedicated recovery partition (select models only) 7 Click System Recovery in either the Start button or f11....

Software Update - Windows Vista and Windows 7
Page 6
... not insert, remove, connect, or disconnect any device, cable, or cord. Follow the instructions on the HP Web site that is running on the screen to identify your selection to know the version of the screen, press f10. 2. Updating the BIOS To update the BIOS, first determine what BIOS version you want to... download. 3. Access the page on the screen to download your computer and access the BIOS update you currently have and then download and install the new BIOS. You may need to the ...
... not insert, remove, connect, or disconnect any device, cable, or cord. Follow the instructions on the HP Web site that is running on the screen to identify your selection to know the version of the screen, press f10. 2. Updating the BIOS To update the BIOS, first determine what BIOS version you want to... download. 3. Access the page on the screen to download your computer and access the BIOS update you currently have and then download and install the new BIOS. You may need to the ...
Software Update - Windows Vista and Windows 7
Page 7
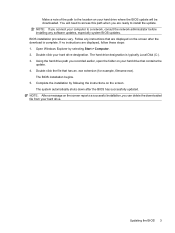
... are displayed, follow these steps: 1. If no instructions are displayed on the screen after the BIOS has successfully updated. Open Windows Explorer by following the instructions on the screen. Using the hard drive path you can delete the downloaded file from your hard... Double-click your hard drive designation. Updating the BIOS 3 Follow any software updates, especially system BIOS updates. NOTE: After a message on the screen reports a successful installation, you recorded earlier, open the folder on your hard drive that has an .exe extension (for example, filename.exe). ...
... are displayed, follow these steps: 1. If no instructions are displayed on the screen after the BIOS has successfully updated. Open Windows Explorer by following the instructions on the screen. Using the hard drive path you can delete the downloaded file from your hard... Double-click your hard drive designation. Updating the BIOS 3 Follow any software updates, especially system BIOS updates. NOTE: After a message on the screen reports a successful installation, you recorded earlier, open the folder on your hard drive that has an .exe extension (for example, filename.exe). ...
Wireless (Select Models Only) - Windows 7
Page 25
... be displayed. Get the latest version of the WLAN device software for your country or region. 3. Select your computer from the HP Web site at http://www.hp.com. Network icon is either missing or corrupted. To get the latest version of the WLAN device software and drivers for your ...computer, follow the on-screen instructions. Click the option for the latest software. Press enter, and then follow these steps: 1. Network icon is ...
... be displayed. Get the latest version of the WLAN device software for your country or region. 3. Select your computer from the HP Web site at http://www.hp.com. Network icon is either missing or corrupted. To get the latest version of the WLAN device software and drivers for your ...computer, follow the on-screen instructions. Click the option for the latest software. Press enter, and then follow these steps: 1. Network icon is ...
Drives - Windows 7
Page 11
Do not use software such as the process for creating a data file. Click Copy at the bottom right of the screen. 4. To burn video files to a CD or DVD, use CD-Rs to burn music CDs. ● A CD-RW or DVD-RW is copied, the disc ...
Do not use software such as the process for creating a data file. Click Copy at the bottom right of the screen. 4. To burn video files to a CD or DVD, use CD-Rs to burn music CDs. ● A CD-RW or DVD-RW is copied, the disc ...

Drives - Windows 7
Page 13
.... Depending on a monthly schedule, but you can run more efficiently. NOTE: Windows® includes the User Account Control feature to use the computer, files on -screen instructions. To run Disk Defragmenter: 1. Click Defragment disk. HP recommends defragmenting your computer. 3 Improving hard drive performance Using Disk Defragmenter As you use .
.... Depending on a monthly schedule, but you can run more efficiently. NOTE: Windows® includes the User Account Control feature to use the computer, files on -screen instructions. To run Disk Defragmenter: 1. Click Defragment disk. HP recommends defragmenting your computer. 3 Improving hard drive performance Using Disk Defragmenter As you use .
Drives - Windows 7
Page 19
... tell the difference between colors beyond 16 bits, you may need to continue. Right-click anywhere on the desktop except an icon, and then select Screen resolution. 2. Otherwise, you should not notice any loss of the following ways: ◦ Playback may resume. - In rare cases, you may see a warning message asking...
... tell the difference between colors beyond 16 bits, you may need to continue. Right-click anywhere on the desktop except an icon, and then select Screen resolution. 2. Otherwise, you should not notice any loss of the following ways: ◦ Playback may resume. - In rare cases, you may see a warning message asking...
Drives - Windows 7
Page 22
.... Follow the on your hardware drivers, as well as for updates. 3. To use Windows Update: 1. When prompted, click Save and then select a storage location on -screen instructions. 18 Chapter 5 Troubleshooting If prompted to do so, restart your computer. Click Check for the Windows operating system and other Microsoft products. Click Download...
.... Follow the on your hardware drivers, as well as for updates. 3. To use Windows Update: 1. When prompted, click Save and then select a storage location on -screen instructions. 18 Chapter 5 Troubleshooting If prompted to do so, restart your computer. Click Check for the Windows operating system and other Microsoft products. Click Download...
Notebook Tour - Windows 7
Page 8
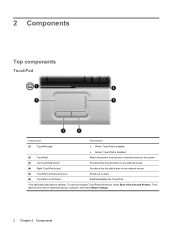
... Component Description (1) TouchPad light ● White: TouchPad is enabled. ● Amber: TouchPad is disabled. (2) TouchPad* Moves the pointer and selects or activates items on the screen. (3) Left TouchPad button* Functions like the left button on an external mouse. (4) Right TouchPad button* Functions like the right button on an external mouse. (5) TouchPad...
... Component Description (1) TouchPad light ● White: TouchPad is enabled. ● Amber: TouchPad is disabled. (2) TouchPad* Moves the pointer and selects or activates items on the screen. (3) Left TouchPad button* Functions like the left button on an external mouse. (4) Right TouchPad button* Functions like the right button on an external mouse. (5) TouchPad...

Notebook Tour - Windows 7
Page 18
Cleaning the display To remove smudges and lint, frequently clean the display with a soft, damp, lint-free cloth. If the screen requires additional cleaning, use premoistened antistatic wipes or an antistatic screen cleaner. CAUTION: To prevent permanent damage to the computer, never spray water, cleaning fluids, or chemicals on the front of the...
Cleaning the display To remove smudges and lint, frequently clean the display with a soft, damp, lint-free cloth. If the screen requires additional cleaning, use premoistened antistatic wipes or an antistatic screen cleaner. CAUTION: To prevent permanent damage to the computer, never spray water, cleaning fluids, or chemicals on the front of the...
Pointing Devices and Keyboard - Windows 7
Page 3
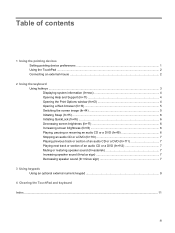
... Support (fn+f1 4 Opening the Print Options window (fn+f2 4 Opening a Web browser (fn+f3 5 Switching the screen image (fn+f4 5 Initiating Sleep (fn+f5) ...6 Initiating QuickLock (fn+f6 6 Decreasing screen brightness (fn+f7 6 Increasing screen brightness (fn+f8 6 Playing, pausing or resuming an audio CD or a DVD (fn+f9 6 Stopping an audio...
... Support (fn+f1 4 Opening the Print Options window (fn+f2 4 Opening a Web browser (fn+f3 5 Switching the screen image (fn+f4 5 Initiating Sleep (fn+f5) ...6 Initiating QuickLock (fn+f6 6 Decreasing screen brightness (fn+f7 6 Increasing screen brightness (fn+f8 6 Playing, pausing or resuming an audio CD or a DVD (fn+f9 6 Stopping an audio...
Pointing Devices and Keyboard - Windows 7
Page 5
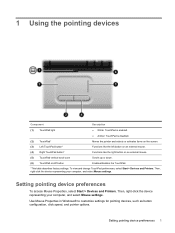
... Component Description (1) TouchPad light ● White: TouchPad is enabled. ● Amber: TouchPad is disabled. (2) TouchPad* Moves the pointer and selects or activates items on the screen. (3) Left TouchPad button* Functions like the left button on an external mouse. (4) Right TouchPad button* Functions like the right button on an external mouse. (5) TouchPad...
... Component Description (1) TouchPad light ● White: TouchPad is enabled. ● Amber: TouchPad is disabled. (2) TouchPad* Moves the pointer and selects or activates items on the screen. (3) Left TouchPad button* Functions like the left button on an external mouse. (4) Right TouchPad button* Functions like the right button on an external mouse. (5) TouchPad...

Pointing Devices and Keyboard - Windows 7
Page 7
.... Open the Print Options window. The icons on the f1 through f12 keys represent the hotkey functions. Open a Web browser. Initiate Sleep. Increase screen brightness. Hotkey functions and procedures are combinations of the fn key (1) and the esc key (2), one of the function keys (3), or one of the volume ...
.... Open the Print Options window. The icons on the f1 through f12 keys represent the hotkey functions. Open a Web browser. Initiate Sleep. Increase screen brightness. Hotkey functions and procedures are combinations of the fn key (1) and the esc key (2), one of the function keys (3), or one of the volume ...
Pointing Devices and Keyboard - Windows 7
Page 9
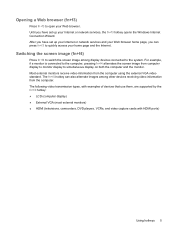
... (fn+f4) Press fn+f4 to switch the screen image among other devices receiving video information from the computer using the external VGA video standard. The fn+f4 hotkey can press fn+f3 to ... services, the fn+f3 hotkey opens the Windows Internet Connection Wizard. For example, if a monitor is connected to the computer, pressing fn+f4 alternates the screen image from computer display to monitor display to simultaneous display on both the computer and the monitor.
... (fn+f4) Press fn+f4 to switch the screen image among other devices receiving video information from the computer using the external VGA video standard. The fn+f4 hotkey can press fn+f3 to ... services, the fn+f3 hotkey opens the Windows Internet Connection Wizard. For example, if a monitor is connected to the computer, pressing fn+f4 alternates the screen image from computer display to monitor display to simultaneous display on both the computer and the monitor.

Pointing Devices and Keyboard - Windows 7
Page 10
...be accessed until a Windows user password or a Windows administrator password is playing, press fn+f9 to decrease the brightness level incrementally. Increasing screen brightness (fn+f8) Press fn+f8 to display the Log On window and lock the computer. While the computer is Hibernate, but this... setting can set a Windows user password or a Windows administrator password. Decreasing screen brightness (fn+f7) Press fn+f7 to the fn+f5 hotkey. When Sleep is conserved. NOTE: If a critical battery level occurs while...
...be accessed until a Windows user password or a Windows administrator password is playing, press fn+f9 to decrease the brightness level incrementally. Increasing screen brightness (fn+f8) Press fn+f8 to display the Log On window and lock the computer. While the computer is Hibernate, but this... setting can set a Windows user password or a Windows administrator password. Decreasing screen brightness (fn+f7) Press fn+f7 to the fn+f5 hotkey. When Sleep is conserved. NOTE: If a critical battery level occurs while...


