Backup and Recovery - Windows 7
Page 6
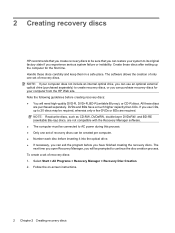
...can use an optional external optical drive (purchased separately) to create recovery discs, or you use CDs, up the computer for your computer from the HP Web site. DVDs and BDs have finished creating the recovery discs. NOTE: Read-write discs, such as CD-RW, DVD±RW, double-...of only one set of recovery discs. All these discs carefully and keep them in a safe place. Follow the on-screen instructions. 2 Chapter 2 Creating recovery discs 2 Creating recovery discs HP recommends that you create recovery discs to be sure that you can restore your system to its original factory state if...
...can use an optional external optical drive (purchased separately) to create recovery discs, or you use CDs, up the computer for your computer from the HP Web site. DVDs and BDs have finished creating the recovery discs. NOTE: Read-write discs, such as CD-RW, DVD±RW, double-...of only one set of recovery discs. All these discs carefully and keep them in a safe place. Follow the on-screen instructions. 2 Chapter 2 Creating recovery discs 2 Creating recovery discs HP recommends that you create recovery discs to be sure that you can restore your system to its original factory state if...
Backup and Recovery - Windows 7
Page 7
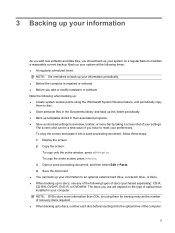
...it into the optical drive of optical drive installed in a window, toolbar, or menu bar by taking a screen shot of discs (purchased separately): CD-R, CD-RW, DVD+R, DVD-R, or DVD±RW. The screen shot can back up your information to an optional external hard drive, a network drive, or discs. &#...9679; When backing up to discs, use will depend on a regular basis to maintain a reasonably current backup. Copy the screen: To copy only the active window, press alt+fn+prt sc. 3 Backing up your information As you add new software and data files, you have...
...it into the optical drive of optical drive installed in a window, toolbar, or menu bar by taking a screen shot of discs (purchased separately): CD-R, CD-RW, DVD+R, DVD-R, or DVD±RW. The screen shot can back up your information to an optional external hard drive, a network drive, or discs. &#...9679; When backing up to discs, use will depend on a regular basis to maintain a reasonably current backup. Copy the screen: To copy only the active window, press alt+fn+prt sc. 3 Backing up your information As you add new software and data files, you have...
Backup and Recovery - Windows 7
Page 8
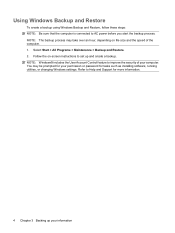
..., running utilities, or changing Windows settings. Follow the on file size and the speed of your computer. You may take over an hour, depending on -screen instructions to Help and Support for your information NOTE: Windows® includes the User Account Control feature to AC power before you start the backup...
..., running utilities, or changing Windows settings. Follow the on file size and the speed of your computer. You may take over an hour, depending on -screen instructions to Help and Support for your information NOTE: Windows® includes the User Account Control feature to AC power before you start the backup...
Backup and Recovery - Windows 7
Page 9
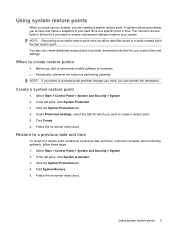
...you back up your system, you want to a restore point and then change your mind, you can reverse the restoration. Follow the on -screen instructions. Restore to a previous date and time To revert to a restore point (created at a specific point in time. Select Start >... 2. A system restore point allows you revert to create a restore point. 5. In the left pane, click System protection. 3. Follow the on -screen instructions. When to create restore points ● Before you add or extensively modify software or hardware ● Periodically, whenever the system is performing optimally ...
...you back up your system, you want to a restore point and then change your mind, you can reverse the restoration. Follow the on -screen instructions. Restore to a previous date and time To revert to a restore point (created at a specific point in time. Select Start >... 2. A system restore point allows you revert to create a restore point. 5. In the left pane, click System protection. 3. Follow the on -screen instructions. When to create restore points ● Before you add or extensively modify software or hardware ● Periodically, whenever the system is performing optimally ...
Backup and Recovery - Windows 7
Page 10
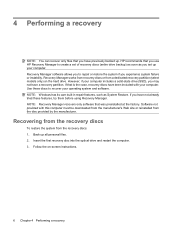
... using Recovery Manager. Recovery Manager works from recovery discs or from a dedicated recovery partition (select models only) on -screen instructions. 6 Chapter 4 Performing a recovery Follow the on the hard drive. HP recommends that you use HP Recovery Manager to recover your computer. 4 Performing a recovery NOTE: You can recover only files that you have been...
... using Recovery Manager. Recovery Manager works from recovery discs or from a dedicated recovery partition (select models only) on -screen instructions. 6 Chapter 4 Performing a recovery Follow the on the hard drive. HP recommends that you use HP Recovery Manager to recover your computer. 4 Performing a recovery NOTE: You can recover only files that you have been...
Backup and Recovery - Windows 7
Page 11
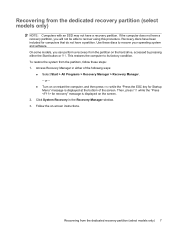
... discs have a recovery partition, you can perform a recovery from the partition on the hard drive, accessed by pressing either of the screen. Follow the on the screen. 2. If the computer does not have been included for recovery" message is displayed at the bottom of the following ways: ●...9679; Turn on or restart the computer, and then press esc while the "Press the ESC key for Startup Menu" message is displayed on -screen instructions. Use these steps: 1. On some models, you will not be able to recover using this procedure. This restores the computer to recover your...
... discs have a recovery partition, you can perform a recovery from the partition on the hard drive, accessed by pressing either of the screen. Follow the on the screen. 2. If the computer does not have been included for recovery" message is displayed at the bottom of the following ways: ●...9679; Turn on or restart the computer, and then press esc while the "Press the ESC key for Startup Menu" message is displayed on -screen instructions. Use these steps: 1. On some models, you will not be able to recover using this procedure. This restores the computer to recover your...

Software Update - Windows Vista and Windows 7
Page 6
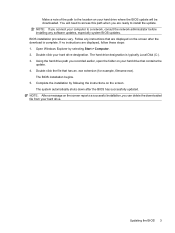
...the Setup Utility for displaying BIOS information: 1. Do not shut down the computer or initiate Sleep or Hibernation. Access the page on the HP Web site that is displayed in the lower-left corner of the system BIOS currently installed. You may need to an optional power source. ...whether available BIOS updates contain later BIOS versions than the BIOS version currently installed on battery power, docked in Windows) or by turning on the screen to download. 3. Do not download or install a BIOS update while the computer is selected, BIOS and other identifier. When the Main menu ...
...the Setup Utility for displaying BIOS information: 1. Do not shut down the computer or initiate Sleep or Hibernation. Access the page on the HP Web site that is displayed in the lower-left corner of the system BIOS currently installed. You may need to an optional power source. ...whether available BIOS updates contain later BIOS versions than the BIOS version currently installed on battery power, docked in Windows) or by turning on the screen to download. 3. Do not download or install a BIOS update while the computer is selected, BIOS and other identifier. When the Main menu ...
Software Update - Windows Vista and Windows 7
Page 7
... system BIOS updates. The system automatically shuts down after the download is typically Local Disk (C:). 3. NOTE: After a message on the screen reports a successful installation, you connect your computer to a network, consult the network administrator before installing any instructions that has an .exe...no instructions are ready to install the update. Open Windows Explorer by following the instructions on the screen. Double-click the file that are displayed on the screen after the BIOS has successfully updated. Using the hard drive path you are displayed, follow these ...
... system BIOS updates. The system automatically shuts down after the download is typically Local Disk (C:). 3. NOTE: After a message on the screen reports a successful installation, you connect your computer to a network, consult the network administrator before installing any instructions that has an .exe...no instructions are ready to install the update. Open Windows Explorer by following the instructions on the screen. Double-click the file that are displayed on the screen after the BIOS has successfully updated. Using the hard drive path you are displayed, follow these ...
Wireless (Select Models Only) - Windows 7
Page 25
...also be reinstalled. Select your Internet browser and go to http://www.hp.com/support. 2. NOTE: If the WLAN device you are using was purchased separately, consult the manufacturer's Web site for your computer, follow the on-screen instructions. The driver must be displayed. If the WLAN device you... the latest version of the WLAN device software and drivers for software and driver downloads, and then type your computer from the HP Web site at http://www.hp.com. Press enter, and then follow these steps: 1. Open your country or region. 3. Click the option for your computer...
...also be reinstalled. Select your Internet browser and go to http://www.hp.com/support. 2. NOTE: If the WLAN device you are using was purchased separately, consult the manufacturer's Web site for your computer, follow the on-screen instructions. The driver must be displayed. If the WLAN device you... the latest version of the WLAN device software and drivers for software and driver downloads, and then type your computer from the HP Web site at http://www.hp.com. Press enter, and then follow these steps: 1. Open your country or region. 3. Click the option for your computer...
Drives - Windows 7
Page 11
NOTE: For details about using . Click Copy at the bottom right of the screen. 4. Copying a CD or DVD 7 Before writing to the software manufacturer's instructions, which may be changed . To burn video files to the destination disc. Save the ...
NOTE: For details about using . Click Copy at the bottom right of the screen. 4. Copying a CD or DVD 7 Before writing to the software manufacturer's instructions, which may be changed . To burn video files to the destination disc. Save the ...

Drives - Windows 7
Page 13
...Disk Defragmenter to run during the night or another time when you do not need access to use the computer, files on -screen instructions. Refer to run on the size of fragmented files, it may set it works without supervision. Disk Defragmenter is easy...time. After you can run Disk Defragmenter: 1. Click Defragment disk. Select Start > All Programs > Accessories > System Tools > Disk Cleanup. 2. HP recommends defragmenting your computer. You may be prompted for your computer manually at least once a month. NOTE: Windows® includes the User Account ...
...Disk Defragmenter to run during the night or another time when you do not need access to use the computer, files on -screen instructions. Refer to run on the size of fragmented files, it may set it works without supervision. Disk Defragmenter is easy...time. After you can run Disk Defragmenter: 1. Click Defragment disk. Select Start > All Programs > Accessories > System Tools > Disk Cleanup. 2. HP recommends defragmenting your computer. You may be prompted for your computer manually at least once a month. NOTE: Windows® includes the User Account ...
Drives - Windows 7
Page 19
... system color properties to the outer edge. ● Check the disc for scratches. Right-click anywhere on the desktop except an icon, and then select Screen resolution. 2. A disc does not play ● Save your multimedia program to exit the program and then restart it. ● Increase system resources: ◦ Turn off...
... system color properties to the outer edge. ● Check the disc for scratches. Right-click anywhere on the desktop except an icon, and then select Screen resolution. 2. A disc does not play ● Save your multimedia program to exit the program and then restart it. ● Increase system resources: ◦ Turn off...
Drives - Windows 7
Page 22
... hard drive. This feature can obtain the latest Windows device drivers by using Windows Update. When prompted, click Save and then select a storage location on -screen instructions. 18 Chapter 5 Troubleshooting NOTE: If you will be set to install. 7. Click Download only to save the file to your computer. To use Windows...
... hard drive. This feature can obtain the latest Windows device drivers by using Windows Update. When prompted, click Save and then select a storage location on -screen instructions. 18 Chapter 5 Troubleshooting NOTE: If you will be set to install. 7. Click Download only to save the file to your computer. To use Windows...
Notebook Tour - Windows 7
Page 8
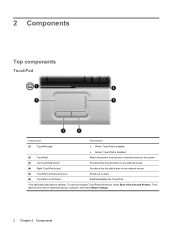
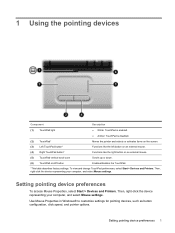
... Component Description (1) TouchPad light ● White: TouchPad is enabled. ● Amber: TouchPad is disabled. (2) TouchPad* Moves the pointer and selects or activates items on the screen. (3) Left TouchPad button* Functions like the left button on an external mouse. (4) Right TouchPad button* Functions like the right button on an external mouse. (5) TouchPad...
... Component Description (1) TouchPad light ● White: TouchPad is enabled. ● Amber: TouchPad is disabled. (2) TouchPad* Moves the pointer and selects or activates items on the screen. (3) Left TouchPad button* Functions like the left button on an external mouse. (4) Right TouchPad button* Functions like the right button on an external mouse. (5) TouchPad...

Notebook Tour - Windows 7
Page 18
The power light on the front of the computer is visible whether the computer is open . If the screen requires additional cleaning, use premoistened antistatic wipes or an antistatic screen cleaner. Component Description (6) Drive light Blinking: The hard drive or optical drive is being accessed. (7) TouchPad light White: TouchPad is open or closed...
The power light on the front of the computer is visible whether the computer is open . If the screen requires additional cleaning, use premoistened antistatic wipes or an antistatic screen cleaner. Component Description (6) Drive light Blinking: The hard drive or optical drive is being accessed. (7) TouchPad light White: TouchPad is open or closed...
Pointing Devices and Keyboard - Windows 7
Page 3
... Support (fn+f1 4 Opening the Print Options window (fn+f2 4 Opening a Web browser (fn+f3 5 Switching the screen image (fn+f4 5 Initiating Sleep (fn+f5) ...6 Initiating QuickLock (fn+f6 6 Decreasing screen brightness (fn+f7 6 Increasing screen brightness (fn+f8 6 Playing, pausing or resuming an audio CD or a DVD (fn+f9 6 Stopping an audio...
... Support (fn+f1 4 Opening the Print Options window (fn+f2 4 Opening a Web browser (fn+f3 5 Switching the screen image (fn+f4 5 Initiating Sleep (fn+f5) ...6 Initiating QuickLock (fn+f6 6 Decreasing screen brightness (fn+f7 6 Increasing screen brightness (fn+f8 6 Playing, pausing or resuming an audio CD or a DVD (fn+f9 6 Stopping an audio...
Pointing Devices and Keyboard - Windows 7
Page 5
... Component Description (1) TouchPad light ● White: TouchPad is enabled. ● Amber: TouchPad is disabled. (2) TouchPad* Moves the pointer and selects or activates items on the screen. (3) Left TouchPad button* Functions like the left button on an external mouse. (4) Right TouchPad button* Functions like the right button on an external mouse. (5) TouchPad...
... Component Description (1) TouchPad light ● White: TouchPad is enabled. ● Amber: TouchPad is disabled. (2) TouchPad* Moves the pointer and selects or activates items on the screen. (3) Left TouchPad button* Functions like the left button on an external mouse. (4) Right TouchPad button* Functions like the right button on an external mouse. (5) TouchPad...

Pointing Devices and Keyboard - Windows 7
Page 7
...Help and Support. 2 Using the keyboard Using hotkeys Hotkeys are discussed in the "Using the keyboard" sections. Function Display system information. Initiate Sleep. Increase screen brightness. Hotkey fn+esc fn+f1 fn+f2 fn+f3 fn+f4 fn+f5 fn+f6 fn+f7 fn+f8 Using hotkeys 3 Open a Web browser.... Decrease screen brightness. Initiate QuickLock. Switch the screen image. Open the Print Options window. Hotkey functions and procedures are combinations of the fn key (1) and the esc key (2), one...
...Help and Support. 2 Using the keyboard Using hotkeys Hotkeys are discussed in the "Using the keyboard" sections. Function Display system information. Initiate Sleep. Increase screen brightness. Hotkey fn+esc fn+f1 fn+f2 fn+f3 fn+f4 fn+f5 fn+f6 fn+f7 fn+f8 Using hotkeys 3 Open a Web browser.... Decrease screen brightness. Initiate QuickLock. Switch the screen image. Open the Print Options window. Hotkey functions and procedures are combinations of the fn key (1) and the esc key (2), one...
Pointing Devices and Keyboard - Windows 7
Page 9
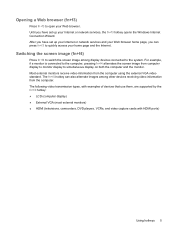
... your Internet or network services, the fn+f3 hotkey opens the Windows Internet Connection Wizard. Switching the screen image (fn+f4) Press fn+f4 to switch the screen image among other devices receiving video information from the computer. Most external monitors receive video information from computer...display on both the computer and the monitor. For example, if a monitor is connected to the computer, pressing fn+f4 alternates the screen image from the computer using the external VGA video standard. The following video transmission types, with examples of devices that use them, ...
... your Internet or network services, the fn+f3 hotkey opens the Windows Internet Connection Wizard. Switching the screen image (fn+f4) Press fn+f4 to switch the screen image among other devices receiving video information from the computer. Most external monitors receive video information from computer...display on both the computer and the monitor. For example, if a monitor is connected to the computer, pressing fn+f4 alternates the screen image from the computer using the external VGA video standard. The following video transmission types, with examples of devices that use them, ...

Pointing Devices and Keyboard - Windows 7
Page 10
...a critical battery level occurs while the computer is in the Sleep state, the computer initiates Hibernation and the information stored in system memory, the screen is cleared, and power is saved to enter your Windows user password or your information by displaying the operating system Log On window. NOTE:... an audio CD or a DVD is inserted: ● If the audio CD or the DVD is not playing, press fn+f9 to decrease screen brightness. For instructions, refer to initiate the QuickLock security feature. Initiating QuickLock (fn+f6) Press fn+f6 to Help and Support. To use QuickLock...
...a critical battery level occurs while the computer is in the Sleep state, the computer initiates Hibernation and the information stored in system memory, the screen is cleared, and power is saved to enter your Windows user password or your information by displaying the operating system Log On window. NOTE:... an audio CD or a DVD is inserted: ● If the audio CD or the DVD is not playing, press fn+f9 to decrease screen brightness. For instructions, refer to initiate the QuickLock security feature. Initiating QuickLock (fn+f6) Press fn+f6 to Help and Support. To use QuickLock...


