User Guide
Page 3
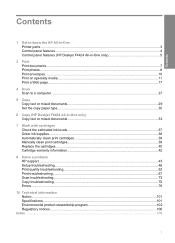
Contents Contents 1 Get to know the HP All-in-One Printer parts...3 Control panel features...4 Control panel features (HP Deskjet F4424 All-in-One only 5 2 Print Print documents...7 Print photos...8 Print envelopes...10 Print on specialty media...11 Print a Web page...17 4 Scan Scan to a ...29 Set the copy paper type...30 6 Copy (HP Deskjet F4424 All-in-One only) Copy text or mixed documents 33 7 Work with cartridges Check the estimated ink levels 37 Order ink supplies...38 Automatically clean print cartridges 39 Manually clean print cartridges 39 Replace the cartridges...40 Cartridge ...
Contents Contents 1 Get to know the HP All-in-One Printer parts...3 Control panel features...4 Control panel features (HP Deskjet F4424 All-in-One only 5 2 Print Print documents...7 Print photos...8 Print envelopes...10 Print on specialty media...11 Print a Web page...17 4 Scan Scan to a ...29 Set the copy paper type...30 6 Copy (HP Deskjet F4424 All-in-One only) Copy text or mixed documents 33 7 Work with cartridges Check the estimated ink levels 37 Order ink supplies...38 Automatically clean print cartridges 39 Manually clean print cartridges 39 Replace the cartridges...40 Cartridge ...
User Guide
Page 9
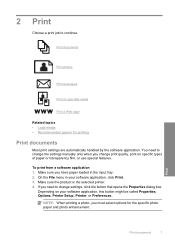
..., click Print. 3. Make sure you have paper loaded in your software application, this button might be called Properties, Options, Printer Setup, Printer, or Preferences. If you need to change settings, click the button that opens the Properties dialog box. Print Print documents 7... the input tray. 2. To print from a software application 1. Make sure the product is the selected printer. 4. NOTE: When printing a photo, you change the settings manually only when you must select options for printing Print documents Most print settings are automatically handled by the software...
..., click Print. 3. Make sure you have paper loaded in your software application, this button might be called Properties, Options, Printer Setup, Printer, or Preferences. If you need to change settings, click the button that opens the Properties dialog box. Print Print documents 7... the input tray. 2. To print from a software application 1. Make sure the product is the selected printer. 4. NOTE: When printing a photo, you change the settings manually only when you must select options for printing Print documents Most print settings are automatically handled by the software...

User Guide
Page 15
... dialog box. Place the paper in the right side of the tray. Open the Printer Properties dialog box. 6. Slide the paper guide all the way to the left . 2. Slide the paper guide all the way to the left . 2. Slide the ...: • Print Quality: Best • Paper Type: Click More, and then select an appropriate HP inkjet paper. • Orientation: Portrait or Landscape • Size: An appropriate paper size • Two-sided printing: Manual 8. Push the paper into the printer until it stops. 4. Click OK to separate them, and then align the edges. 3. The...
... dialog box. Place the paper in the right side of the tray. Open the Printer Properties dialog box. 6. Slide the paper guide all the way to the left . 2. Slide the paper guide all the way to the left . 2. Slide the ...: • Print Quality: Best • Paper Type: Click More, and then select an appropriate HP inkjet paper. • Orientation: Portrait or Landscape • Size: An appropriate paper size • Two-sided printing: Manual 8. Push the paper into the printer until it stops. 4. Click OK to separate them, and then align the edges. 3. The...
User Guide
Page 39
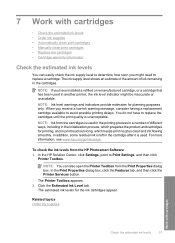
... Print Properties dialog box, click the Features tab, and then click the Printer Services button. NOTE: Ink level warnings and indicators provide estimates for the ink cartridges appear. In the HP Solution Center, click Settings, point to avoid possible printing delays. NOTE: ...Automatically clean print cartridges • Manually clean print cartridges • Replace the cartridges • Cartridge warranty information Check the estimated ink levels You can also open the Printer Toolbox from the HP Photosmart Software 1. For more information, see www.hp.com/go/inkusage. The ink ...
... Print Properties dialog box, click the Features tab, and then click the Printer Services button. NOTE: Ink level warnings and indicators provide estimates for the ink cartridges appear. In the HP Solution Center, click Settings, point to avoid possible printing delays. NOTE: ...Automatically clean print cartridges • Manually clean print cartridges • Replace the cartridges • Cartridge warranty information Check the estimated ink levels You can also open the Printer Toolbox from the HP Photosmart Software 1. For more information, see www.hp.com/go/inkusage. The ink ...

User Guide
Page 41
.... 3. NOTE: Do not remove both print cartridges at a time. To clean the print cartridges 1. In the Print Settings area, click Printer Toolbox. 2. TIP: Coffee filters are lint-free and work well for cleaning print cartridges. • Distilled, filtered, or bottled water (.... In the HP Solution Center, click Settings. Work with cartridges Manually clean print cartridges 39 For more information, see Manually clean print cartridges. Turn on ink, clean the print cartridges automatically. Click Clean the Print Cartridges. 3. Remove and clean each print cartridge one at the same...
.... 3. NOTE: Do not remove both print cartridges at a time. To clean the print cartridges 1. In the Print Settings area, click Printer Toolbox. 2. TIP: Coffee filters are lint-free and work well for cleaning print cartridges. • Distilled, filtered, or bottled water (.... In the HP Solution Center, click Settings. Work with cartridges Manually clean print cartridges 39 For more information, see Manually clean print cartridges. Turn on ink, clean the print cartridges automatically. Click Clean the Print Cartridges. 3. Remove and clean each print cartridge one at the same...


