

HP Notebook Hard Drives & Solid State Drives Identifying, Preventing, Diagnosing and Recovering from Drive Failures Care and Mai
Page 6
... Accelerator drivers. The latest device driver versions address multiple known issues that are released to 150MB/sec transfer rate for disk traffic, and provides link power management with Serial ATA hard disk drives. Intel Matrix Storage Technology driver HP offers the Intel Matrix Storage Manager driver for the SATA Advanced Host Controller (AHCI) Interface. Intel Matrix Storage Manager Driver provides support for notebook PC models that could affect hard disk drive performance and...
... Accelerator drivers. The latest device driver versions address multiple known issues that are released to 150MB/sec transfer rate for disk traffic, and provides link power management with Serial ATA hard disk drives. Intel Matrix Storage Technology driver HP offers the Intel Matrix Storage Manager driver for the SATA Advanced Host Controller (AHCI) Interface. Intel Matrix Storage Manager Driver provides support for notebook PC models that could affect hard disk drive performance and...
User Guide
Page 5
... hardware and software information 4 Right side ...5 Left side ...6 Display ...7 Top ...8 TouchPad ...8 Lights ...9 Button, speakers, and subwoofer 10 Keys ...11 Bottom ...12 Labels ...13 3 Connecting to a network ...14 Connecting to a wireless network ...15 Using the wireless controls 15 Using the wireless button 15 Using HP Connection Manager (select models only 15 Using operating system controls 16 Using a WLAN ...16 Using an Internet service provider 16 Setting up a WLAN 17 Configuring a wireless router 17 Protecting your WLAN 17 Connecting to a WLAN 18 Using Bluetooth wireless...
... hardware and software information 4 Right side ...5 Left side ...6 Display ...7 Top ...8 TouchPad ...8 Lights ...9 Button, speakers, and subwoofer 10 Keys ...11 Bottom ...12 Labels ...13 3 Connecting to a network ...14 Connecting to a wireless network ...15 Using the wireless controls 15 Using the wireless button 15 Using HP Connection Manager (select models only 15 Using operating system controls 16 Using a WLAN ...16 Using an Internet service provider 16 Setting up a WLAN 17 Configuring a wireless router 17 Protecting your WLAN 17 Connecting to a WLAN 18 Using Bluetooth wireless...
User Guide
Page 7
... (select models only 47 Using Disk Defragmenter 48 Using Disk Cleanup ...48 Updating programs and drivers ...49 Cleaning your computer ...50 Cleaning the display, sides, and cover 50 Cleaning the TouchPad and keyboard 50 Traveling with or shipping your computer 51 9 Securing your computer and information 52 Locating your security software ...52 Using passwords ...53 Setting Windows passwords 53 Setting Setup Utility (BIOS) passwords 54 Using Internet security software ...54 Using antivirus software ...55 Using firewall software ...55 Installing software updates ...55 Installing Windows...
... (select models only 47 Using Disk Defragmenter 48 Using Disk Cleanup ...48 Updating programs and drivers ...49 Cleaning your computer ...50 Cleaning the display, sides, and cover 50 Cleaning the TouchPad and keyboard 50 Traveling with or shipping your computer 51 9 Securing your computer and information 52 Locating your security software ...52 Using passwords ...53 Setting Windows passwords 53 Setting Setup Utility (BIOS) passwords 54 Using Internet security software ...54 Using antivirus software ...55 Using firewall software ...55 Installing software updates ...55 Installing Windows...
User Guide
Page 28
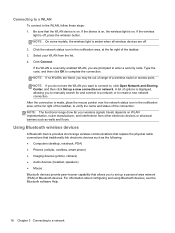
... . A list of a wireless router or access point. NOTE: On some models, the wireless light is on , the wireless light is amber when all wireless devices are prompted to create a new network connection. NOTE: If no WLANs are listed, you may be out of range of options is displayed, allowing you to manually search for and connect to a network or to enter a security code. Click Connect. Using Bluetooth wireless devices A Bluetooth device provides short-range wireless communications that replace the physical cable connections that...
... . A list of a wireless router or access point. NOTE: On some models, the wireless light is on , the wireless light is amber when all wireless devices are prompted to create a new network connection. NOTE: If no WLANs are listed, you may be out of range of options is displayed, allowing you to manually search for and connect to a network or to enter a security code. Click Connect. Using Bluetooth wireless devices A Bluetooth device provides short-range wireless communications that replace the physical cable connections that...
User Guide
Page 33
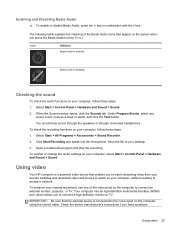
... the Sound window opens, click the Sounds tab. Open a multimedia program and play the recording. Icon Definition Beats Audio is disabled. To check the recording functions on the computer, using the correct cable. Using video 23 To confirm or change the audio settings on your computer, without needing to the correct port on your desktop. 3. Beats Audio is enabled. Click Start Recording and speak into the microphone. Using video Your HP computer is connected to access a network...
... the Sound window opens, click the Sounds tab. Open a multimedia program and play the recording. Icon Definition Beats Audio is disabled. To check the recording functions on the computer, using the correct cable. Using video 23 To confirm or change the audio settings on your computer, without needing to the correct port on your desktop. 3. Beats Audio is enabled. Click Start Recording and speak into the microphone. Using video Your HP computer is connected to access a network...

User Guide
Page 37
.... Using the action keys An action key performs an assigned function. See Using Setup Utility (BIOS) and System Diagnostics on each of the screen. This action key can disable this section. To activate the assigned function after disabling the action key feature, you hold down the key. NOTE: Depending on page 11. f4 Switches the screen image between display devices connected to support. Using the keyboard The keyboard allows you to type and the action keys, and hot keys...
.... Using the action keys An action key performs an assigned function. See Using Setup Utility (BIOS) and System Diagnostics on each of the screen. This action key can disable this section. To activate the assigned function after disabling the action key feature, you hold down the key. NOTE: Depending on page 11. f4 Switches the screen image between display devices connected to support. Using the keyboard The keyboard allows you to type and the action keys, and hot keys...
User Guide
Page 46
... memory, allowing you can be disabled in Windows Control Panel. Rapid Start Technology allows your work is closed, open the display. 36 Chapter 6 Managing power Power settings and timeouts can be changed using Power Options in Setup Utility (BIOS). If Rapid Start Technology is saved to a disc or an external media card. NOTE: You cannot initiate any type of information, do not initiate Sleep or Hibernation while reading from inactivity. Using Sleep or Hibernation Microsoft Windows has two power-saving states, Sleep...
... memory, allowing you can be disabled in Windows Control Panel. Rapid Start Technology allows your work is closed, open the display. 36 Chapter 6 Managing power Power settings and timeouts can be changed using Power Options in Setup Utility (BIOS). If Rapid Start Technology is saved to a disc or an external media card. NOTE: You cannot initiate any type of information, do not initiate Sleep or Hibernation while reading from inactivity. Using Sleep or Hibernation Microsoft Windows has two power-saving states, Sleep...
User Guide
Page 58
... the hard drive so that you can safely delete to free up disk space and help the computer run more efficiently. However, depending on -screen instructions. 48 Chapter 8 Maintaining your computer To run Disk Defragmenter: 1. Follow the on the size of your drive is not necessary to run Disk Defragmenter on your hard drive and the number of this, the hard drive works harder to locate files...
... the hard drive so that you can safely delete to free up disk space and help the computer run more efficiently. However, depending on -screen instructions. 48 Chapter 8 Maintaining your computer To run Disk Defragmenter: 1. Follow the on the size of your drive is not necessary to run Disk Defragmenter on your hard drive and the number of this, the hard drive works harder to locate files...
User Guide
Page 64
... displayed, press f10. 3. To set , entered, changed , or deleted. When the Startup Menu is set , change, or delete an administrator or power-on password in place of the screen, press esc. 2. To provide ongoing protection against newly discovered viruses and other online threats. Setting Setup Utility (BIOS) passwords Password Administrator password Power-on password Function ● Must be kept up to date. Using Internet security software When you use your computer to access email, a network, or the Internet...
... displayed, press f10. 3. To set , entered, changed , or deleted. When the Startup Menu is set , change, or delete an administrator or power-on password in place of the screen, press esc. 2. To provide ongoing protection against newly discovered viruses and other online threats. Setting Setup Utility (BIOS) passwords Password Administrator password Power-on password Function ● Must be kept up to date. Using Internet security software When you use your computer to access email, a network, or the Internet...
User Guide
Page 68
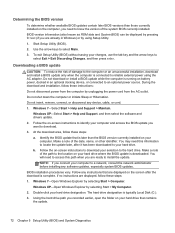
... installed on battery power, docked in Windows) or by following the on-screen instructions. 58 Chapter 10 Using Setup Utility (BIOS) and System Diagnostics Select Start > Help and Support > Maintain. 2. Identify the BIOS update that contains the update. 4. Follow any instructions that has an .exe extension (for example, filename.exe). Double-click your changes, use the tab key and the arrow keys to the hard drive. The hard drive designation is complete. Start Setup Utility (BIOS). 2. To exit Setup Utility (BIOS...
... installed on battery power, docked in Windows) or by following the on-screen instructions. 58 Chapter 10 Using Setup Utility (BIOS) and System Diagnostics Select Start > Help and Support > Maintain. 2. Identify the BIOS update that contains the update. 4. Follow any instructions that has an .exe extension (for example, filename.exe). Double-click your changes, use the tab key and the arrow keys to the hard drive. The hard drive designation is complete. Start Setup Utility (BIOS). 2. To exit Setup Utility (BIOS...
User Guide
Page 86
... keyboard 28 switch screen image 27 volume down 28 volume mute 28 volume up 28 wireless 28 antivirus software, using 55 audio functions, checking 23 audio-in (microphone) jack 5 audio-out (headphone) jacks 5 B backing up software and information 56 backups 60 bass settings hot key 28 battery conserving power 40 battery information, finding 40 battery power 40 Beats Audio 22, 28 Beats Audio Control Panel 22 Beats Audio hot key 23 best practices 1 BIOS determining version 57 downloading an update 58 updating 57 Bluetooth device 15, 18 Bluetooth label 13 boot order changing...
... keyboard 28 switch screen image 27 volume down 28 volume mute 28 volume up 28 wireless 28 antivirus software, using 55 audio functions, checking 23 audio-in (microphone) jack 5 audio-out (headphone) jacks 5 B backing up software and information 56 backups 60 bass settings hot key 28 battery conserving power 40 battery information, finding 40 battery power 40 Beats Audio 22, 28 Beats Audio Control Panel 22 Beats Audio hot key 23 best practices 1 BIOS determining version 57 downloading an update 58 updating 57 Bluetooth device 15, 18 Bluetooth label 13 boot order changing...
User Guide
Page 87
... 13 lights AC adapter 5 caps lock 9 hard drive 6 mute 9 power 6, 9 TouchPad 8, 9, 30 webcam 7, 20 wireless 9 M maintenance Disk Cleanup 48 Disk Defragmenter 48 Microsoft Certificate of Authenticity label 13 mouse, external setting preferences 26 mute light, identifying 9 N network jack, identifying 6 O operating environment 68 operating system Microsoft Certificate of Authenticity label 13 Product Key 13 optional external devices, using 45 original system recovery 64 P passwords Setup Utility (BIOS) 54 Windows 53 pinching TouchPad gesture 33 ports HDMI 6, 21, 24 Intel Wireless Display 25 USB...
... 13 lights AC adapter 5 caps lock 9 hard drive 6 mute 9 power 6, 9 TouchPad 8, 9, 30 webcam 7, 20 wireless 9 M maintenance Disk Cleanup 48 Disk Defragmenter 48 Microsoft Certificate of Authenticity label 13 mouse, external setting preferences 26 mute light, identifying 9 N network jack, identifying 6 O operating environment 68 operating system Microsoft Certificate of Authenticity label 13 Product Key 13 optional external devices, using 45 original system recovery 64 P passwords Setup Utility (BIOS) 54 Windows 53 pinching TouchPad gesture 33 ports HDMI 6, 21, 24 Intel Wireless Display 25 USB...
User Guide
Page 88
...connecting 45 USB devices connecting 44 description 44 removing 45 USB hubs 44 USB ports, identifying 5, 21 using external AC power 41 using passwords 53 using the power meter 38 V vents, identifying 12 video 23 W webcam 22 webcam light, identifying 7, 20 webcam, identifying 7, 20 Windows applications key, identifying 11 Windows Backup and Restore restoring files 64 Windows logo key, identifying 11 Windows passwords 53 Windows security updates, installing 55 wireless button 15 wireless certification label 13 wireless controls button 15 operating system 15 wireless light 9, 15 wireless network...
...connecting 45 USB devices connecting 44 description 44 removing 45 USB hubs 44 USB ports, identifying 5, 21 using external AC power 41 using passwords 53 using the power meter 38 V vents, identifying 12 video 23 W webcam 22 webcam light, identifying 7, 20 webcam, identifying 7, 20 Windows applications key, identifying 11 Windows Backup and Restore restoring files 64 Windows logo key, identifying 11 Windows passwords 53 Windows security updates, installing 55 wireless button 15 wireless certification label 13 wireless controls button 15 operating system 15 wireless light 9, 15 wireless network...
HP Envy 4 - Maintenance and Service Guide
Page 56
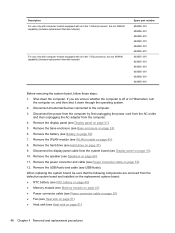
... page 37). 9. If you are removed from the computer. 4. Remove the battery (see Base enclosure on page 31). 5. Remove the hard drive (see Display panel on page 43). 8. Disconnect all external devices connected to the computer. 3. Shut down through the operating system. 2. Disconnect the display panel cable from the system board (see Hard drive on page 35). 7. Remove the WLAN module (see USB/Audio). When replacing the system board, be sure that the following...
... page 37). 9. If you are removed from the computer. 4. Remove the battery (see Base enclosure on page 31). 5. Remove the hard drive (see Display panel on page 43). 8. Disconnect all external devices connected to the computer. 3. Shut down through the operating system. 2. Disconnect the display panel cable from the system board (see Hard drive on page 35). 7. Remove the WLAN module (see USB/Audio). When replacing the system board, be sure that the following...

HP Envy 4 - Maintenance and Service Guide
Page 77
... disk drives, display, keyboard, mouse, and printer). Changing the language of the screen. 2. Use the arrow keys to select Exit > Exit Saving Changes, and then press enter. Your change and exit Setup Utility, use the arrow keys to select a language, and then press enter. 4. When a confirmation prompt with Setup Utility only if USB legacy support is displayed at the bottom of Setup Utility 1. To save your language selected is displayed, press enter. 5. Setup Utility includes settings for Startup Menu" message is enabled...
... disk drives, display, keyboard, mouse, and printer). Changing the language of the screen. 2. Use the arrow keys to select Exit > Exit Saving Changes, and then press enter. Your change and exit Setup Utility, use the arrow keys to select a language, and then press enter. 4. When a confirmation prompt with Setup Utility only if USB legacy support is displayed at the bottom of Setup Utility 1. To save your language selected is displayed, press enter. 5. Setup Utility includes settings for Startup Menu" message is enabled...
HP Envy 4 - Maintenance and Service Guide
Page 79
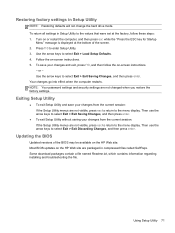
... BIOS updates on -screen instructions. - Updating the BIOS Updated versions of the screen. 2. or - Then use the arrow keys to the menu display. Press f10 to the values that were set at the bottom of the BIOS may be available on -screen instructions. 5. Exiting Setup Utility ● To exit Setup Utility and save your changes and exit, press f10, and then follow these steps: 1. Using Setup Utility 71 Restoring factory settings in Setup Utility to enter Setup Utility. 3. Follow the on the HP...
... BIOS updates on -screen instructions. - Updating the BIOS Updated versions of the screen. 2. or - Then use the arrow keys to the menu display. Press f10 to the values that were set at the bottom of the BIOS may be available on -screen instructions. 5. Exiting Setup Utility ● To exit Setup Utility and save your changes and exit, press f10, and then follow these steps: 1. Using Setup Utility 71 Restoring factory settings in Setup Utility to enter Setup Utility. 3. Follow the on the HP...
HP Envy 4 - Maintenance and Service Guide
Page 80
... installed. Windows 7-Open Windows Explorer by selecting Start > My Computer. 2. Do not insert, remove, connect, or disconnect any instructions that is later than those currently installed on your hard drive where the BIOS update is downloaded. The hard drive designation is typically Local Disk (C:). 3. Start Setup Utility (BIOS). 2. b. BIOS installation procedures vary. Double-click your computer to a network, consult the network administrator before installing any software updates, especially system BIOS updates. Use the arrow keys to download. 3. You may need...
... installed. Windows 7-Open Windows Explorer by selecting Start > My Computer. 2. Do not insert, remove, connect, or disconnect any instructions that is later than those currently installed on your hard drive where the BIOS update is downloaded. The hard drive designation is typically Local Disk (C:). 3. Start Setup Utility (BIOS). 2. b. BIOS installation procedures vary. Double-click your computer to a network, consult the network administrator before installing any software updates, especially system BIOS updates. Use the arrow keys to download. 3. You may need...
HP Envy 4 - Maintenance and Service Guide
Page 85
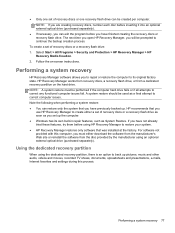
... an optional external optical drive (purchased separately). Select Start > All Programs > Security and Protection > HP Recovery Manager > HP Recovery Media Creation. 2. Follow the on the hard drive. If you have not already tried these features, try them before you have finished creating the recovery discs or recovery flash drive. HP Recovery Manager works from recovery discs, a recovery flash drive, or from the disc provided by the manufacturer using HP Recovery Manager to restore your system. ● HP Recovery Manager restores only software that you to repair or restore...
... an optional external optical drive (purchased separately). Select Start > All Programs > Security and Protection > HP Recovery Manager > HP Recovery Media Creation. 2. Follow the on the hard drive. If you have not already tried these features, try them before you have finished creating the recovery discs or recovery flash drive. HP Recovery Manager works from recovery discs, a recovery flash drive, or from the disc provided by the manufacturer using HP Recovery Manager to restore your system. ● HP Recovery Manager restores only software that you to repair or restore...
HP Envy 4 - Maintenance and Service Guide
Page 93
... 28 H hard drive precautions 26 product description 2 removal 37 spare part numbers 18, 37 hard drive light 9 hard drive, spare part numbers 17, 18, 20 HDMI port, identifying 8 HP Recovery Manager 77 I integrated webcam light, identifying 4 internal display switch, identifying 4 internal microphones, identifying 4 J jacks audio-in (microphone) 10 audio-out (headphone) 10 network 8 RJ-45 (network) 8 K keyboard product description 3 removal 60 spare part numbers 14, 21, 22, 60 keys action 6 esc 6 fn 6 Windows applications 6 Windows logo 6 L lights AC adapter 10 caps lock 7 hard drive 9 Index...
... 28 H hard drive precautions 26 product description 2 removal 37 spare part numbers 18, 37 hard drive light 9 hard drive, spare part numbers 17, 18, 20 HDMI port, identifying 8 HP Recovery Manager 77 I integrated webcam light, identifying 4 internal display switch, identifying 4 internal microphones, identifying 4 J jacks audio-in (microphone) 10 audio-out (headphone) 10 network 8 RJ-45 (network) 8 K keyboard product description 3 removal 60 spare part numbers 14, 21, 22, 60 keys action 6 esc 6 fn 6 Windows applications 6 Windows logo 6 L lights AC adapter 10 caps lock 7 hard drive 9 Index...
HP Envy 4 - Maintenance and Service Guide
Page 94
... audio 2 chipset 1 display panel 1 Ethernet 2 external media cards 2 graphics 1 hard drives 2 keyboard 3 memory module 1 microphone 2 operating system 3 optical drive 2 pointing device 3 ports 2 power requirements 3 processors 1 product name 1 serviceability 3 video 2 wireless 2 product name 1, 30 product number 30 R recovering from the dedicated recovery partition 77 recovering from the recovery discs 79 recovery discs 76 recovery, system 77 removal/replacement preliminaries 25 procedures 29 restore points 81 RJ-45 (network) jack, identifying 8 RTC battery removal 40 spare part numbers...
... audio 2 chipset 1 display panel 1 Ethernet 2 external media cards 2 graphics 1 hard drives 2 keyboard 3 memory module 1 microphone 2 operating system 3 optical drive 2 pointing device 3 ports 2 power requirements 3 processors 1 product name 1 serviceability 3 video 2 wireless 2 product name 1, 30 product number 30 R recovering from the dedicated recovery partition 77 recovering from the recovery discs 79 recovery discs 76 recovery, system 77 removal/replacement preliminaries 25 procedures 29 restore points 81 RJ-45 (network) jack, identifying 8 RTC battery removal 40 spare part numbers...


