
HP Notebook Hard Drives & Solid State Drives Identifying, Preventing, Diagnosing and Recovering from Drive Failures Care and Mai
Page 6
... Manager Driver provides support for lower power consumption on computer systems equipped with SATA in AHCI or NATIVE mode Adding SATA drivers using WinPE can be located at the following URL: http://bizsupport2.austin.hp.com/bc/docs/support/SupportManual/c01600726/c01600726.pdf. Updates to the Intel Matrix Storage Manager driver are configured with Intel® Application Accelerator drivers. Procedures for adding SATA drivers to RIS (Remote Installation Service) installation...
... Manager Driver provides support for lower power consumption on computer systems equipped with SATA in AHCI or NATIVE mode Adding SATA drivers using WinPE can be located at the following URL: http://bizsupport2.austin.hp.com/bc/docs/support/SupportManual/c01600726/c01600726.pdf. Updates to the Intel Matrix Storage Manager driver are configured with Intel® Application Accelerator drivers. Procedures for adding SATA drivers to RIS (Remote Installation Service) installation...

Start Here
Page 7
... Windows Basics guide included with your computer. Shutting down the computer To shut down the computer Using a keyboard and mouse Using touch gestures 1. Action Shut down the computer from the right edge of the corner of the screen to display the TouchPad or touch screen to display the Start button and the Start menu. or - 1. Swipe from the Start menu, follow the instructions below to charms, and then click Settings. Locating the Start button...
... Windows Basics guide included with your computer. Shutting down the computer To shut down the computer Using a keyboard and mouse Using touch gestures 1. Action Shut down the computer from the right edge of the corner of the screen to display the TouchPad or touch screen to display the Start button and the Start menu. or - 1. Swipe from the Start menu, follow the instructions below to charms, and then click Settings. Locating the Start button...
Start Here
Page 10
... information provided. From the Start screen, type HP Software Setup. 3 Backup, restore, and recovery updates The following backup, restore, and recovery procedures replace the procedures provided in the User Guide for your computer. 2. Refer to the User Guide for restore and recovery steps for your computer. Follow the on backup, restore, and recovery, refer to the User Guide provided for recovery partitions NOTE: If you need to access the HP Support Assistant has changed . From the Start screen, select the HP Support Assistant app. 2. Checking for...
... information provided. From the Start screen, type HP Software Setup. 3 Backup, restore, and recovery updates The following backup, restore, and recovery procedures replace the procedures provided in the User Guide for your computer. 2. Refer to the User Guide for restore and recovery steps for your computer. Follow the on backup, restore, and recovery, refer to the User Guide provided for recovery partitions NOTE: If you need to access the HP Support Assistant has changed . From the Start screen, select the HP Support Assistant app. 2. Checking for...
User Guide
Page 5
... Locating software ...4 Right side ...5 Left side ...6 Display ...7 Top ...9 TouchPad ...9 Lights ...10 Buttons and speakers ...11 Keys ...12 Bottom ...13 Labels ...13 3 Connecting to a network ...15 Connecting to a wireless network ...15 Using the wireless controls 15 Using the wireless button 15 Using operating system controls 16 Using a WLAN ...16 Using an Internet service provider 16 Setting up a WLAN 16 Configuring a wireless router 17 Protecting your WLAN 17 Connecting to a WLAN 17 Using HP Mobile Broadband (select models only 18 Inserting and removing a SIM 18 Using Bluetooth...
... Locating software ...4 Right side ...5 Left side ...6 Display ...7 Top ...9 TouchPad ...9 Lights ...10 Buttons and speakers ...11 Keys ...12 Bottom ...13 Labels ...13 3 Connecting to a network ...15 Connecting to a wireless network ...15 Using the wireless controls 15 Using the wireless button 15 Using operating system controls 16 Using a WLAN ...16 Using an Internet service provider 16 Setting up a WLAN 16 Configuring a wireless router 17 Protecting your WLAN 17 Connecting to a WLAN 17 Using HP Mobile Broadband (select models only 18 Inserting and removing a SIM 18 Using Bluetooth...
User Guide
Page 7
... 43 Resolving a low battery level when the computer cannot exit Hibernation ....... 43 Running on external AC power ...44 Troubleshooting power problems 44 HP CoolSense (select models only 45 Refreshing your software content with Intel Smart Connect Technology (select models only 45 Shutting down (turning off) the computer 45 7 Managing and sharing information ...47 Using a USB device ...47 Connecting a USB device 47 Removing a USB device ...48 Connecting a powered USB device 48 Inserting and removing a digital storage card 49 8 Maintaining...
... 43 Resolving a low battery level when the computer cannot exit Hibernation ....... 43 Running on external AC power ...44 Troubleshooting power problems 44 HP CoolSense (select models only 45 Refreshing your software content with Intel Smart Connect Technology (select models only 45 Shutting down (turning off) the computer 45 7 Managing and sharing information ...47 Using a USB device ...47 Connecting a USB device 47 Removing a USB device ...48 Connecting a powered USB device 48 Inserting and removing a digital storage card 49 8 Maintaining...
User Guide
Page 8
... 56 Installing HP and third-party software updates 57 Securing your wireless network ...57 Backing up your software applications and information 57 Using an optional security cable lock 57 10 Using Setup Utility (BIOS) and HP PC Hardware Diagnostics (UEFI 59 Starting Setup Utility (BIOS) ...59 Updating the BIOS ...59 Determining the BIOS version 59 Downloading a BIOS update 60 Using HP PC Hardware Diagnostics (UEFI) (select models only 60 Downloading HP PC Hardware Diagnostics (UEFI) to a USB device 61 11 Backing up, restoring, and recovering ...62 Creating recovery media and backups...
... 56 Installing HP and third-party software updates 57 Securing your wireless network ...57 Backing up your software applications and information 57 Using an optional security cable lock 57 10 Using Setup Utility (BIOS) and HP PC Hardware Diagnostics (UEFI 59 Starting Setup Utility (BIOS) ...59 Updating the BIOS ...59 Determining the BIOS version 59 Downloading a BIOS update 60 Using HP PC Hardware Diagnostics (UEFI) (select models only 60 Downloading HP PC Hardware Diagnostics (UEFI) to a USB device 61 11 Backing up, restoring, and recovering ...62 Creating recovery media and backups...

User Guide
Page 25
... cameras. From the Start screen, type h, and then select Help and Support. The wireless light indicates the overall power state of your computer and a wired or wireless network connection. Connecting to other Bluetoothenabled devices such as airports, restaurants, coffee shops, hotels, and universities. Connecting to that gives you wireless connectivity over a much larger area. All of the wireless devices on or turn on your computer are enabled at the factory, so the wireless light...
... cameras. From the Start screen, type h, and then select Help and Support. The wireless light indicates the overall power state of your computer and a wired or wireless network connection. Connecting to other Bluetoothenabled devices such as airports, restaurants, coffee shops, hotels, and universities. Connecting to that gives you wireless connectivity over a much larger area. All of the wireless devices on or turn on your computer are enabled at the factory, so the wireless light...

User Guide
Page 26
..., install a network cable to connect your home, you must connect to a WLAN infrastructure (provided through a service provider or a public or corporate network). The illustration below shows an example of hardware or software. Type network and sharing in a safe place. Setting up a WLAN To set up a connection or network, connect to a network, manage wireless networks, and diagnose and repair network problems. To use for Internet access. The ISP will give you a user ID and a password to use operating system controls: 1. Using operating system controls The Network and...
..., install a network cable to connect your home, you must connect to a WLAN infrastructure (provided through a service provider or a public or corporate network). The illustration below shows an example of hardware or software. Type network and sharing in a safe place. Setting up a WLAN To set up a connection or network, connect to a network, manage wireless networks, and diagnose and repair network problems. To use for Internet access. The ISP will give you a user ID and a password to use operating system controls: 1. Using operating system controls The Network and...

User Guide
Page 37
... keys or hot key functions on the keyboard to one of each gesture: 1. Under Devices and Printers, select Mouse. NOTE: TouchPad gestures are not supported in addition to activate the demonstration. To view a demonstration of the USB ports on a touch screen (select models only). Touch gestures can customize the touch gestures by changing settings, button configurations, click speed, and pointer options. Select Control Panel, and then select Hardware and Sound. 2. To turn on the screen using your fingers. The guide...
... keys or hot key functions on the keyboard to one of each gesture: 1. Under Devices and Printers, select Mouse. NOTE: TouchPad gestures are not supported in addition to activate the demonstration. To view a demonstration of the USB ports on a touch screen (select models only). Touch gestures can customize the touch gestures by changing settings, button configurations, click speed, and pointer options. Select Control Panel, and then select Hardware and Sound. 2. To turn on the screen using your fingers. The guide...

User Guide
Page 47
...: The Windows key on each of the screen. f3 Increases the screen brightness incrementally as long as you to the system. f4 Switches the screen image between display devices connected to the previous screen. NOTE: To conserve battery power, turn off or on both the computer and the monitor. You can prevent the computer from an open app or the Windows desktop. CAUTION: Use extreme care when making changes in Setup Utility (BIOS).
...: The Windows key on each of the screen. f3 Increases the screen brightness incrementally as long as you to the system. f4 Switches the screen image between display devices connected to the previous screen. NOTE: To conserve battery power, turn off or on both the computer and the monitor. You can prevent the computer from an open app or the Windows desktop. CAUTION: Use extreme care when making changes in Setup Utility (BIOS).
User Guide
Page 61
... available. From the Start screen, type d, and then type disk in the search box. For additional information, access the Disk Defragmenter software Help. Technology is always changing, and updating programs and drivers allows your computer. Using Disk Cleanup Disk Cleanup searches the hard drive for unnecessary files that you would not be getting the most recent gaming software. To run Disk Defragmenter: 1. Follow the on -screen instructions. Fibrous materials, such...
... available. From the Start screen, type d, and then type disk in the search box. For additional information, access the Disk Defragmenter software Help. Technology is always changing, and updating programs and drivers allows your computer. Using Disk Cleanup Disk Cleanup searches the hard drive for unnecessary files that you would not be getting the most recent gaming software. To run Disk Defragmenter: 1. Follow the on -screen instructions. Fibrous materials, such...
User Guide
Page 70
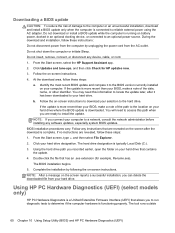
... or initiate Sleep. Follow the on battery power, docked in an optional docking device, or connected to reliable external power using the AC adapter. Follow the on-screen instructions to download your selection to the location on the screen after it to a network, consult the network administrator before installing any software updates, especially system BIOS updates. Click your hard drive. The BIOS installation begins. 5. Using HP PC Hardware Diagnostics (UEFI) (select models only) HP PC Hardware Diagnostics is a Unified Extensible Firmware Interface (UEFI...
... or initiate Sleep. Follow the on battery power, docked in an optional docking device, or connected to reliable external power using the AC adapter. Follow the on-screen instructions to download your selection to the location on the screen after it to a network, consult the network administrator before installing any software updates, especially system BIOS updates. Click your hard drive. The BIOS installation begins. 5. Using HP PC Hardware Diagnostics (UEFI) (select models only) HP PC Hardware Diagnostics is a Unified Extensible Firmware Interface (UEFI...
User Guide
Page 74
... Recovery installs only drivers and hardware-enabling applications. For more information, see Removing the HP Recovery partition on page 66. ● If you have replaced the hard drive, you can choose to restore to an automatically created restore point. For more information, see Help and Support. From the Start screen, type h, and then select Help and Support. ● If you need to restore your personal files and data, you can use the Factory Reset option of HP Recovery media...
... Recovery installs only drivers and hardware-enabling applications. For more information, see Removing the HP Recovery partition on page 66. ● If you have replaced the hard drive, you can choose to restore to an automatically created restore point. For more information, see Help and Support. From the Start screen, type h, and then select Help and Support. ● If you need to restore your personal files and data, you can use the Factory Reset option of HP Recovery media...

User Guide
Page 80
... DriveGuard 50 hard drive light 7 HDMI configuring audio 25 HDMI port, connecting 24 HDMI port, identifying 6, 22 headphones, connecting 23 Hibernation exiting 41 initiated during critical battery level 43 initiating 41 high-definition devices, connecting 24, 26 hot keys bass settings 39 description 38 reveal system information 39 using 38 HP 3D DriveGuard 50 HP and third-party software updates, installing 57 HP Mobile Broadband, disabled 18 HP Recovery Manager 66 correcting boot problems 67 starting 66 HP Recovery media creating 63 recovery 67 HP Recovery partition 66 recovery 66 removing 67...
... DriveGuard 50 hard drive light 7 HDMI configuring audio 25 HDMI port, connecting 24 HDMI port, identifying 6, 22 headphones, connecting 23 Hibernation exiting 41 initiated during critical battery level 43 initiating 41 high-definition devices, connecting 24, 26 hot keys bass settings 39 description 38 reveal system information 39 using 38 HP 3D DriveGuard 50 HP and third-party software updates, installing 57 HP Mobile Broadband, disabled 18 HP Recovery Manager 66 correcting boot problems 67 starting 66 HP Recovery media creating 63 recovery 67 HP Recovery partition 66 recovery 66 removing 67...
User Guide
Page 81
... lights AC adapter 5 caps lock 10 hard drive 7 mute 10 power 7, 10 wireless 10 low battery level 43 M maintenance Disk Cleanup 51 Disk Defragmenter 50 Media Slot, identifying 6 microphone, connecting 23 minimized image creating 66 minimized image recovery 66 mouse, external setting preferences 27 mute light, identifying 10 N network jack, identifying 5 O operating environment 68 optional external devices, using 48 original system recovery 66 P passwords Setup Utility (BIOS) 55 Windows 55 pinching touch screen gesture 34 pinching TouchPad gesture 29 ports HDMI 6, 22, 24 Intel Wireless Display...
... lights AC adapter 5 caps lock 10 hard drive 7 mute 10 power 7, 10 wireless 10 low battery level 43 M maintenance Disk Cleanup 51 Disk Defragmenter 50 Media Slot, identifying 6 microphone, connecting 23 minimized image creating 66 minimized image recovery 66 mouse, external setting preferences 27 mute light, identifying 10 N network jack, identifying 5 O operating environment 68 optional external devices, using 48 original system recovery 66 P passwords Setup Utility (BIOS) 55 Windows 55 pinching touch screen gesture 34 pinching TouchPad gesture 29 ports HDMI 6, 22, 24 Intel Wireless Display...
HP Envy 14 Sleekbook - Maintenance and Service Guide
Page 82
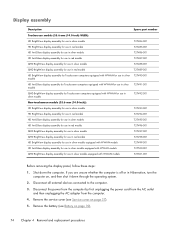
... through the operating system. 2. Remove the service cover (see Battery on page 37). 5. Disconnect all external devices connected to the computer. 3. Disconnect the power from the computer by first unplugging the power cord from the AC outlet and then unplugging the AC adapter from the computer. 4. Remove the battery (see Service cover on page 39), 74 Chapter 4 Removal and replacement procedures Display assembly Description Spare part number Touchscreen models (35.6-mm...
... through the operating system. 2. Remove the service cover (see Battery on page 37). 5. Disconnect all external devices connected to the computer. 3. Disconnect the power from the computer by first unplugging the power cord from the AC outlet and then unplugging the AC adapter from the computer. 4. Remove the battery (see Service cover on page 39), 74 Chapter 4 Removal and replacement procedures Display assembly Description Spare part number Touchscreen models (35.6-mm...
HP Envy 14 Sleekbook - Maintenance and Service Guide
Page 92
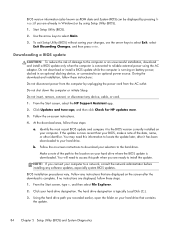
... been downloaded to reliable external power using Setup Utility (BIOS). 1. If the update is connected to your hard drive. Click your computer to install the update. Using the hard drive path you recorded earlier, open the folder on the screen after it to the BIOS version currently installed on battery power, docked in Windows) or by unplugging the power cord from the computer by using the AC adapter. Do not insert, remove, connect, or disconnect any instructions that are displayed...
... been downloaded to reliable external power using Setup Utility (BIOS). 1. If the update is connected to your hard drive. Click your computer to install the update. Using the hard drive path you recorded earlier, open the folder on the screen after it to the BIOS version currently installed on battery power, docked in Windows) or by unplugging the power cord from the computer by using the AC adapter. Do not insert, remove, connect, or disconnect any instructions that are displayed...
HP Envy 14 Sleekbook - Maintenance and Service Guide
Page 99
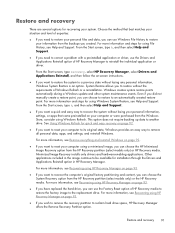
... Reinstall option in HP Recovery Manager. Minimized Image Recovery installs only drivers and hardware-enabling applications. Other applications included in the image continue to another drive. For more information, see Recovering using File History, see Recovering using Windows Refresh. From the Start screen, type h, and then select Help and Support. ● If you can use the Drivers and Applications Reinstall option of HP Recovery Manager to the replacement drive. Windows creates system restore points automatically during a Windows update and other system maintenance events...
... Reinstall option in HP Recovery Manager. Minimized Image Recovery installs only drivers and hardware-enabling applications. Other applications included in the image continue to another drive. For more information, see Recovering using File History, see Recovering using Windows Refresh. From the Start screen, type h, and then select Help and Support. ● If you can use the Drivers and Applications Reinstall option of HP Recovery Manager to the replacement drive. Windows creates system restore points automatically during a Windows update and other system maintenance events...

HP Envy 14 Sleekbook - Maintenance and Service Guide
Page 108
... adapter 14 AC adapter, spare part numbers 25 action keys identifying 8 adapter spare part numbers 26 audio, product description 2 audio-out (headphone) jacks 14 B back up personal files 89 backups 88 battery removal 39 spare part numbers 21, 26, 39 BIOS determining version 83 downloading an update 84 Blu-ray ROM DVDR/RW Super Multi Double-Layer Drive precautions 33 boot order changing HP Recovery Manager 94 buttons left TouchPad 10 power 7 right TouchPad 10 C cables, service considerations 32 caps lock light, identifying 9 card reader board removal 54 spare part number...
... adapter 14 AC adapter, spare part numbers 25 action keys identifying 8 adapter spare part numbers 26 audio, product description 2 audio-out (headphone) jacks 14 B back up personal files 89 backups 88 battery removal 39 spare part numbers 21, 26, 39 BIOS determining version 83 downloading an update 84 Blu-ray ROM DVDR/RW Super Multi Double-Layer Drive precautions 33 boot order changing HP Recovery Manager 94 buttons left TouchPad 10 power 7 right TouchPad 10 C cables, service considerations 32 caps lock light, identifying 9 card reader board removal 54 spare part number...

HP Envy 14 Sleekbook - Maintenance and Service Guide
Page 109
...description audio 2 chipset 1 display panel 1 Ethernet 2 external media cards 3 graphics 1 hard drives 2 internal expansion cards 3 keyboard 3 memory module 1 microphone 2 operatingsystem 4 optical drives 2 pointing device 3 ports 3 power requirements 4 processors 1 product name 1 serviceability 4 video 2 wireless 2 product name 1 product number 15 R recovery 91, 92 discs 90, 94 HP Recovery Manager 93 media 94 starting 94 supported discs 90 system 93 USB flash drive 94 using HP Recovery media 90 recovery media creating 89 creating using HP Recovery Manager 90 recovery partition 94 removing 95...
...description audio 2 chipset 1 display panel 1 Ethernet 2 external media cards 3 graphics 1 hard drives 2 internal expansion cards 3 keyboard 3 memory module 1 microphone 2 operatingsystem 4 optical drives 2 pointing device 3 ports 3 power requirements 4 processors 1 product name 1 serviceability 4 video 2 wireless 2 product name 1 product number 15 R recovery 91, 92 discs 90, 94 HP Recovery Manager 93 media 94 starting 94 supported discs 90 system 93 USB flash drive 94 using HP Recovery media 90 recovery media creating 89 creating using HP Recovery Manager 90 recovery partition 94 removing 95...


