
Getting Started
Page 17
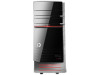
... to turn on the computer for the first time and complete the initial setup. For help with getting started using your computer, see the Windows 7 desktop, the initial setup is complete. NOTE: Do not connect or add other devices to the computer until after you will be reminded to complete the...
... to turn on the computer for the first time and complete the initial setup. For help with getting started using your computer, see the Windows 7 desktop, the initial setup is complete. NOTE: Do not connect or add other devices to the computer until after you will be reminded to complete the...
Getting Started
Page 19
..., see "Connecting a Modem" on page 37. NOTE: Online Services provides a list of the following security measures: Enable WPA-Personal or WEP security encryption on the desktop, and then log in. 4 Open your ISP. For dial-up a network, use any Web browser; You can use one or more of ISPs; NOTE: If...
..., see "Connecting a Modem" on page 37. NOTE: Online Services provides a list of the following security measures: Enable WPA-Personal or WEP security encryption on the desktop, and then log in. 4 Open your ISP. For dial-up a network, use any Web browser; You can use one or more of ISPs; NOTE: If...
Getting Started
Page 30
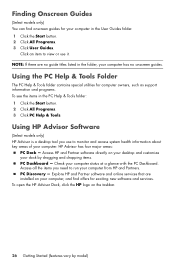
... use to run your computer from HP and Partners. Access all the items you use it. Finding Onscreen Guides (Select models only) You can find offers for exciting new software and services. Using HP Advisor Software (Select models only) HP Advisor is a desktop tool you need to monitor and... access system health information about key areas of your computer. HP Advisor has four major areas: PC Dock - PC Discovery - To open...
... use to run your computer from HP and Partners. Access all the items you use it. Finding Onscreen Guides (Select models only) You can find offers for exciting new software and services. Using HP Advisor Software (Select models only) HP Advisor is a desktop tool you need to monitor and... access system health information about key areas of your computer. HP Advisor has four major areas: PC Dock - PC Discovery - To open...
Getting Started
Page 56
...-Recovery Procedure" on the computer. 52 Getting Started (features vary by model) Therefore, ensure you back up , to a removable disc, any data you see the desktop. 10 Turn off the computer. 2 Disconnect all data and programs you have not done so, select Back up your system does not detect a recovery partition...
...-Recovery Procedure" on the computer. 52 Getting Started (features vary by model) Therefore, ensure you back up , to a removable disc, any data you see the desktop. 10 Turn off the computer. 2 Disconnect all data and programs you have not done so, select Back up your system does not detect a recovery partition...
Getting Started
Page 57
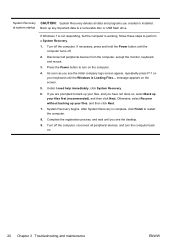
... recovery discs" on page 51. You will be deleted. message appears on the screen. 5 Under I need help immediately, click Factory Reset. 7 If you see the desktop. 8 Turn off . 4 Disconnect all peripheral devices, and turn on the computer.
... recovery discs" on page 51. You will be deleted. message appears on the screen. 5 Under I need help immediately, click Factory Reset. 7 If you see the desktop. 8 Turn off . 4 Disconnect all peripheral devices, and turn on the computer.
Getting Started Guide
Page 25
... the computer and run Recovery Manager from the computer except the monitor, keyboard, and mouse. 3. Complete the registration process, and wait until you see the desktop. 10. When the computer restarts, you see the Recovery Manager welcome screen again. Disconnect all peripheral devices from the recovery disc or USB flash drive...
... the computer and run Recovery Manager from the computer except the monitor, keyboard, and mouse. 3. Complete the registration process, and wait until you see the desktop. 10. When the computer restarts, you see the Recovery Manager welcome screen again. Disconnect all peripheral devices from the recovery disc or USB flash drive...
Getting Started Guide
Page 26
... computer back on the computer. 4. at system startup Back up your keyboard until the computer turns off the computer. As soon as you see the desktop. 9. message appears on your files first (recommended), and then click Next. If you have not done so, select Back up any important data to back...
... computer back on the computer. 4. at system startup Back up your keyboard until the computer turns off the computer. As soon as you see the desktop. 9. message appears on your files first (recommended), and then click Next. If you have not done so, select Back up any important data to back...
Getting Started Guide
Page 30
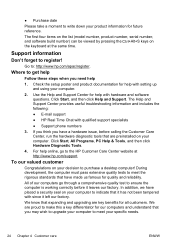
Where to purchase a desktop computer! Use the Help and Support Center for help 1. To our ...through a comprehensive quality test to write down your computer to indicate that are preinstalled on the keyboard at http://www.hp.com/support. Go to register! For help with qualified support specialists ● Support phone numbers 3. All of ...your specific needs. 24 Chapter 4 Customer care ENWW During development, the computer must pass extensive quality tests to the HP Customer Care Center website at the same time. Click Start, and then click Help and Support. ● Purchase ...
Where to purchase a desktop computer! Use the Help and Support Center for help 1. To our ...through a comprehensive quality test to write down your computer to indicate that are preinstalled on the keyboard at http://www.hp.com/support. Go to register! For help with qualified support specialists ● Support phone numbers 3. All of ...your specific needs. 24 Chapter 4 Customer care ENWW During development, the computer must pass extensive quality tests to the HP Customer Care Center website at the same time. Click Start, and then click Help and Support. ● Purchase ...
Getting Started Guide
Page 31
...to time. It contains more detailed help and will help with your new computer. The HP website has updated software, tips and tricks, answers for many years to come. If that happens to your desktop from the time you purchased your ENWW Support information 25 Go to the Support website ...listed earlier in this guide, and a HP Customer Representative will assist you. If you have completely set up and running is...
...to time. It contains more detailed help and will help with your new computer. The HP website has updated software, tips and tricks, answers for many years to come. If that happens to your desktop from the time you purchased your ENWW Support information 25 Go to the Support website ...listed earlier in this guide, and a HP Customer Representative will assist you. If you have completely set up and running is...
Quick Setup Guide
Page 13
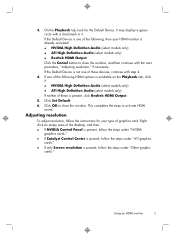
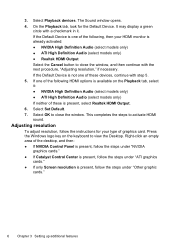
... to close the window, and then continue with the next procedure, "Adjusting resolution," if necessary. If one of the following , then your type of the desktop, and then: ● If NVIDIA Control Panel is present, follow the steps under "NVIDIA graphics cards." ● If Catalyst Control Center is present, follow the...
... to close the window, and then continue with the next procedure, "Adjusting resolution," if necessary. If one of the following , then your type of the desktop, and then: ● If NVIDIA Control Panel is present, follow the steps under "NVIDIA graphics cards." ● If Catalyst Control Center is present, follow the...
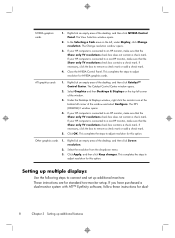
Quick Setup Guide
Page 14
...resolutions check box does not contain a check mark. If your HP computer is connected to adjust resolution for dual- 8 Chapter 3 Setting up additional monitors: These instructions are for this option. Close the NVIDIA Control Panel. Under the Desktops & Displays window, right click the monitor icon at the ... the drop-down menu. 3. In the Selecting a Task area on the top left corner of the desktop, and then click NVIDIA Control Panel. This completes the steps to an HP monitor, make sure that the Show only TV resolutions check box does not contain a check mark. The...
...resolutions check box does not contain a check mark. If your HP computer is connected to adjust resolution for dual- 8 Chapter 3 Setting up additional monitors: These instructions are for this option. Close the NVIDIA Control Panel. Under the Desktops & Displays window, right click the monitor icon at the ... the drop-down menu. 3. In the Selecting a Task area on the top left corner of the desktop, and then click NVIDIA Control Panel. This completes the steps to an HP monitor, make sure that the Show only TV resolutions check box does not contain a check mark. The...
Quick Setup Guide
Page 15
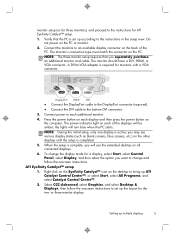
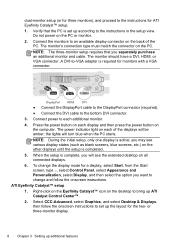
...select Catalyst Control Center™. 2. The monitor should have a DVI, HDMI, or VGA connector. Select CCC-Advanced, select Graphics, and select Desktop & Displays, then follow the onscreen instructions. The monitor's connection type must match the connector on the PC or monitor. 2. you separately ...purchase an additional monitor and cable. Right-click on the Eyefinity Catalyst™ icon on the desktop to bring up the layout for a display, select Start, select Control Panel, select Display, and then select the option you ...
...select Catalyst Control Center™. 2. The monitor should have a DVI, HDMI, or VGA connector. Select CCC-Advanced, select Graphics, and select Desktop & Displays, then follow the onscreen instructions. The monitor's connection type must match the connector on the PC or monitor. 2. you separately ...purchase an additional monitor and cable. Right-click on the Eyefinity Catalyst™ icon on the desktop to bring up the layout for a display, select Start, select Control Panel, select Display, and then select the option you ...

Troubleshooting & Maintenance Guide
Page 15
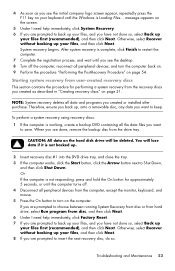
.... 1. ENWW System Recovery options 11 If the computer is working , follow these steps to perform a System Recovery. 1. Disconnect all data and programs you see the desktop. 10. Select Yes, and then click Next. NOTE: If your files, and then click Next. 8. Under I need help immediately, select System Recovery. System Recovery begins...
.... 1. ENWW System Recovery options 11 If the computer is working , follow these steps to perform a System Recovery. 1. Disconnect all data and programs you see the desktop. 10. Select Yes, and then click Next. NOTE: If your files, and then click Next. 8. Under I need help immediately, select System Recovery. System Recovery begins...

Troubleshooting & Maintenance Guide
Page 16
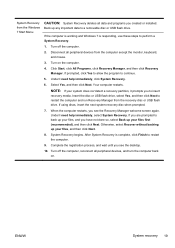
... at the factory. Disconnect all the data files you are using recovery DVDs, insert recovery disc #1 into a USB port. 3. To create recovery media, see the desktop. 9. To perform a System Recovery using a recovery USB flash drive, insert it into the DVD drive tray, and close the tray. If the computer is powering...
... at the factory. Disconnect all the data files you are using recovery DVDs, insert recovery disc #1 into a USB port. 3. To create recovery media, see the desktop. 9. To perform a System Recovery using a recovery USB flash drive, insert it into the DVD drive tray, and close the tray. If the computer is powering...

Quick Setup Guide - Windows 8
Page 11
...separation. Press the Windows logo key on the keyboard. 3 Setting up additional features Using Beats Audio™ (select models only) Your HP TouchSmart PC features audio connectors (headphone and Audio Out) that you connect analog speakers to the computer if you to experience music with...the Beats user interface, from the Start screen, type b, and then select HP Beats Audio. Activating sound 1. All you may need to view the Desktop. 2. If you activate sound and adjust resolution. Select HP TouchSmart PC models also include four Beats-optimized internal speakers and a Beats toggle ...
...separation. Press the Windows logo key on the keyboard. 3 Setting up additional features Using Beats Audio™ (select models only) Your HP TouchSmart PC features audio connectors (headphone and Audio Out) that you connect analog speakers to the computer if you to experience music with...the Beats user interface, from the Start screen, type b, and then select HP Beats Audio. Activating sound 1. All you may need to view the Desktop. 2. If you activate sound and adjust resolution. Select HP TouchSmart PC models also include four Beats-optimized internal speakers and a Beats toggle ...
Quick Setup Guide - Windows 8
Page 12
... High Definition Audio (select models only) ● ATI High Definition Audio (select models only) ● Realtek HDMI Output Select the Cancel button to view the Desktop. This completes the steps to close the window, and then continue with step 5. 5. Right-click an empty area of the... desktop, and then: ● If NVIDIA Control Panel is present, follow the steps under "NVIDIA graphics cards." ● If Catalyst Control Center is present, follow the ...
... High Definition Audio (select models only) ● ATI High Definition Audio (select models only) ● Realtek HDMI Output Select the Cancel button to view the Desktop. This completes the steps to close the window, and then continue with step 5. 5. Right-click an empty area of the... desktop, and then: ● If NVIDIA Control Panel is present, follow the steps under "NVIDIA graphics cards." ● If Catalyst Control Center is present, follow the ...
Quick Setup Guide - Windows 8
Page 13
... a Task area on the top left corner of the window and select Configure. If your HP computer is connected to connect and set up multiple displays 7 Right-click an empty area of the desktop, and then click Catalyst™ Control Center. ATI graphics cards 1. This completes the steps ...check box does not contain a check mark. Other graphics cards 1. Right-click an empty area of the desktop, and then click Screen resolution. 2. If your HP computer is connected to an HP monitor, make sure that the Show only TV resolutions check box does not contain a check mark. Click ...
... a Task area on the top left corner of the window and select Configure. If your HP computer is connected to connect and set up multiple displays 7 Right-click an empty area of the desktop, and then click Catalyst™ Control Center. ATI graphics cards 1. This completes the steps ...check box does not contain a check mark. Other graphics cards 1. Right-click an empty area of the desktop, and then click Screen resolution. 2. If your HP computer is connected to an HP monitor, make sure that the Show only TV resolutions check box does not contain a check mark. Click ...
Quick Setup Guide - Windows 8
Page 14
...The monitor should have a DVI, HDMI, or VGA connector. Connect power to each display and then press the power button on the desktop to bring up additional features ATI Eyefinity Catalyst™ setup 1. Right-click on the Eyefinity Catalyst™ icon on the computer. ...Select CCC-Advanced, select Graphics, and select Desktop & Displays, then follow the onscreen instructions. To change and follow the onscreen instructions to set up the layout for ATI Eyefinity Catalyst™...
...The monitor should have a DVI, HDMI, or VGA connector. Connect power to each display and then press the power button on the desktop to bring up additional features ATI Eyefinity Catalyst™ setup 1. Right-click on the Eyefinity Catalyst™ icon on the computer. ...Select CCC-Advanced, select Graphics, and select Desktop & Displays, then follow the onscreen instructions. To change and follow the onscreen instructions to set up the layout for ATI Eyefinity Catalyst™...

Troubleshooting and Maintenance Guide
Page 7
... large or too small, or the images are not blocked and that came with your monitor. Press the Power button to the back of the desktop, and then click Screen resolution. 2. Images on the screen are Adjust the monitor resolution setting in an exceedingly hot environment. Right-click an empty area...
... large or too small, or the images are not blocked and that came with your monitor. Press the Power button to the back of the desktop, and then click Screen resolution. 2. Images on the screen are Adjust the monitor resolution setting in an exceedingly hot environment. Right-click an empty area...

Regulatory, Safety and Environmental Notices User Guide
Page 3
... important supplemental information. About This Guide This guide provides regulatory, safety and environmental information that is compliant with U.S., Canadian, and international regulations for notebook computers, desktops, thin clients and personal workstations.
... important supplemental information. About This Guide This guide provides regulatory, safety and environmental information that is compliant with U.S., Canadian, and international regulations for notebook computers, desktops, thin clients and personal workstations.

