Resolving Start Up and No Boot Problems Checklist
Page 1
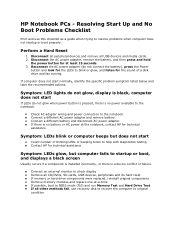
... specific problem symptom listed below and take the recommended actions. Disconnect the AC power adapter, remove the battery, and then press and hold the power button for the sound of blinking LEDs or beeping tones to BIOS mode (f10) and run Memory Test and Hard Drive Test If all USB devices and media cards. 2. If computer does not start Count number of a disk drive and fan turning. Symptom: LEDs blink or computer beeps but computer fails to the notebook. Connect an external monitor...
... specific problem symptom listed below and take the recommended actions. Disconnect the AC power adapter, remove the battery, and then press and hold the power button for the sound of blinking LEDs or beeping tones to BIOS mode (f10) and run Memory Test and Hard Drive Test If all USB devices and media cards. 2. If computer does not start Count number of a disk drive and fan turning. Symptom: LEDs blink or computer beeps but computer fails to the notebook. Connect an external monitor...
Resolving Start Up and No Boot Problems Checklist
Page 2
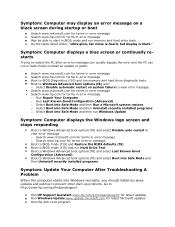
... Run HP Support Assistant www.hp.com/go/helpandsupport for latest updates Run Windows Update www.update.microsoft.com for terms in error message Boot to BIOS mode (f10) and Restore the BIOS defaults (f9) Boot to BIOS mode (f10) and run Hard Drive Test Boot to Windows Advanced boot options (f8) and select Last Known Good Configuration (Advanced) Boot to Windows Advanced boot options (f8) and select Boot into Safe Mode and then Uninstall recently installed programs Symptom: Update Your Computer After Troubleshooting A Problem...
... Run HP Support Assistant www.hp.com/go/helpandsupport for latest updates Run Windows Update www.update.microsoft.com for terms in error message Boot to BIOS mode (f10) and Restore the BIOS defaults (f9) Boot to BIOS mode (f10) and run Hard Drive Test Boot to Windows Advanced boot options (f8) and select Last Known Good Configuration (Advanced) Boot to Windows Advanced boot options (f8) and select Boot into Safe Mode and then Uninstall recently installed programs Symptom: Update Your Computer After Troubleshooting A Problem...
HP ENVY 15 User Guide - Windows 7
Page 6
... the volume ...29 Using the media activity keys 30 Multimedia software ...30 Using HP MediaSmart software 31 Using multimedia software 31 Installing multimedia software from a disc 31 Audio ...32 Connecting external audio devices 32 Checking your audio functions 32 Using Beats Audio ...33 Identifying Beats Audio icons 34 Video ...34 Connecting an external monitor or projector 34 Connecting an HDMI device 35 Configuring audio for HDMI 36 Webcam ...37 Webcam tips ...37 Adjusting webcam properties 37 Using the ambient light sensor ...39 Using adaptive brightness 39 Using the webcam IR...
... the volume ...29 Using the media activity keys 30 Multimedia software ...30 Using HP MediaSmart software 31 Using multimedia software 31 Installing multimedia software from a disc 31 Audio ...32 Connecting external audio devices 32 Checking your audio functions 32 Using Beats Audio ...33 Identifying Beats Audio icons 34 Video ...34 Connecting an external monitor or projector 34 Connecting an HDMI device 35 Configuring audio for HDMI 36 Webcam ...37 Webcam tips ...37 Adjusting webcam properties 37 Using the ambient light sensor ...39 Using adaptive brightness 39 Using the webcam IR...
HP ENVY 15 User Guide - Windows 7
Page 13
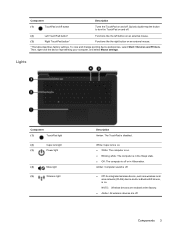
... area network (WLAN) device and/or a Bluetooth® device, is off . (2) Left TouchPad button* Functions like the left button on an external mouse. (3) Right TouchPad button* Functions like the right button on . Quickly double-tap the button to turn the TouchPad on and off or in the Sleep state. ● Off: The computer is on an external mouse. *This table describes factory settings. Lights Component (1) TouchPad light (2) Caps lock light (3) Power light (4) Mute light (5) Wireless light Description Amber: The TouchPad is disabled. To view and change...
... area network (WLAN) device and/or a Bluetooth® device, is off . (2) Left TouchPad button* Functions like the left button on an external mouse. (3) Right TouchPad button* Functions like the right button on . Quickly double-tap the button to turn the TouchPad on and off or in the Sleep state. ● Off: The computer is on an external mouse. *This table describes factory settings. Lights Component (1) TouchPad light (2) Caps lock light (3) Power light (4) Mute light (5) Wireless light Description Amber: The TouchPad is disabled. To view and change...
HP ENVY 15 User Guide - Windows 7
Page 30
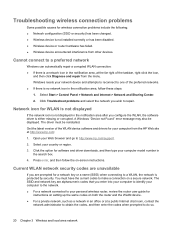
.... 3. Press enter, and then follow these steps: 1. Select Start > Control Panel > Network and Internet > Network and Sharing Center. 2. Select your Web browser and go to a preferred network Windows can automatically repair a corrupted WLAN connection: ● If there is no network icon in the search box. 4. Click the option for software and driver downloads, and then type your personal wireless router, review the router user guide for instructions on setting up the same codes on...
.... 3. Press enter, and then follow these steps: 1. Select Start > Control Panel > Network and Internet > Network and Sharing Center. 2. Select your Web browser and go to a preferred network Windows can automatically repair a corrupted WLAN connection: ● If there is no network icon in the search box. 4. Click the option for software and driver downloads, and then type your personal wireless router, review the router user guide for instructions on setting up the same codes on...
HP ENVY 15 User Guide - Windows 7
Page 33
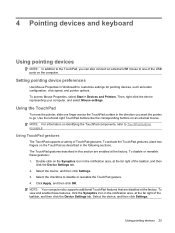
... access Mouse Properties, select Start > Devices and Printers. NOTE: For information on identifying the TouchPad components, refer to TouchPad buttons on the TouchPad as button configuration, click speed, and pointer options. To disable or reenable these features, click the Synaptics icon in the notification area, at the far right of the USB ports on the computer. Click Apply, and then click OK. Using pointing devices 23 Setting...
... access Mouse Properties, select Start > Devices and Printers. NOTE: For information on identifying the TouchPad components, refer to TouchPad buttons on the TouchPad as button configuration, click speed, and pointer options. To disable or reenable these features, click the Synaptics icon in the notification area, at the far right of the USB ports on the computer. Click Apply, and then click OK. Using pointing devices 23 Setting...
HP ENVY 15 User Guide - Windows 7
Page 51
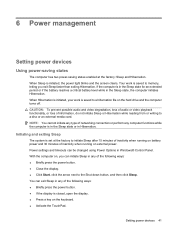
... possible audio and video degradation, loss of audio or video playback functionality, or loss of inactivity when running on external power. Initiating and exiting Sleep The system is closed, open the display. ● Press a key on the hard drive and the computer turns off. Power settings and timeouts can exit Sleep in Hibernation. If the computer is initiated, the power light blinks and the screen clears. You can be changed using Power Options in the Sleep state...
... possible audio and video degradation, loss of audio or video playback functionality, or loss of inactivity when running on external power. Initiating and exiting Sleep The system is closed, open the display. ● Press a key on the hard drive and the computer turns off. Power settings and timeouts can exit Sleep in Hibernation. If the computer is initiated, the power light blinks and the screen clears. You can be changed using Power Options in the Sleep state...
HP ENVY 15 User Guide - Windows 7
Page 60
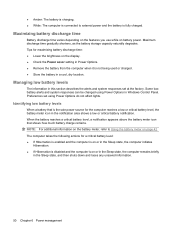
... be changed using Power Options do not affect lights. ● Amber: The battery is charging. ● White: The computer is connected to Using the battery meter on page 42. NOTE: For additional information on the battery meter, refer to external power and the battery is the sole power source for maximizing battery discharge time: ● Lower the brightness on the display. ● Check the Power saver setting in the Sleep state...
... be changed using Power Options do not affect lights. ● Amber: The battery is charging. ● White: The computer is connected to Using the battery meter on page 42. NOTE: For additional information on the battery meter, refer to external power and the battery is the sole power source for maximizing battery discharge time: ● Lower the brightness on the display. ● Check the Power saver setting in the Sleep state...
HP ENVY 15 User Guide - Windows 7
Page 70
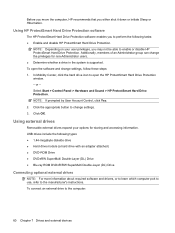
... may not be able to the manufacturer's instructions. Select Start > Control Panel > Hardware and Sound > HP ProtectSmart Hard Drive Protection. Using HP ProtectSmart Hard Drive Protection software The HP ProtectSmart Hard Drive Protection software enables you to the computer: 60 Chapter 7 Drives and external devices In Mobility Center, click the hard drive icon to change settings, follow these steps: 1. Click the appropriate button to open the software and change settings. 3. Using external drives Removable external drives expand your user privileges, you either shut it down or...
... may not be able to the manufacturer's instructions. Select Start > Control Panel > Hardware and Sound > HP ProtectSmart Hard Drive Protection. Using HP ProtectSmart Hard Drive Protection software The HP ProtectSmart Hard Drive Protection software enables you to the computer: 60 Chapter 7 Drives and external devices In Mobility Center, click the hard drive icon to change settings, follow these steps: 1. Click the appropriate button to open the software and change settings. 3. Using external drives Removable external drives expand your user privileges, you either shut it down or...

HP ENVY 15 User Guide - Windows 7
Page 73
.../USB 2.0 port may require additional support software, which support USB 1.0, USB 1.1, USB 2.0 devices. External devices 63 For more USB ports, connect an optional hub. You will hear a sound when the device has been detected. A USB port connects an optional external device, such as a USB keyboard, mouse, drive, printer, scanner, or hub, to the USB port. External devices Using a USB device NOTE: If your computer, select Start > Control Panel > Network and Sharing Center > View computers and devices. The computer has 2 USB ports, which is displayed in HP QuickWeb mode...
.../USB 2.0 port may require additional support software, which support USB 1.0, USB 1.1, USB 2.0 devices. External devices 63 For more USB ports, connect an optional hub. You will hear a sound when the device has been detected. A USB port connects an optional external device, such as a USB keyboard, mouse, drive, printer, scanner, or hub, to the USB port. External devices Using a USB device NOTE: If your computer, select Start > Control Panel > Network and Sharing Center > View computers and devices. The computer has 2 USB ports, which is displayed in HP QuickWeb mode...
HP ENVY 15 User Guide - Windows 7
Page 98
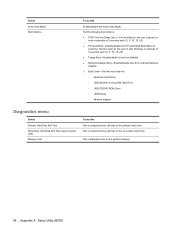
... memory. 88 Appendix A Setup Utility (BIOS) Select Action Key Mode Boot Options To do this Enable/disable the Action Key Mode. Run a diagnostic test on the secondary hard drive. Set the following boot options: ● POST Hot Key Delay (sec.)―Set the delay for the user to start Windows in intervals of 5 seconds each (0, 5, 10, 15, 20). ● Floppy Boot―Enable/disable boot from diskette. ● Network Adapter Boot―Enable/disable boot from external Network Adapter. ● Boot Order―Set the boot order for the user to press hot keys...
... memory. 88 Appendix A Setup Utility (BIOS) Select Action Key Mode Boot Options To do this Enable/disable the Action Key Mode. Run a diagnostic test on the secondary hard drive. Set the following boot options: ● POST Hot Key Delay (sec.)―Set the delay for the user to start Windows in intervals of 5 seconds each (0, 5, 10, 15, 20). ● Floppy Boot―Enable/disable boot from diskette. ● Network Adapter Boot―Enable/disable boot from external Network Adapter. ● Boot Order―Set the boot order for the user to press hot keys...
HP ENVY 15 User Guide - Windows 7
Page 100
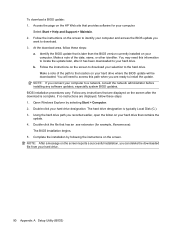
... the location on your hard drive. BIOS installation procedures vary. The BIOS installation begins. 5. NOTE: If you can delete the downloaded file from your computer and access the BIOS update you recorded earlier, open the folder on the screen. Using the hard drive path you want to a network, consult the network administrator before installing any instructions that is typically Local Disk (C:). 3. If no instructions are displayed on the screen to identify your hard drive. 90 Appendix A Setup Utility (BIOS) Open Windows...
... the location on your hard drive. BIOS installation procedures vary. The BIOS installation begins. 5. NOTE: If you can delete the downloaded file from your computer and access the BIOS update you recorded earlier, open the folder on the screen. Using the hard drive path you want to a network, consult the network administrator before installing any instructions that is typically Local Disk (C:). 3. If no instructions are displayed on the screen to identify your hard drive. 90 Appendix A Setup Utility (BIOS) Open Windows...
HP ENVY 15 User Guide - Windows 7
Page 108
... 55 BD drive 60 Beats Audio, using 33 Bluetooth device 13 Bluetooth label 11 Bluetooth wireless devices 19 boot options 88 boot order 88 buttons left TouchPad 3 power 4 right TouchPad 3 TouchPad on/off 3 C cables eSATA 64 USB 63 calculator key, identifying 5 calibrating battery 54 caps lock light, identifying 3 CD drive 60 Certificate of Authenticity label 11 charging batteries 49 checking audio functions 32 cleaning, TouchPad and keyboard 28 components additional hardware 10 bottom 8 display 9 front 6 left-side 7 right-side 6 top 2 configuring HDMI 36 connection, external power 45 connector...
... 55 BD drive 60 Beats Audio, using 33 Bluetooth device 13 Bluetooth label 11 Bluetooth wireless devices 19 boot options 88 boot order 88 buttons left TouchPad 3 power 4 right TouchPad 3 TouchPad on/off 3 C cables eSATA 64 USB 63 calculator key, identifying 5 calibrating battery 54 caps lock light, identifying 3 CD drive 60 Certificate of Authenticity label 11 charging batteries 49 checking audio functions 32 cleaning, TouchPad and keyboard 28 components additional hardware 10 bottom 8 display 9 front 6 left-side 7 right-side 6 top 2 configuring HDMI 36 connection, external power 45 connector...
HP ENVY 15 User Guide - Windows 7
Page 109
D default settings, restoring 86 Diagnostics menu 88 digital card inserting 65 removing 66 supported formats 65 Digital Media Slot, identifying 6 Disk Cleanup software 58 Disk Defragmenter software 58 diskette drive 60 display image, switching 26 drive light 8, 59 drive media 41 drives boot order 88 connecting external 60 diskette 60 external 60 hard 60 optical 60 DVD drive 60 E encryption 17 entering a power-on password 79 entering an administrator password 78 eSATA cable, connecting 64 eSATA devices connecting 64 removing 64 eSATA port, identifying 7 esc key, identifying 6 external audio ...
D default settings, restoring 86 Diagnostics menu 88 digital card inserting 65 removing 66 supported formats 65 Digital Media Slot, identifying 6 Disk Cleanup software 58 Disk Defragmenter software 58 diskette drive 60 display image, switching 26 drive light 8, 59 drive media 41 drives boot order 88 connecting external 60 diskette 60 external 60 hard 60 optical 60 DVD drive 60 E encryption 17 entering a power-on password 79 entering an administrator password 78 eSATA cable, connecting 64 eSATA devices connecting 64 removing 64 eSATA port, identifying 7 esc key, identifying 6 external audio ...
HP ENVY 15 User Guide - Windows 7
Page 110
... or driver 91 recovering using the dedicated recovery partition 95 recovering using the recovery discs 95 recovery discs 91, 92 Recovery Manager 91, 95 recovery partition 91 recovery, system 95 regulatory information regulatory label 11 wireless certification labels 11 restore points 94 RJ-45 (network jack), identifying 7 rotating TouchPad gesture 24 S screen brightness keys 25 screen image, switching 26 scrolling TouchPad gesture 24 secondary hard disk self test 88 security cable slot, identifying 6 security cable, installing 83 Security menu 87 security, wireless 16 serial number, computer...
... or driver 91 recovering using the dedicated recovery partition 95 recovering using the recovery discs 95 recovery discs 91, 92 Recovery Manager 91, 95 recovery partition 91 recovery, system 95 regulatory information regulatory label 11 wireless certification labels 11 restore points 94 RJ-45 (network jack), identifying 7 rotating TouchPad gesture 24 S screen brightness keys 25 screen image, switching 26 scrolling TouchPad gesture 24 secondary hard disk self test 88 security cable slot, identifying 6 security cable, installing 83 Security menu 87 security, wireless 16 serial number, computer...
HP ENVY 17 - Maintenance and Service Guide
Page 12
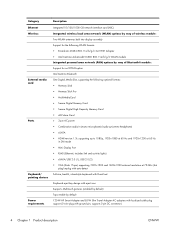
Category Ethernet Wireless External media card Ports Keyboard/ pointing devices Power requirements Description Integrated 10/100/1000 GB network interface card (NIC) Integrated wireless local area network (WLAN) options by way of wireless module: Two WLAN antennas built into display assembly Support for the following WLAN formats: ● Broadcom 43224 802.11a/b/g/n 2x2 WiFi Adapter ● Intel Centrino Advanced-N 6200 802.11a/b/g/n WLAN module Integrated personal area network (PAN) options by way of Bluetooth® module: Support for...
Category Ethernet Wireless External media card Ports Keyboard/ pointing devices Power requirements Description Integrated 10/100/1000 GB network interface card (NIC) Integrated wireless local area network (WLAN) options by way of wireless module: Two WLAN antennas built into display assembly Support for the following WLAN formats: ● Broadcom 43224 802.11a/b/g/n 2x2 WiFi Adapter ● Intel Centrino Advanced-N 6200 802.11a/b/g/n WLAN module Integrated personal area network (PAN) options by way of Bluetooth® module: Support for...
HP ENVY 17 - Maintenance and Service Guide
Page 88
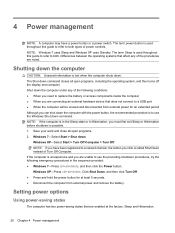
... the location on your hard drive where the BIOS update is downloaded. Do not shut down the computer or initiate Sleep or Hibernation. You may need to access this information to your computer: Windows 7-Select Start > Help and Support > Maintain. Follow any instructions that provides software for example, filename.exe). The hard drive designation is running on -screen instructions. 80 Chapter 5 Setup Utility (BIOS) ENWW The BIOS installation begins. 5. During the download and installation, follow...
... the location on your hard drive where the BIOS update is downloaded. Do not shut down the computer or initiate Sleep or Hibernation. You may need to access this information to your computer: Windows 7-Select Start > Help and Support > Maintain. Follow any instructions that provides software for example, filename.exe). The hard drive designation is running on -screen instructions. 80 Chapter 5 Setup Utility (BIOS) ENWW The BIOS installation begins. 5. During the download and installation, follow...

HP ENVY 17 - Maintenance and Service Guide
Page 115
...1 display panel 2 Ethernet 4 external media cards 4 graphics 1 hard drives 2 keyboard 4 memory module 2 microphone 3 operating system 5 optical drives 3 pointing device 4 ports 4 power requirements 4 processors 1 product name 1 security 5 serviceability 5 video 3 wireless 4 product name 1, 17, 35 product number 17, 35 R removal/replacement preliminaries 30 procedures 35 right-side components 14 RJ-45 jack connector pinout 96 location 12 RTC battery removal 41 spare part number 20, 27, 41 Rubber Feet Kit, spare part number 20, 28, 52 S Screw Kit, spare part number 25, 28 security cable slot 14...
...1 display panel 2 Ethernet 4 external media cards 4 graphics 1 hard drives 2 keyboard 4 memory module 2 microphone 3 operating system 5 optical drives 3 pointing device 4 ports 4 power requirements 4 processors 1 product name 1 security 5 serviceability 5 video 3 wireless 4 product name 1, 17, 35 product number 17, 35 R removal/replacement preliminaries 30 procedures 35 right-side components 14 RJ-45 jack connector pinout 96 location 12 RTC battery removal 41 spare part number 20, 27, 41 Rubber Feet Kit, spare part number 20, 28, 52 S Screw Kit, spare part number 25, 28 security cable slot 14...
HP Notebook Reference Guide - Windows 7
Page 30
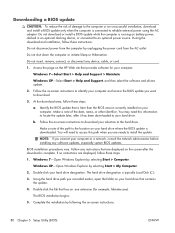
... you need to replace the battery or access components inside the computer ● When you are enabled at least 5 seconds. ● Disconnect the computer from external power for at the factory: Sleep and Hibernation. 20 Chapter 4 Power management Windows XP-Select Start > Turn Off Computer > Turn Off. NOTE: Windows 7 uses Sleep and Windows XP uses Standby. The Shut down command closes all open programs, including the operating system, and then turns off the display...
... you need to replace the battery or access components inside the computer ● When you are enabled at least 5 seconds. ● Disconnect the computer from external power for at the factory: Sleep and Hibernation. 20 Chapter 4 Power management Windows XP-Select Start > Turn Off Computer > Turn Off. NOTE: Windows 7 uses Sleep and Windows XP uses Standby. The Shut down command closes all open programs, including the operating system, and then turns off the display...
HP Notebook Reference Guide - Windows 7
Page 67
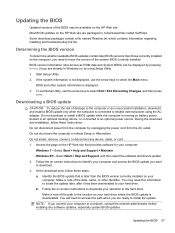
... Setup Utility, use the arrow keys to select the Main menu. Windows XP-Select Start > Help and Support, and then select the software and drivers update. 2. Some download packages contain a file named Readme.txt, which contains information regarding installing and troubleshooting the file. BIOS and other identifier. Make a note of the date, name, or other system information is downloaded. Start Setup Utility. 2. During the download and installation, follow these instructions: Do not disconnect power...
... Setup Utility, use the arrow keys to select the Main menu. Windows XP-Select Start > Help and Support, and then select the software and drivers update. 2. Some download packages contain a file named Readme.txt, which contains information regarding installing and troubleshooting the file. BIOS and other identifier. Make a note of the date, name, or other system information is downloaded. Start Setup Utility. 2. During the download and installation, follow these instructions: Do not disconnect power...


