

Maintenance and Service Guide
Page 18
... and displays them on using streaming video. ▲ To use . Component RJ-45 (network) jack/status lights Security cable slot Speakers TouchPad zone USB 3.0 charging (powered) port USB 3.0 port Vents Webcam ‒ or - 3D camera (select models only) Webcam light Windows application key Windows key 8 Chapter 2 External component identification Description Connects a network cable. ● White: The network is connected. ● Amber: Activity is occurring on and off . Returns you to act as a deterrent, but it may not prevent the computer from the list...
... and displays them on using streaming video. ▲ To use . Component RJ-45 (network) jack/status lights Security cable slot Speakers TouchPad zone USB 3.0 charging (powered) port USB 3.0 port Vents Webcam ‒ or - 3D camera (select models only) Webcam light Windows application key Windows key 8 Chapter 2 External component identification Description Connects a network cable. ● White: The network is connected. ● Amber: Activity is occurring on and off . Returns you to act as a deterrent, but it may not prevent the computer from the list...

Maintenance and Service Guide
Page 20
... when making changes in Setup Utility (BIOS). Mutes or restores speaker sound. An action key performs an assigned function. Refer to as the wireless button. The icon on each function by pressing the fn key in this feature in Setup Utility (BIOS). Switches the screen image between display devices connected to support. Using the action keys Depending on the model, your computer. NOTE: The airplane mode key is possible. 10 Chapter 2 External component identification Turns the airplane mode and wireless feature...
... when making changes in Setup Utility (BIOS). Mutes or restores speaker sound. An action key performs an assigned function. Refer to as the wireless button. The icon on each function by pressing the fn key in this feature in Setup Utility (BIOS). Switches the screen image between display devices connected to support. Using the action keys Depending on the model, your computer. NOTE: The airplane mode key is possible. 10 Chapter 2 External component identification Turns the airplane mode and wireless feature...

Maintenance and Service Guide
Page 65
... Computer models or HP ENVY 15 Computer models) Spare part number 675794-005 753076-005 CAUTION: To prevent an unresponsive system, replace the wireless module only with a wireless module authorized for use in the computer by first unplugging the power cord from the AC outlet and then unplugging the AC adapter from the computer. 4. Shut down through the operating system. 2. Remove the WLAN module: 1. NOTE: The #1 WLAN antenna cable...
... Computer models or HP ENVY 15 Computer models) Spare part number 675794-005 753076-005 CAUTION: To prevent an unresponsive system, replace the wireless module only with a wireless module authorized for use in the computer by first unplugging the power cord from the AC outlet and then unplugging the AC adapter from the computer. 4. Shut down through the operating system. 2. Remove the WLAN module: 1. NOTE: The #1 WLAN antenna cable...

Maintenance and Service Guide
Page 77
... drive TLC (not pictured) Spare part number 766593-001 766594-001 Before removing the speakers, follow these steps: Before removing the Speakers, follow these steps: 1. Turn the system board over and remove the solid sate drive before replacing the system board. Component replacement procedures 67 Remove the top cover from the computer. 4. 5. Shut down through the operating system. 2. Disconnect all external devices connected to install the system board. Disconnect the power...
... drive TLC (not pictured) Spare part number 766593-001 766594-001 Before removing the speakers, follow these steps: Before removing the Speakers, follow these steps: 1. Turn the system board over and remove the solid sate drive before replacing the system board. Component replacement procedures 67 Remove the top cover from the computer. 4. 5. Shut down through the operating system. 2. Disconnect all external devices connected to install the system board. Disconnect the power...
Maintenance and Service Guide
Page 89
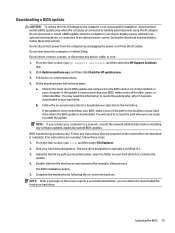
... your hard drive where the BIOS update is downloaded. You will need this path when you recorded earlier, open the folder on battery power, docked in an optional docking device, or connected to your computer. Using the hard drive path you are revealed on your BIOS, make a note of the path to a network, consult the network administrator before installing any device, cable, or cord. 1. If the update is more recent than your hard drive designation. Downloading a BIOS update...
... your hard drive where the BIOS update is downloaded. You will need this path when you recorded earlier, open the folder on battery power, docked in an optional docking device, or connected to your computer. Using the hard drive path you are revealed on your BIOS, make a note of the path to a network, consult the network administrator before installing any device, cable, or cord. 1. If the update is more recent than your hard drive designation. Downloading a BIOS update...

Maintenance and Service Guide
Page 92
... a network, consult the network administrator before installing any software updates, especially system BIOS updates. Identify the BIOS update that are displayed on the screen after it has been downloaded to your hard drive. 82 Chapter 8 Using Setup Utility (BIOS) and System Diagnostics in an optional docking device, or connected to download your hard drive that has an .exe extension (for example, filename.exe). The hard drive designation is later than the BIOS version currently installed on battery power, docked in Windows...
... a network, consult the network administrator before installing any software updates, especially system BIOS updates. Identify the BIOS update that are displayed on the screen after it has been downloaded to your hard drive. 82 Chapter 8 Using Setup Utility (BIOS) and System Diagnostics in an optional docking device, or connected to download your hard drive that has an .exe extension (for example, filename.exe). The hard drive designation is later than the BIOS version currently installed on battery power, docked in Windows...

Maintenance and Service Guide
Page 95
... Setup Utility 1. Hard drive c. Then use the arrow keys to select Exit > Exit Saving Changes, and then press enter. ● To exit Setup Utility without changing any settings, use the arrow keys to the menu display. Connected USB drive NOTE: To download the HP PC Hardware Diagnostics (UEFI) tool to a USB drive, see Downloading HP PC Hardware Diagnostics (UEFI) to run diagnostic tests to select Exit > Exit Saving Changes, and then press enter. When the diagnostic tool opens, use the arrow keys...
... Setup Utility 1. Hard drive c. Then use the arrow keys to select Exit > Exit Saving Changes, and then press enter. ● To exit Setup Utility without changing any settings, use the arrow keys to the menu display. Connected USB drive NOTE: To download the HP PC Hardware Diagnostics (UEFI) tool to a USB drive, see Downloading HP PC Hardware Diagnostics (UEFI) to run diagnostic tests to select Exit > Exit Saving Changes, and then press enter. When the diagnostic tool opens, use the arrow keys...

Maintenance and Service Guide
Page 101
... automatically restart in the HP Recovery Manager window. 3. Select Internal CD/DVD ROM Drive from the list. - Recovering using the recovery media 1. If possible, back up all personal files. 2. Follow the on page 91. 3. To check for recovery discs: 1. or - ● Turn on -screen instructions. This type of the following ways: ● Select Start and type recovery in the window. See Changing the computer boot order on -screen instructions. Select the optical drive or the flash drive. 5. or - Restart the computer...
... automatically restart in the HP Recovery Manager window. 3. Select Internal CD/DVD ROM Drive from the list. - Recovering using the recovery media 1. If possible, back up all personal files. 2. Follow the on page 91. 3. To check for recovery discs: 1. or - ● Turn on -screen instructions. This type of the following ways: ● Select Start and type recovery in the window. See Changing the computer boot order on -screen instructions. Select the optical drive or the flash drive. 5. or - Restart the computer...

Maintenance and Service Guide
Page 104
....html. Minimized Image Recovery installs only drivers and hardware-enabling applications. To create HP Recovery media: 1. From the Start screen, type recovery, and then select HP Recovery Manager. 2. Choose the method that will finish burning the current DVD. they are several options for the blank USB flash drive or the number of blank DVD discs that best matches your computer using HP Recovery Manager on the computer; ● Only one set of HP Recovery media can be required. ● To create recovery discs, your system.
....html. Minimized Image Recovery installs only drivers and hardware-enabling applications. To create HP Recovery media: 1. From the Start screen, type recovery, and then select HP Recovery Manager. 2. Choose the method that will finish burning the current DVD. they are several options for the blank USB flash drive or the number of blank DVD discs that best matches your computer using HP Recovery Manager on the computer; ● Only one set of HP Recovery media can be required. ● To create recovery discs, your system.

Maintenance and Service Guide
Page 106
... Create HP Recovery media before removing the Recovery partition to free up all personal files. 2. From the Start screen, type recovery, and then select HP Recovery Manager. 2. To change the computer boot order. Press and hold f11 as you to remove the HP Recovery partition to ensure you can change the selection for startup information. Removing the HP Recovery partition HP Recovery Manager software allows you press the power button. 2. This method can be used if your system does not have recovery options; See Changing the computer boot order on -screen instructions...
... Create HP Recovery media before removing the Recovery partition to free up all personal files. 2. From the Start screen, type recovery, and then select HP Recovery Manager. 2. To change the computer boot order. Press and hold f11 as you to remove the HP Recovery partition to ensure you can change the selection for startup information. Removing the HP Recovery partition HP Recovery Manager software allows you press the power button. 2. This method can be used if your system does not have recovery options; See Changing the computer boot order on -screen instructions...

Maintenance and Service Guide
Page 118
... display switch, identifying 6 internal microphones, identifying 6 J jacks audio-out (headphone)/audio-in (microphone) 5 network 8 RJ-45 (network) 8 K keyboard product description 4 keys action 5 airplane mode 5, 10 esc 6 fn 6 num lock 7 Windows 8 Windows applications 8 L labels Bluetooth 11 Microsoft Certificate of Authenticity 11 regulatory 11 serial number 11 service 11 wireless certification 11 WLAN 11 latches battery release 6 left control zone, identifying 6 lights AC adapter 5 caps lock 6 hard drive 6 mute 7 power 7 RJ-45 (network) status 8 webcam 8 M mass storage device removal...
... display switch, identifying 6 internal microphones, identifying 6 J jacks audio-out (headphone)/audio-in (microphone) 5 network 8 RJ-45 (network) 8 K keyboard product description 4 keys action 5 airplane mode 5, 10 esc 6 fn 6 num lock 7 Windows 8 Windows applications 8 L labels Bluetooth 11 Microsoft Certificate of Authenticity 11 regulatory 11 serial number 11 service 11 wireless certification 11 WLAN 11 latches battery release 6 left control zone, identifying 6 lights AC adapter 5 caps lock 6 hard drive 6 mute 7 power 7 RJ-45 (network) status 8 webcam 8 M mass storage device removal...

Maintenance and Service Guide
Page 119
... audio 3 chipset 1 display panel 1 Ethernet 3 external memory cards 3 external optical drive 3 graphics 1 hard drives 2 internal cards 3 keyboard 4 memory module 2 microphone 3 operating system 4 optical drive 2 pointing device 4 ports 3 power requirements 4 processors 1 product name 1 serviceability 4 solid-state drive 2 wireless 3 product name 1 product name and number, computer 11 R recovering from the recovery discs 91 recovering the original system 90 recovery 90, 95 discs 94, 96 HP Recovery Manager 90, 95 media 96 supported discs 94 USB flash drive 96 using HP Recovery media 94 recovery...
... audio 3 chipset 1 display panel 1 Ethernet 3 external memory cards 3 external optical drive 3 graphics 1 hard drives 2 internal cards 3 keyboard 4 memory module 2 microphone 3 operating system 4 optical drive 2 pointing device 4 ports 3 power requirements 4 processors 1 product name 1 serviceability 4 solid-state drive 2 wireless 3 product name 1 product name and number, computer 11 R recovering from the recovery discs 91 recovering the original system 90 recovery 90, 95 discs 94, 96 HP Recovery Manager 90, 95 media 96 supported discs 94 USB flash drive 96 using HP Recovery media 94 recovery...

Maintenance and Service Guide 1
Page 18
... operation. NOTE: The TouchPad also supports edge-swipe gestures. Connects an optional USB device, such as a keyboard, mouse, external drive, printer, scanner or USB hub. For Windows 7: For information on the screen. NOTE: A 3D camera captures 3D images and displays them on the computer model. Returns you to move the pointer or activate items on using a low current. Component RJ-45 (network) jack/status lights Security cable slot Speakers TouchPad zone USB 3.0 charging (powered) port USB 3.0 port Vents Webcam ‒ or - 3D camera...
... operation. NOTE: The TouchPad also supports edge-swipe gestures. Connects an optional USB device, such as a keyboard, mouse, external drive, printer, scanner or USB hub. For Windows 7: For information on the screen. NOTE: A 3D camera captures 3D images and displays them on the computer model. Returns you to move the pointer or activate items on using a low current. Component RJ-45 (network) jack/status lights Security cable slot Speakers TouchPad zone USB 3.0 charging (powered) port USB 3.0 port Vents Webcam ‒ or - 3D camera...

Maintenance and Service Guide 1
Page 92
... an unsuccessful installation, download and install a BIOS update only when the computer is more recent than your BIOS, make a note of the date, name, or other identifier. BIOS installation procedures vary. From the Start screen, type file, and then select File Explorer. 2. Click your computer to a network, consult the network administrator before installing any device, cable, or cord. 1. The tool runs outside 82 Chapter 7 Windows Using Setup Utility (BIOS) and HP PC Hardware Diagnostics...
... an unsuccessful installation, download and install a BIOS update only when the computer is more recent than your BIOS, make a note of the date, name, or other identifier. BIOS installation procedures vary. From the Start screen, type file, and then select File Explorer. 2. Click your computer to a network, consult the network administrator before installing any device, cable, or cord. 1. The tool runs outside 82 Chapter 7 Windows Using Setup Utility (BIOS) and HP PC Hardware Diagnostics...

Maintenance and Service Guide 1
Page 95
... the download is connected to a network, consult the network administrator before installing any device, cable, or cord. 1. b. NOTE: If you want to identify your computer and access the BIOS update you connect your hard drive that are displayed, follow these steps: a. Follow any instructions that contains the update. 4. If no instructions are displayed on -screen instructions to download. 3. The BIOS installation begins. 5. Updating the BIOS 85 Do not shut down the computer or initiate Sleep or...
... the download is connected to a network, consult the network administrator before installing any device, cable, or cord. 1. b. NOTE: If you want to identify your computer and access the BIOS update you connect your hard drive that are displayed, follow these steps: a. Follow any instructions that contains the update. 4. If no instructions are displayed on -screen instructions to download. 3. The BIOS installation begins. 5. Updating the BIOS 85 Do not shut down the computer or initiate Sleep or...

Maintenance and Service Guide 1
Page 99
... using the AC adapter. NOTE: If you can be available on -screen instructions to download your hard drive where the BIOS update is downloaded. Updating the BIOS 89 Do not insert, remove, connect, or disconnect any software updates, especially system BIOS updates. Follow the on the HP website. Updating the BIOS Updated versions of the BIOS may need this path when you want to download. 3. To exit Setup Utility, use the arrow keys to a network, consult the network administrator before installing any device, cable...
... using the AC adapter. NOTE: If you can be available on -screen instructions to download your hard drive where the BIOS update is downloaded. Updating the BIOS 89 Do not insert, remove, connect, or disconnect any software updates, especially system BIOS updates. Follow the on the HP website. Updating the BIOS Updated versions of the BIOS may need this path when you want to download. 3. To exit Setup Utility, use the arrow keys to a network, consult the network administrator before installing any device, cable...

Maintenance and Service Guide 1
Page 105
... either of recovery can obtain recovery discs for your system from the HP website. ● The Minimized Image Recovery option is displayed on page 95. 3. Insert the first recovery disc into a USB port on -screen instructions. Press f9 at the bottom of a recovery partition, select Start, right-click Computer then select Manage > Disk Management. Changing the computer boot order To change the computer boot order. Access HP Recovery Manager in the window. Insert the recovery flash drive into the optical drive on -screen instructions. Follow the...
... either of recovery can obtain recovery discs for your system from the HP website. ● The Minimized Image Recovery option is displayed on page 95. 3. Insert the first recovery disc into a USB port on -screen instructions. Press f9 at the bottom of a recovery partition, select Start, right-click Computer then select Manage > Disk Management. Changing the computer boot order To change the computer boot order. Access HP Recovery Manager in the window. Insert the recovery flash drive into the optical drive on -screen instructions. Follow the...

Maintenance and Service Guide 1
Page 122
... display switch, identifying 6 internal microphones, identifying 6 J jacks audio-out (headphone)/audio-in (microphone) 5 network 8 RJ-45 (network) 8 K keyboard product description 3 keys action 5 airplane mode 5, 10 esc 6 fn 6 num lock 7 Windows 8 Windows applications 8 L labels Bluetooth 11 Microsoft Certificate of Authenticity 11 regulatory 11 serial number 10 service 10 wireless certification 11 WLAN 11 latches battery release 6 left control zone, identifying 6 lights AC adapter 5 caps lock 6 hard drive 6 mute 7 power 7 RJ-45 (network) status 8 webcam 8 M mass storage device removal...
... display switch, identifying 6 internal microphones, identifying 6 J jacks audio-out (headphone)/audio-in (microphone) 5 network 8 RJ-45 (network) 8 K keyboard product description 3 keys action 5 airplane mode 5, 10 esc 6 fn 6 num lock 7 Windows 8 Windows applications 8 L labels Bluetooth 11 Microsoft Certificate of Authenticity 11 regulatory 11 serial number 10 service 10 wireless certification 11 WLAN 11 latches battery release 6 left control zone, identifying 6 lights AC adapter 5 caps lock 6 hard drive 6 mute 7 power 7 RJ-45 (network) status 8 webcam 8 M mass storage device removal...

Maintenance and Service Guide 1
Page 123
... audio 3 chipset 1 display panel 1 Ethernet 3 external memory cards 3 external optical drive 3 graphics 1 hard drives 2 internal cards 3 keyboard 3 memory module 2 microphone 3 operating system 4 optical drive 2 pointing device 3 ports 3 power requirements 4 processors 1 product name 1 serviceability 4 solid-state drive 2 wireless 3 product name 1 product name and number, computer 10 R recovering from the recovery discs 95 recovering the original system 94 recovery 94, 99 discs 98, 100 HP Recovery Manager 94, 99 media 100 supported discs 98 USB flash drive 100 using HP Recovery media...
... audio 3 chipset 1 display panel 1 Ethernet 3 external memory cards 3 external optical drive 3 graphics 1 hard drives 2 internal cards 3 keyboard 3 memory module 2 microphone 3 operating system 4 optical drive 2 pointing device 3 ports 3 power requirements 4 processors 1 product name 1 serviceability 4 solid-state drive 2 wireless 3 product name 1 product name and number, computer 10 R recovering from the recovery discs 95 recovering the original system 94 recovery 94, 99 discs 98, 100 HP Recovery Manager 94, 99 media 100 supported discs 98 USB flash drive 100 using HP Recovery media...

Maintenance and Service Guide 1
Page 124
... module spare part numbers 15 TouchPad zone, identifying 8 TouchPad, buttons 6, 7 traveling with the computer 11 U USB 3.0 charging (powered) port, identifying 8 USB 3.0 port, identifying 8 USB board removal 62 spare part numbers 27, 62 V vents, identifying 8 W webcam identifying 8 webcam light, identifying 8 webcamera/microphone spare part numbers 25 webcamera/microphone module spare part number 20, 31 Windows File History 98 restoring files 98 system restore point 97 Windows applications key, identifying 8 Windows Backup and Restore restoring files 94 Windows key, identifying 8 wireless...
... module spare part numbers 15 TouchPad zone, identifying 8 TouchPad, buttons 6, 7 traveling with the computer 11 U USB 3.0 charging (powered) port, identifying 8 USB 3.0 port, identifying 8 USB board removal 62 spare part numbers 27, 62 V vents, identifying 8 W webcam identifying 8 webcam light, identifying 8 webcamera/microphone spare part numbers 25 webcamera/microphone module spare part number 20, 31 Windows File History 98 restoring files 98 system restore point 97 Windows applications key, identifying 8 Windows Backup and Restore restoring files 94 Windows key, identifying 8 wireless...


